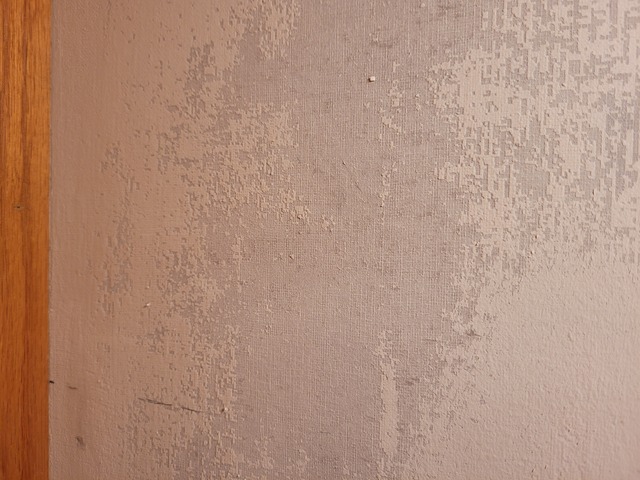
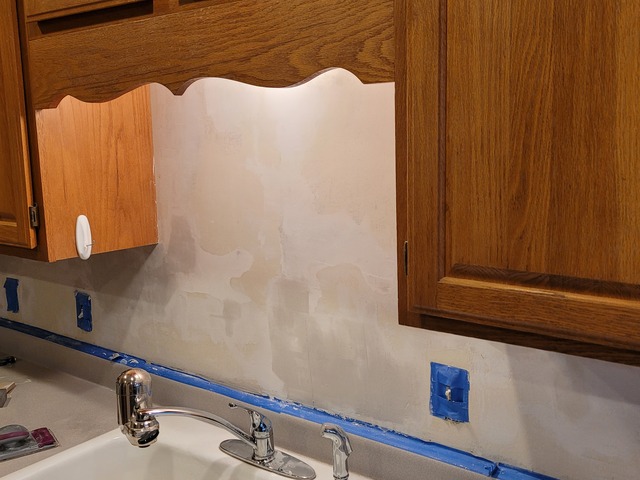
I have a question on a surface prep that would be required befor using any sort of wallpaper or backer. We had wallpaper that was no longer adhering so pulled that down. We tried to put up some peel and stick wallpaper as a somewhat temporary fix. Where it stuck, I like it But it didn't adhere in many other areas My question is if we get some of the "tiles" like this that go up with adhesive, do we need to get the surface totally cleaned/bare. Here's what it looks like
I marked this as woodworking as there will be oak trim involved 🤷♀️
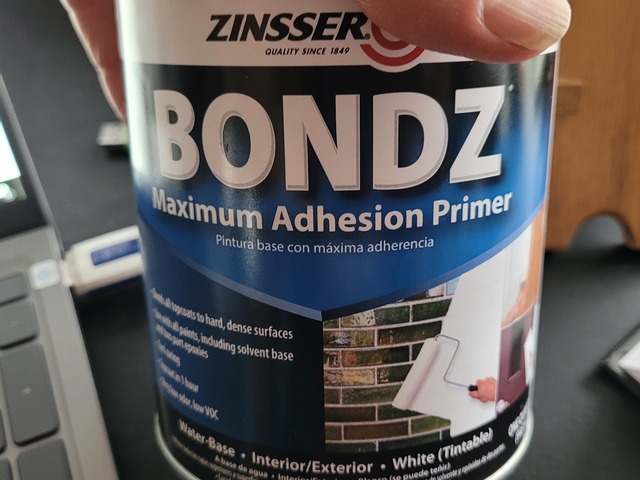
If I were doing it, I would use a good bonding primer first. When the wallpaper was installed, they probably used a sizing paste to help with removal in the future.
I used self stick tiles on my backslash. I used a linoleum roller to stick them with as much pressure as possible. I've had a few come loose on the corner so I used a bit of silicone caulk to restick the corners. They have been up for a couple years and I've been happy with it.
When I took wallpaper off I used a vinegar and water mis to get some of the adhesive that was left behind. In my bathroom I took the walls down with the wall paper.
To get to the step of using a bonding primer or self stick tiles, would all the old paste need to come off? Fearing creating more damage. After our peel and stick fiasco, I want to make sure we are back on track.
Best way to proceed is to remove the glue (paste). Wallpaper glue is water-base, so is latex paint or primer, and so, it is possible that the paint reactivates the glue. You can wash off the glue with various solutions(warm water/vinegar/ a little dishsoap), or sand it. Another option would be to use an oil-base primer over the glue, one or two thin coats, not entirely ideal. One other option is to skim-coat with drywall mud, then primer.
Brian - thank you for additional insights. Given this is in the center of our house I want to avoid oil-based given the smell so I like the water-based option you recommended. I think trying water/soap would be good to get the surface better prepped. I've also heard of using water and fabric softener to remove wallpaper so wonder if that would work here (would smell nice anyway)?? I did some drywall mudding in a prior bathroom remodel but if we can remove and then Kilz, I think that would leave a better surface given my (limited) skill level (there'd just so much one can learn from YouTube, although it did allow me to fix issues where a wall had ripped drywall paper and other problems!).
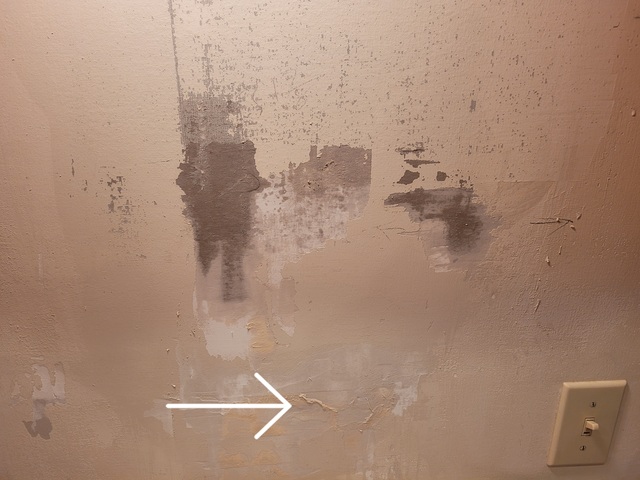
Well, I think I've messed up. Used water and scrapped (that was likely the error). I don't know what is the glue and what's the drywall/underlying surface. Seems to be flakey.
Ok, Barb. It is hard for me to advise further - without being there to see exactly whats going on.
However, to remove glue/paste, the best way to do that is to soak the area with whatever solution you are using (there are commercial products also, fabric softener will also work) With a very big brush, or even a soft bristled dust broom(without the handle), is a good way to wet the wall, like you were slopping on watery paint. Start from the bottom and work up, in arcing sweeps. Put drop cloths down to soak up the water. You will use alot of water. Let that sit for awhile, 5-10minutes (maybe), then soak the area again. Use warm water. Now, with a big wet sponge (like those used for cleaning up tile grout) start wiping down the wall, rinse the sponge often, (wiping, not scrubbing). If things start to dry out, slop on more water. And where you can see chunky glue areas use a 6" taping knife, or a putty knife to gently remove it; if the glue isnt soft - more water there. Work in small sections until satisfied, then move on. Have a bucket of water there to rinse the taping knife and sponge. You can run the taping knife over the entire area, but The Sponge is your primary tool. This process will take some time, and elbow grease. If you get areas where the integrity of the sheetrock is comprimised, leave those areas be, and come back when they are dry and sand those spots. Once you get the wall clean, make sure everything is totally dry before the next steps. A fan will help to speed that up, or a dehumidifier.
I agree with Wildbrianwood. Focus on smaller areas and keep working wet until it feel and looks clean and smooth. Once you let that dry well give it a light sanding and coat with a sealer. You may want to run this by someone at a Sherwin Williams store, they have probably seen this before.
One more thing, Barb. Take the cover plate off that lightswitch, and tape the interior guts off real good so no water gets in there! If you can shut power to that outlet, the better.
Because the wall will not be finish painted, you neednt aim for 100% removal of glue, a decent target would be 90% or so.
Thank you so much!! Will take a step back and restart with the water and sponge. Definitely got too aggressive and damaged the section were it looks like a patch was made (as there is a crushed dent there that I know we didn't do!). Plan to try to tackle the glue and then run out for some Kilz. "Fun" start to the new year. 🙄 Don't think my second career will be home renovation (although flooring isn't so bad...).
You will get it Barb, home renovation is not all that bad. It can be a learning process, I have removed wallpaper before (no fun), still had a few sots with wallpaper paste, and ended up doing a few skim coats of joint compound to smooth everything out.
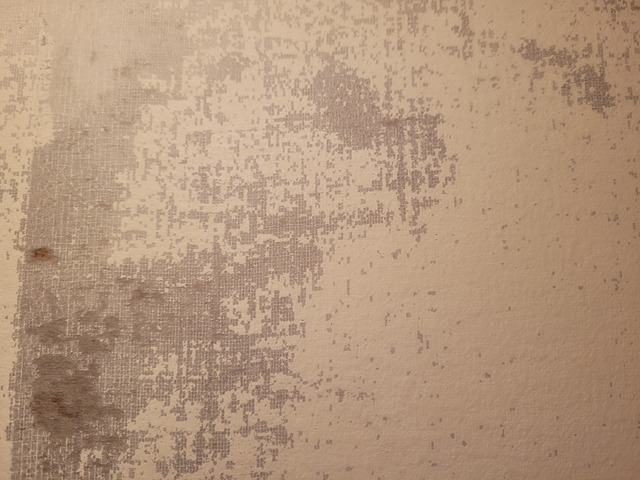
Hard to tell, but it looks like there is a fine "grid" pattern in that underlayment, Immediately makes me think hardie board or cement board (usually used behind tile/thinset work. If so, Idea use a sanding block with some 60/80 grit for a good scuffing. Once scuffed, wall tile mastic works well for tiles.
There is a pattern-but wonder if that was residue of the paper. I'm guessing the builder did some sort of skim coat (we have found a number of "interesting things" over the years as we have done updates - best one was concreting in the fireplace blowers so we had use a jackhammer to remove/replace). Also they dented the wall and put tape over it so I have tried to repair that. I washed the wall with hot water, did light scrap with a metal scraper (??don't know the right name), and now plan to go over with a sander before moving on the binder/sealer. We hope to put up the wall paper we have so won't be tiling (definitely don't have the skills for that...I've already suggested to my husband that we should have paid someone to do this 😏).
Had to mud to fix spots - waiting on that to dry so I can sand again
Then will use bond/sealer. My husband got this as store he went to didn't have the Kilz. If this isn't as good, I can run out to different store to get the Kitz tomorrow
Appreciate the confidence Corelz125 but this needs to get done soon. 😬 Maybe someday when I have more time!
Thanks for all the insights Brian. Starting to see this might actually work out and we can get the kitchen presentable again. Down the road a better "reno" may be desired, but this will be OK for now.