


Share your craft projects
Make new craft buddies
Ask craft questions
Blog your craft journey


17 Comments

Welcome to our site, nice to have you on board.
Jamesw

Hey Randy, you will find things much mellower over here. Enjoy it, as this appears to be the best of the best, without the hoopla.
HorizontalMike
Great thanks Mike.
Randy - If I'm not on the computer than I'm out making sawdust.
I thought I’d use this area to show off my shop and the addition
This was started back on Spring.
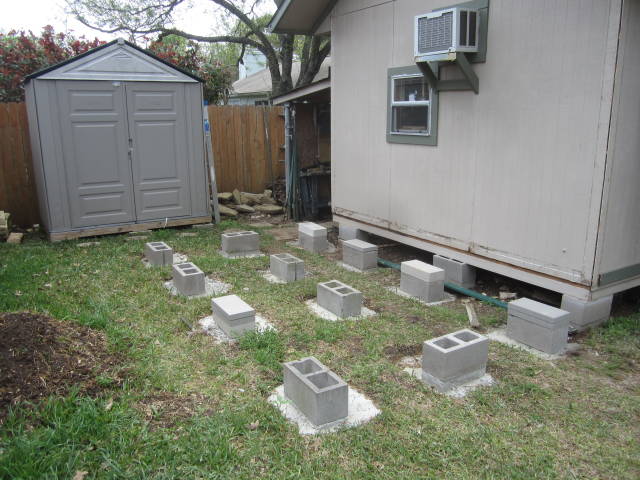
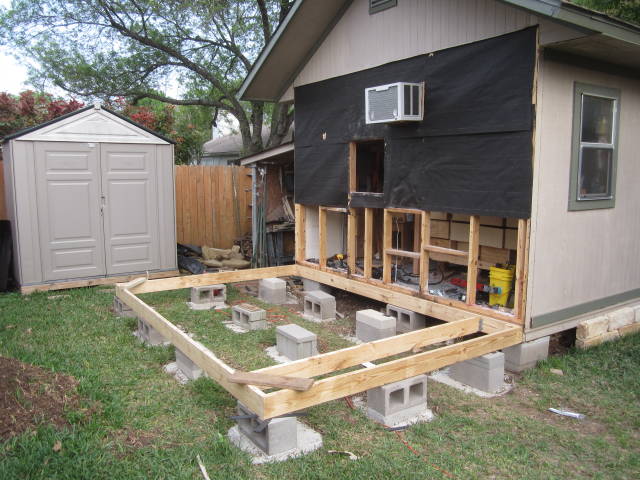
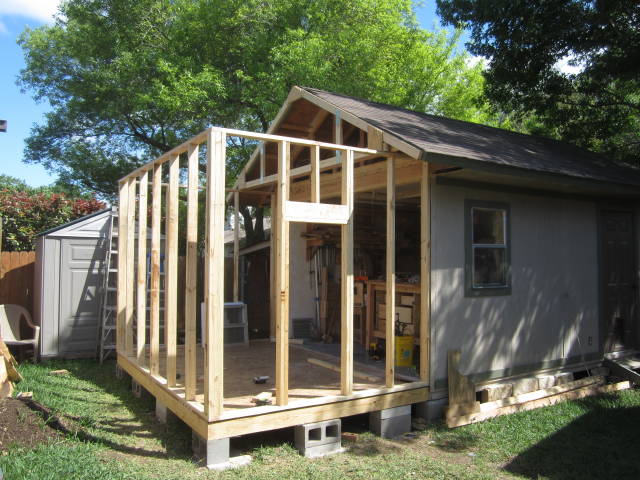
Now that we are in the spring, it’s time for me to come out of my shell and break ground with the addition onto my shop, I started off by pouring 2’x 2’ concrete pads for the center blocks to sit on, the outer pads I centered 13” deep holes dug with a post hole digger to help stabilize from settling and movement, I used string line levels making sure all of the supports were plumb, Next came the wall to be demoed, I ripped out all of the sheet rock along with the insulation as the exterior siding will have to me knocked out from the inside, in order to do that I had to move tools and equipment out of the way along with my workbench to make room bunching them up together.
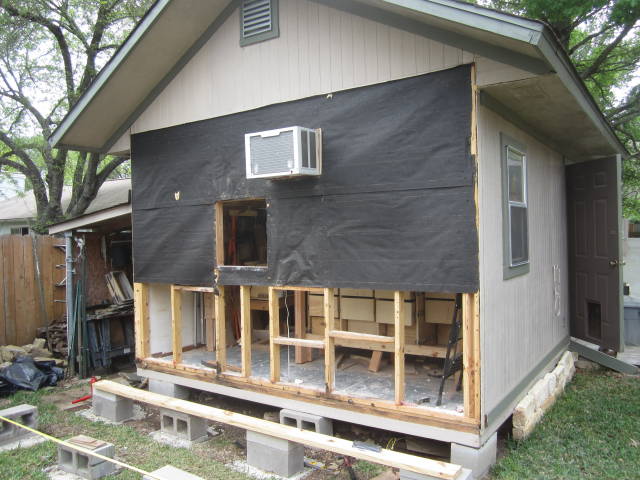
My current stand alone shop which can be viewed via my workshop here on the LJ’s site is 12’ x 16’ with an added 3’ x 5’ exterior closet which houses my DC on the opposite end from where the addition will be, the shop now is a bit crowded as it is, I will be adding on an addition 8’ to the end of the 12’ wide building making it 24’ x 12’ the max I am allowed in order to stay within my property boundaries.
Once the new addition has been erected and before completely removing the framing on the wall to be removed, I plan on putting in two 2”x 8” blind headers at ceiling level sandwiching the end truss on each side as even though it’s a common gable wall it still bares some weight and will need to be supported.
I also plan on upgrading the current #10 gauge wire feeding the shop from the main with two separate 30 amp breakers to a single 50 amp and #6 gauge wire single strand.
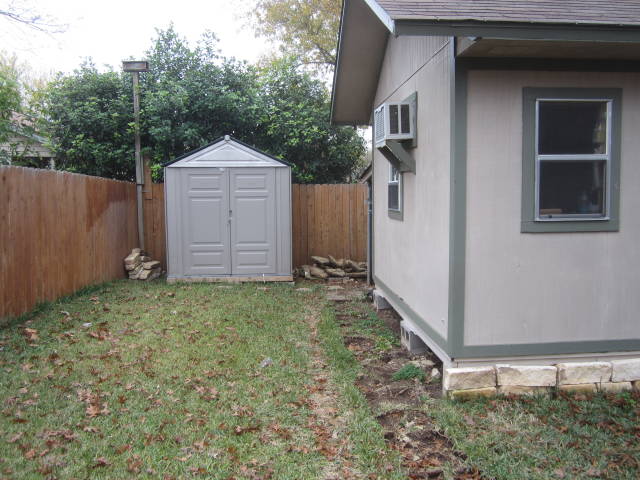
Showing where the addition will be placed, see all of that pretty grass, say bye bye but it’s for the better cause and besides less mowing :)
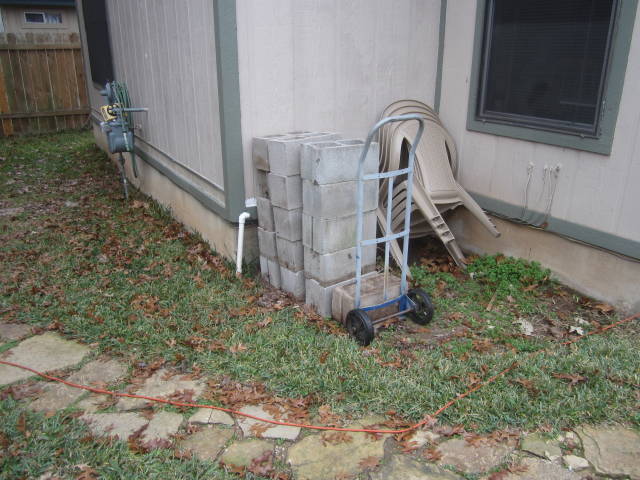
Showing the center blocks to be used, lucky my dad had these as extras so I grabbed the gloves and threw them in the back of my truck.
Pads are poured, so long grass.


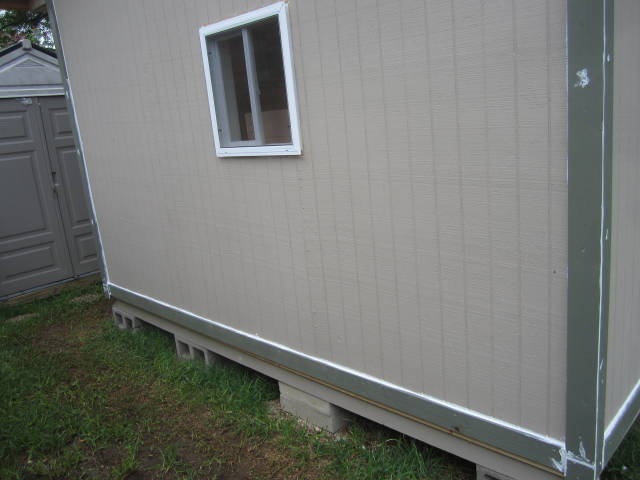
I had to make some temporary boxes in order to make some concrete pillars as the pads were not quite even, all support blocks are plum and level with each other in all directions and with the existing blocks on the building.
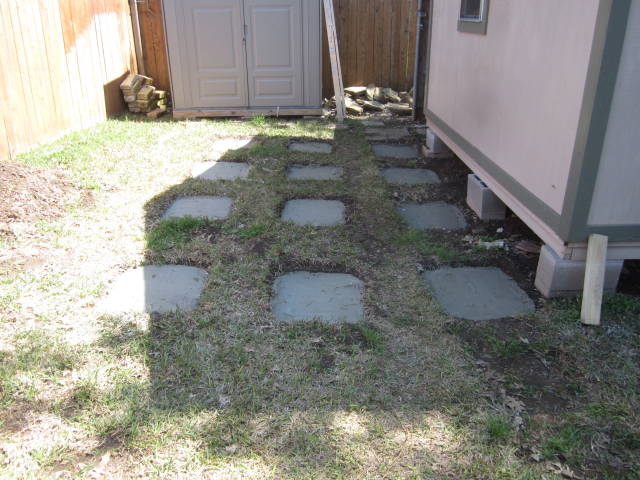
More photos showing block placement along with exterior trim removed from the building.
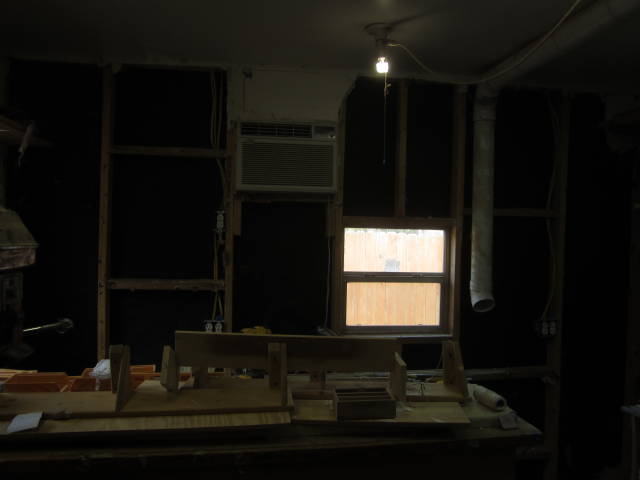
Showing the removal of the sheet rock along with the insulation on the wall to be removed, bad lighting on this photo.
Showing the removal of the sheet rock along with the insulation on the wall to be removed, bad lighting on this photo.
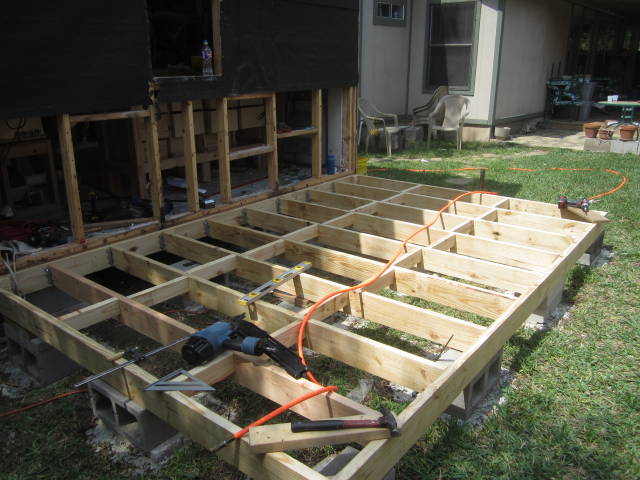
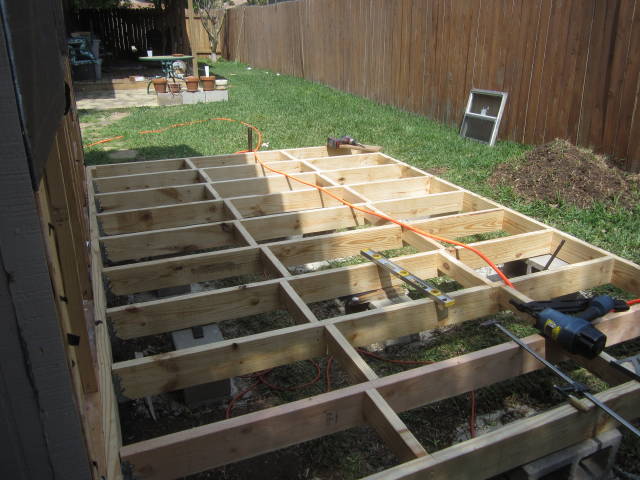
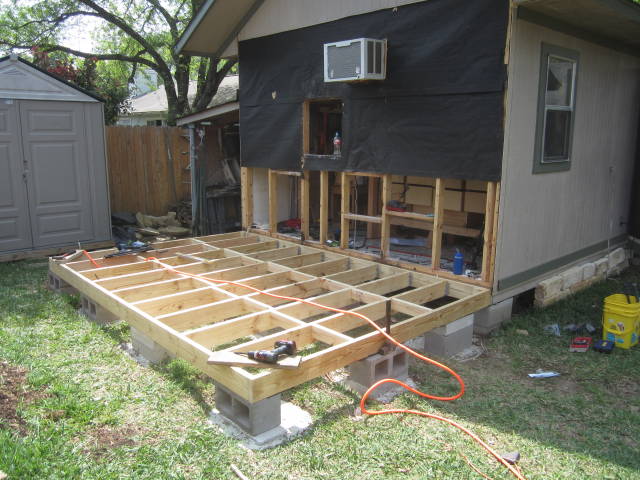
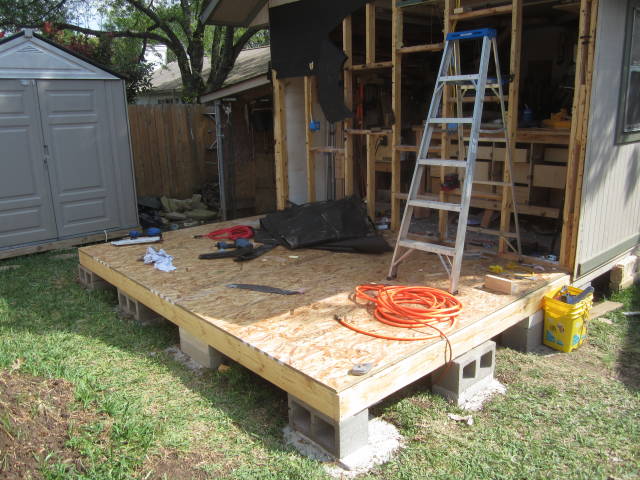
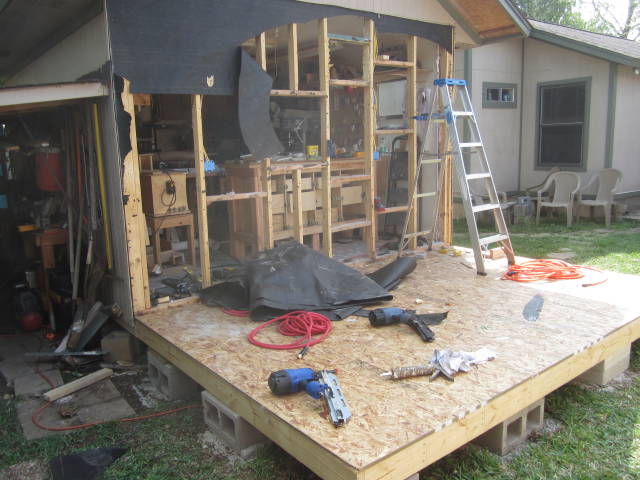
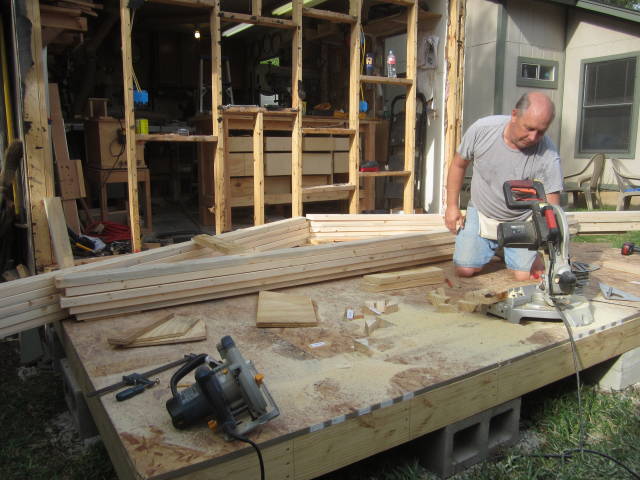
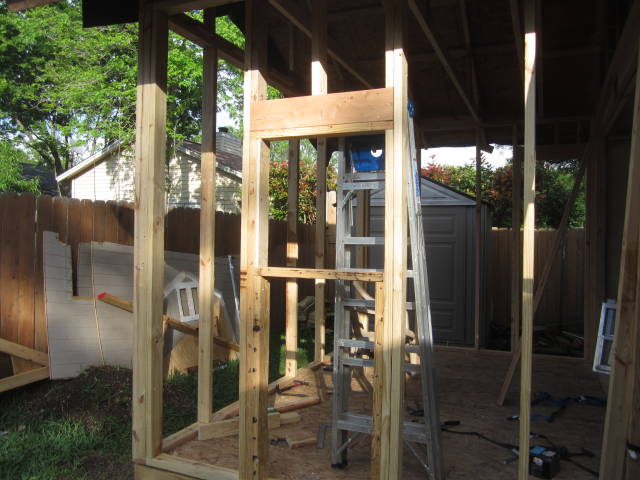
Exterior wall is off and the new floor is starting to take shape, with the help of a good friend we have the outer frame locked in and square now comes the floor joist.

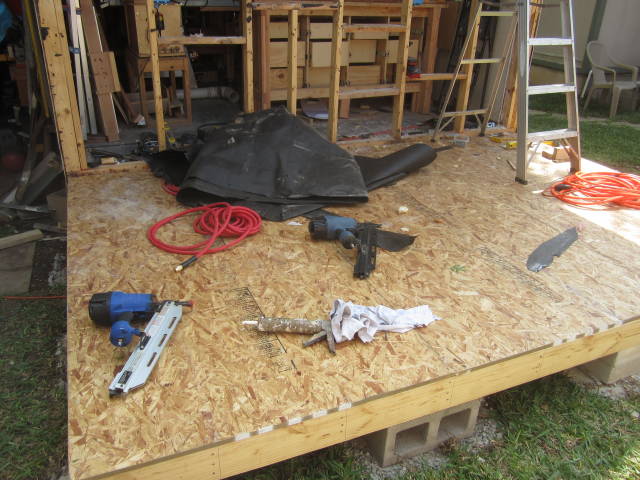
The new floor is tied to the old floor using large 1/2” x 3 1/2” hex head lag screws and is now complete with the top 3/4” OCB decking
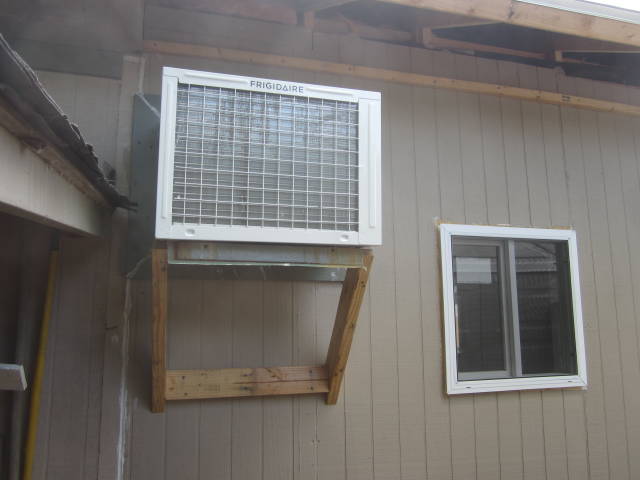
The AC is out, the 8000 BTU AC unit was covered in dirt and dust and will be replaced with an 18500 BTU AC with heat pump.
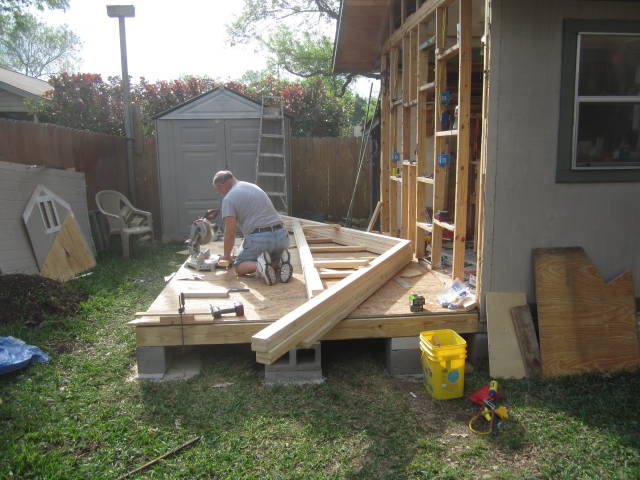
Today we’ll start off with building the trusses, setting them aside, than the walls and will continue until this day ends.
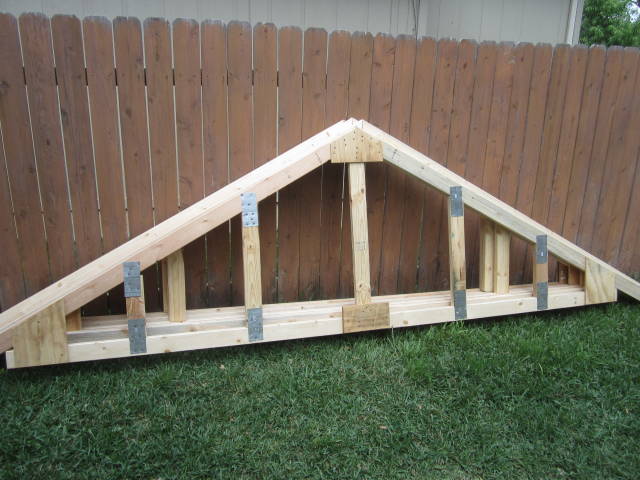
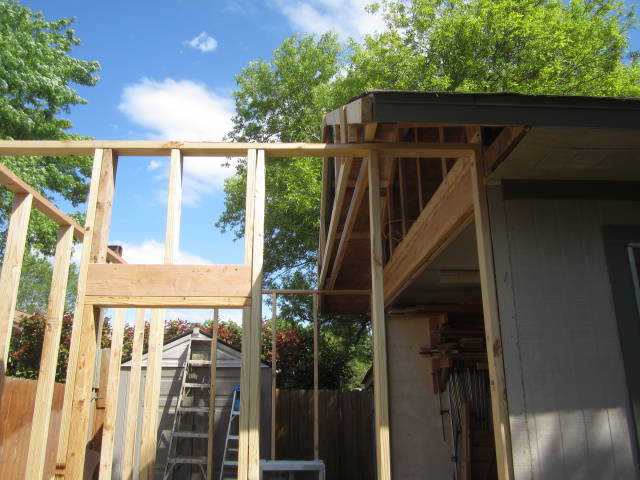
The floor was complete so now came the Trusses / Rafters, 5 total were made, I made a make shift ceiling support on the inside of the building before tearing out the wall to make way for the header, we weren’t able to do a sandwich on each side of the end truss as originally planed due to obstacles in the way and also when my dad and I had built it many years ago we had made a catwalk truss (boards put together in L shape ) for better end support so we instead put the header under the end wall cap, I used two 2×8 x 12 for the header.
Note, the person in the pictures is the one that’s helping me.
Trusses being built.
Friend shown here is the person that’s helping me with this project.
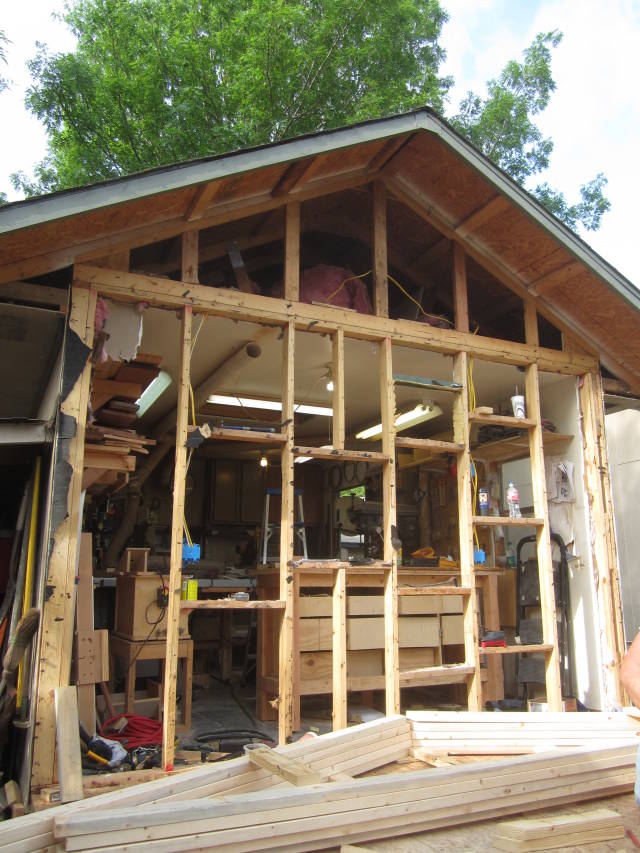
Old wall being removed.
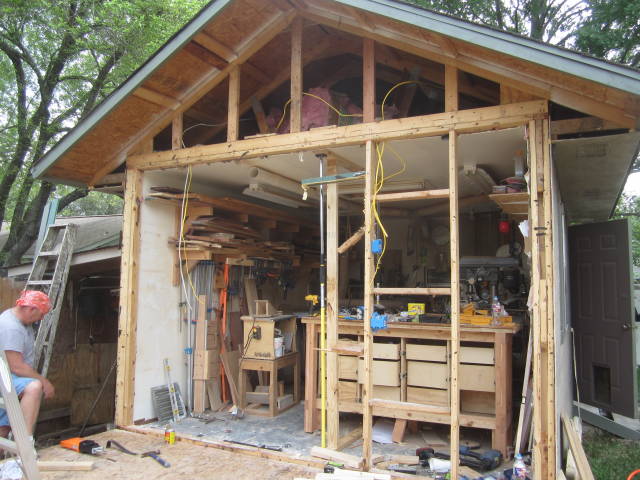
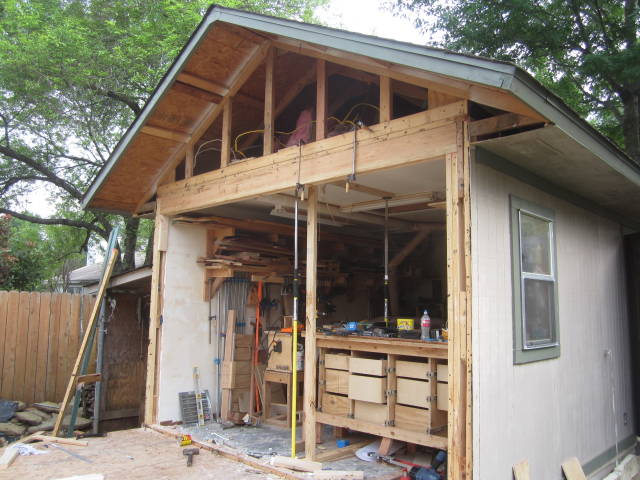
Wall is completely out and the header is being installed.

Completed framing in on the header adding the last two jack studs on one side removing the temporary stud holding one end of the header along with the temporary ceiling support and also removed the bottom floor wall plate was pretty much all I got done Sunday by late afternoon, it rained two days straight keeping my sitting in front of the TV.
Note; the new floor matched up very well to the existing floor after removing the bottom wall plate that was left in place.
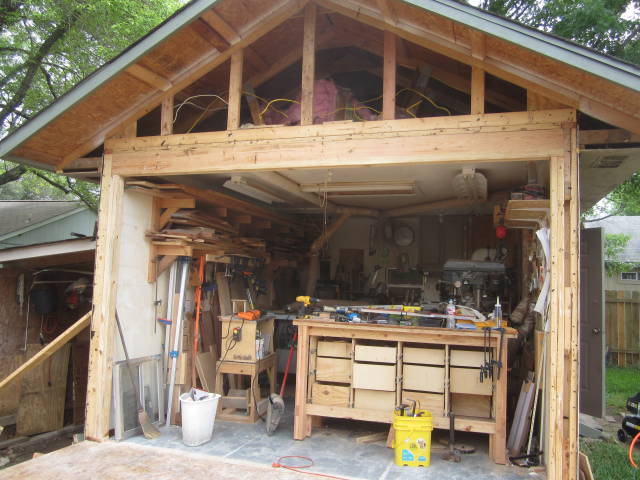
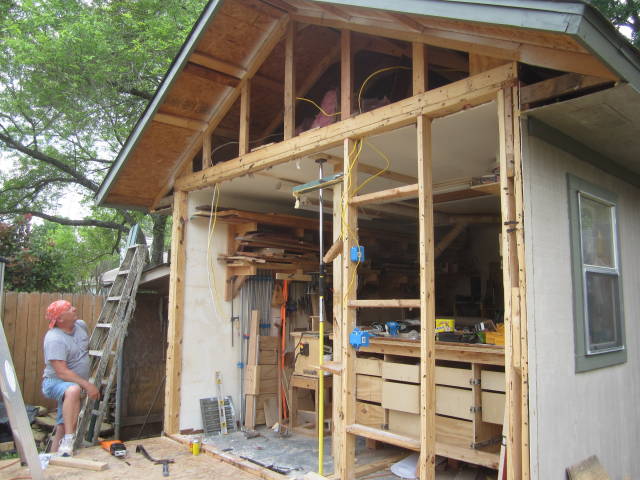
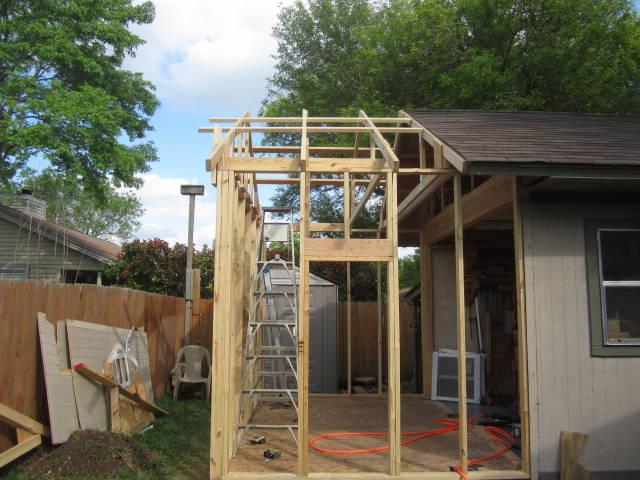
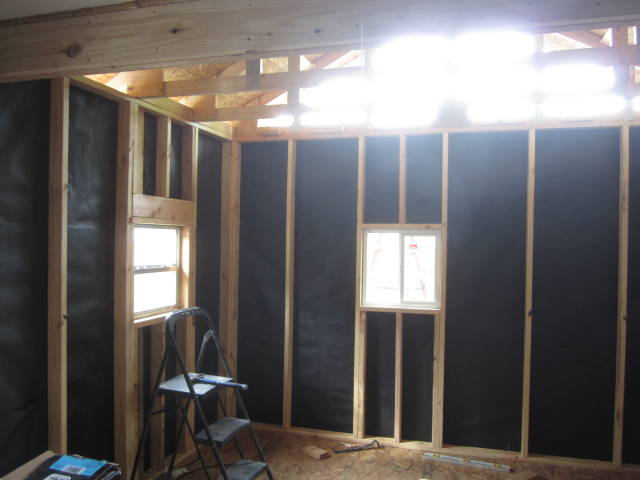
Walls are up, locked in and anchored down with 4” ring shank nails hand pounded in :) , I used 6” x 1/2” Lag Screws to anchor the new walls to the existing walls along with nails, I have one window partially framed in with header, I built the existing rafter in place by attaching a 12’ long board to each end of the trim boards resting on top of the top wall plate creating a rafter and also attaching a second rafter to the outer side of that existing trim boards having two rafters / trusses tied together.
Tomorrow I’ll be completing the rafters and adding the roof sheathing.

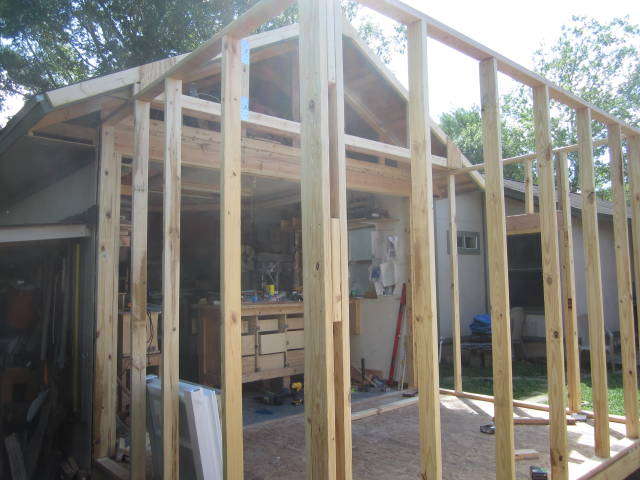
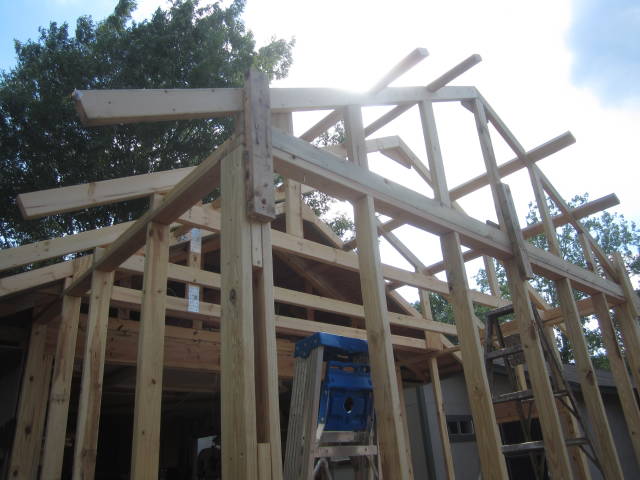
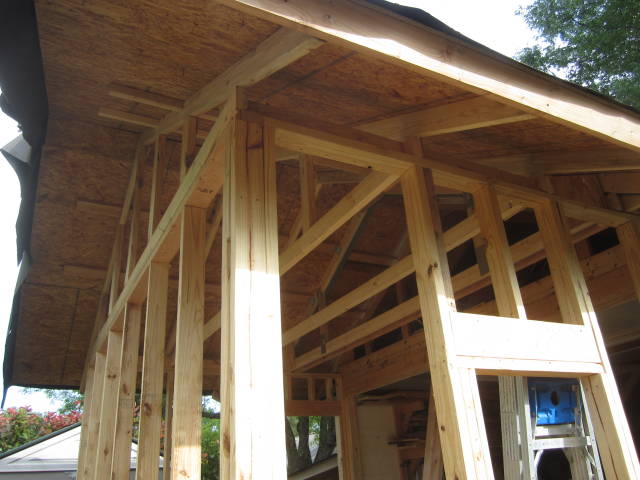
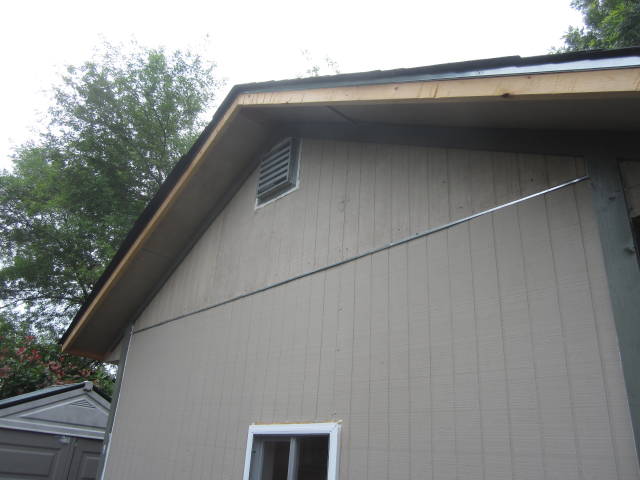
OK rafters / Trusses are up and ready for the sheathing, This was a solo day for me, I alone hiked these behemoths up and secured them in place by using bar clamps, by far the hardest part since I was working alone today, since it was only 3 rafters I measured for placement over the studs hence they aren’t true to 24” some are on 25 – 26 center so I decided to tie them all together by notched out the top edge of each rafter at two 24” sections and to the building for better support, I used L shaped hurricane clips to tie the butt end of each 2×4 to the face board they are cut to 7’ length which also allows 11” over hang on the gable end, 11” on the end is all I can due in order to stay out of the easement.
The boards sticking up on the end of the gable on the end are just there to hold the end rafter when I was nailing it to the structure they will be coming off tomorrow before we put the sheathing up.
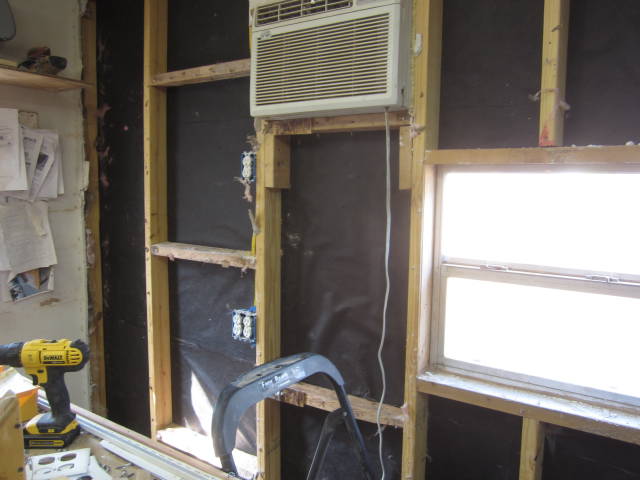
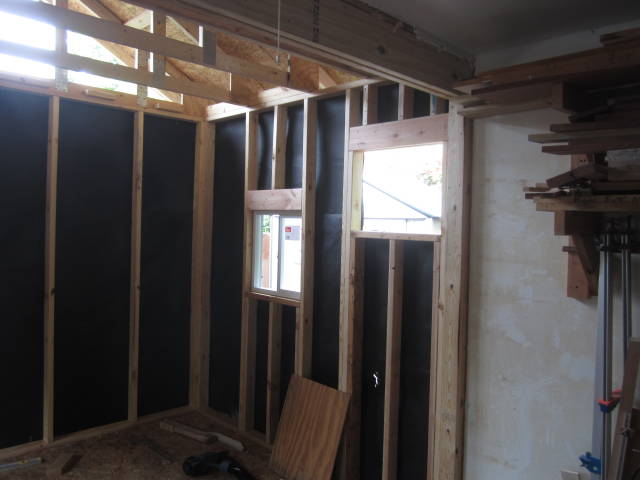
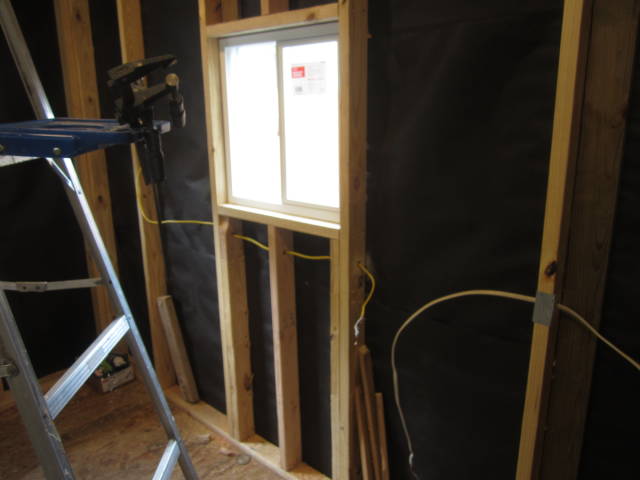
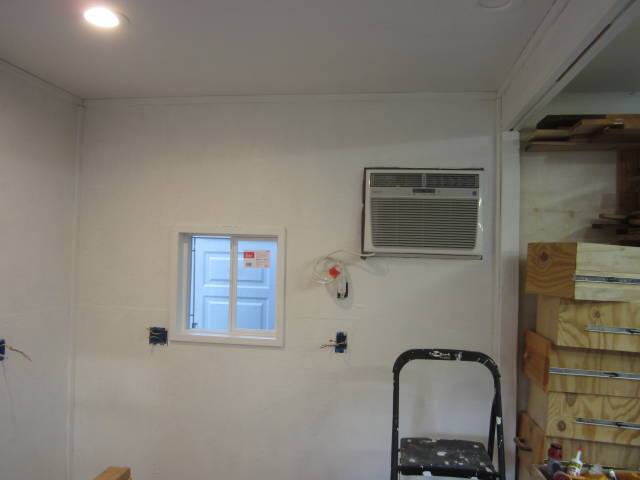
Got one window completely framed out minus the jack stud to be installed below the window base plate and re-framed for the AC unit by removing one of the studs, moving it over making it a king stud and installing two trimmers with a 2×6 double header and added cripplers it also still needs the bottom frame base plate along with jack studs.
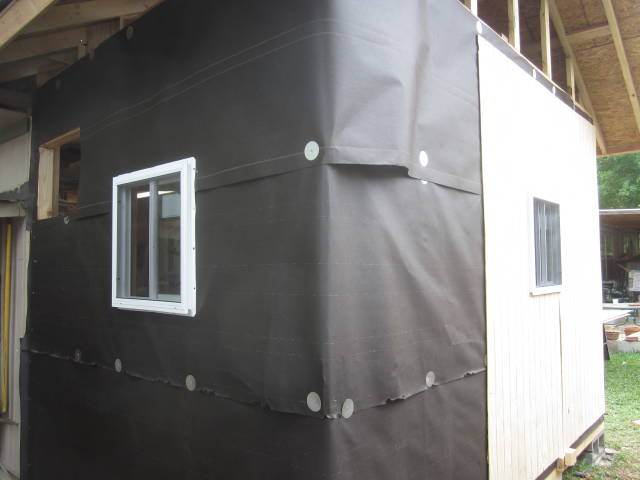
With rain in the weather I had to work fast on getting a cover over the structure, so my friend that is helping came to my aid, we both got the sheathing and the paper up just in time as it started lightly raining on us half way through and once we were done the bottom of the clouds fell out.
Tomorrow not sure how much I will get done if any at all and Sat nothing at all will be done to the building, I’m taking a break with some wind in the face Sat, so Friday my focus is going to be on my Harley, getting it ready for Sat’s ride to see the spring color so I’ll be washing protecting the leather and waxing the bike.
Here is showing the open for window completely framed out.
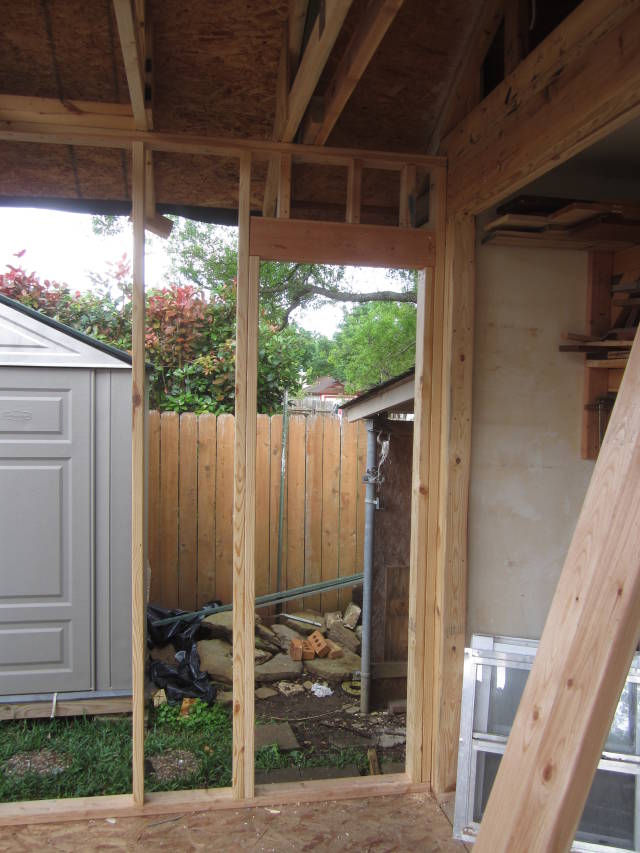
Here is showing the re-framing opening for the AC unit, (wall mounted) I still need to frame in the base along with jack studs
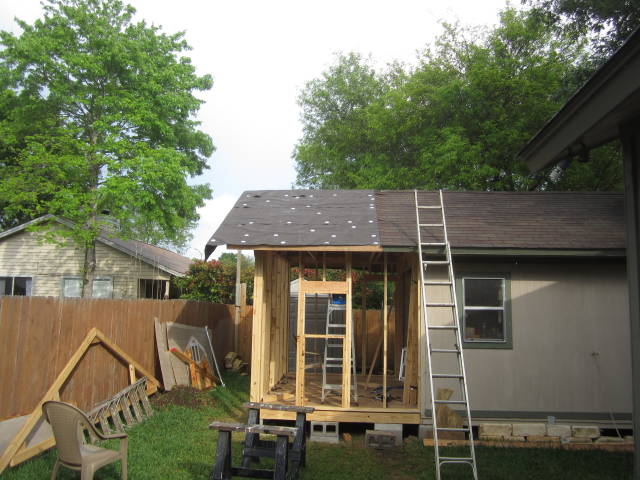

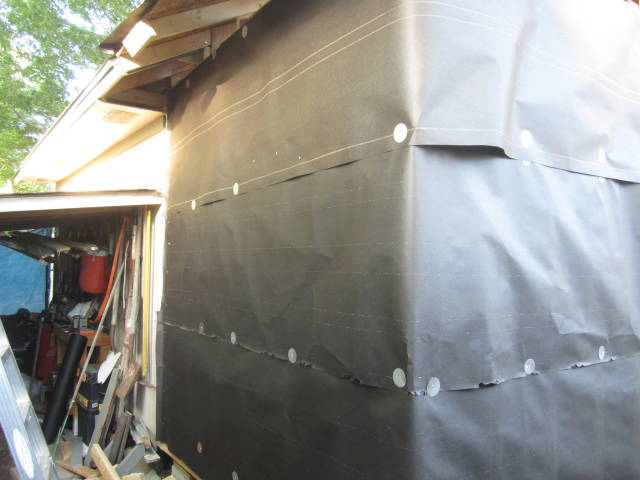
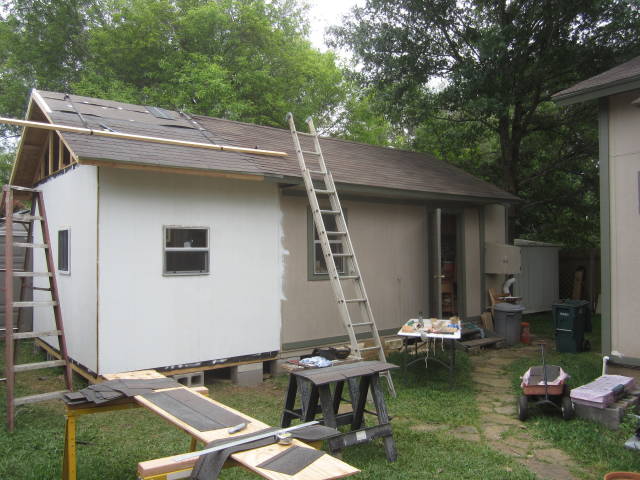
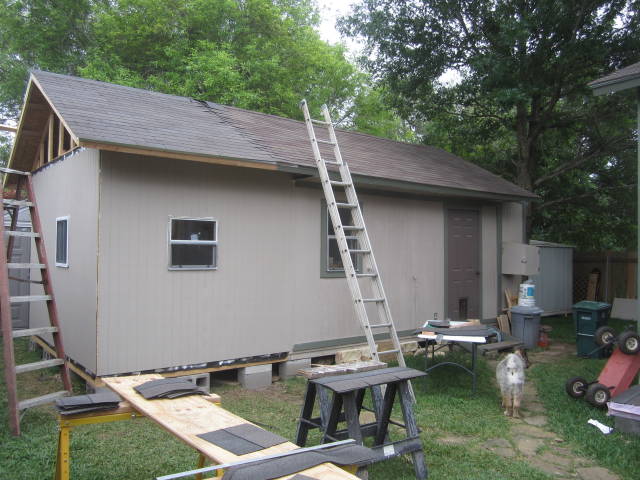
Sunday, I completed with all the framing and wrapped the building with Tar paper, Today (Monday) I finished up with all the face boards on the front, back and the gable end reattached some of the tar paper on the roof, we had a huge storm blow in Sat night and lifted some of the paper up, I also installed the windows and installed 4 of the seven wall sheathing panels, tomorrow (Tuesday) I’ll have help and will get back on the roof getting the shingles on it.
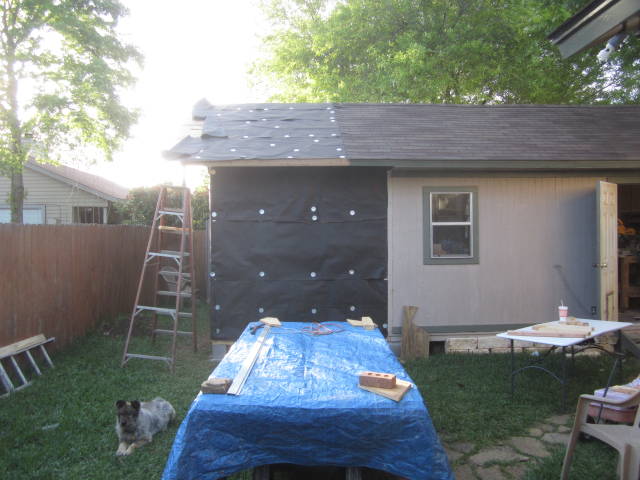
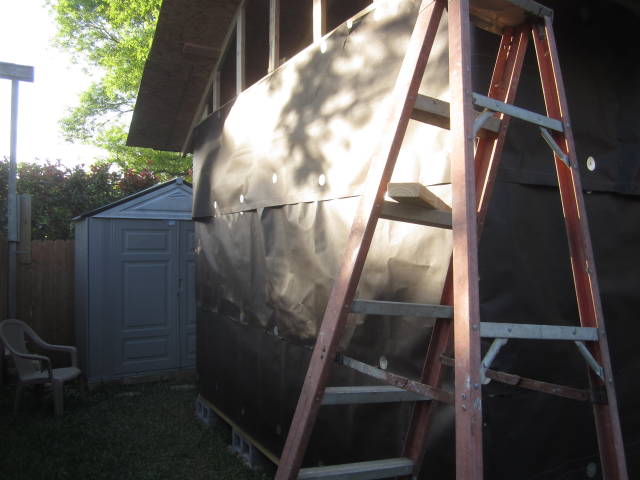
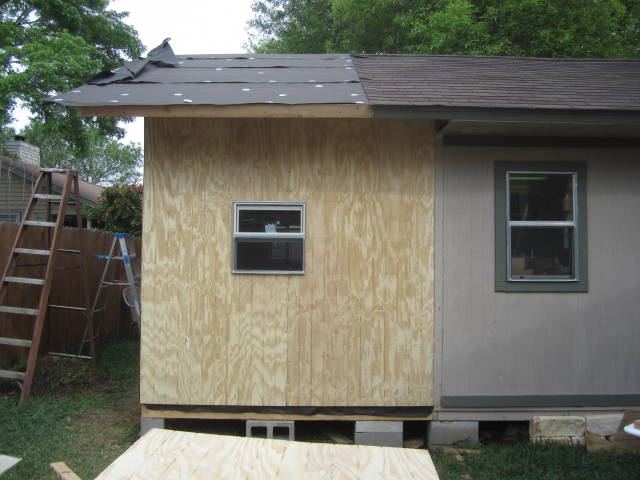
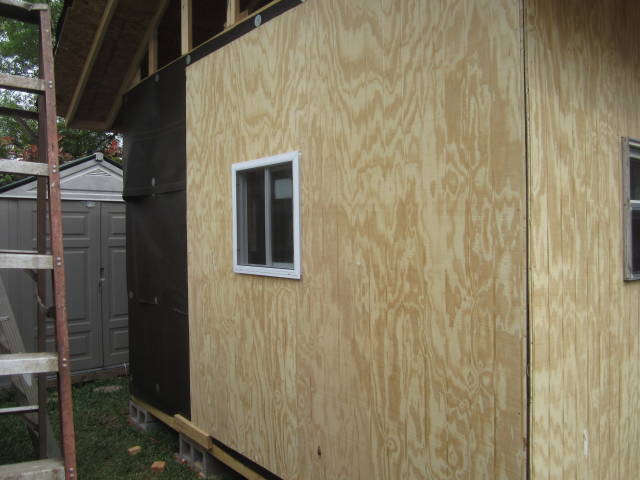
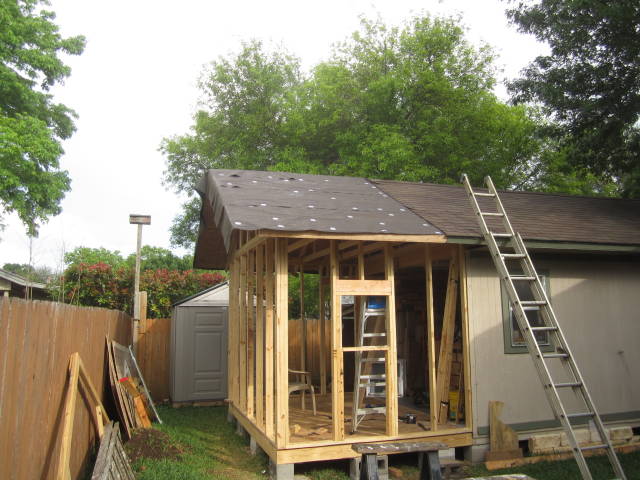
Monday and Tuesday I completed the exterior walls, along with getting half of the roof shingled, My friend was over to help me on Tuesday getting the shingles up, we still need to other side to do, I managed to get the primer and the paint on the walls, this morning I spent picking up supplies to run the electrical through out the shop, I plan on putting in a sub floor outlet as well, I had limited selection on the shingles but did my best to match what was already up there.
Today we have low clouds with a mist so not sure if any at all will get done today.
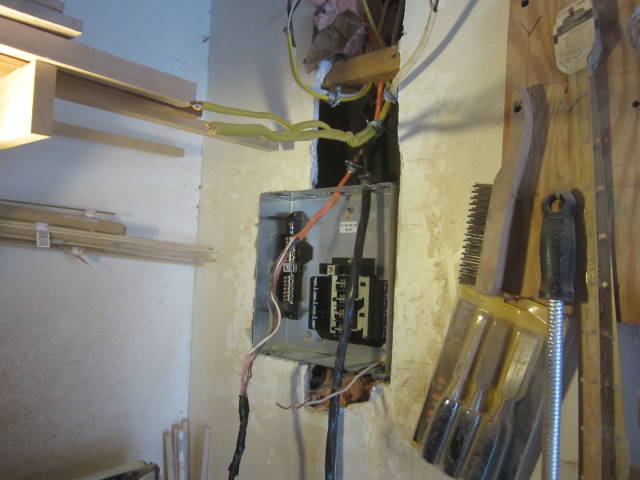
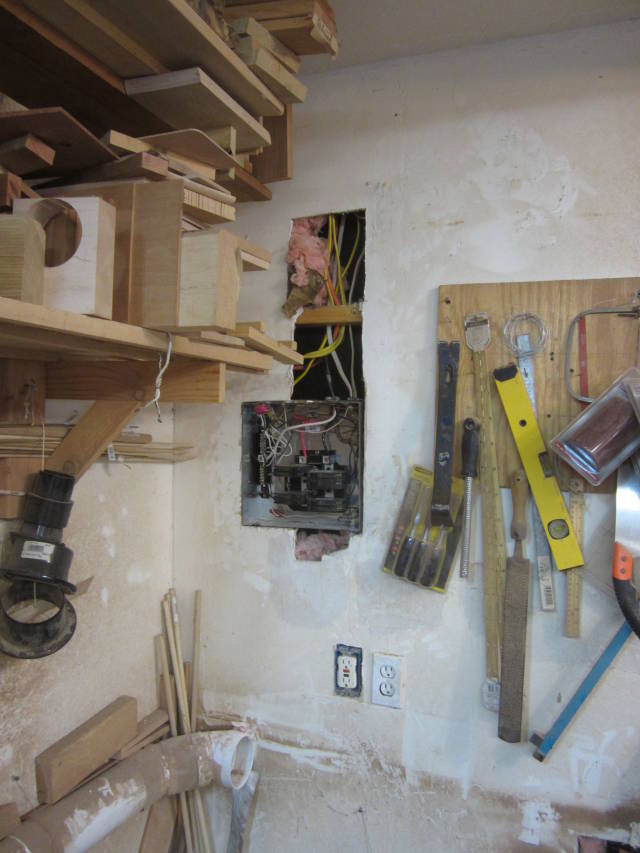
No pictures on this episode only to report that I pulled the 10/3 out and pulled the 6/3 in along with replacing the two separate single pole 30 amp breakers with a single double pole 50 amp breaker at the main, tomorrow will be a continuation of wiring up the shop and replacing the old 4 space sub panel with an 125 amp 8 space panel.
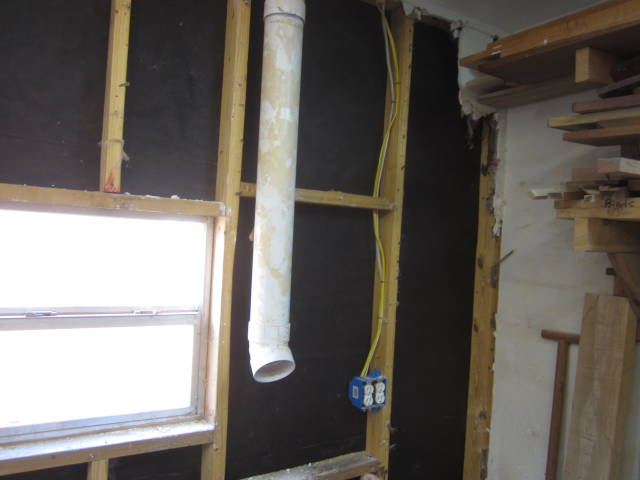
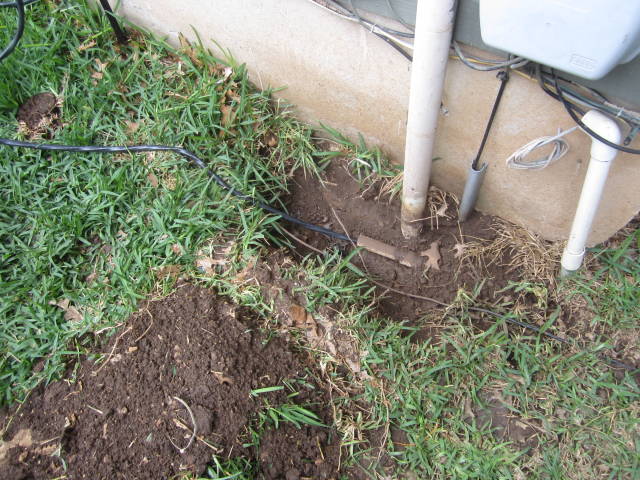
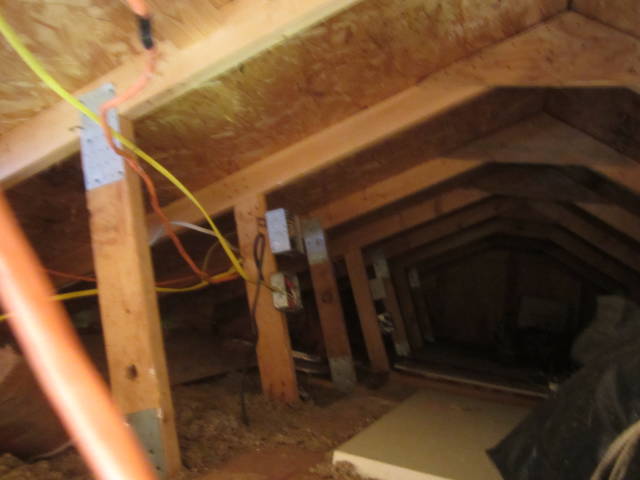
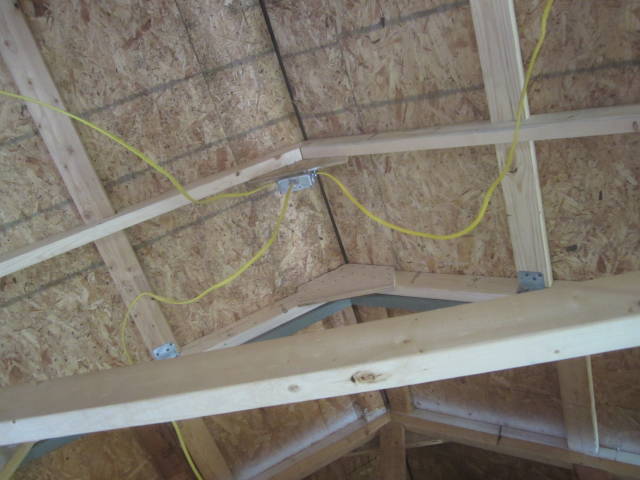
his morning started off with Heavy rains up til around 9:30ish when it stopped, I grabbed the 8’ ladder cordless drill with a 7/8 spade bit went up into the attic and drilled two holes through the top plate along side the already pulled wires and dropped down three more pulls one 10/3 and two 12/2 wires but with the fire blocks in the wall I had to remove a good portion of the sheet rock in order to feed the wires down through the fire block, I than created a make shift spool and rolled off the 6/3 wire into the underground pipe that was already there, I used the rope that I had pulled through the pipe when pulling out the old 10/3 wire, you might notice that the pipe is actually water pipe, it was pipe I already had from another project and so I cut my budget using it when I originally built the shop 10 + years ago, (Note) I did purchase 40’ of gray pipe ready to place into the ground in case I wasn’t able to pull through the existing pipe, since I was able to use the existing I will return what I don’t use, once I pulled through the pipe I finished fitting it through the LB into the shop, I still need to clamp the pipe to the building and close the LB.
The 10/3 is going to be a dedicated for the 240 volt 15 amp AC unit.
Inside I removed the old Gould 4 space sub panel and replaced it with an 8 space 125 amp GE sub panel, keeping it the same as what I have on the house than ran the wires into the box ready to be connected to the breakers.
In my last blog, I mentioned that I would cutout an outlet into the center of the floor of the shop, I decided to scrap that idea after measuring the width of the shop along with the width of the table saw it’s just not feasible with the shop being 12’ minus the 8” for the walls making it roughly 11’4” and with the tablesaw being 64” and since everything is going to be mobile anyway.
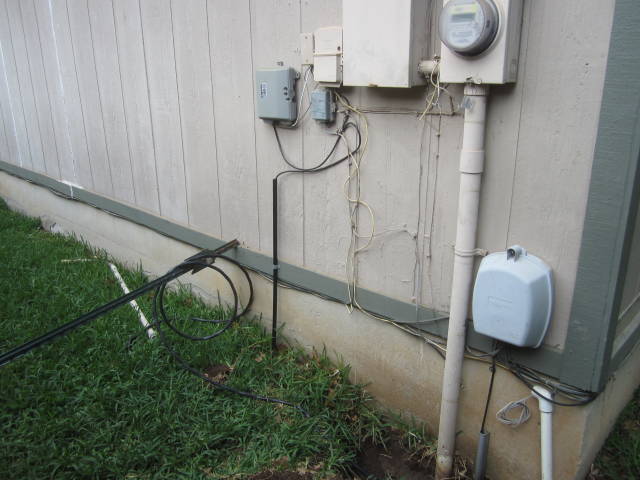
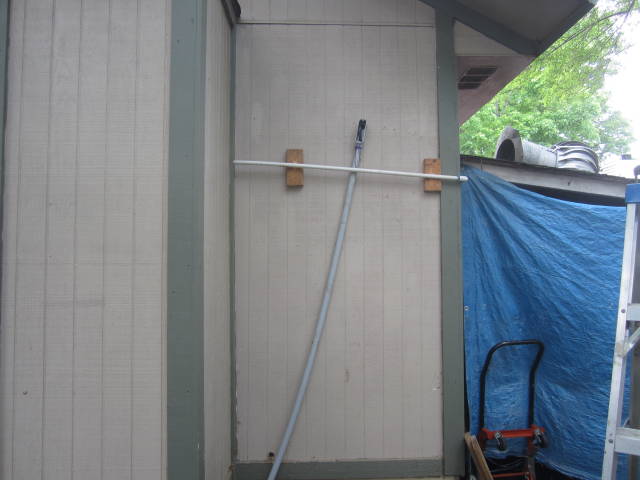
The white conduit you see running horizontal across the gray pipe I just ran is my air line from the air compressor which is located under the lean-to outside the shop, I don’t keep a constant pressure on it.


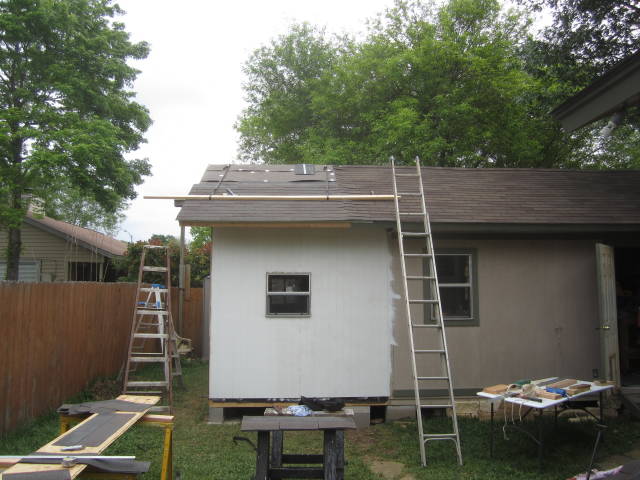
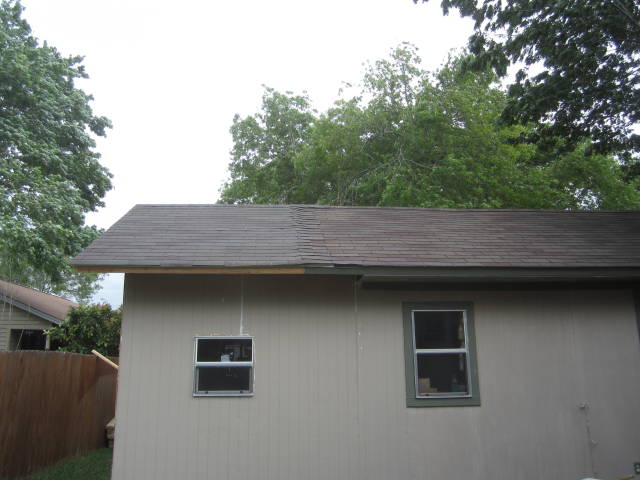
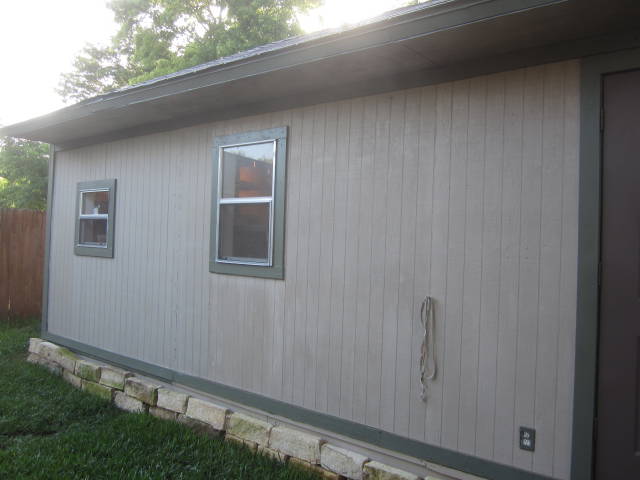
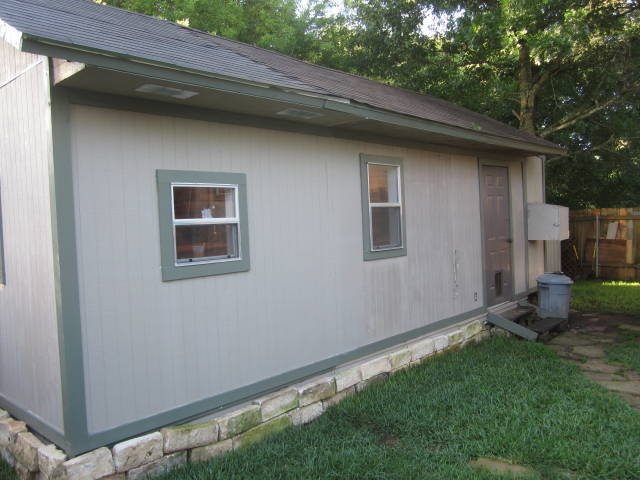
The building is now completely dried in, I completed the shingling of the roof today both side but due to the cool weather we are having this week, I’ll have to wait until the warm weather returns to calk the old shingles with Tar.
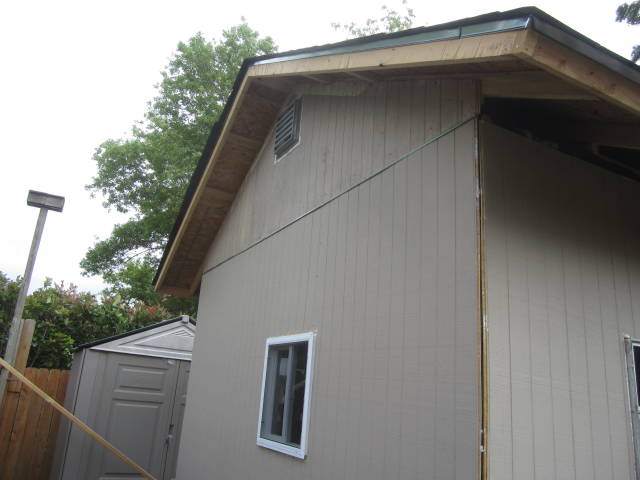
The Gable end is complete with the upper pieces matching right back with minor cuts on the pieces, still needs a bit more paint and the trim work done.
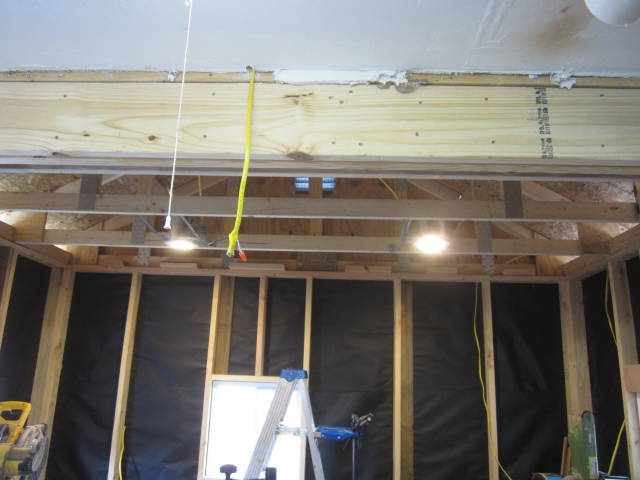
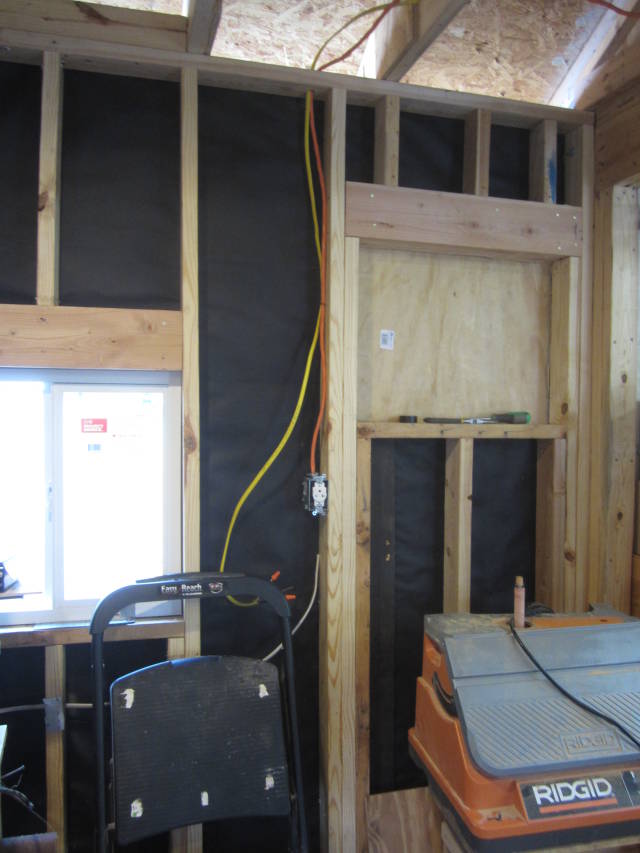
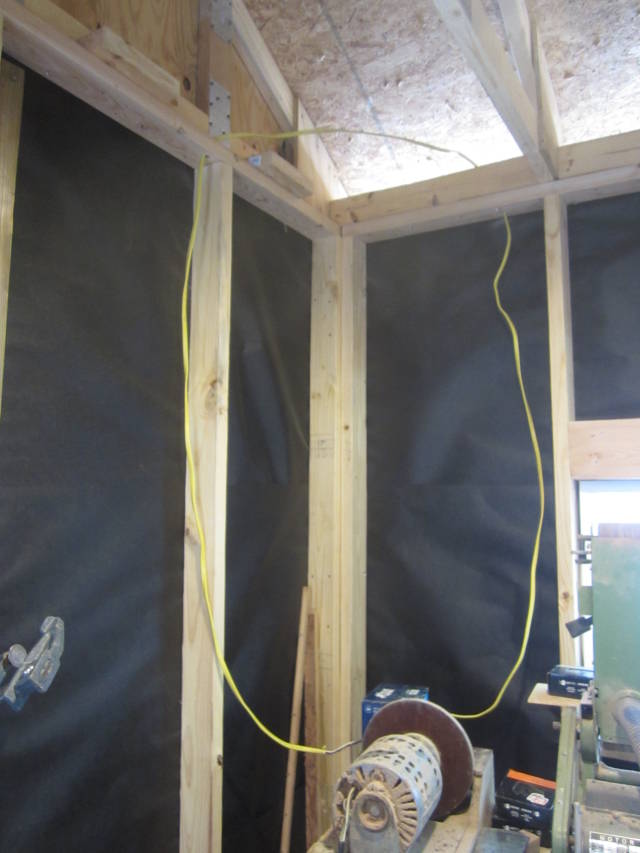
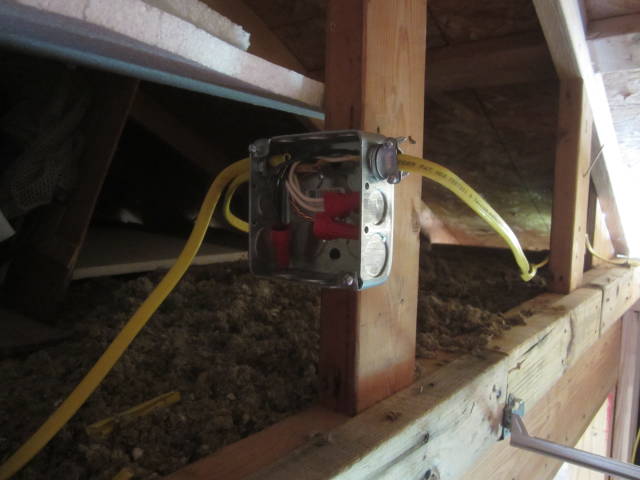
For the past few days we’ve been working on the wiring getting it all back in order, the sub panel is now complete with all the wiring done and breakers installed, still more to be done on the wiring, we ran into a snag though, not knowing how the wires were ran after removing the old wall and after installing a new junction box in the attic then attaching the left over wires together in the junction box thinking we were reconnecting the plugs, we had lights but no plugs we used a meter on all of the plugs with trying different breakers and also ruling out defective breakers, but no power to the plugs, we both looked at the old sub panel which was a 4 space only sub panel and I had all the breakers labeled, two breakers feeding the plugs on two walls, a single breaker feeding the outlet to the AC and the last breaker feeding the lights, which kind of led us on path to the issue, my friend left and we were going to tackle it the following day but I just couldn’t let it lie so I got on the computer to review all of the old pictures from when the original building was built by dad and myself and found that we had two hot feeds feeding each other creating a loop lucky I had an inline GFI plug that was tripping, once I knew what was going on I located both hot feeds and disconnected one and resolved the problem.
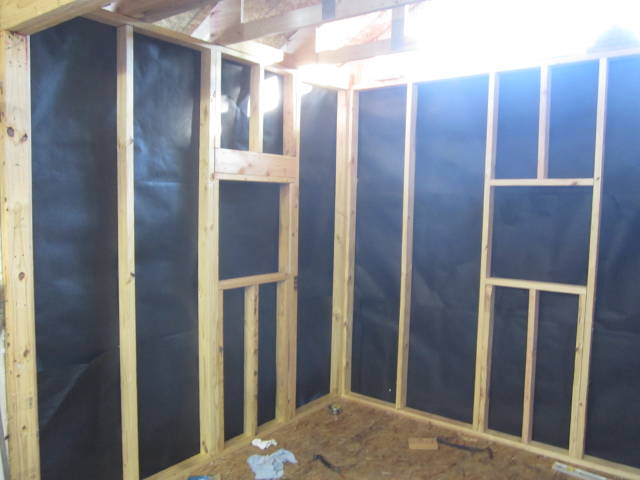
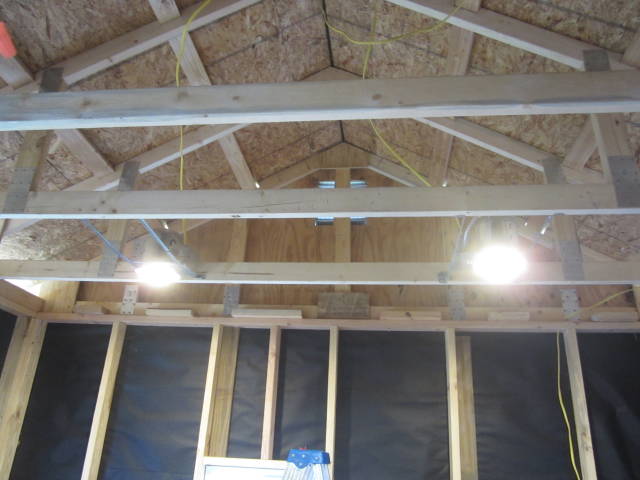
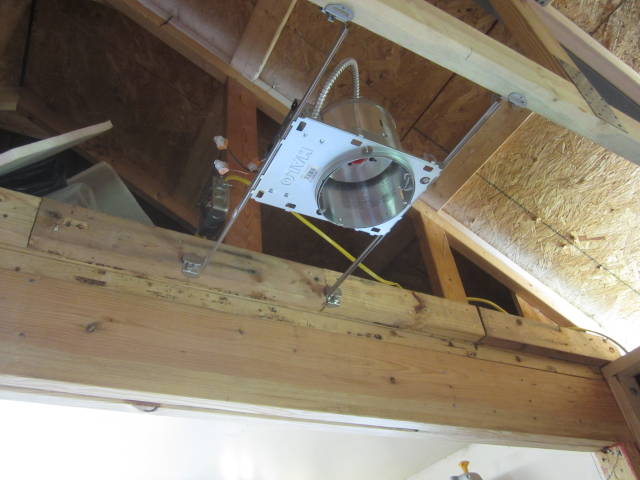
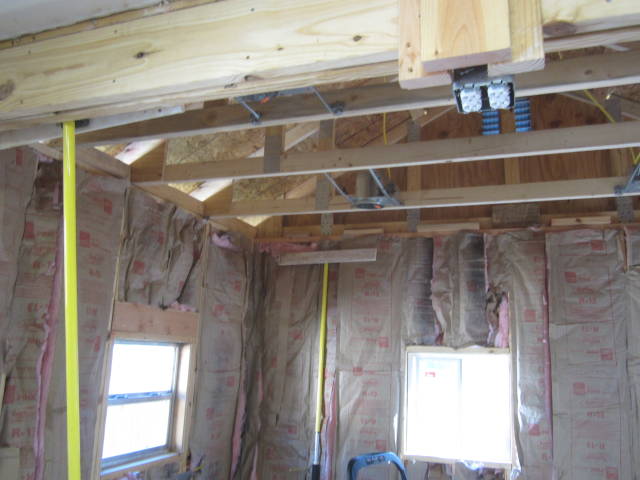
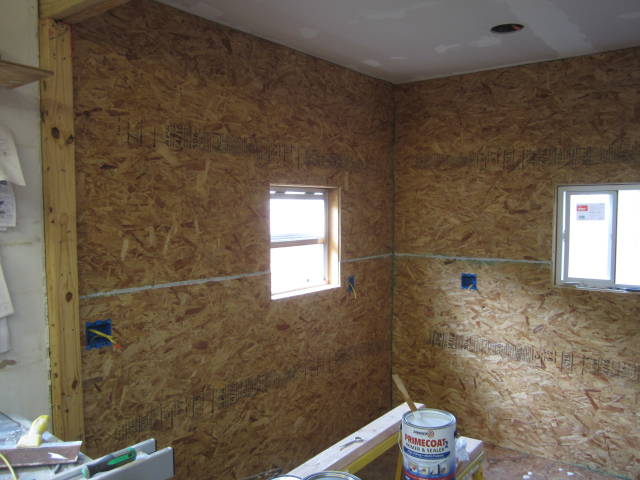
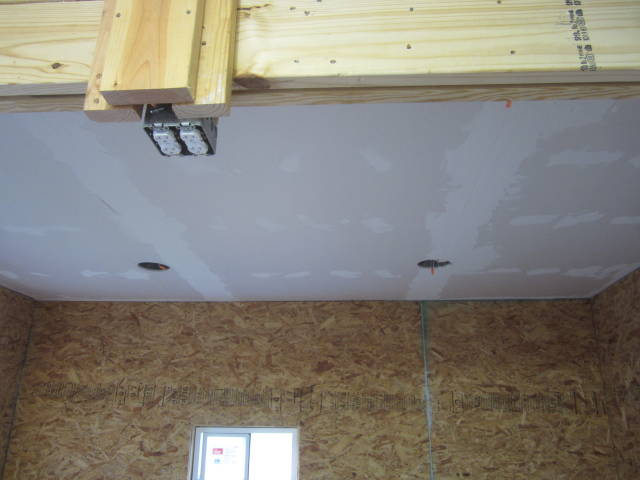
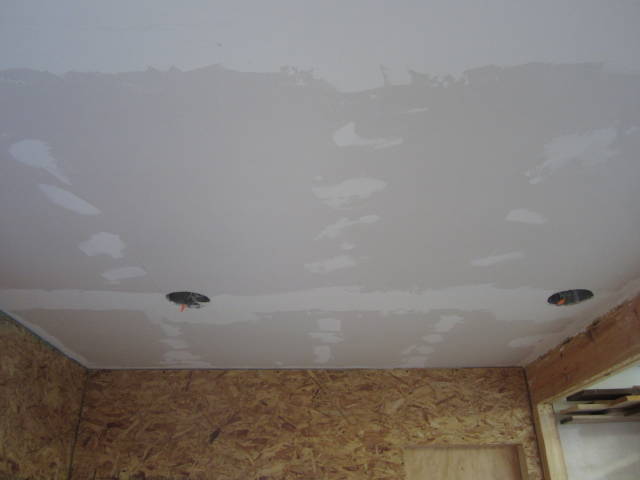
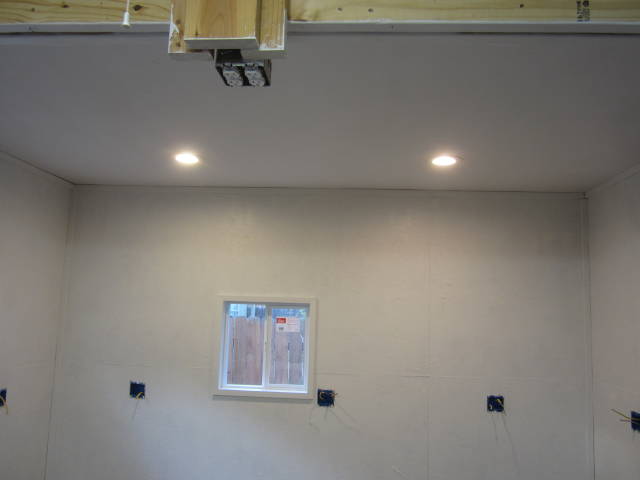
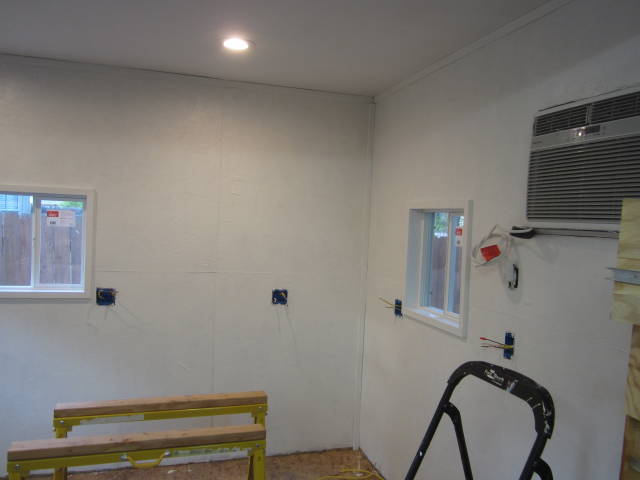
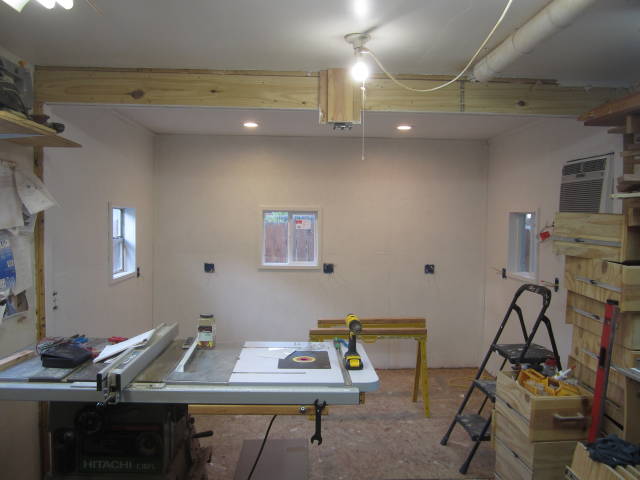
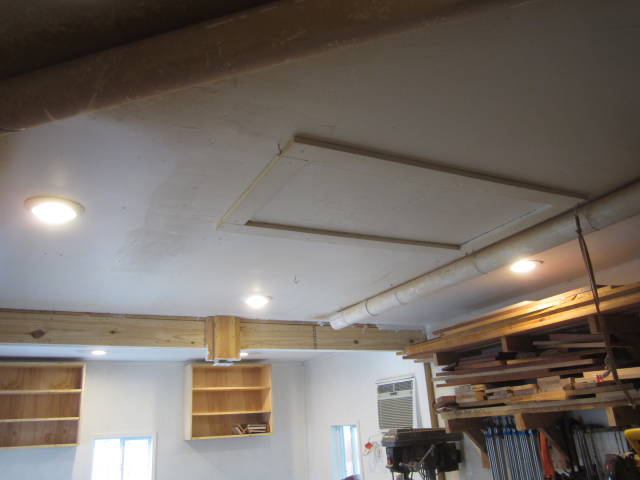
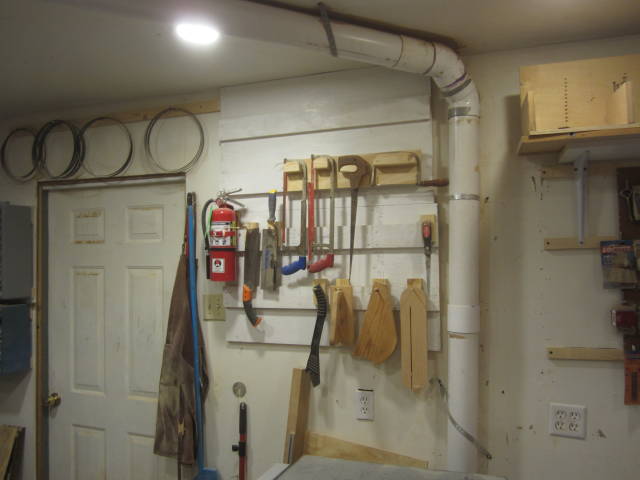
In the photos you will notice that I’ve optioned for recessed canister LED lighting in the new section and will also be replacing all of the fluorescent lighting through out the old section with all LED recessed lighting, in order to raise the ceiling reducing the amount of objects hanging down.
The 240 outlet has been installed still yet to install the AC which will come soon, it’s still sitting in the box on top of my wheel barrow :)


So much has been done I kind of forgotten where I left off at, :)
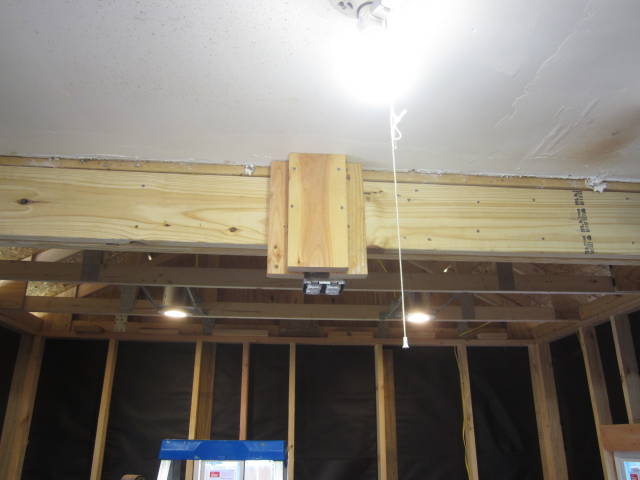
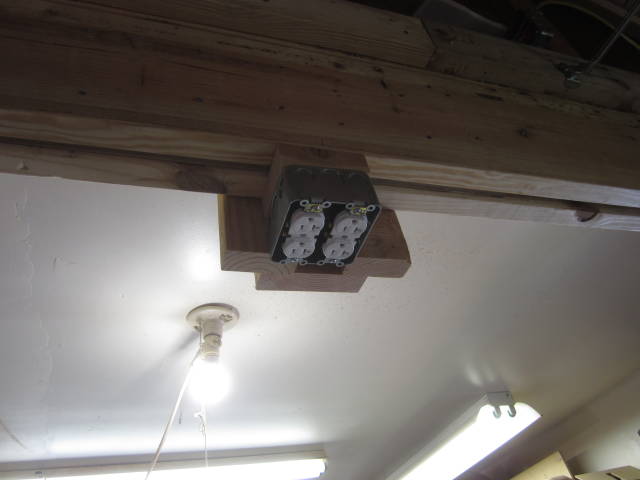
Wed most of the day was spent doing some house cleaning along with some more wiring and installing the ceiling duplex of plugs. I placed two 2×4s on each side of the wires leading down to the plug housing and one 2×6 to cover the wires for protection but after putting more thought into this I believe I will remove the 2×6 as I wouldn’t want to forget and run a screw through trying to hang something I’d rather see the wires and allow the 2×4s to guard them.
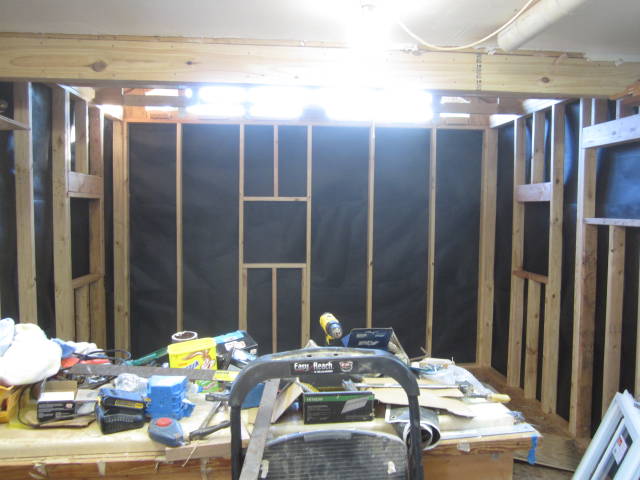
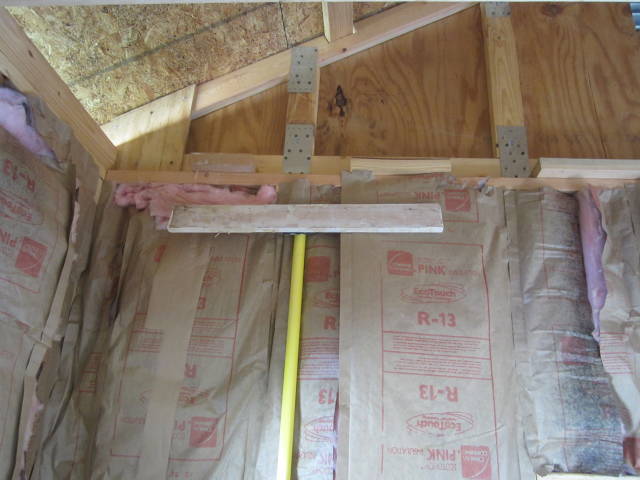
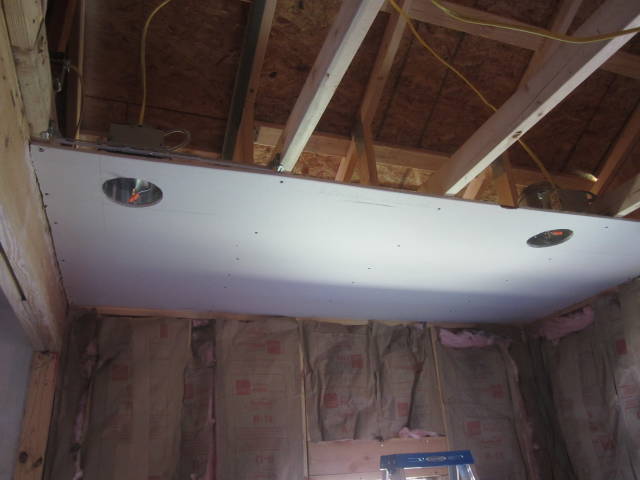
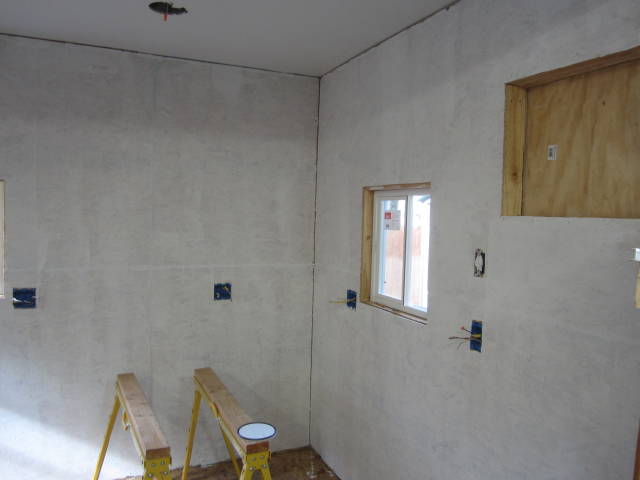
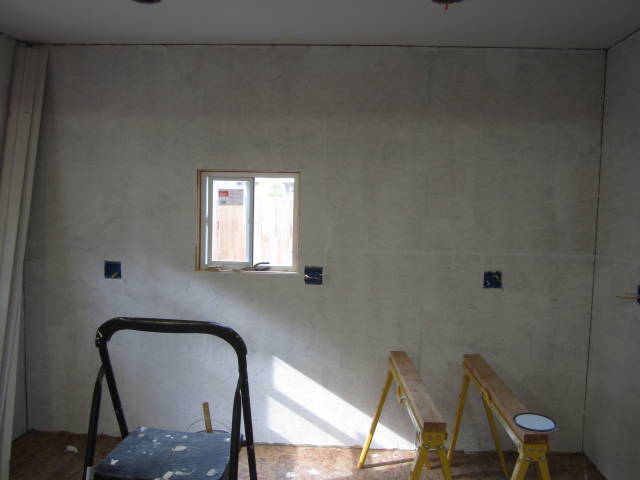
Thursday was spent installing the next two recessed lighting, installing another junction box in the attic to feed the rest of the plugs and lastly installing wall insulation, today was spent hanging the ceiling sheet rock, tomorrow will be hanging the walls along with the AC unit.
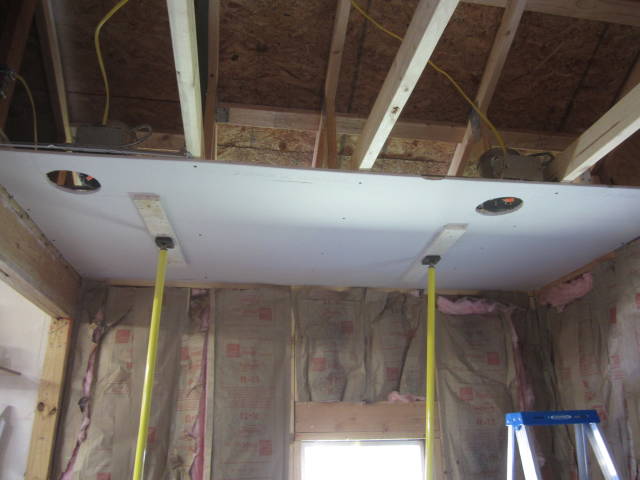
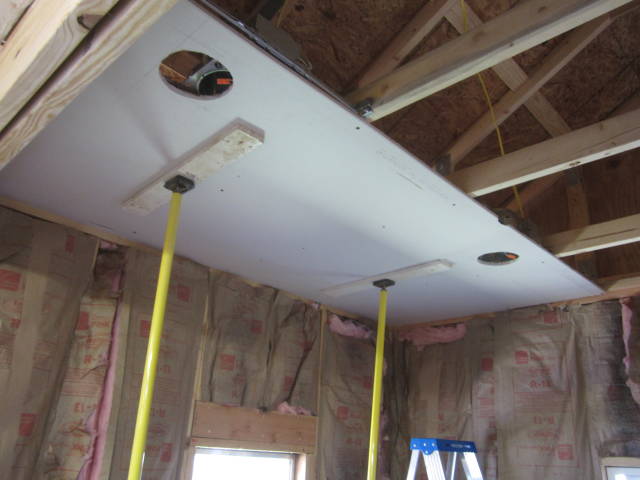
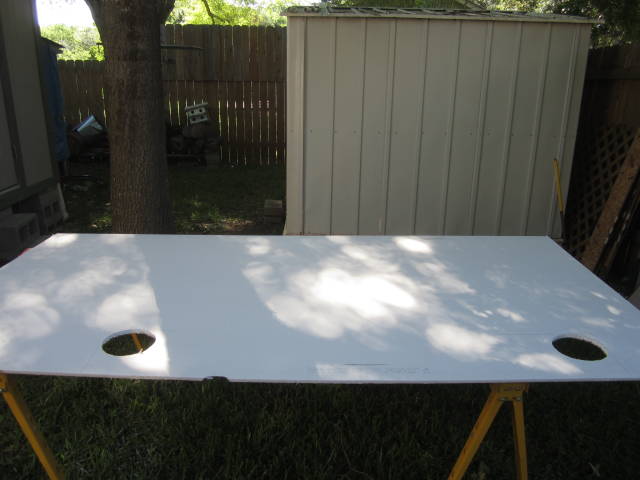
Hanging the sheet rock I used a 2×6 screwed to the wall studs just a few inches below where the sheet rock was to be screwed in on one end of the wall, I already had the jacks I just added some 1”x 3” boards screwed into one end of the jack to act as a support, I first leaned one end of the sheet rock so that it rested on top of the 2×6 and walked the other end up keeping pressure against so that it remained resting on top of the board, I then had one jack ready and within reach and placed it under the end I was lifting and then placed the second jack so that it raised the other end off of the board, I used my dremel tool with a spiral bit to cut the holes in the sheet rock with.
Warning! Lots of pictures to view :)
Randy - If I'm not on the computer than I'm out making sawdust.
So much has been done I kind of forgotten where I left off at, :)
Wed most of the day was spent doing some house cleaning along with some more wiring and installing the ceiling duplex of plugs. I placed two 2×4s on each side of the wires leading down to the plug housing and one 2×6 to cover the wires for protection but after putting more thought into this I believe I will remove the 2×6 as I wouldn’t want to forget and run a screw through trying to hang something I’d rather see the wires and allow the 2×4s to guard them.
Thursday was spent installing the next two recessed lighting, installing another junction box in the attic to feed the rest of the plugs and lastly installing wall insulation, today was spent hanging the ceiling sheet rock, tomorrow will be hanging the walls along with the AC unit.
Hanging the sheet rock I used a 2×6 screwed to the wall studs just a few inches below where the sheet rock was to be screwed in on one end of the wall, I already had the jacks I just added some 1”x 3” boards screwed into one end of the jack to act as a support, I first leaned one end of the sheet rock so that it rested on top of the 2×6 and walked the other end up keeping pressure against so that it remained resting on top of the board, I then had one jack ready and within reach and placed it under the end I was lifting and then placed the second jack so that it raised the other end off of the board, I used my dremel tool with a spiral bit to cut the holes in the sheet rock with.
Warning! Lots of pictures to view :)

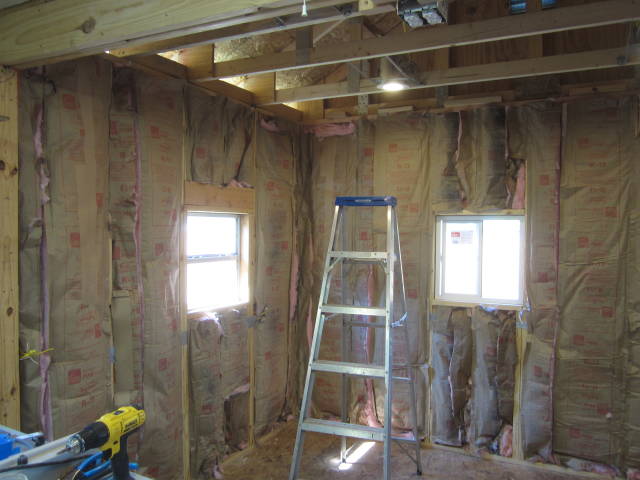
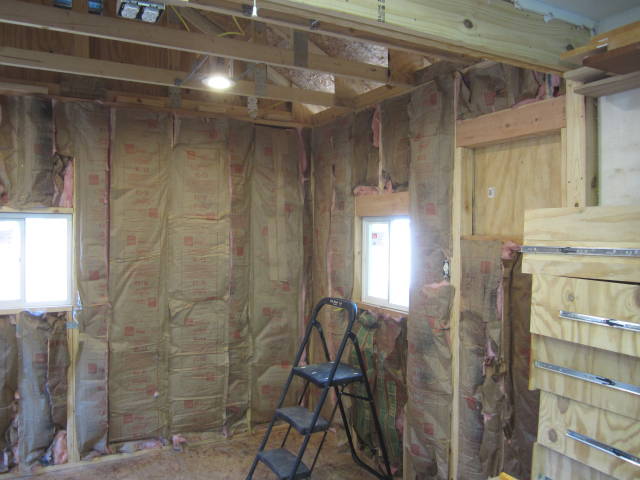

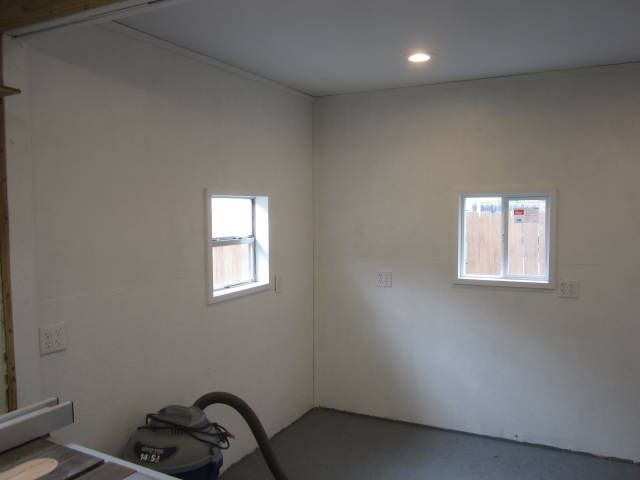
Sunday, I completed taping and floating and starting hanging OSB on the walls along with cutting out the receptacle box holes, Yesterday (Monday) I completed hanging the walls along with the first coat of primer on the ceiling and walls, today I will be insulating the attic starting off early this morning while it’s cool and installing the AC unit.
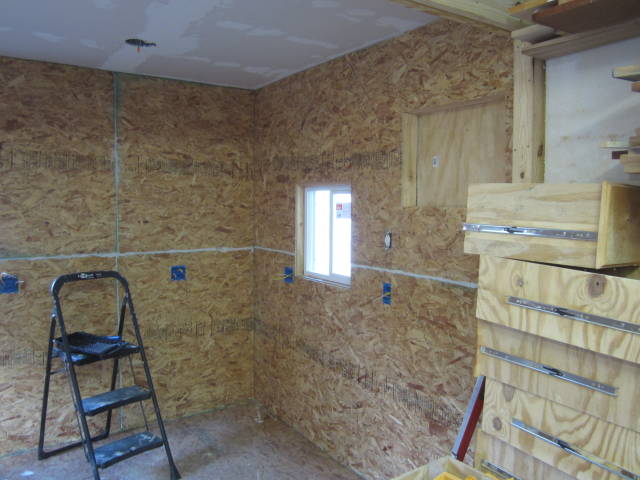
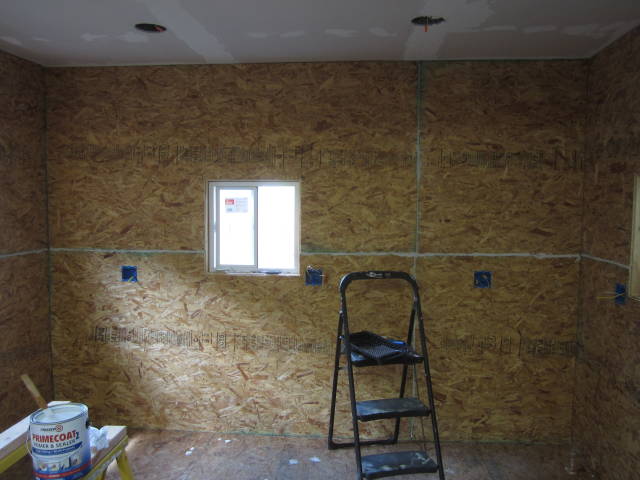

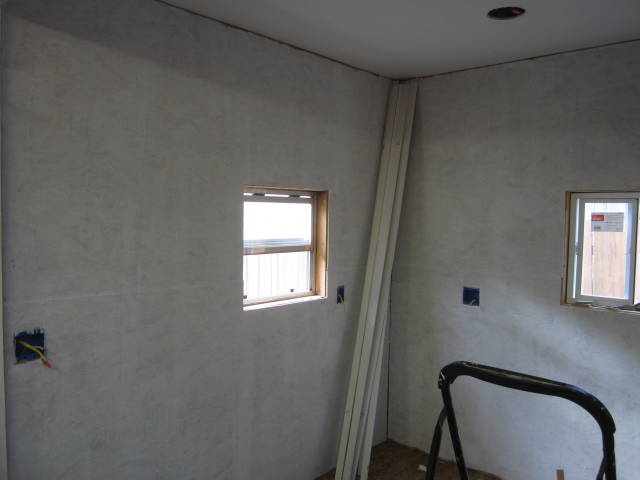
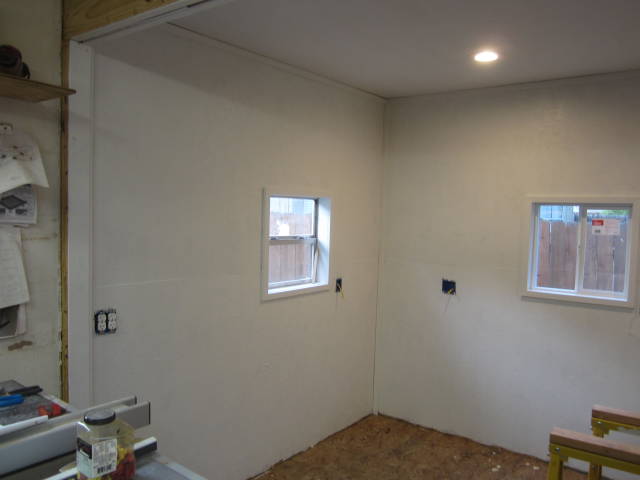
Yesterday morning was spent insulating the attic then the rest of the day was spent trimming out the walls, today I completed the trim on the walls along with making and adding trim around the windows, painting the walls, also the AC went in the wall, after installing he LED lights I found two not working so I’ll have to make another trip up into the attic to resolve the problem.
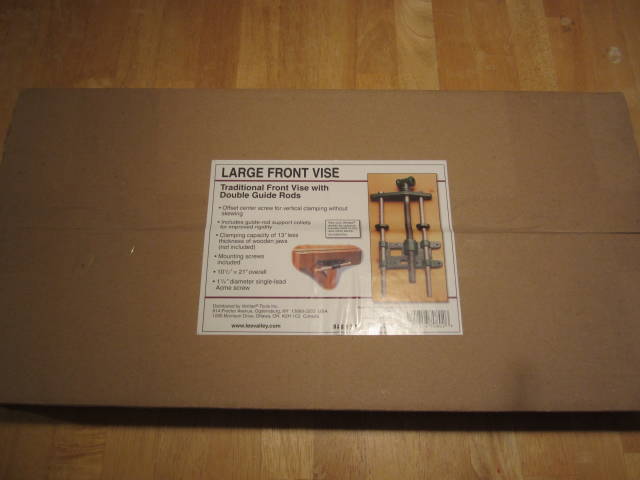
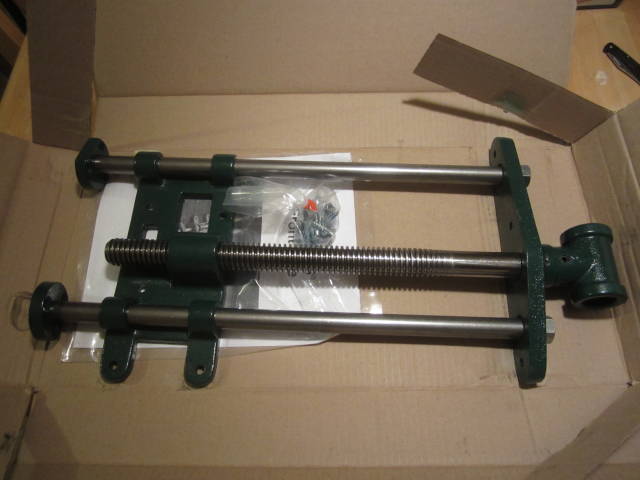
I’m also happy that I received my new large front vice from Lee Valley yesterday.
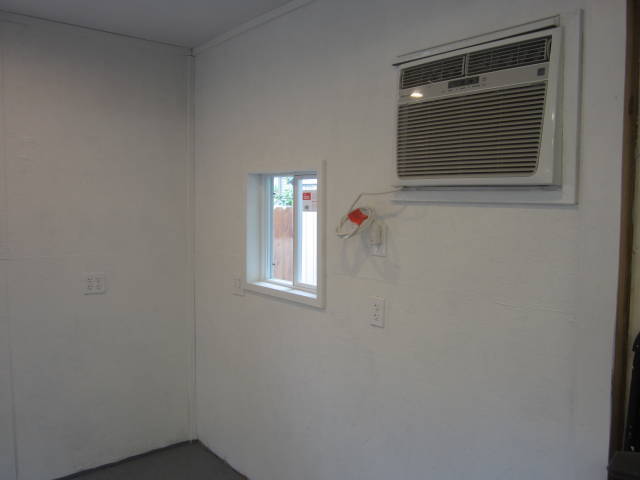
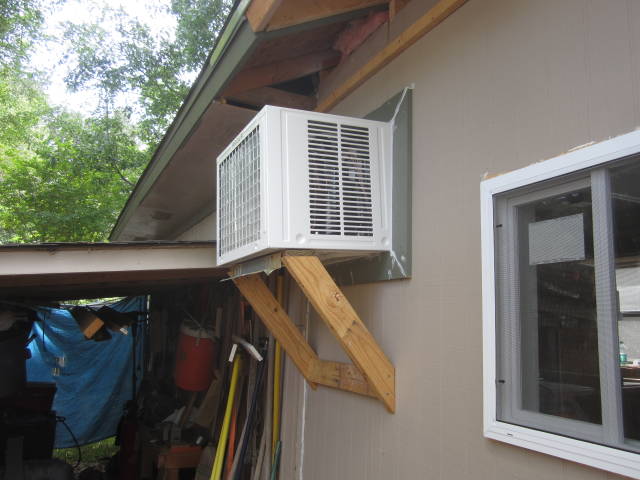
Starting the middle of this week, I built the knee bracing for the AC unit, I believe it was Grizz that expressed concern on wall bracing for the unit? If so in the photos will show what I was talking about on knee bracing.
After the bracing was done I had my sisters BF come over to help me lift the AC unit into the case once I had it mounted in the wall, well after it was all said and done I realized I had the case to far into the building and needed to readjust but my sister BF had already left and I didn’t want to bother him again so I asked another friend to come help me it was the person that’s been helping me, we made the changes and replaced the AC unit back into the case now it’s in like it’s supposed to be, once that was all done I used insulation batting to stuff in between the case and the walls to close in all gaps, I than followed it up with white Lighting 3006 caulking completed trimming the inside along with the outside around the AC unit followed up with more caulking closing all the gaps it’s now sealed in and freezing me out of the shop :)
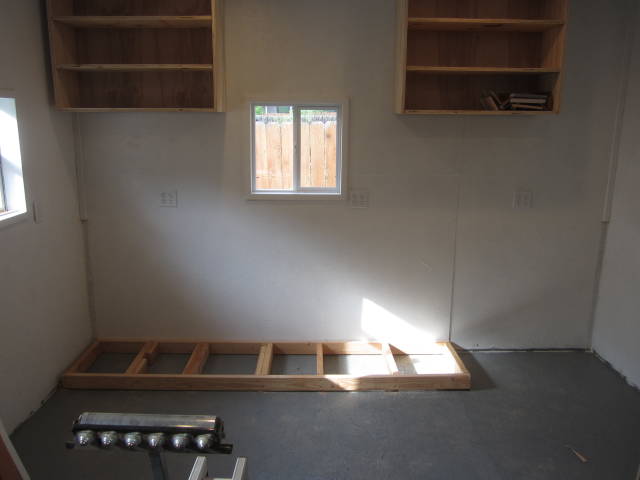
Yesterday I applied dark gray garage floor epoxy paint to the floor, purchased and painted all of the exterior trim boards and today I completed installing the rest of the plugs along with wall plates, installed 2”x 2” on the backside for connecting the soffit too and did some more house cleaning along with purchasing all the plyboard for the wall and base cabinets.
The plan is to start working and cutting the parts for the wall and base cabinets.

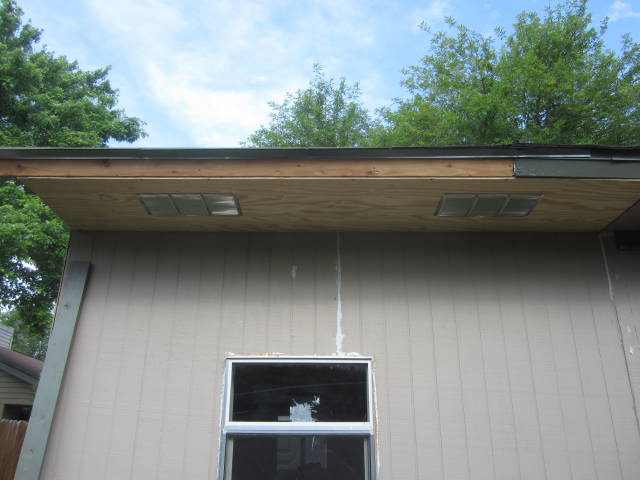
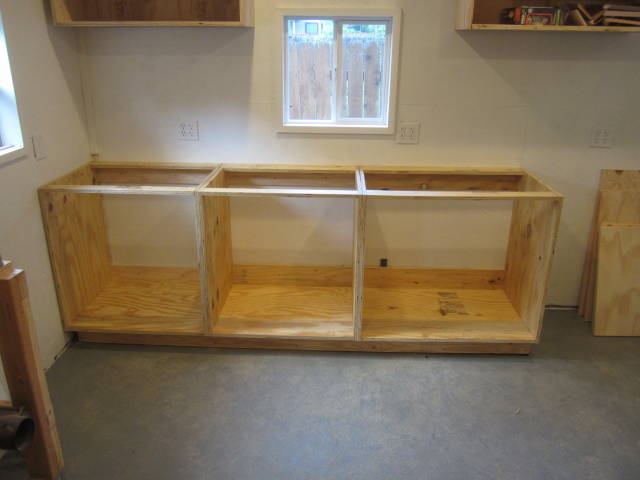
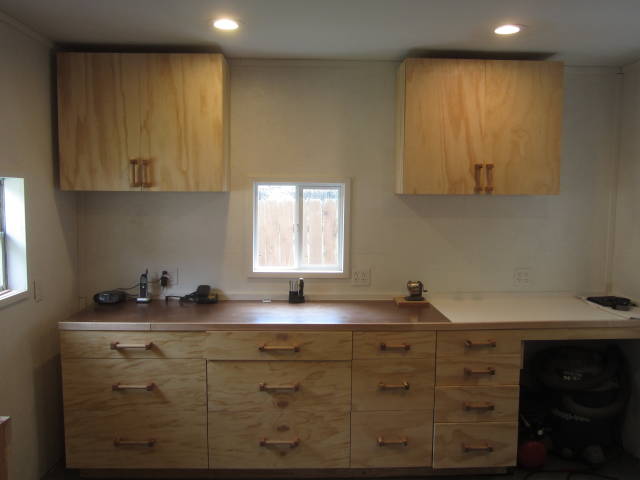
Soffits are installed, wall cabinet casing are built and installed, started on the base cabinets and removed all of the ceiling fluorescent lighting and replaced with LED recessed lighting, still 4 more to go in the old part of the building.
With all the rain we are having, I’m having to use the break in the clouds to work on the outside but I also am grinding hard on the inside to get my shop back in operation.
The wall cabinets will receive edge banding and cabinet grade ply doors with European hinges, the shelves are adjustable, they measure 36” x 30” x 12”
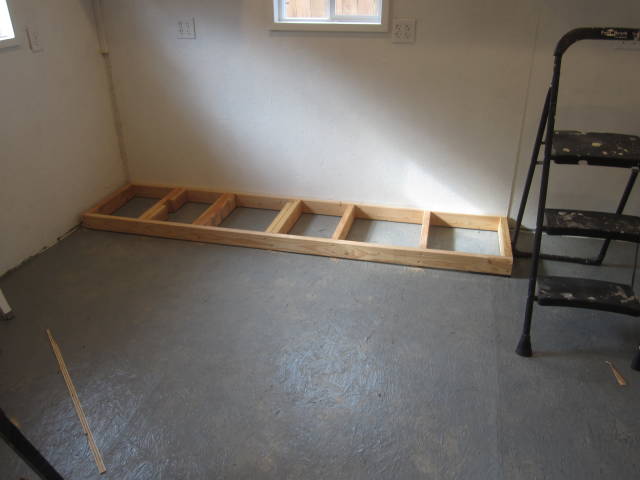
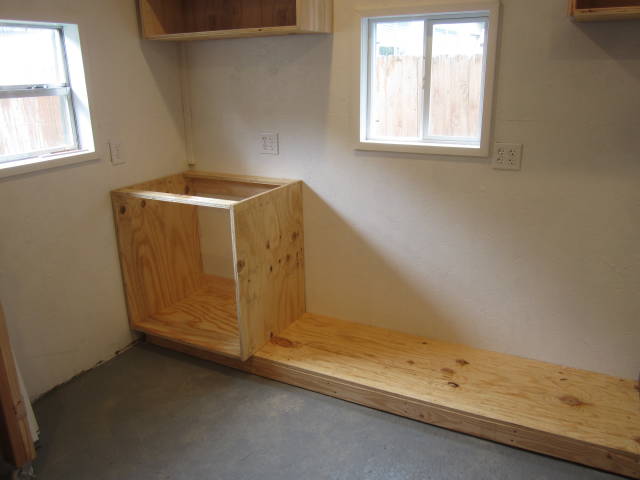
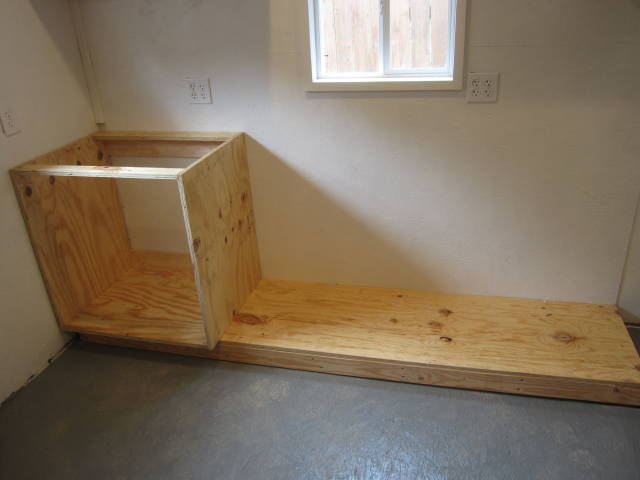
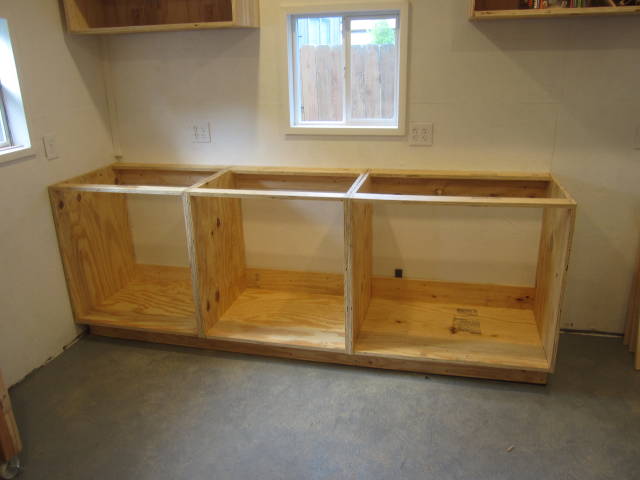
The floor base cabinets, instead of cutting the toe kick notch cut in the side pieces as I have done in the past I’m instead trying something new, I’m instead building the base out of 2×4s using them as the platform to set the cabinets on, they are 21” deep to allow the 3” space for your toes and feet and instead of the 4 1/2” high space it will be 4 1/4” (3 1/2” + 3/4”) bottom cabinet plate, the base cabinets will measure in 30” pods 3 long for 8’ L x 36” H, with using this method it also allows for easy leveling before the cabinets are installed on top. I used composite shims to level.
Randy - If I'm not on the computer than I'm out making sawdust.
More to come later.
Randy - If I'm not on the computer than I'm out making sawdust.


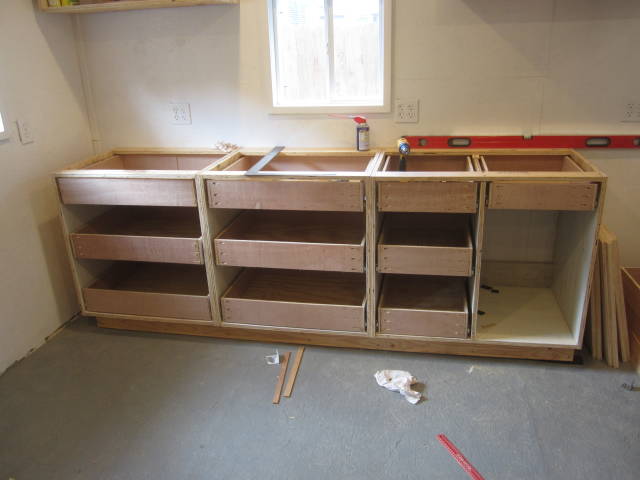
Cutting and building the base cabinets, I started out early getting an early start on the lighting, before sunup to attack the lights and get them completed as summer heat is upon us and I still needed attic work to do and wanted to get it out of the way while it was still cool.
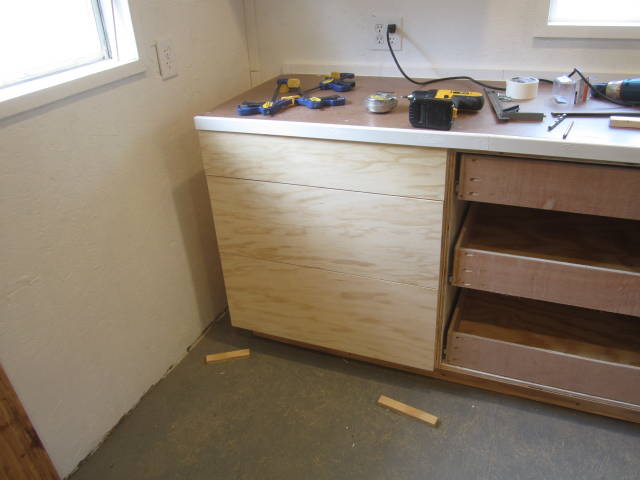
I installed three more light boxes, the kind that clamp to the sheet rock and ran new wiring I than started back on the base cabinets, the top will receive a single sheet of 3/4” ply then a sheet of 1/2” and a final sheet of masonite, I have the 3/4” sheet just sitting on top right now as I still have to build and install the drawers.
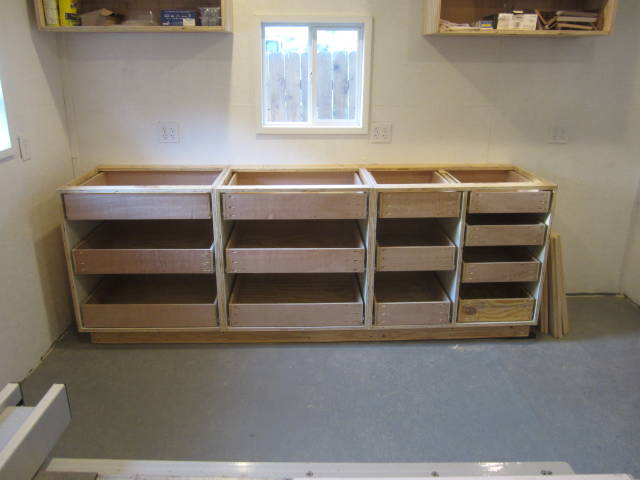
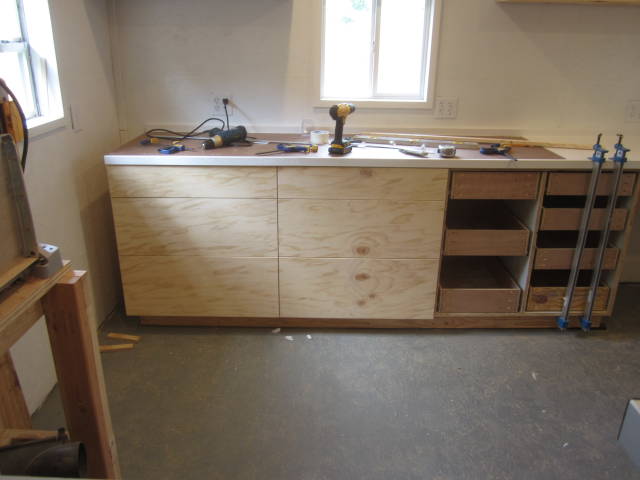
The past several days I did some more work on the exterior, completed all of the soffits, added some more trim and a bit more paint, still more to do on the exterior, on the inside I plugged away and completed the drawers and have them ready to install, I’m using story sticks for installing the drawer sliders, I cut four scrap pieces of ply to the length I needed for the top drawers, using a brad nailer I popped a couple of temporary nails in each stick,
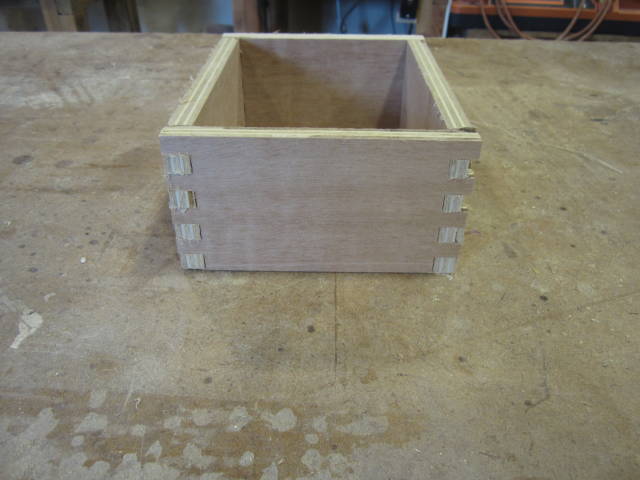
Building the drawers I first tried box joints but since I don’t have a dado set I use a router bit instead but I was getting tear out plus it was too time consuming so I gave rabbit joints a try, the glue wait time was another issue so I settled on pocket hole screws instead which made things move much faster.


The temporary story sticks with two brad nails holding them to the wall.
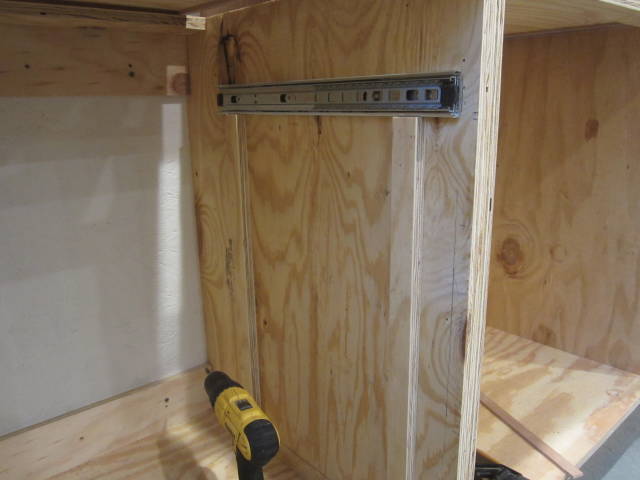
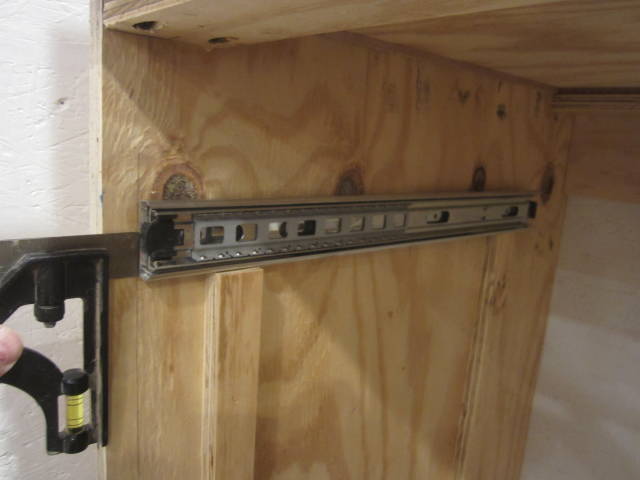
I used an adjustable square to set the depth of the sliders.
Started early this morning and plugged at it all day from dusk 7:00 AM to 7:15 PM, Rick Dennington was right when he said in my blog #19 “It’s a proud feeling to stand back and look at your work, and say “I did that”….
The bottom drawers are sitting 3/16” off the bottom of the cabinet floor, I used 3/16” shims for spacers, the rest of the drawers were done with story sticks.
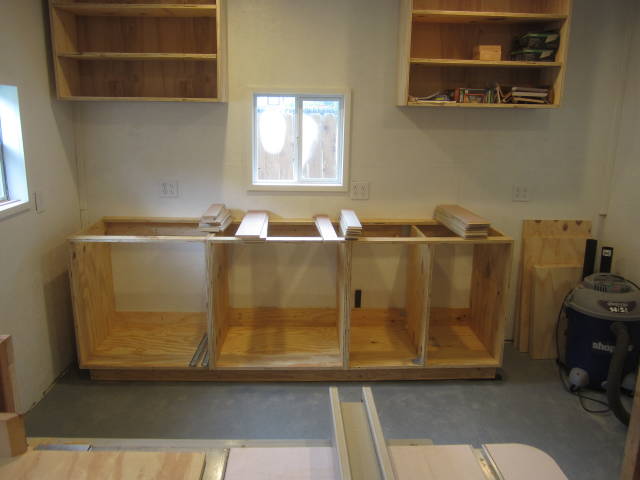
Tomorrow I’ll start on fitting the counter top, then doors and drawer fronts lastly I decided on cabinet paint white for the finish.
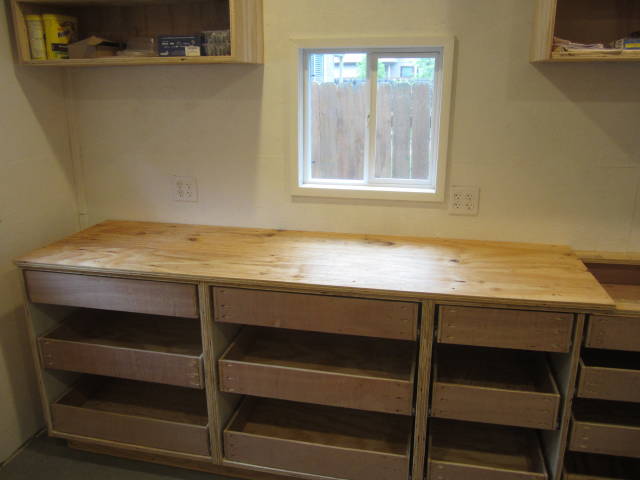
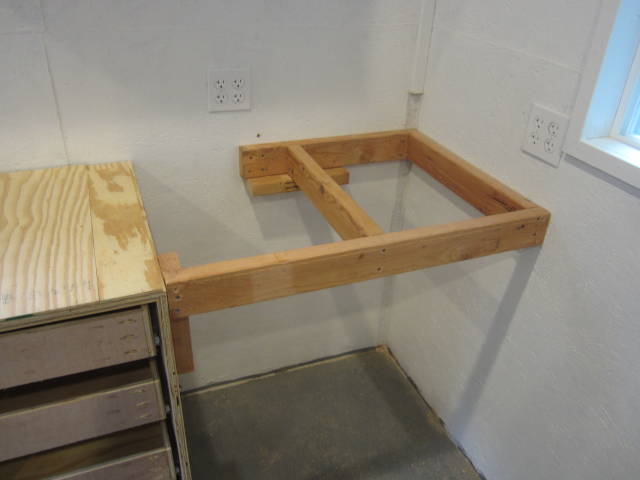
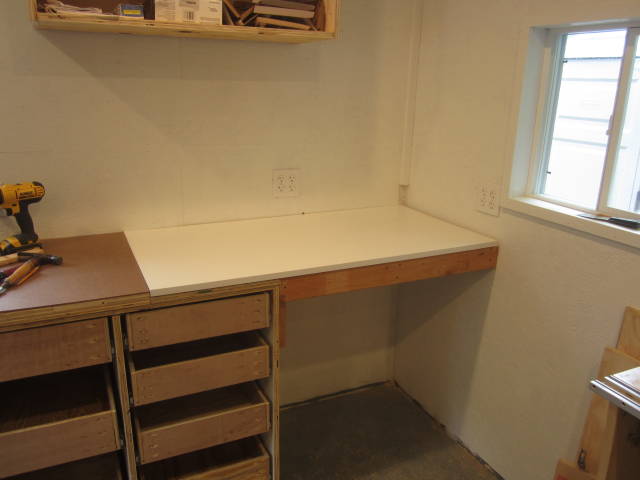
The past two days I drilled hard at trying to complete the cabinet work center, All drawers were installed yesterday, today I started working on installing the top which consist of a sheet of 3/4” ply, a sheet of 1/2 ply and a final sheet of masonite, the open right corner was left open to install a 4’ x 25” kitchen formica counter top that a next door neighbor gave me several months back only it had sit on my deck that whole duration and thus warped I didn’t find that out until I trying installing it this morning it had a significant downward bow so I sit it out to be disposed of and beelined to Homedepot once I got there I made my way to the rod and flat bar isle and grabbed a 2” x 4’ flat bar to use as a straight edge then made my way to the 4’ kitchen counter top section, everyone of the counter tops I found had a slight warp in them so I remembered someone posting here on LJ’s some melamine boards so I searched and found just what I needed a 4’ x 15 3/4” slab of true and straight Melamine board plus it was much.. much cheaper, I purchased two of them and ripped one so they both fit in the corner, I used the same trim boards that I used on the wall corners for the face of the cabinet and the back top edging of the counter top. The corner I beefed up very well with 2×4’s to support the Melamine boards. Once the top was complete I started cutting and putting on the drawer fronts.
Going through the pictures it will show how it all came together.

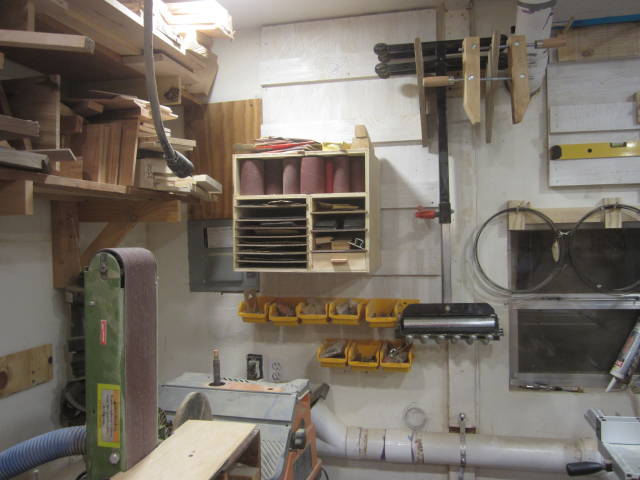
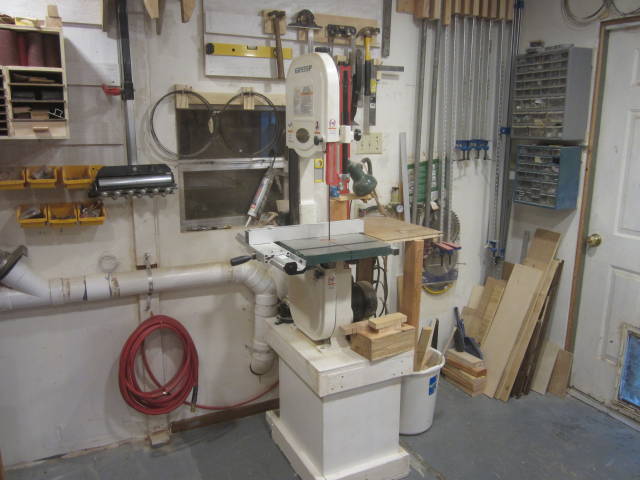
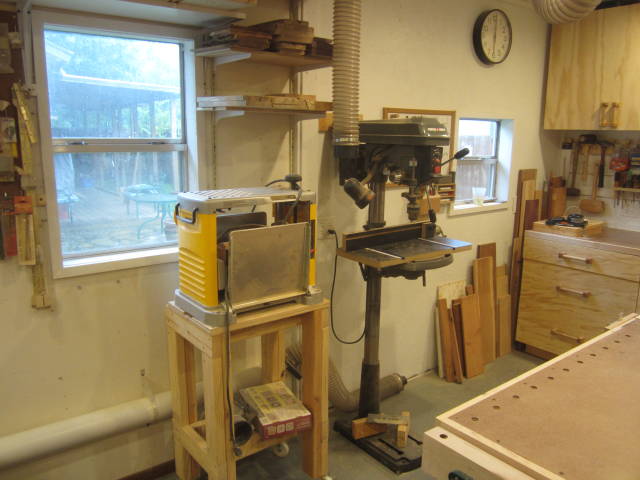
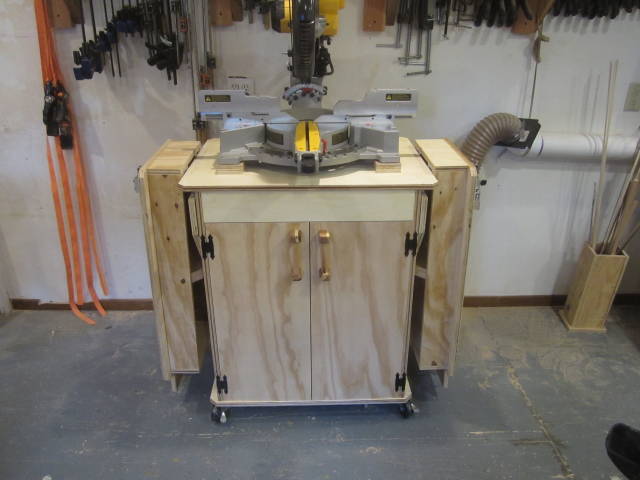
Here’s an update on the shop addition, I have completed the work center and will now move to building a new center workbench replacing the old one, I’ve installed a french cleat system to house my clamps along with some other changes in the shop such as removing the old corner wall cabinets and discarding them and then will reposition both the drill press and the bandsaw on the wall that the old wall cabinets were on.
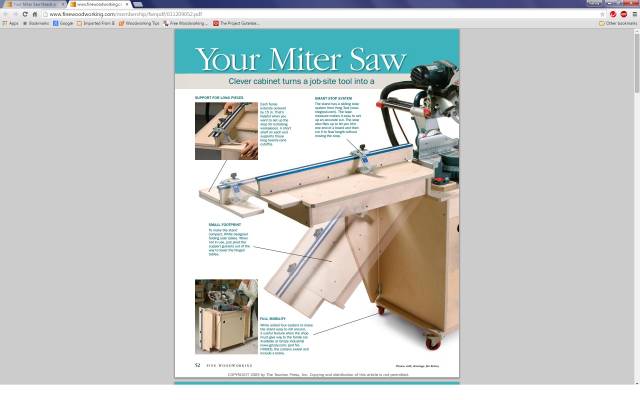
I’ve also put on order the Kreg Fence System for the upcoming miter saw station that I will be building as well, I’ll be using the Fine Woodworking plans to build the station with.
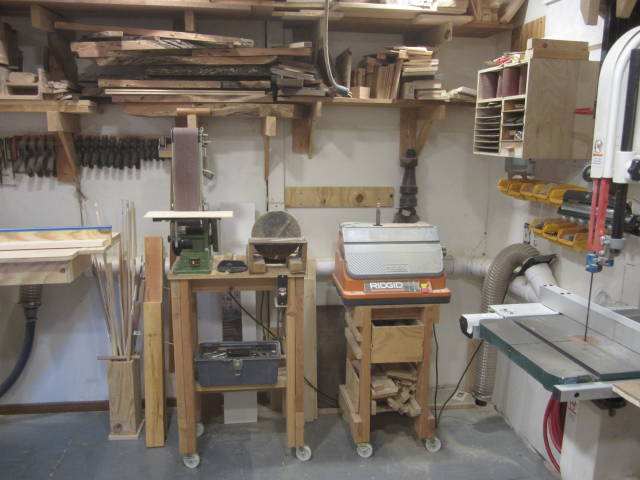
Today was spent house cleaning along with both rearranging and reorganizing working in the original part of the shop, all walls and ceiling were vacuumed, the Bandsaw was relocated to a new wall along with the drill press and the smaller equipment was moved to the wall that the bandsaw used to sit on, two of the old wall cabinets were removed and taken over to my dads house to be hung in his garage.
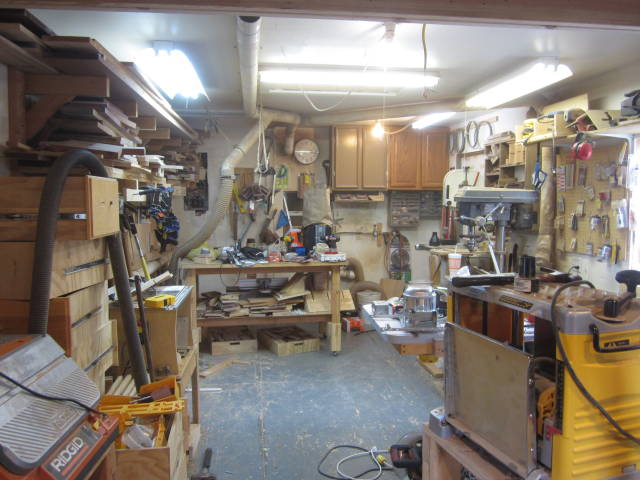
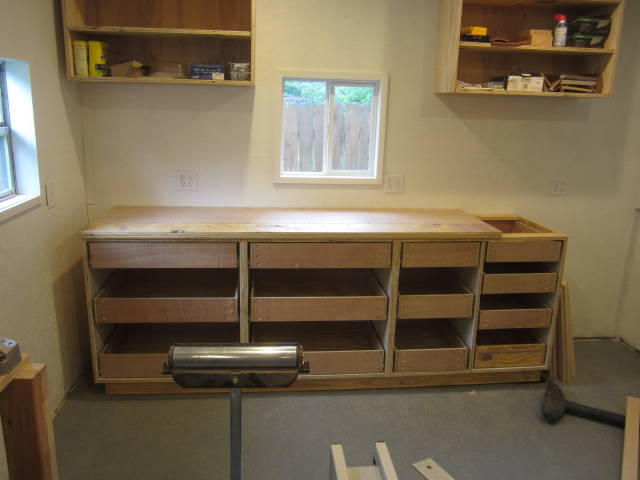
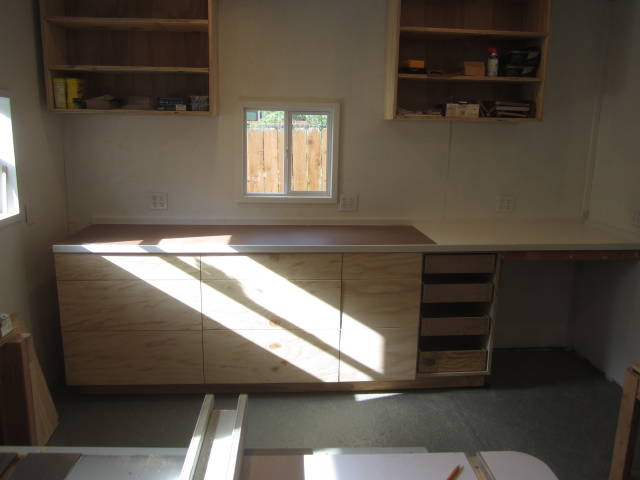
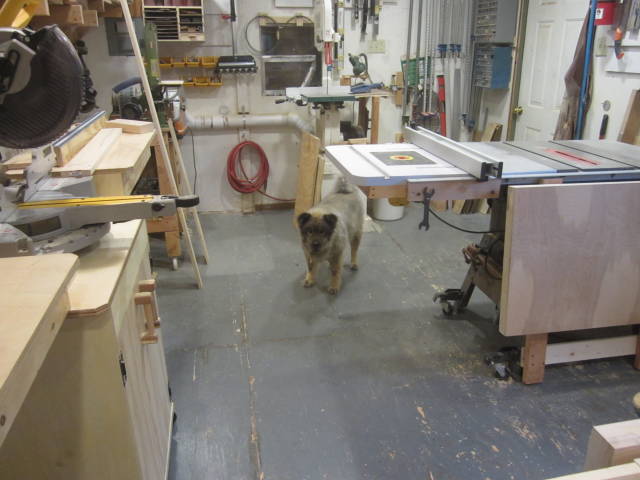
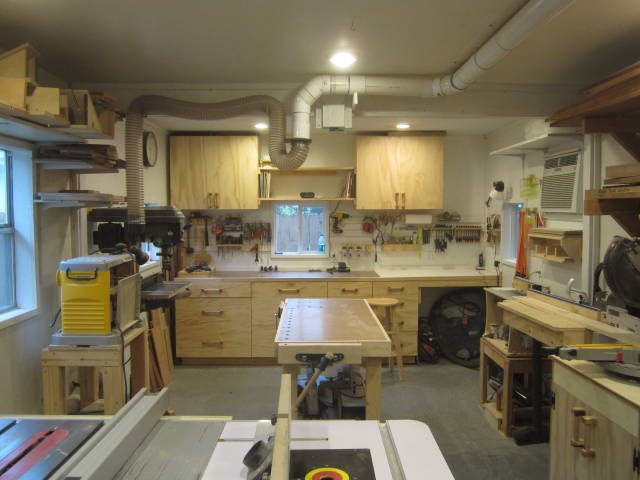
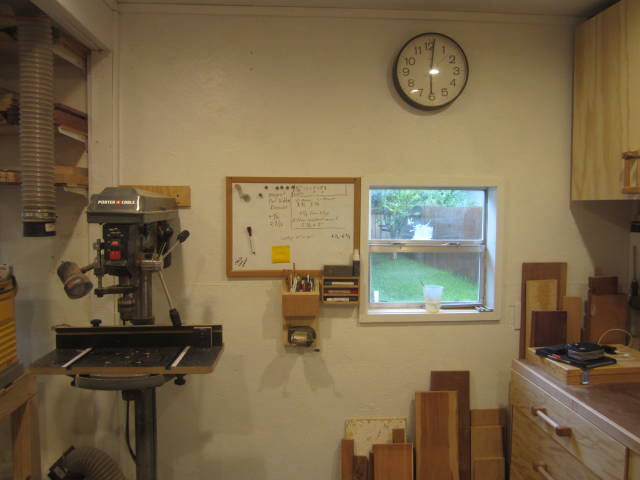
The pictures below show the inside of the whole shop as it is now, still a lot more to do, the center workbench you see, I want everyone to say goodbye to it, it’s going to be demolished, it’s going to be replaced with the proper workbench with holes for dogs and a lee valley front vise, I am also showing you the recessed LED lighting that replaced all of the fluorescent lighting fixtures that used to hang from the ceiling.
Edit In I also failed to mention that my air compressor is located outside the shop under a lean-to and the DC is also located outside the shop in an attached closet that I made for the DC collector, this frees up a lot of space as well.
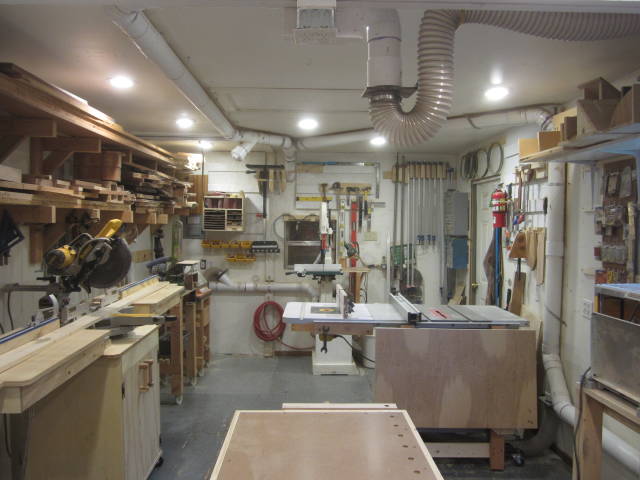
I now have the machinery in their rightful places and pretty sure everything is set in stone now, I swapped the workbench with the tablesaw along with the small machinery, the workbench now sits under the ceiling receptacle box and is lined up with the DC as well, I completed the DC plumbing and have that all worked in along with the completed trim and interior paint, I have now started building the miter saw stand, actually the old stand told me that he wanted to go first over the new workbench, one of the casters broke loose from the screws and it was limping with a huge tilt so I removed the miter saw and have several of the parts cut and ready for assembly. All of the plyboard are project wood, partially workbench and miter saw stand.
I still have to come up with something for an out feed table on the table saw.
For those that are viewing for the first time, I have both my Air compressor and DC located outside of the shop.


Randy - If I'm not on the computer than I'm out making sawdust.
The shop went from a 12′ × 16′ to a 12′ × 24′
Randy - If I'm not on the computer than I'm out making sawdust.

Very impressive and detailed intro. Looks like your ready to do some woodwork .
Wheaties
Thanks Bruce and yes I am :)
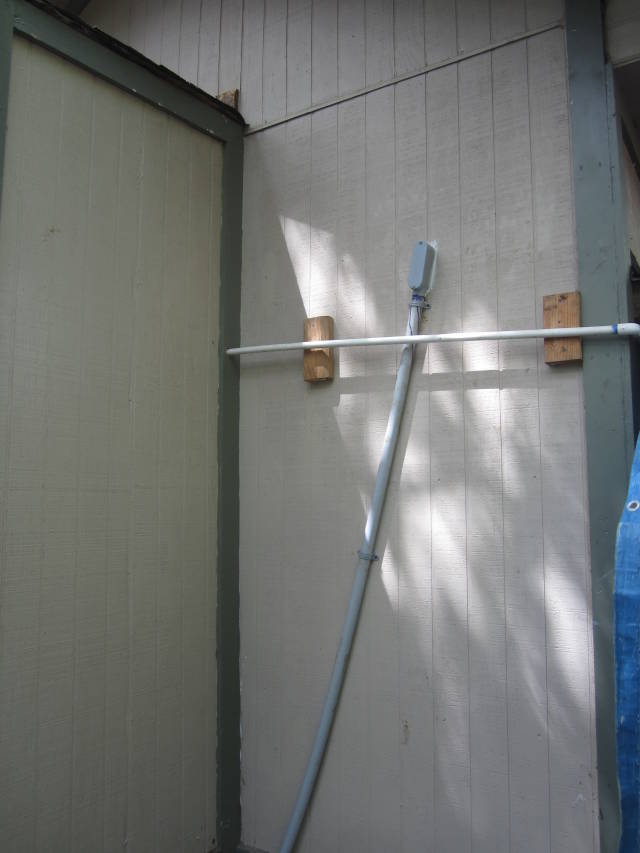
Here are the final details of my shop, the DC is housed inside of a closet on the opposite end of the building in an 3′ × 5′ closet attached to the building and the Air Compressor is located on the outside as well under a Lean-To located on the backside of the building freeing up more floor space.
Randy - If I'm not on the computer than I'm out making sawdust.
Wow, well done, like the progression photos. Quite a nice space/shop to do all your projects. Very nice, good job.
Jamesw

Wow… great addition. You did an awesome job on the addition and the detailed write up. Your story makes me want to redo mine all over again. Thank you so much for this.
Jeff Vandenberg aka "Woodsconsin"

you done a nice job
jim

Very good build and super photo work up
woodworking classes, custom furniture maker
Thanks James, Jeff and both Jim’s :)
Jeff I’d look forward to assisting you in anyway I can if you decide to add.
Randy - If I'm not on the computer than I'm out making sawdust.
Wow! Just got to this, but wow. I had actually been in Blackie’s old shop and now all I can say is WOW, just WOW!
HorizontalMike
Thanks Mike
Randy - If I'm not on the computer than I'm out making sawdust.