Share your craft projects
Make new craft buddies
Ask craft questions
Blog your craft journey
Essential Woodworking Techniques That Every Woodworker Should Master
Would you believe that there are people out there who have never used a saw? It's not as crazy as it sounds. Many woodworkers, especially those with a background in carpentry or construction, see sawing as an optional skill. And to be fair, they're often right! There are plenty of projects that don't require the use of a saw at all. But if you want to make furniture from scratch - and who doesn't? - then you'll need to know how to handle your tools correctly and safely. That means learning some basic woodworking techniques like measuring and marking, sawing, drilling, chiseling sanding and finishing. In this article we will explore these essential skills so that anyone can feel more confident about tackling a woodworking project.
Mark the dimensions of your project on the wood
This may seem like a trivial task, but it's actually quite important. If your measurements are inaccurate, your project is likely to be a disaster. That's why it's so important to take your time and make sure everything is correct.
Marking the wood is just as important as measuring it. Make sure you use a sharp pencil or marker so that the lines are clear and easy to see. It's also a good idea to use a ruler or tape measure to make sure everything is precise. You can easily draw a line along a ruler or tape measure by running a sharp edge of the pencil along it.
A common saying among carpenters is "measure twice, cut once". This means that you should double-check your measurements before cutting. If you're going to make a mistake, it's best if it happens here and not when you're trying to saw through expensive wood!
Cut out the pieces using a saw
If there's one skill you absolutely need to know, it's how to saw. Not only will you have a lot of success by knowing this basic woodworking technique, but it can also save you a lot of money on tools. Learning the basics of how to use a handsaw will go a long way to helping you quickly and efficiently complete any project from start to finish.
Saws come in all shapes and sizes. Before choosing one, make sure you know what type of woodworking projects you'll be doing most often. If you plan on working with a lot of hardwoods, then it's a good idea to get a western saw with a thin kerf blade. A Japanese handsaw will be more appropriate if you prefer working with softwoods.
If this is your first time buying a handsaw, then you'll notice that they don't cost much and come in many different styles. Do your research and look for one that has comfortable grips and a blade that is easy to change. You should also make sure the teeth are sharp and it feels comfortable in your hand.
Once you've bought a saw, it's important to know how to use it properly. First, make sure the saw is long enough for the wood you're working with. Sawing works best when you can apply pressure behind the saw and not into it. When you're cutting through a board, keep the bottom of your hand flat and apply pressure in a backwards and upwards motion. Be sure to use gentle strokes when sawing and don't force the saw through the wood.
Drill holes for screws and other hardware
The main reason most people don't attempt to make their own furniture is because they don't know how to correctly drill holes. Woodworking is more complicated than it seems, and drilling is a crucial part of the process. Not only does it keep your project together, but you'll need wood screws if you want to finish anything!
Before we get into the nitty-gritty details of drilling, let's answer a common question: is it better to use a power drill or a hand drill? While there are many different opinions on this matter, the most accurate answer is that you should use whatever method you're most comfortable with. If you have any trouble using either type of drill, then don't be afraid to ask someone for help - chances are they'll be more than happy to help you out!
There are many different types of drills available, but most common styles are either cordless or electric. If you're on the fence about which type to buy, then ask yourself if portability is important to you. Most woodworkers recommend using a hand drill because they offer better precision - even for beginners.
Drilling is done by making a hole in your material, but you can also make marks on the surface of it. Try drilling on scrap pieces of wood before you attempt to drill through more expensive materials or thin pieces. It's hard to remove big holes from woods like oak and mahogany, so make sure each hole is where it's supposed to be before continuing!
Chisel away any excess wood until the piece is the desired shape
One of the most commonly used woodworking techniques is chiseling. Chisels come in many different shapes, sizes and types, but they all have one purpose: making cuts that are straight. This basic principle can be applied to many forms of woodworking including cabinet work, cutting joints and finishing projects.
The process of using a chisel is very simple: simply score the wooden surface to be cut and then whack it with a mallet or hammer. You can also use it when there's no wood to remove by scoring the surface and making scratches; this is especially useful for when you're removing paint from an old piece of furniture.
Chisels are used for many different types of woodworking projects, but are especially helpful when you're cutting dovetails. These are popular joints used in cabinet work and can be found on just about any piece of furniture with drawers.
Sand down the rough edges until it's smooth to the touch
After sawing or chiseling, your rough piece of wood will be full of splinters and rough spots. It needs to be sanded down until it's smooth to the touch; this is one of the most important steps of all.
The sandpaper you use should also depend on what kind of project you're making. For example, you would use a higher grit for finishing and lower grits for sawing wood. Higher grit means smoother and generally finer finish, while lower grit means rougher and coarser finish.
Begin by attaching the sandpaper to your sander of choice. For hand sanding, it's recommended that you use an orbital sander because they're easier to control and more accurate than belt sanders. It's also wise to invest in a sander that has variable speeds because you can adjust it depending on the type of wood you're working on. For example, woods like pine and maple would require a slower speed than oak or mahogany.
Once your sander is attached, this is where the process gets a little bit tricky. There are two basic types of orbital sanders - one which has the paper attached to it, and one that doesn't. The paper-attached variety allows you to quickly change out your sandpaper, but they usually have lower power than their counterpart.
The non-attached type allows you to use the entire surface of the sander, but you have to drill holes into your sandpaper. This method is less efficient because it takes longer to change out your sandpaper, but they usually have more power than their counterpart.
After correctly attaching your paper, you should test it on a scrap piece of wood first before attempting to do any actual work. When you are confident about your paper's grit, line up your sander with the direction of the woodgrain and get to work!
Finish with a coat of paint, varnish, or wax
The last woodworking process that you should master is finishing. This can be anything from painting to staining or even adding a wax finish to the piece.
Regardless of what kind of project you're working on, it's essential that you complete this step because it protects your work from dirt and damage.
Wheels are usually made out of rubber and are great for small projects, while cloth wheels are usually made out of cotton.
When it comes to choosing the right sander, some people prefer electrically powered sanders because they're faster than their manually powered counterparts; however these come with a price tag that is significantly higher. For most woodworking projects, we recommend using a random orbit sander with a sanding pad. This is usually the easiest to use and most versatile.
If you're painting, it's important that you sand down all of the paint on your piece before adding any varnish. Varnish protects the surface from getting dirty, but it won't do anything if there's already something preventing it from adhering to the wood.
Once the paint is all sanded down, it's time for a coat of varnish! You can choose between using regular oil-based varnish or stains, but generally speaking it's much harder to put multiple coats of stain onto a piece.
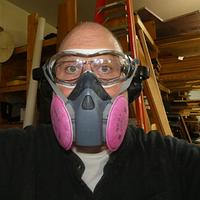
There are also some other factors that affect the drying time of paint and varnish, such as humidity and temperature. You can also use a dust mask or respirator when applying these products because they emit harmful fumes.
Once your finish is dry, you should add some felt pads to the bottom of each leg in order to prevent it from scratching the flooring. A good rule of thumb when trying to determine the size of these pads is that if it feels like it's putting too much pressure on your piece when you rest a corner of it on the floor, then you should add more felt.
Finally, let your finish dry in a clean and well-ventilated area where there isn't any humidity or wind. If you live in a humid area, it's wise to put your project in a dehumidifier if possible.
Varnish painting is the art of adding varnish on top of paint and making sure that no areas are missed. If you're applying multiple coats of paint for example, then you should allow the first coat to dry completely before you start with the second.
"Sand it in" is when you move your sander over the piece in back-and-forth motions to make sure that every surface of it is covered by varnish. If parts of your project are missed, then this will show through.
The final step! Wax finishing consists of applying wax with a pad in small circles. This step is generally used to refine the surface of your piece, especially if you're applying multiple coats of varnish.
If you're using wax as an extra sealing measure, then apply a coat on top of your varnish and let dry. If you use this method on raw wood however, then it might become too shiny or hard to see the natural grain pattern.
You can choose between beeswax and paraffin wax when doing finishing work. These two waxes are very soft and can be spread easily, but paraffin is darker. Beeswax dries faster than paraffin, which can cause it to yellow slightly.
When waxing your piece, use the same techniques that you would use for oil-based varnish. This includes taking care not to miss any spots, as well as using a dust mask or respirator because it emits harmful fumes.
When you want to protect your piece from damage and dirt, then you should use oil-based polyurethane. This is the safest finish that you can apply to a piece of furniture, especially if it's going to be used by children or pets.
As with varnish painting, make sure that you've sanded down all of your paint before applying this finish. It's also important to use a separate sander for polyurethane because it can ruin the pads on one designed for varnishing.
Don't apply polyurethane in high humidity conditions or if it's raining outside because it will cause the wood to expand. Make sure that the humidity of your room is below 45% before you apply polyurethane, and let dry for more than 24 hours after applying it.
Conclusion
In this article, we’ve covered the essential woodworking techniques that every woodworker should know. When you master these six skills, you can tackle any project with confidence and polish! From measuring to sanding, there are many ways for a newbie or seasoned professional to improve their craft. We hope the content in this post has been helpful – if so please share it on social media! Thanks for reading and have an excellent day.


