


Share your craft projects
Make new craft buddies
Ask craft questions
Blog your craft journey
MontyJ
226 posts
and
11 followers
in over 12 years
in over 12 years
Gazebo build #2: Roof framing
This is
part 2
in a
4 part
series:
Gazebo build
-
Laying it out...
-
Roof framing
-
Roofing
- Laying it out...
- Roof framing
- Roofing
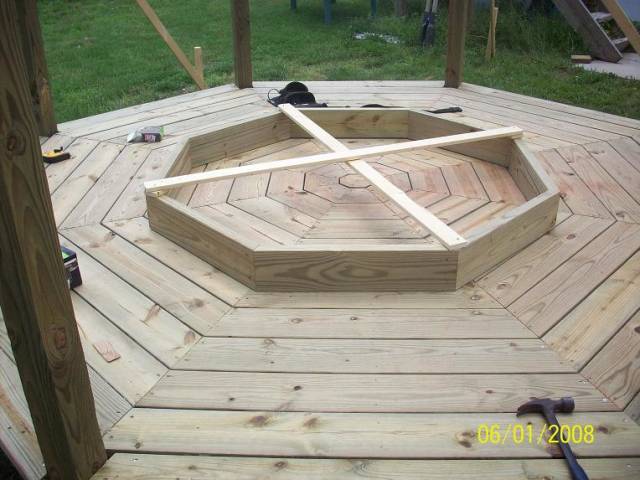
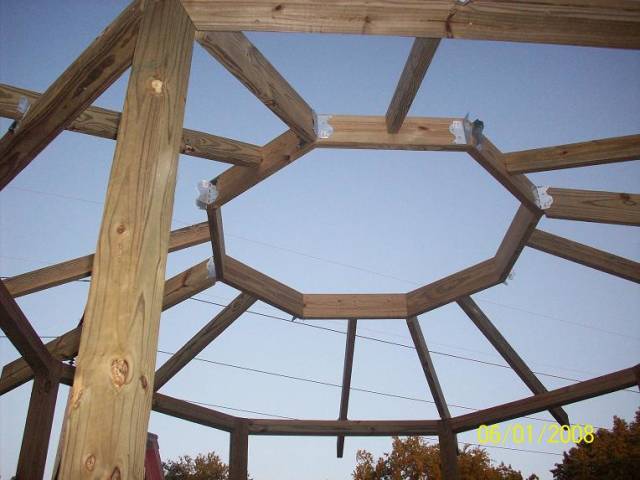
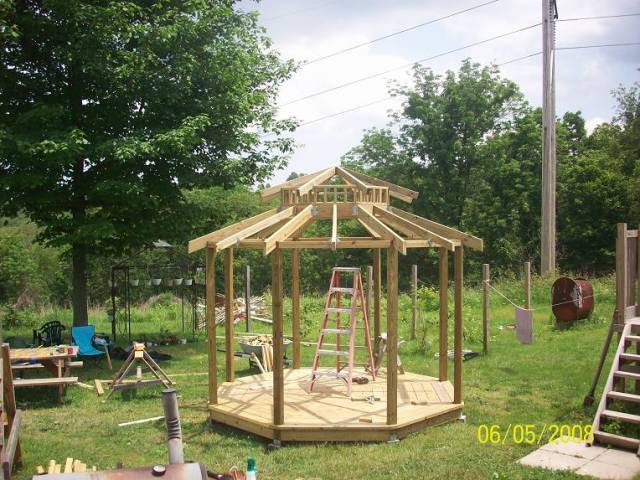
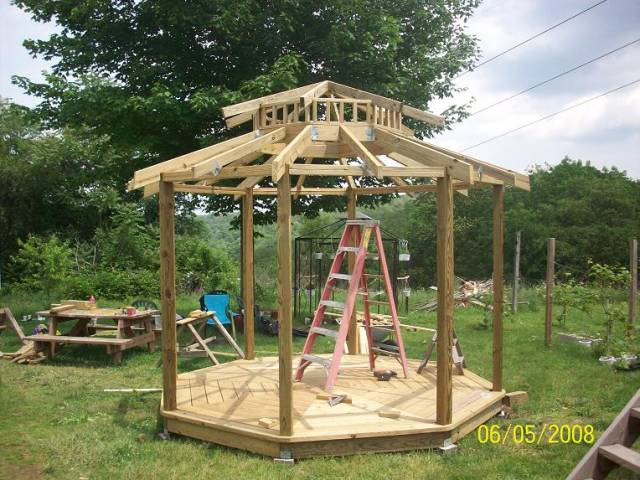
To have a double roof, you need a double header. The math is the same as before, but you have to decide how big you want the upper roof to be. This is the header for the upper roof support:
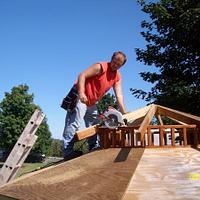
I used rafter hangers on the corners. On the sides, it’s just a matter of nailing the rafters on. The angle of the cut is determined by how high you want the upper roof to be from the main roof. Simple Pythagoras’s theorem does the rest. Yes, there is some geometry involved in building a gazebo ;)
I used hurricane ties to attach the side rafters to the lower header. To get the assembly up there, I had the wife and one of my daughters hand it to me while I stood on the ladder in the center. It took a bit of work, but wasn’t bad. Just be sure to have some bracing ready because the rafters will want to spread until they are nailed in.
The rafters that sit on the posts were cut in a birds mouth. They are also 2×6 instead of 2×4 like the other rafters. You have to use 2×6 in this instance to make up for the loss in height when you cut the birds mouth. After all, you want all of the rafters at the same angle and height when you’re done. Brian, you mentioned compound angles in the roof. There are none. I did use a speed square to square the rafter tails though.
And never mind those empty beer containers sitting around ;)
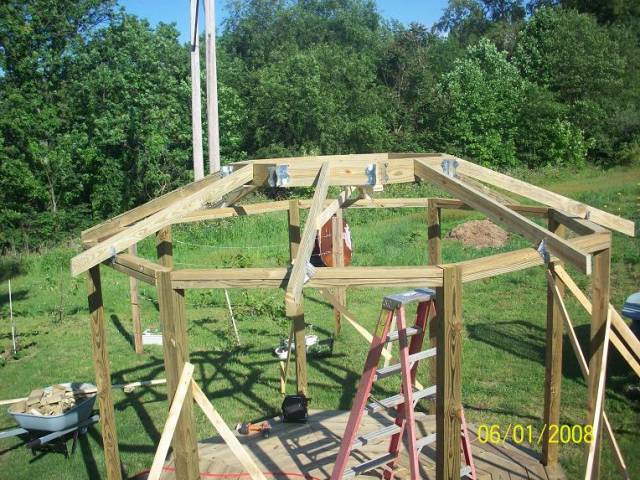
Next comes the frieze. For you purists out there, yes, I know it’s not a true frieze, but what would you call it? In any event, it holds up the upper roof. I made it by routing dados in 2×2 stock then building eight separate baluster sections, which I then mitered to match the upper header. In order to give the upper rafters more foot room, I added cleats.
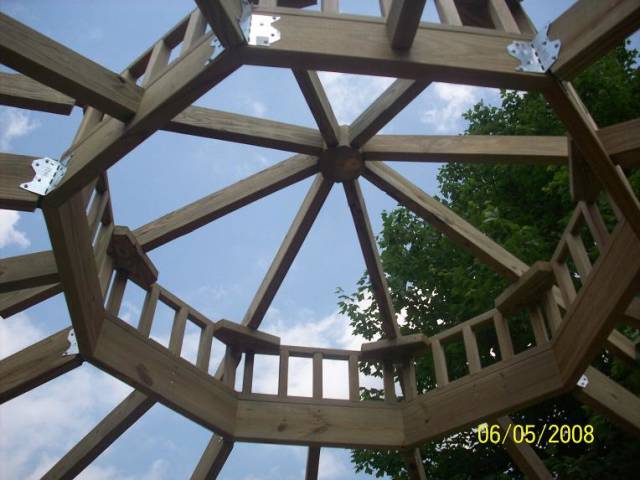
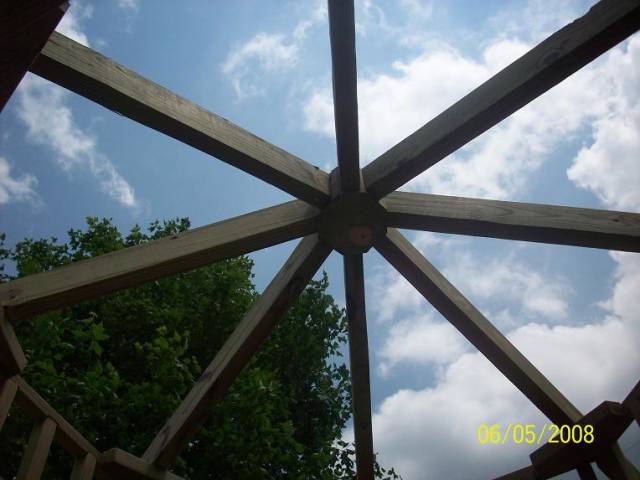
If you look at the pics above and below you will notice the most important part of this roof. It’s called a kingpost. If it’s wrong, you have a problem. Take your time to make sure you lay it out correctly. It must be an octagon. Every upper rafter nails directly to the kingpost. If this fails, so does most of your roof. I cut mine out with a chain saw.
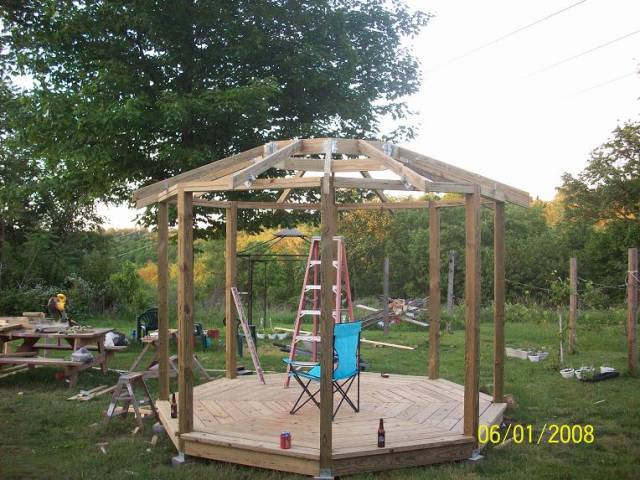
If you have been following along, you should have a roof that looks similar to this:
Next up, sheathing and shingles.
Where are the band-aids?---Pro Libertate!
6 Comments

This is fun to follow along. Thanks and keep it up!
Losing fingers since 1969

I am following alright but it will take me a couple of years to get the roof :)
I noticed you have the metal holders on the angles to hold the joists but not in the middle.
are the middle joist needed?
Abbas, Castro Valley, CA
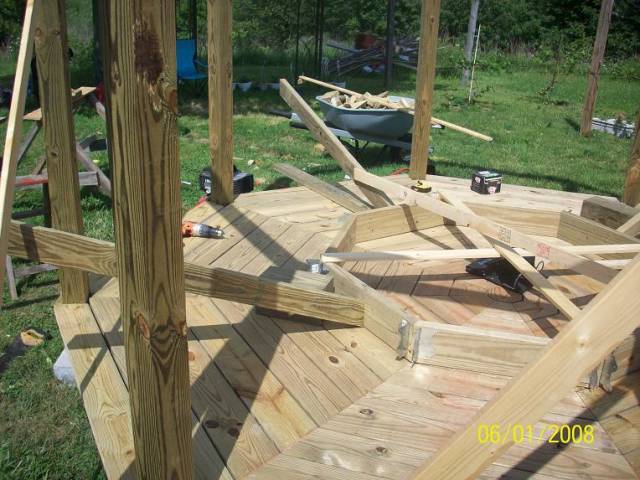
You’re talking about up on the upper header right? Actually I guess the proper name would be ridge beam or octagonal ridge beam, where the lower rafters attach. I used rafter hangers on the corners because there is no way to securely nail the rafters there. In the center, I just nailed through the ridge beam. To answer your second question, yes, those center rafters are needed. Using the formula from before, the posts are nearly 60" apart. That’s much too far for the roof sheathing to span without sagging, especially if there is a snow load on it (which we get quite often here in West Virginia).
The roof framing is a bit complicated, especially if you have never worked with rafters before. All of the angles are the same for all rafters, but the post rafters are longer and have to have the birds mouth cut into them. To make it a little easier, simply make all of the rafter a bit long. Once you determine how much overhang you want on the corners, measure that distance out on each corner rafter, then pop a chalk line from corner to corner to get the cut off point for the center rafters. Then use a speed square to cut the tails off at the same angle as the upper cut. In the last pic above you can see my speed square on the floor.
Where are the band-aids?---Pro Libertate!
Thanks! That answers my question.
Abbas, Castro Valley, CA
Awesome blog…you are doing a great job on both the blog and the gazebo….If I may ask, how much did you end up into this project in materials?
Mike
Mike
Well, it’s been awhile, but if I remember correctly I spent roughly $1000-1200 which includes everything from start to finish, including stain, ceiling fan, and electric.
Where are the band-aids?---Pro Libertate!