I have just finished up and shipped my project for the LJs 2022 knife swap. This was a first for me, as I’ve never made a knife before…well, I still haven’t, but I did make and assemble scales onto finished knife blanks. Maybe next year I’ll do my owm metal work, we’ll see...
But that’s not the topic of this post. Nope, I’m here to layout what I ended up putting together to finish this project. Unlike a lot of folks, I actually enjoy the finishing process. Certainly sometimes it can be laborious, but for this project I chose to finish in a more simple method. At least initially. I finished the wood scales that I built with 100% tung oil, which is something I haven’t done before. It takes quite a while for the oil to dry and then cure but the application is pretty simple as finishing goes. Especially during these swaps, I try to use new skills and techniques as a way to expand my skill set.
One of the neat things about finishing with tung oil (as with many other oils) is that you have the ability to buff the finish up to a nice shine. Alas I didn’t have buffing pads nor a dedicated buffer to do this with, so I started with hand buffing…which worked OK but really wasn’t gonna get the desired result. A little research brought me into an interesting space. Buffing metal and buffing wood are actually very similar albeit with slightly different tools and different compounds. So,I went down a rabbit hole with buffing compounds, buffing pads, pretty much anything that has anything to do with buffing. After quite a bit of research it became evident that having a proper buffing set up would make a lot of sense in my small home shop, since I do both metalworking and woodworking. Space is always at a premium in my shop, so I wasn’t interested in adding another tool if I didn’t need to.
The requirements for buffing wood and buffing metal (at least according to the Internet) are similar but not the same. Buffer speed for buffing wood on an 8 inch wheel requires a motor speed of around 1750 RPM. Any faster than that and you risk burnishing the wood inappropriately. Motor speeds for buffing metal on an 8 inch wheel requires around 3000 to 3500 RPM. Now, I could’ve gotten smaller wheels and that would have decreased the linear speed on the smaller wheels, but that’s math. And I’d be giving up surface area, adding heat, and making the whole buffing process more difficult in my mind.
So, what I needed was a variable speed motor, a large enough motor height to allow large wheels to spin freely, lighting, all without adding a tool if I could help it. As it turns out I had all those things already: on my wood lathe. I have a Rikon 70–220vsr. It has a 12 1/2 inch swing, which is perfect for 8 inch wheels! It also has variable speeds up to about 3800 RPM, which is also perfect! And I even have a light on it… So now requirement number one is met, let’s move on.
After doing research, it became evident that one of the more popular ways to accomplish what I was looking for was to buy a kit from a manufacturer that included at least most of the parts and pieces I would need to get the results that I wanted. Why reinvent the wheel right? (Ha! Get it?? Buffing WHEEL? No? Ok…) Did I mention there are about a hundred different buffing wheel configurations available? Different materials, densities, sizes, colors…the list goes on. The challenge was that no single vendor (that I found) had both wood and metal buffing kits that appeared to be high-quality, and were going to be adaptable to put onto my lathe. I was, however, able to find a wood buffing kit from the Beall Tool Company that seemed to fit exactly what I needed and was readily adaptable to my lathe. They have a pretty awesome adapter that allows you to insert a fixture into your 2MT headstock and then thread the buffing pads directly into that adapter with the included 3/8” bolts. It means only one wheel is available at a time (as opposed to some of the mandrel kits), but it gave me added flexibility. It came with not only the adapters but also all three wheels of different densities and the three polishing compounds that they recommend. Score!
For the metal buffing side, I found a really well put together kit from Combat Abrasives. I had purchased some sanding belts from them before and their stuff is high-quality, and they focus almost entirely on metal, and they have a kit just for blade polishing! The kid included three different density wheels (which are very different than the densities for wood buffing), three polishing compounds, and support plates to keep the wheels rigid during the high-speed buffing. Seems like it’s gonna be a perfect fit! One minor issue… The arbors for the wood buffing wheels are 3/8 of an inch, the arbors for the metal buffing wheels are 5/8 of an inch… tell me this isn’t a government operation?
But the lathe adapter from Beall Tool Company gave me an idea: All I needed was a 5/8“ threaded shaft that reduce down to 3/8 ” and then could thread into the adapter directly. That sounded like something I could make! So I went down to the hardware store and found a 5/8“ hex bolt… at that diameter, no matter how long the bolt is, only about 2 1/2 inches of it is threaded, the rest of it is a smooth shank up to the hex head… at least that’s how it is at my hardware store. So, I cut the head off the bolt, turned down the smooth shaft to 3/8 of an inch on my little metal lathe, and then tapped it to 3/8-16, which is what’s on the Beall adapter. I used a 5/8“ jam nut as a stop, and another 5/8“ nut as a keeper on the end to hold the metal buffing pads in place. Since everything turns counterclockwise there’s actually no real reason to weld anything in place (as it’s self-tightening), but I did put a couple of tack welds on the jam nut just to make me feel better.
So moment of truth, I assembled everything using my shop made adapter and the Beall Tool Co adapter, and gave them a spin! Everything worked just the way it was supposed to, the first time, which is pretty surprising for me!
I did a couple proof of concept tests and the whole system works exactly how I had envisioned it… which is also pretty surprising for me! So now, with one shop made adapter, and a quick switch of the pulleys on the lathe, I can go from buffing wood to buffing metal in about 30 seconds. Maybe 1 minute Pottz… ?
Now, you’re probably not interested in a bunch of pictures of buffing wheels, but I did include some below just as a way to lay out the transition between wood buffing and metal buffing and how the shop made adapter works, as well as how everything packs up and stays really fairly compact given the broad abilities to buff both metal and wood.
As an aside, if you’ve never participated in an LJs Swap, you really are missing out. They’ll be more coming up so give it a shot! It’s an amazing way to expand your skill set and build something creative. The veterans that are involved are super supportive and are always ready to answer questions to help make your experience better. The swaps have become one of my most favorite parts of LJs. Hopefully someone here will set up swaps sometime in the future! Enjoy!
Beall Tool Co MT2 headstock adapter (3/8” threaded)
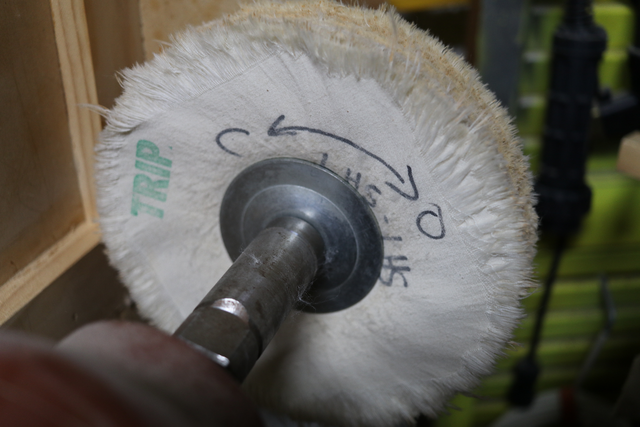
One of the Beall wood buffing pads attached.
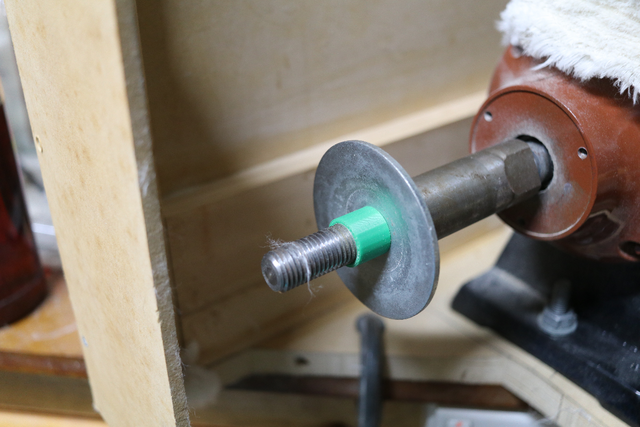
Shop made 5/8” to 3/8” adapter Assembled into the Beall adapter
One of the Combat Abrasives rigid buffing wheels (5/8” arbor) mounted with support plates.
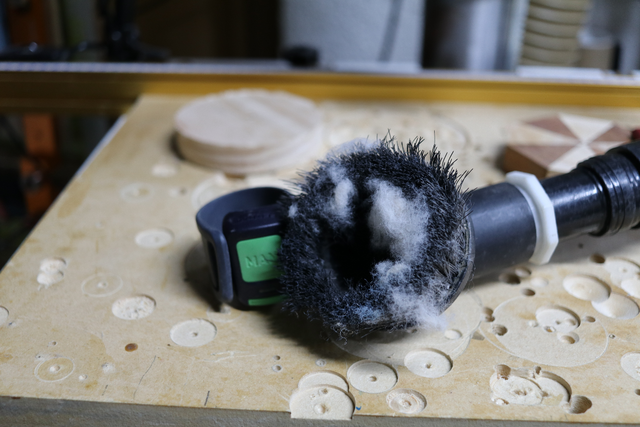
The Beall Tool Co Wood Buffing Kit (I also bought some 3” bowl buffs…and I made a wheel ‘conditioner’ (right side) to break in and clean the wheels. NOTE: breaking in wheels of either type makes a HUGE mess!!!)
Combat Abrasives Knife Polishing Kit…and shop made adapter.
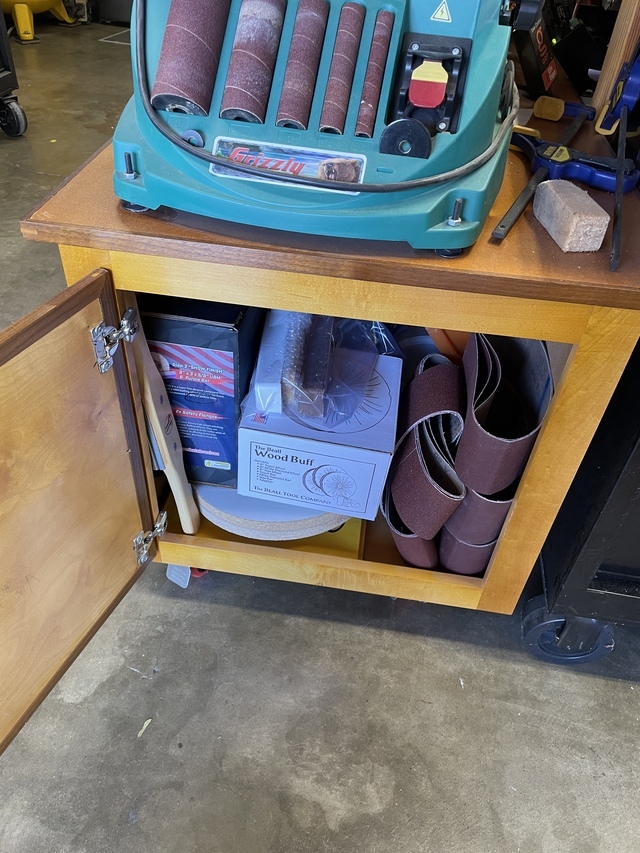
Everything packs up tight…
…and fits under my sanding station.
Ryan/// ~sigh~ I blew up another bowl. Moke told me "I made the inside bigger than the outside".
nice write up buddy. i use the beall buffing wheels i got from penn state. all 3 are mounted on a shaft together so no changing needed. hey as for swaps martin saw debbiep talking to me about how she enjoyed the pen swaps way back when she was on lj's and martin saw it and told me if we wanted to do swaps he was all for it. maybe we can lure more guys from the other side to join us here? id love to see a big migration.
working with my hands is a joy,it gives me a sense of fulfillment,somthing so many seek and so few find.-SAM MALOOF.
Agreed. I suspect there will be a swell, then a settling. I’m hoping the changes in the works here are enough of a draw to recreate the traffic over there. Everything with time I suppose, but I do like the layout and Project-centric theme here.
And hopefully the new faces here add a bunch of content to help add worth. Myself included!
Ryan/// ~sigh~ I blew up another bowl. Moke told me "I made the inside bigger than the outside".
Great write-up Ryan. I hadn't seen the Combat buffing stuff and I really like the look of those wheels and the stiffeners. I may have to bite the bullet on that kit. Can't decide whether to do that or just buy one wheel and make my own stiffeners to try it out and see if they're worth the cabbage over regular stitched wheels. I like your arbor that incorporates both systems too. Well thought out and executed man :-)
Thanks Kenny! For the price of the kit, unless you’ve already got a bunch of the parts, it seemed like a great deal. The wheels are definitely a superior class to regular stitched wheels…by how much, I’m not the right person to evaluate. However, they do a great job.
I toyed around with trying to put them all on a mandrel to reduce turn over time, but that would increase storage space and, honestly, who am I kidding? I’m not in a rush or in a production setting, so the space is more important than a minute to change wheels. Great product and now they work in conjunction with my Beall wheels. Happy camper!
Ryan/// ~sigh~ I blew up another bowl. Moke told me "I made the inside bigger than the outside".
Just noticed this over at LJ... Good write up... hinted you should post here, but it looks like is has been posted and I missed it... and a repeat would attract less viewers.
If your first cut is too short... Take the second cut from the longer end... LBD
I did it as a blog Duck, because it didn’t seem to fit elsewhere well. And it’s covering a couple things, so I guess that works. I’ll repost it as a tool review if that section gets up and running…lots of other higher priority stuff for Martin right now, so I’m not worried about it!
Ryan/// ~sigh~ I blew up another bowl. Moke told me "I made the inside bigger than the outside".
RyanGi commented 21 days ago Thanks Kenny! For the price of the kit, unless you’ve already got a bunch of the parts, it seemed like a great deal....
I've found a few extras didn't go astray to prevent cross contamination... I stain a lot of my projects black, and that stain on the buffs will carry on to natural timber... to get the black off by buffing on scraps takes much longer (if costed) than buying extra buffs... and that includes the exorbitant shipping costs to Aussieland.. our locally sourced buffs are crap in comparrison.
I'm not into bowls, however, they make great buffs for the insides of bowls... with the trip., WD and carnauba waxes.
..... The arbors for the wood buffing wheels are 3/8 of an inch, the arbors for the metal buffing wheels are 5/8 of an inch… tell me this isn’t a government operation?....
Many ways to overcome this, however, I found that 3D printing was my easiest out, Over time, I bought some slow speed grinders (approx. 1,400 RPM), one for my 8" flap wheels and one dedicated for buffing. I found these spindle adapters (off the shelf though I can't remember where I bought them) were ideal for large pieces as the "lathe tripples" were too close together for some jobs. The Beall lathe extensions are great, however, I find that even changing buffs to me is my most precious time cost.
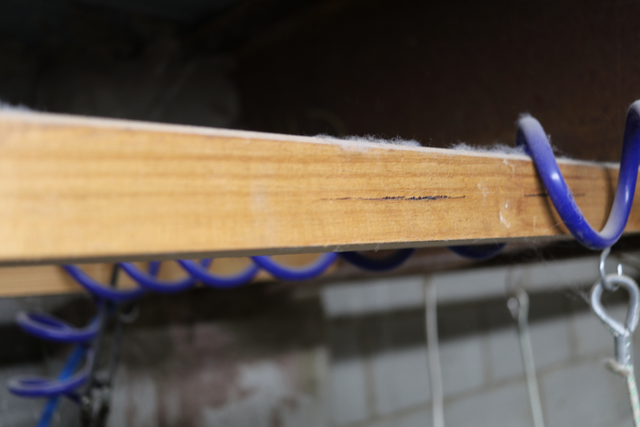
NOTE: breaking in wheels of either type makes a HUGE mess!!!)
Breaking in... that is bullshit hype by the vendor... I've been using mine extensively for over 4 years, yet I'm still cleaning up the fluff, that still in the overheads,
If your first cut is too short... Take the second cut from the longer end... LBD
I could certainly see the need for a few extra if you work with a lot of stained goods Duck, makes perfect sense. I’m just getting started with them, so it’s new to me. I did, however, get a set of the round buffs for bowls as well. I figure, it saves on shipping this way since I’d probably end up with them anyway!
Ryan/// ~sigh~ I blew up another bowl. Moke told me "I made the inside bigger than the outside".
RyanGi commented 3 minutes ago I could certainly see the need for a few extra if you work with a lot of stained goods Duck, makes perfect sense. I’m just getting started with them, so it’s new to me. I did, however, get a set of the round buffs for bowls as well. I figure, it saves on shipping this way since I’d probably end up with them anyway!
I finished up with two sets of those buffs as my order got stuffed up with a NZ order (wouldn't be surprised if it was for Pjonesy)... bottom line was, Beall said keep them as it was uneconomical to ship back... only good benefit of international orders.
Still hasn't goaded me into making bowls... Hmm, maybe buff the arm pits.
If your first cut is too short... Take the second cut from the longer end... LBD


.jpg)
.jpg)
.jpg)
.jpg)
.jpg)
.jpg)
.jpg)
.jpg)
.jpg)