


Share your craft projects
Make new craft buddies
Ask craft questions
Blog your craft journey

Ron Stewart
953 posts
and
24 followers
in over 3 years
in over 3 years
Teak and Aluminum Audio/Video Console #3: Construction Notes
This is
part 3
in a
5 part
series:
Teak and Aluminum Audio/Video Console
-
Construction Drawings
-
Construction Notes
-
Materials and Costs
- Construction Drawings
- Construction Notes
- Materials and Costs
Building the rack was pretty straightforward, but I would like to point out a few details.
Assembly Order
I built the rack in this order:
I built the rack in this order:
- Cutting the panels.
- Gluing the two-part panels (the top shelf and supports).
- Building the bottom shelf (top panel, outer frame, inner frame, and cross braces).
- Painting the exposed edges of the bottom shelf outer frame.
- Veneering the top and bottom shelves.
- Routing all rabbets, dadoes, cable slots, and roundovers. Note that the rabbets and dadoes in the top and bottom shelves are routed after the shelves are veneered.
- Drilling the shelf pin holes in the supports.
- Painting the supports, back, and interior shelves.
- Finishing the veneered top/bottom shelves.
- Gluing the supports and back to the bottom shelf.
- Gluing the fixed shelves to the back/bottom shelf assembly.
- Gluing the top shelf to the tops of the supports and back.
- Building the base (metal trim, rails, and feet).
- Attaching the base.
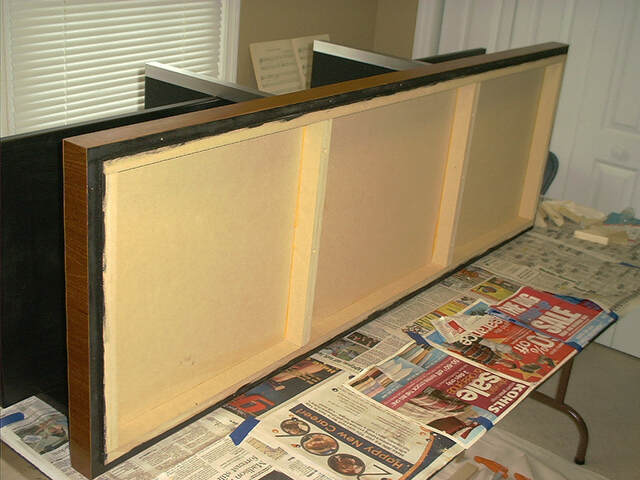
Bottom Shelf
The bottom shelf looks like a solid 1-3/4" thick slab, but it's really a shallow box made of a 1/2" MDF panel and a narrow outer frame. Inside this outer frame is an inner frame (with two cross-braces) that is 1/4" wider/taller. When the base is attached to the inner frame, there appears to be a 1/4" gap between the box and the base.
The bottom edge of the outer frame, and the exposed part of the inner frame, are painted black.
The bottom edge of the outer frame, and the exposed part of the inner frame, are painted black.
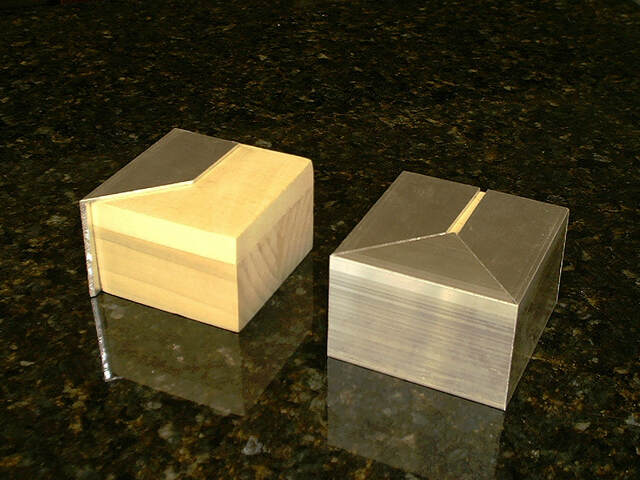
Foot Details
I wanted the decorative feet to look like solid 3" wide x 2" high blocks of aluminum, but blocks that size are expensive (and unavailable locally). I ended up making the feet from 2" aluminum angle, miter cut, glued to a block of scrap wood. I cut the metal pieces first; then I cut the wood block to fit inside the resulting three-sided frame.
I wanted the decorative feet to look like solid 3" wide x 2" high blocks of aluminum, but blocks that size are expensive (and unavailable locally). I ended up making the feet from 2" aluminum angle, miter cut, glued to a block of scrap wood. I cut the metal pieces first; then I cut the wood block to fit inside the resulting three-sided frame.
I used wood glue to attach the aluminum to the wood.
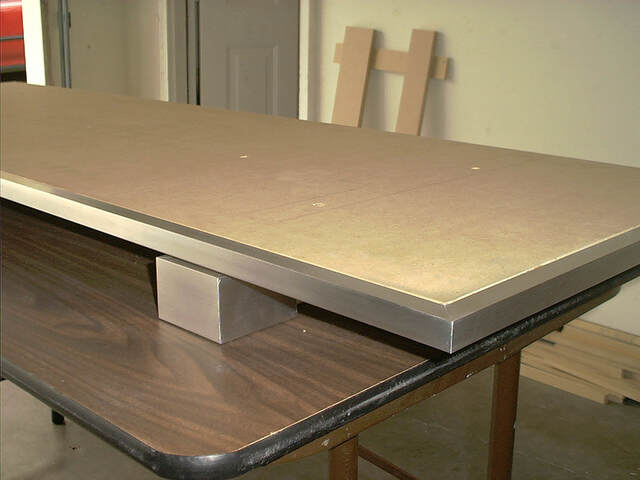
Base Details
I wanted the base to look like a 3/4" slab of solid aluminum. To create that look, I framed (on three sides) a 3/4" MDL panel with 3/4" aluminum angle. I finalized the dimensions of the MDF panel after I veneered the bottom shelf, so the base and shelf were the same size. (That is, the base length is that of the veneered shelf minus twice the thickness of the aluminum, and the base width is the shelf width minus the aluminum thickness.) I also routed a 1/16" deep rabbet to place the top of the aluminum flush with the top of the MDF.
I wanted the base to look like a 3/4" slab of solid aluminum. To create that look, I framed (on three sides) a 3/4" MDL panel with 3/4" aluminum angle. I finalized the dimensions of the MDF panel after I veneered the bottom shelf, so the base and shelf were the same size. (That is, the base length is that of the veneered shelf minus twice the thickness of the aluminum, and the base width is the shelf width minus the aluminum thickness.) I also routed a 1/16" deep rabbet to place the top of the aluminum flush with the top of the MDF.
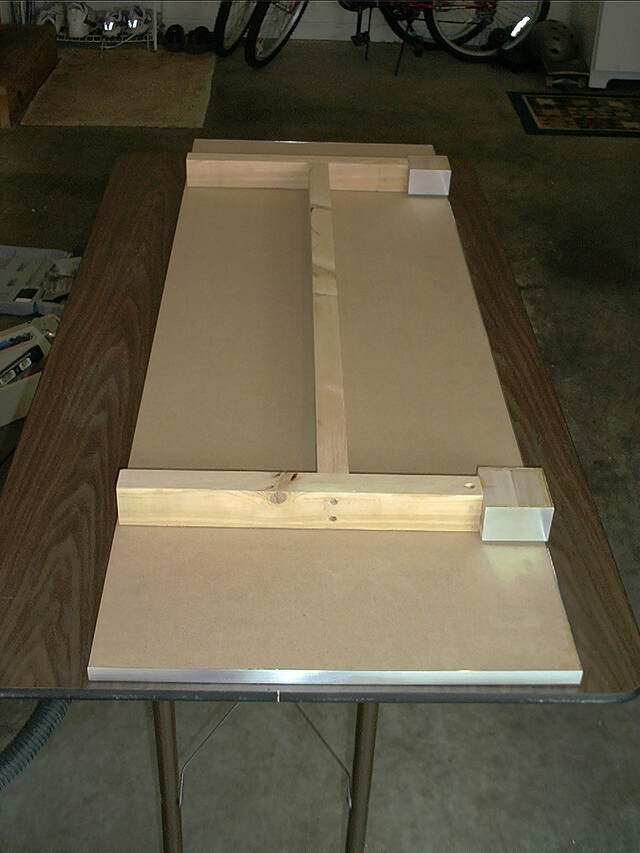
The feet are purely decorative, and the base appears to float above them by 1/4". An H-frame cut from a scrap 2" x 4" actually supports the rack. The H-frame is 2 1/4" tall to create the 1/4" gap.
I glued the back of the feet to the front ends of the frame. After the glue dried, I drove a deck screw at an angle through the brace into each foot to really secure the feet.
Veneeering
I used the dry-bond, iron-on method (apply wood glue to the substrate and back of the veneer, wait for it to dry, and use a clothes iron to bond the veneer) to attach the veneer to the shelves. I trimmed the veneer with my router and a flush-trimming bit.
I used the dry-bond, iron-on method (apply wood glue to the substrate and back of the veneer, wait for it to dry, and use a clothes iron to bond the veneer) to attach the veneer to the shelves. I trimmed the veneer with my router and a flush-trimming bit.