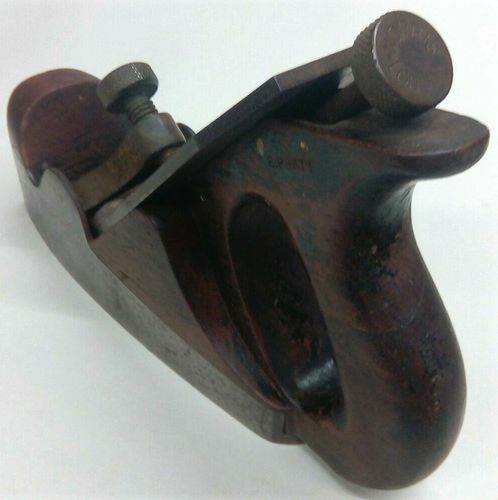
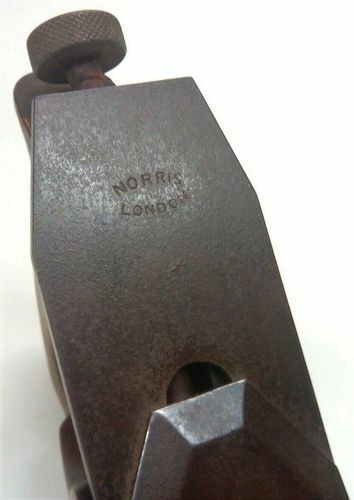
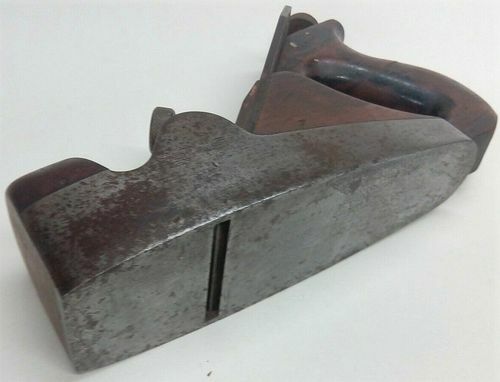
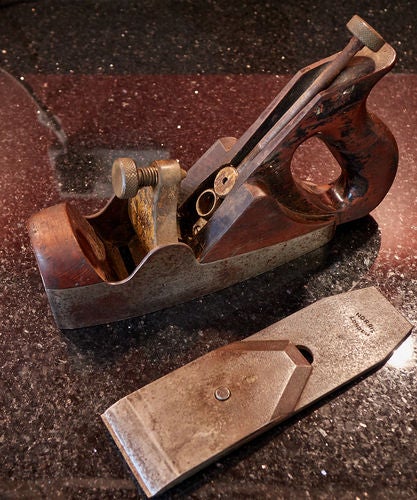
After looking for many years and losing many auctions, I finally won a Norris A5 smoother for a reasonable price. I knew it needed a lot of work, but at least it looked doable. It turned out to be a rollercoaster ride with a number of heart-stopping moments. Here are the seller's pics (not the clearest photos) so you can see what I started out with.
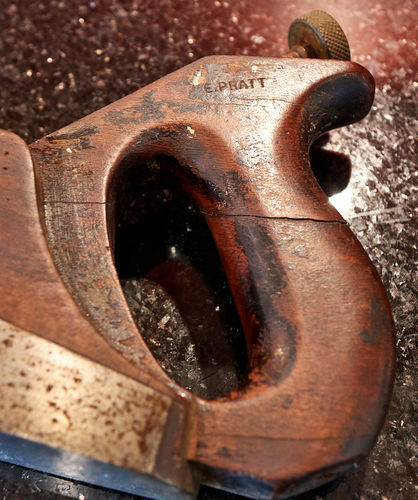
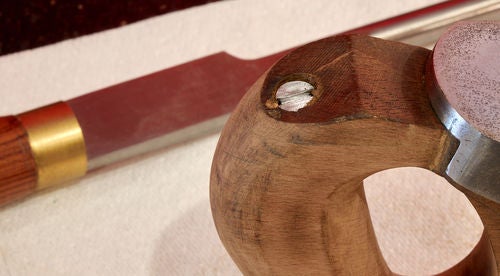
Once I hade it in my possession, the first thing I did was clean the wood with 0000 steel wool and Liberon Wax and Polish Remover. The wood was covered in years of grime and of course the obligatory spots of paint. The seller did state that there was a crack in the handle which he said was held securely by the factory fitted screw. What he didn't tell me though was that there were actually five separate cracks in the handle. The worst one was the one in the middle which went nearly all the way through.
I decided to leave the wood until last and concentrate on the metal components first.
I removed everything that was meant to be removed. The worst bit to get off was the adjuster mechanism. Norris changed the design of the adjuster at least three times while they were making the A5 and each was held in differently. The one on my plane was held in by two little wood screws under the lever cap. I had to back off the adjuster all the way to get to one of the screws and remove it through the middle of the banjo (That's the round bit with the hole that the lever cap screw sits in). There was just enough room to put a slotted screwdriver bit in the screw heads, apply a downforce with my forefinger and use a 6mm open-ended spanner to turn the bit. Very fiddly, but I managed to get them out. The banjo bolt has a left-handed thread that screws into the end of the main adjuster rod. Once I had it all in bits, I got the rust off everything by soaking the components overnight in Hammerite Rust Remover and then giving them a scrub with an old toothbrush. I then cleaned them further with metal polish. The two sides of the plane body were painted with Hammerite Rust Remover gel and left for 20 mins before washing with water.
I spent about half a day working on the cap iron and another half day on the iron itself before I was happy with them. This just consisted of moving them back and forth on my diamond stones and waterstones. Monotonous, but I was pleasantly surprised at how they came out considering the state they were in to start with.
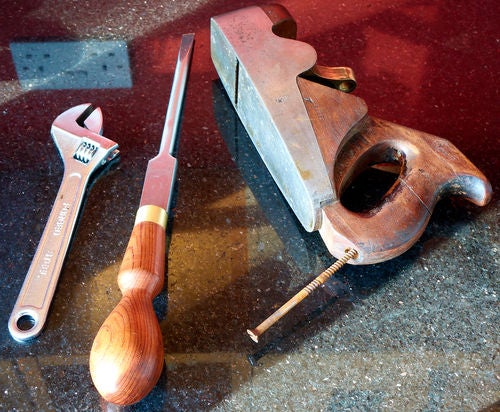
Now it was time to tackle the cracks in the handle, but first I had to try and get the screw out that goes up through the grip of the handle. I picked up the biggest turnscrew I own, held the plane in one hand and tried to extract the screw. It didn't budge at all, so I turned the plane upside down in the vice and used an adjustable spanner on the flats of the turnscrew to get more leverage. I still couldn't move it. I was worried it would cam out of the screw at any moment, but I didn't have any other choice but to persevere as it would be impossible to apply clamping pressure to the cracks with the screw in situ. I tried jerking it quickly and on the second attempt it finally started moving and I was then able to remove it.
Strange when you think about it that the very screw that was holding the handle together was probably what caused the cracks in the first place as the wood dried out around it.
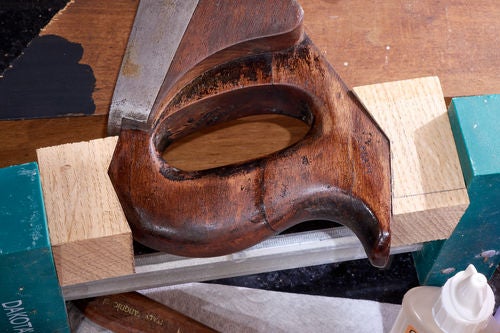
Don W and Bob Summerfield suggested I use epoxy for the big crack and superglue for the smaller cracks. Don also suggested I should add some black to the epoxy. They've repaired more cracks in handles than I've had hot dinners, so that was good enough for me. I added a few drops of Liberon Ebony Pallet Wood Dye (water-based) and used a thin artist's pallete knife to push the epoxy deep into the crack. As you can see I made some clamping blocks out of some spare oak I had laying around to ensure I could exert maximum force on the handle to close the cracks.
With the cracks fixed, I turned my attention to the sides of the casting, basically working my way through the grits from P60 to P320. Although I could have gone further in terms of removing more of the pitting, I decided to leave a bit of it to hint at the plane's history (If you believe that you'll believe anything LOL). After that I cleaned the lever cap with P500 grit and then 0000 steel wool. That went pretty quickly and came out rather well I think as you'll see in later photos.
The wood was then sanded with P120, P240 and P320. There's a limit to how much you can sand an overstuffed infill plane because the wood has to stay flush with the sides of the casting. This was as good as I could reasonably get it without sanding too far.
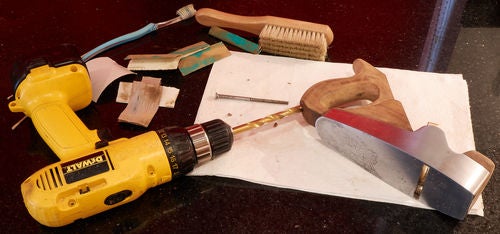
Luckily, I had the sense to make sure the screw went back in before I applied a new finish to the wood and it was just as well that I did because when the screw was fully home, one edge of the screwhead was proud of the surface. I sorted that out by grinding the tip off the screw and drilling out the counterbore a little bit more. Drilling the counterbore was another heart stopping moment because I knew there was a danger the drill might catch and split the handle. I made sure I was lined up and gave the trigger a quick ZZZERT. Phew - I got away with it!
I tried the screw in the handle again and this time it cleared the bottom of the handle.
I masked up the sides and got everything together to apply the new finish.
I thought long and hard about how I should finish the infills and I decided that if it was going to look good I would need to go dark. I decided to ebonize it with ebony spirit-based dye and then multiple coats of Liberon Black Polish which is basically black shellac.
First the dye. Shake well it said…..so I did.
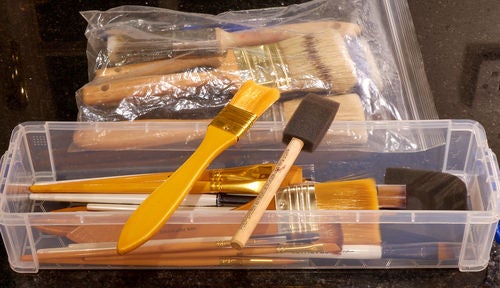
I chose a foam applicator to apply the dye and a gold taklon brush for the shellac.
The dye was applied in about 30 seconds without any issues.
Since I had to wait a while for the dye to dry, I decided it was a good time for some chilli.
With my hunger satisfied, I poured some of the Black Polish into an empty jar and added a little methylated spirit to thin it. Here it is after three coats. At this point, I wasn't too concerned about brush marks because once dry the finish would be rubbed out. I also knew I would be able to adjust the sheen.
The following photo shows the finish after five coats.
At this point I decided it looked crap and it would always look crap. I didn't want it to look crap, so it had to come off again. I poured some meths into a pot and brushed it on over the shellac. After about 5 strokes, I wiped the brush on a paper towel to remove the shellac from my brush. I kept repeating this process until all of the shellac was removed, thus disproving the saying that "Once you've gone black, there's no going back."
Now I had to decide what to do instead. I'm a big fan of 'in the wood' finishes rather than 'on the wood' finishes, particularly on tool handles, so I decided to go with Peacock oil (my favourite oil finish). I did some quick experiments to see whether I should use another dye on top of the dark grey dye that I now had on the wood. I tried ovelaying Georgian and Victorian Mahogany and Rosewood dyes, but in the end I decided I would just apply Peacock Regal Red oil directly over the existing dye. I cut some lint free cloth and liberally applied the oil, waited 15 mins, then applied some more oil and then repeated this another four times until the oil remained on the surface after the 15 minute absorbency period.
I removed the surplus oil with a paper towel, buffed the surface and set it aside to dry for 48 hours. I was really pleased with the way the oil was looking and couldn't resist removing the masking tape.
But that isn't the end of an oil finish. After the 48 hour period, I applied a thin coat of Clear Honey Peacock Oil, waited 1 hour, removed the surplus with a paper towel, buffed the surface until dry and set it aside for 24 hours. This step was repeated 2 more times. At this point the wood was completely sealed and the wood fibres had been hardened. You can even feel the difference in hardness.
So here is the plane after reassembling it. The wood is dark like I wanted it to be, but now you can still see the grain. It will look even better once the shiny metal components develop a nice patina. In a couple of weeks time, I will give the wood a couple of coats of Alfie Shine hard wax to increase the sheen slightly. If you haven't tried this wax you should. It smells divine (frankincense and Myrrh).
But how does it work I hear you say. Very nicely thanks for asking.
That's a beauty Andy. I've been watching Norris infill sales for quite a few years but have never pulled the plug as the prices I've always seen have been too out there for me. One of these days I'm going to run across a sassenach
at a garage sale, feed him too much ale and then snipe his plane from him/her at a way low price! :)