My wife and I have some friends who are nearing the end of a house renovation, and I wanted to make them something as a house-warming gift. I decided to make a bench with a woven Danish cord seat, and I've selected a perfect spot for it in their new addition, which I'll stipulate. Not really.
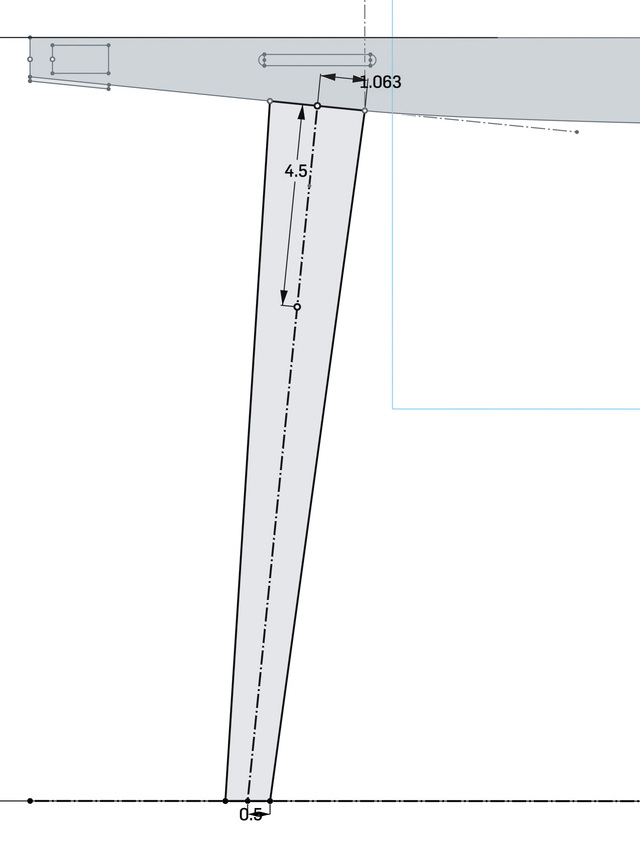
This project gave me a perfect excuse to start learning Onshape and its style of parametric modeling. It was a bit of a learning curve, and I'm still on it. But being able to adjust dimensions, distances, angles, etc. and have them instantly propagated throughout the model made fine-tuning the design a real treat.
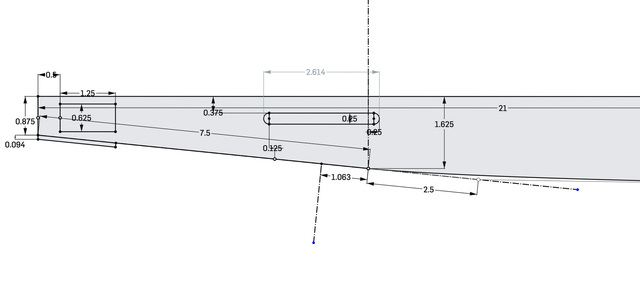
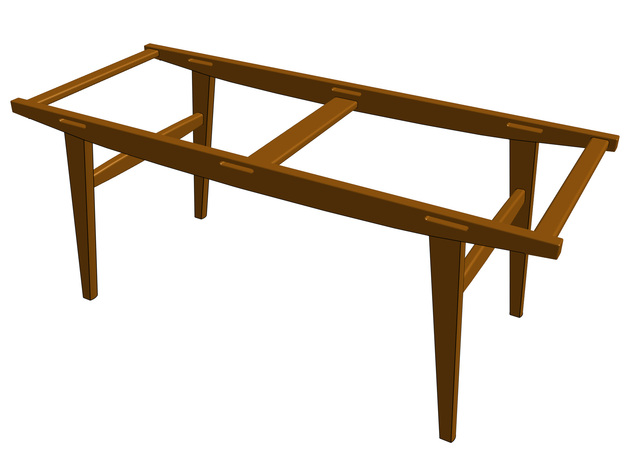
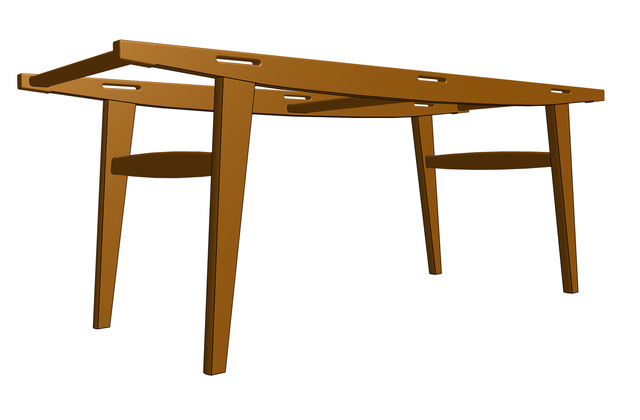
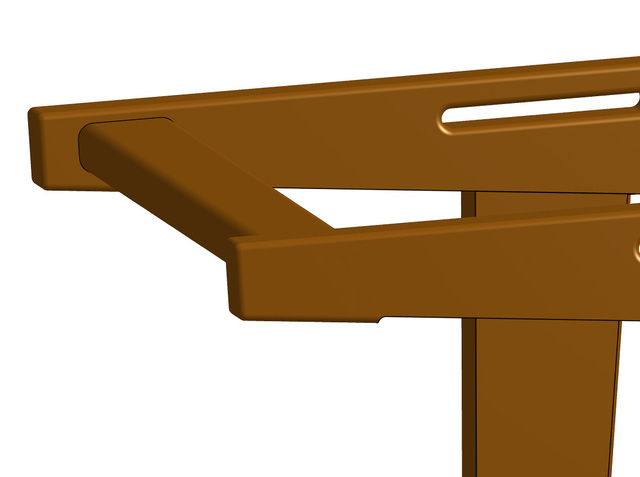
Here are some of the constraints that I could vary to play with to shape the top rail. It was almost intoxicating. Here's a 3D rendering of the final design (or maybe just version 1). It's 42" wide, 17" deep, 17" tall. I did not attempt to model the woven seat, but I definitely had to keep the mechanics of weaving in mind as I was working out the design. I wanted the woven pattern to be continuous across the surface of the seat, not interrupted where the legs join the rails. In order to do this, where the cord can't wrap around the rail, it needs an alternative path to return to the opposite rail. I chose to do that with a weaving slot over each of the rail/leg joints. This is not the only way to do it, but I chose this method because when the seat is viewed from above, it will appear that the cord wraps the rails along their entire length (up to the outer stretchers).
The center stretcher will provide additional stability and will also keeps the rails from bowing inward from the tension of the cord. This is most likely overkill, but since I chose to incorporate the center stretcher, it needs its own weaving slot. The space between the center stretcher and the seat will be a good place to hide knots when I need to extend the length of the cord.
Hopefully, the slots will not have weakened the rail/leg joints too much, but if so, there's always version 2.
One of the other practical design elements is the extended lower edge of the rail at either end. This forms a little stop for the last wrap of cord to prevent it from sliding further outward, which it would otherwise tend to do because of the narrowing rail.
Once I had the design finalized, I started working on making templates for the pieces, which I'll post next.
Eric - as I was writing those descriptions, I realized that I wasn't explaining things well. Fortunately, pictures will explain it for me once I get to that stage of the process.