


Share your craft projects
Make new craft buddies
Ask craft questions
Blog your craft journey

LIttleBlackDuck
5771 posts
and
56 followers
in over 3 years
in over 3 years
More from LIttleBlackDuck
Hints and tips that some may not have heard of. #54: Creating a New Blog Series
Hints and tips that some may not have heard of. #53: Dust extraction made easy(er) with remote control.
A collection of Clamps. #30: Irwin Quick-Grip Handi-Clamp.
Hints and tips that some may not have heard of. #52: Dis_CORD in the workshop.
Hints and tips that some may not have heard of. #51: Glass Jars for those recalcitrant chems.
Hints and tips that some may not have heard of. #35: Dog Stops on the Go…
This is
part 35
in a
54 part
series:
Hints and tips that some may not have heard of.
Boys and Girls,
While this topic is primarily cetered around a MFT style bench top, some of it's concepts could be adapted for those mongrel 3/4" dog holes, with a bit of imagination... as the TSO loc dogs (my short name for them) are strictly 20mm... Go figure, a Yankee company saw the light and went metric.
An up front, heads-up for the photo gallery,

If I haven’t already convince you of the benefits of the TSO Power-Loc Bench Connector Dogs (review at LJ), here is another handy little use for them… a short little side project for convenience, and to save time in the future… though it may be a tad longer project with conventional tools, but the investment will be returned in the future.
A quick digression:-
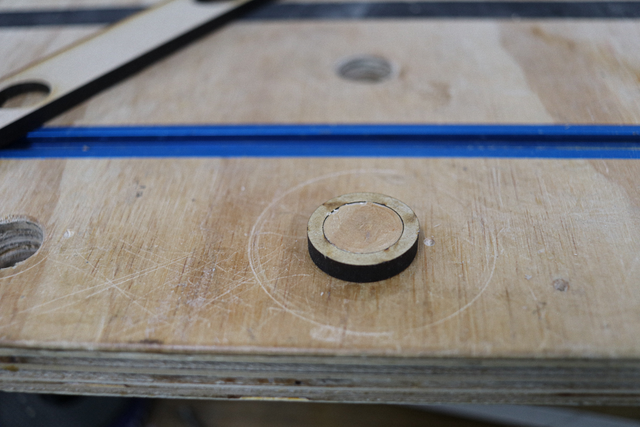
If you happen to have 20mm dowels, they may be customised with a bit of glue, but I’ll leave that to you as I no longer need to go down that path and I won’t reinvent the wheel just for a blog.
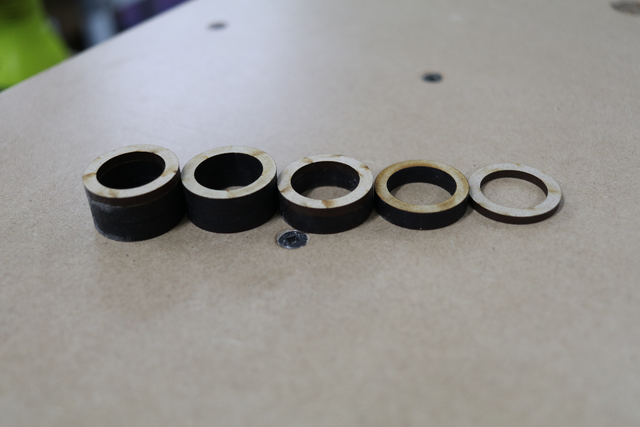
OK, to prove I’m a softie, here’s a quick dirty impersonation, but the holes still must be 96mm apart,
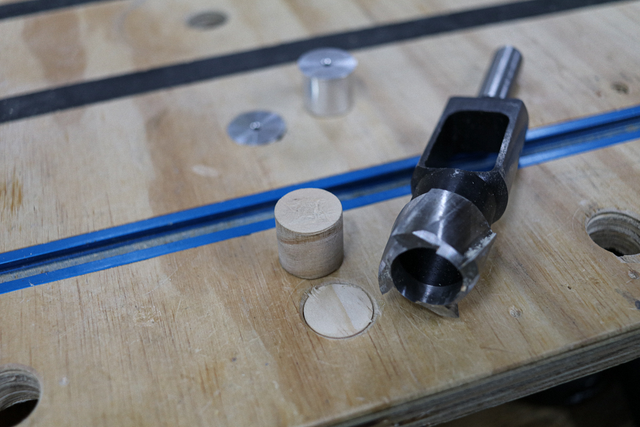
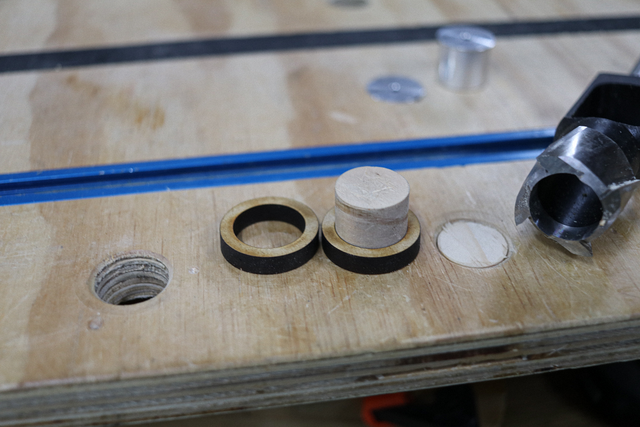
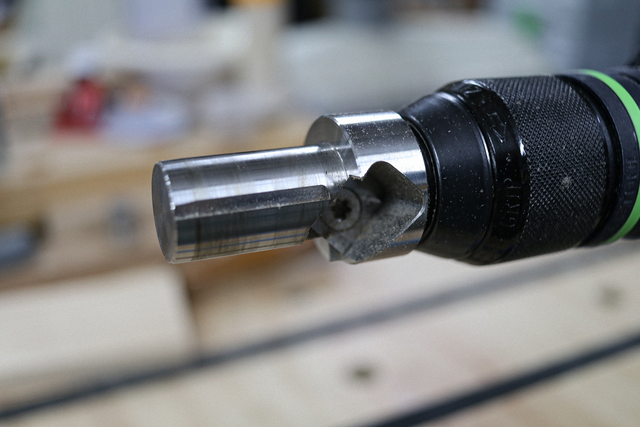
“dowels” cut with a 20mm plug cutter (80mm working length). Yeah, yeah… don’t bother bitchin’… too bloody expensive!
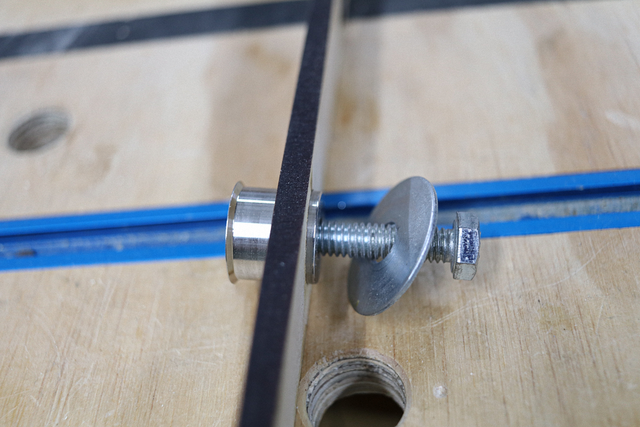
(Hmmm!... Before yazall (the one that didn’t bitch) start dreaming of getting a 30mm plug cutter (ignoring the cost) to drill a 20mm hole in the centre to make your own dogs, remember that the hole has to be perfectly centered to maintain the integrity of the MFT style tabletop, which would be hard on a drill press… close will not be enough… yeah I thought of it… so I went with laser cut circles,
I bought the plug cutter to replace these UJK Aluminium Revision Dogs,

that I used to plug up some of the dog holes to prevent stuff falling through.
Like Arnie... I (am) be back:-
I use the TSO dogs extensively on my MFT style benchtops to hold items mounted to bases, through matching holes.
In the past I normally brace some timber against a pair of dogs to serve as fences,
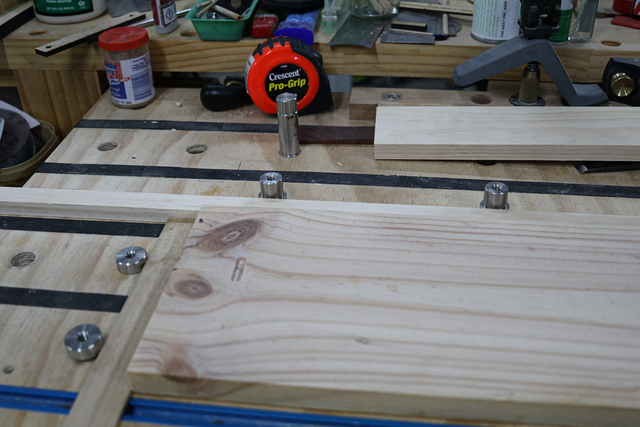
or get fanciful using assembly squares against dogs,
but far too often they are just too thick (19mm).
Then I progressed to drilling 20mm dog holes into 19mm stock to serve as static fences using long dogs as anchors,
but quickly graduated to using the TSO dogs,

(Sorry about the included Leigh hardware, but all my original fences have been re-purposed… no scrap bin in Churchill.)
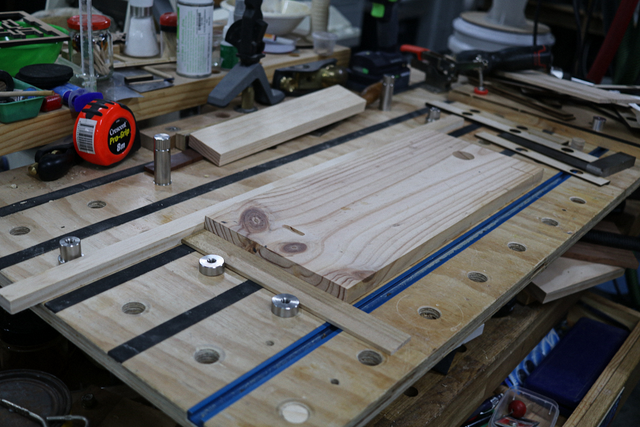
However at times I needed to work on narrower stock where either the dogs or the thickness of the fences interfered with the work flow, so I had to narrow the fence and move/minimise the size of the dogs,
and ensure clearance,
though less of an issue with 19mm stock,
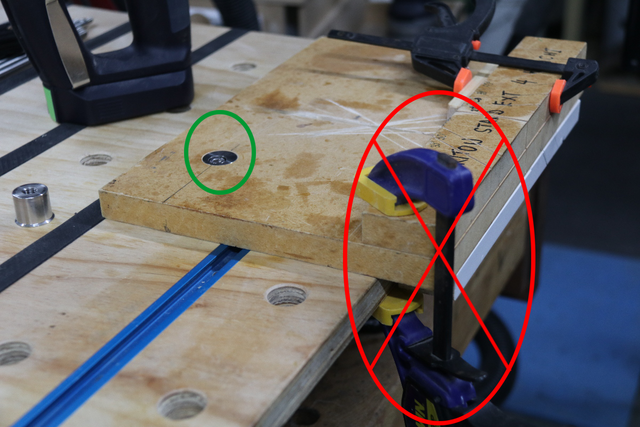
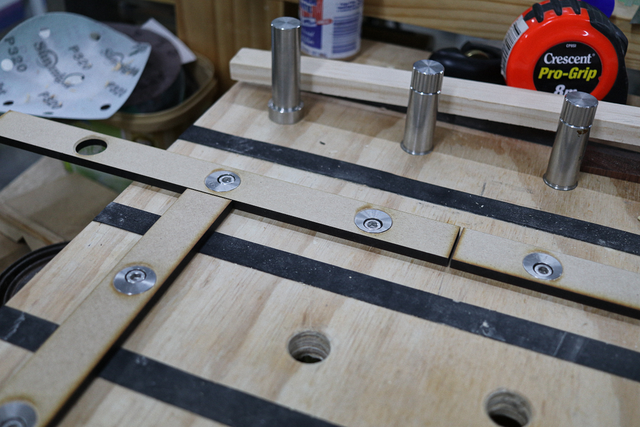
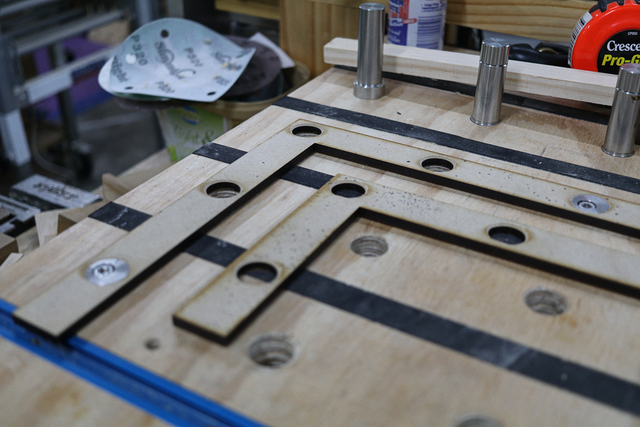
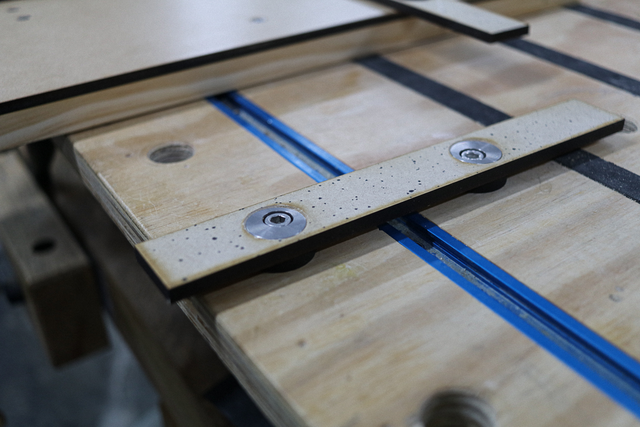
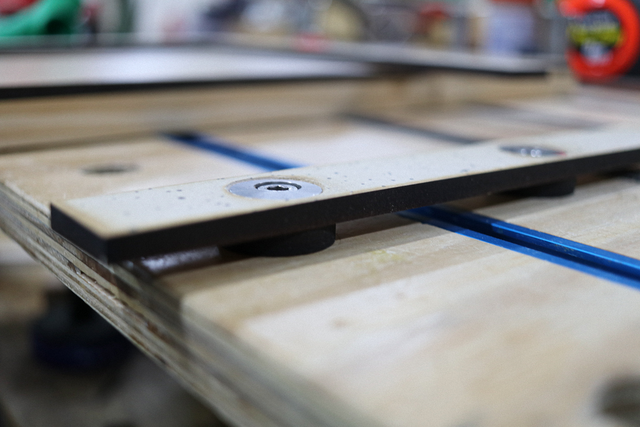
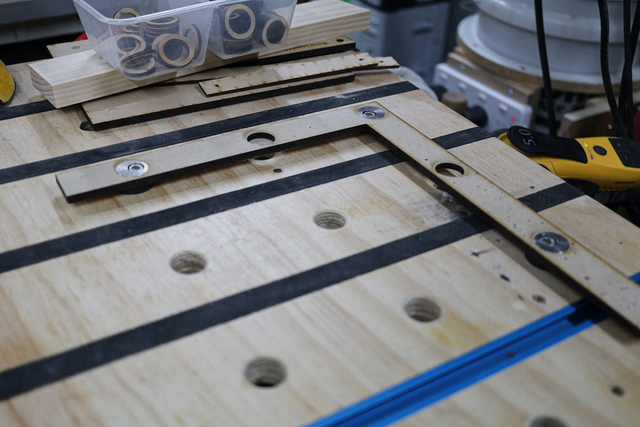
I eventually considered using these TSO dogs to hold low profile fence stops against the workbench without protruding dogs, clamps or holdfasts. Designed a variety of 6mm stops with various number of holes,

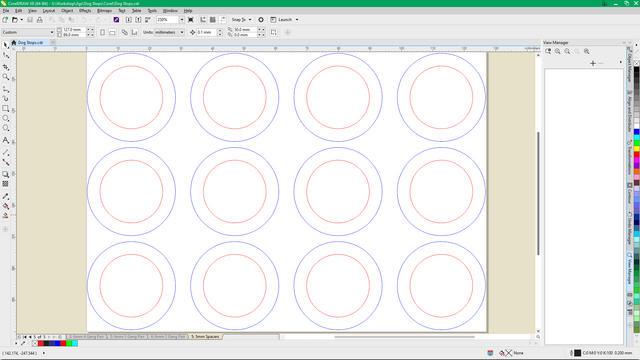
I laser cut a selection of 3mm and 6mm thick fence stops out of MDF with various dog hole configurations,
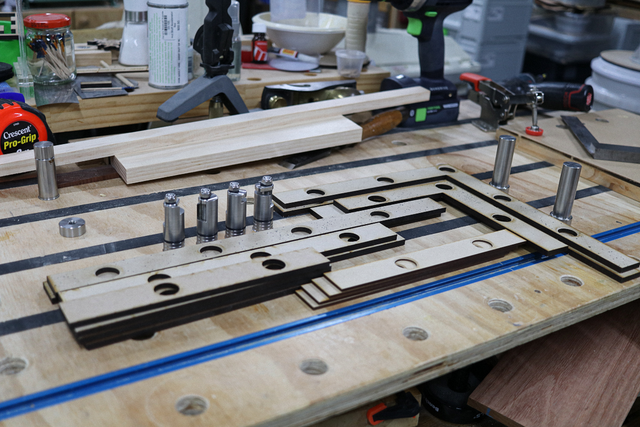
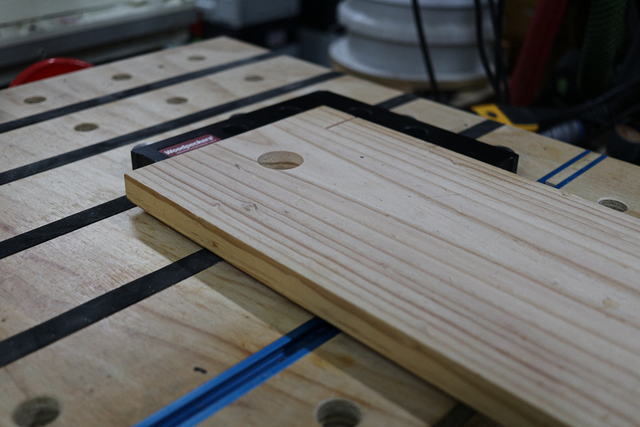
For all you laser/CNC “poo-pooers”, I also made some NON-laser ones out of pine,
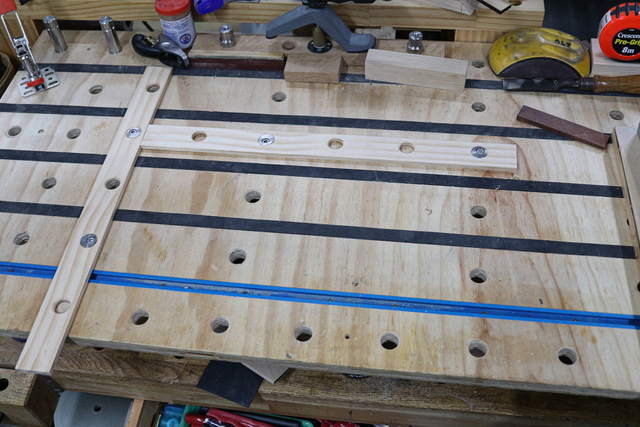
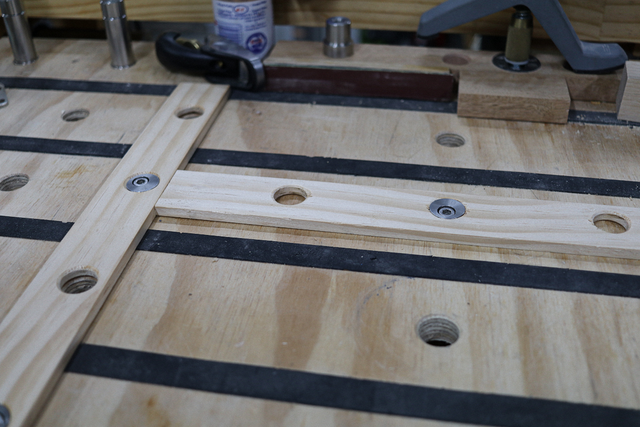
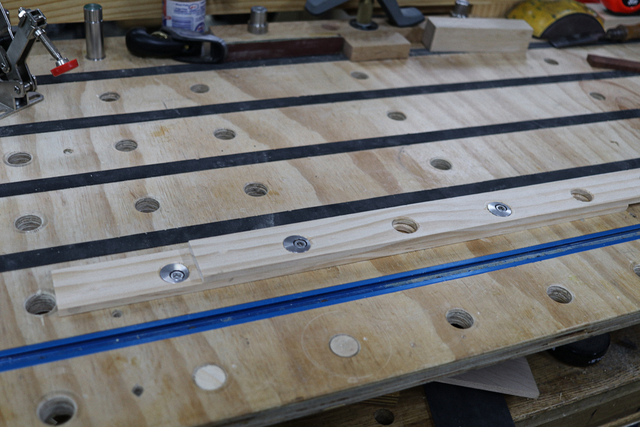
though you’ll have to watch one of my videos if you are interested to see how I did it.
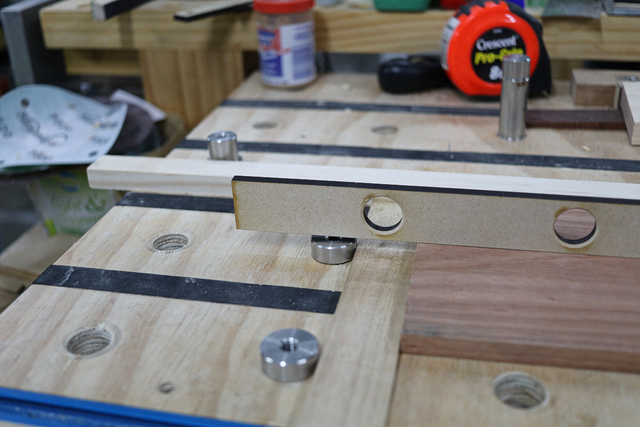
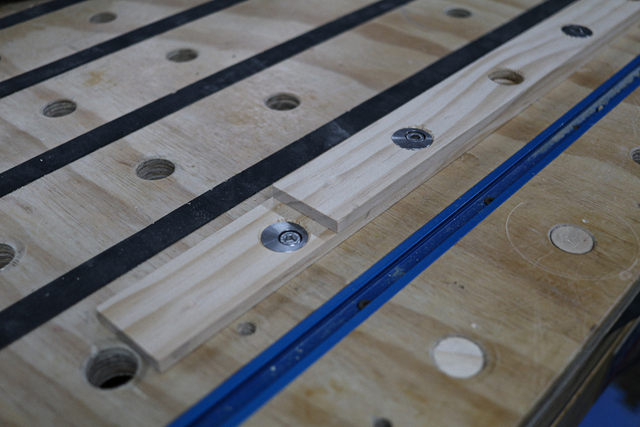
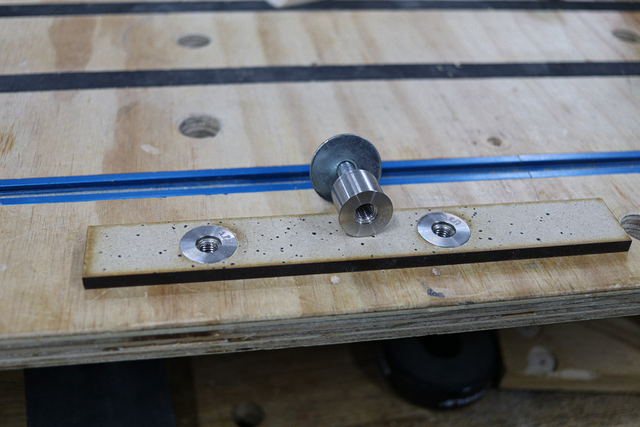
To accommodate the features of the TSO dogs, I chamfered the holes using a drill mounted UJK Parf reamer,
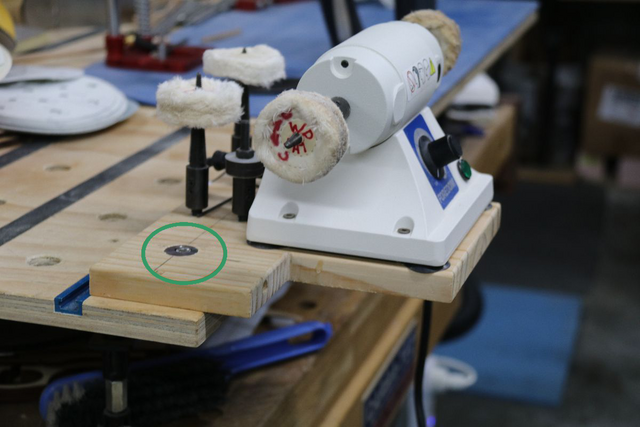
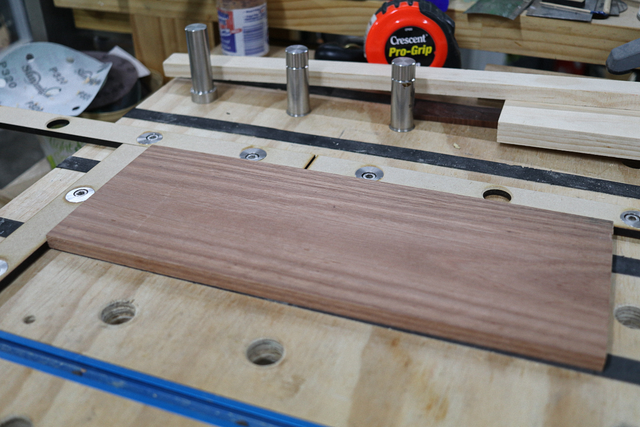
And mounted one on my mini office workbench for demo purposes,
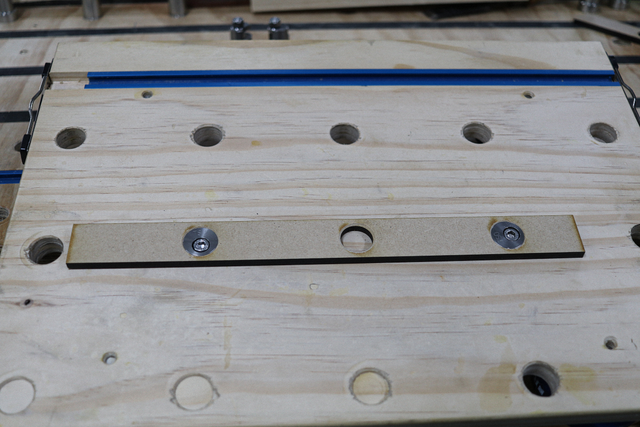
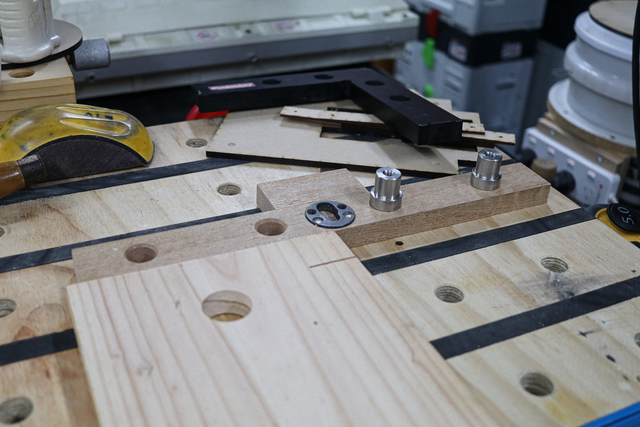
I also cut some spacers that can be inserted under the fence to build up thickness under 30mm by combinations of 3mm and 6mm heights,
I just have to select the correct size to pack it out depending on the topside thickness.
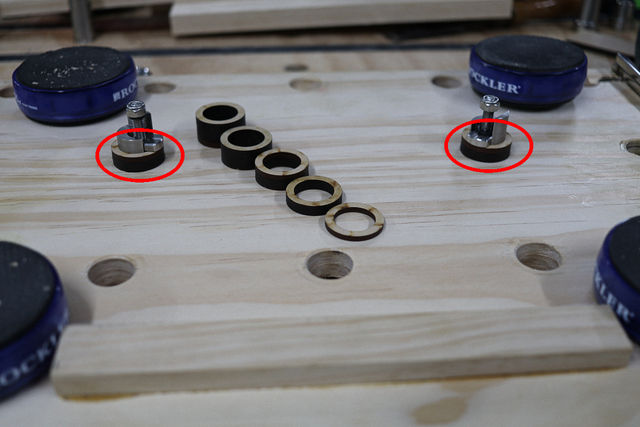
The dogs have a nominal capacity of 30-40mm, primarily designed to connect 2 x 20mm stock thickness, I have cut and laminated a number of spacers to place under the benchtop to build out that requirement,

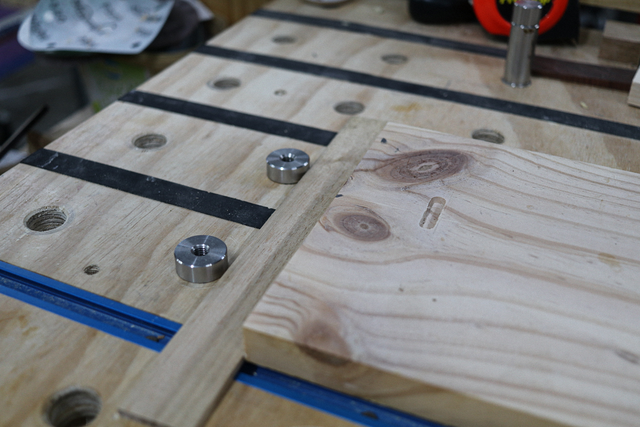
If you find the TSO dogs a tad too heavy for your pockets, you can always get some of these dogs
which also come with the flush collar, however, they need to be bolted from underneath,
which to me, negates the idea of convenience and time saving costs.
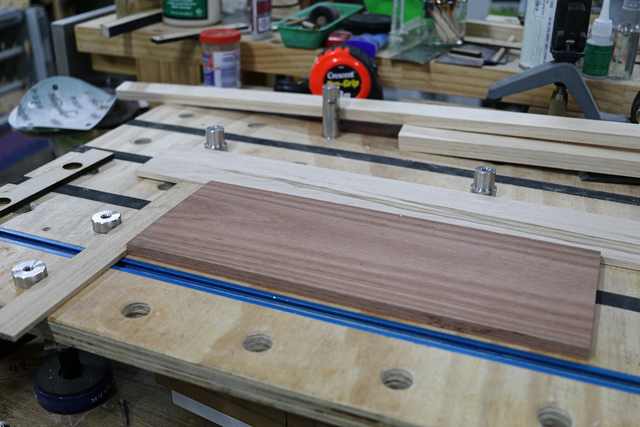
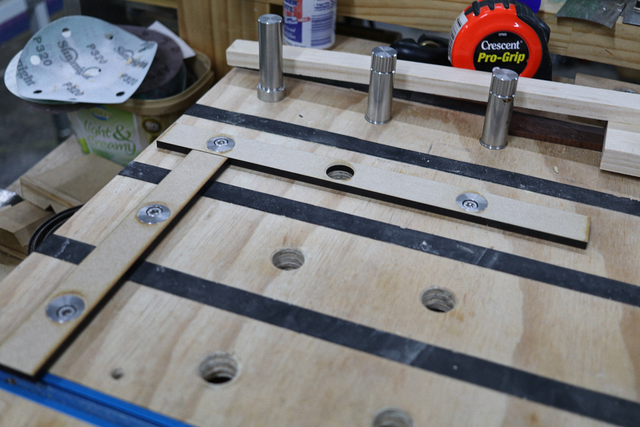
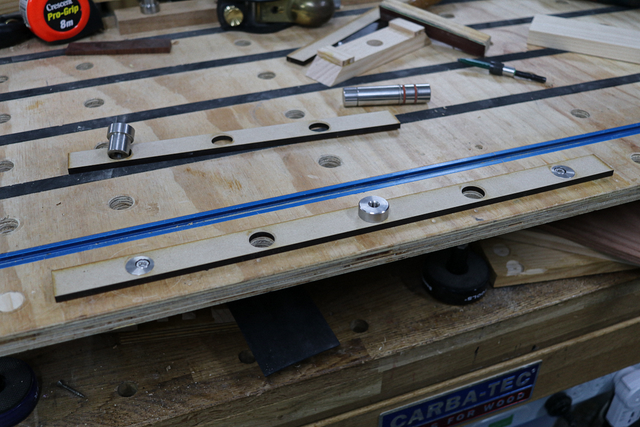
The fences are often used in pairs at 90° to each other
to form a corner to captivate a parallelogram
They are designe to abut to each other (with a 1mm gap), either in parallel,

or at 90°,

Two straight stops can be used to make a corner, however they will require 4 dogs,
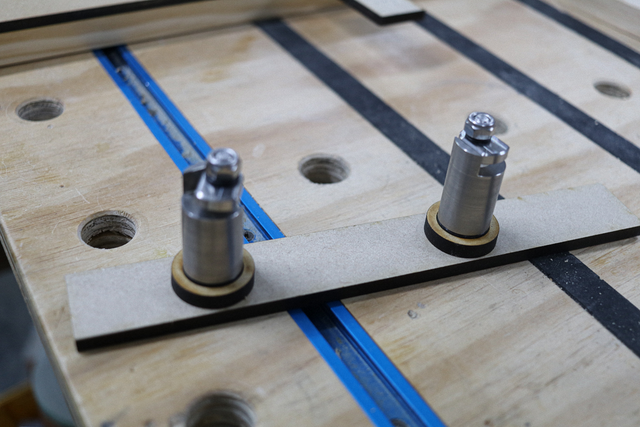
however, if you use a corner stop,
only 2 dogs are require…
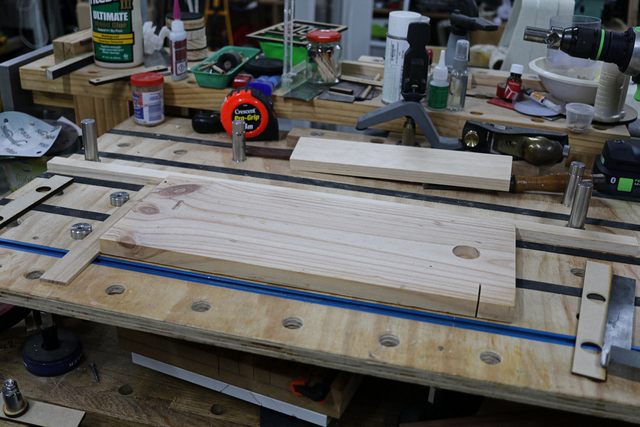
For long stops (eg. 5 holer),
a middle bracing dog (TSO preferably) should be used to prevent possible bowing.
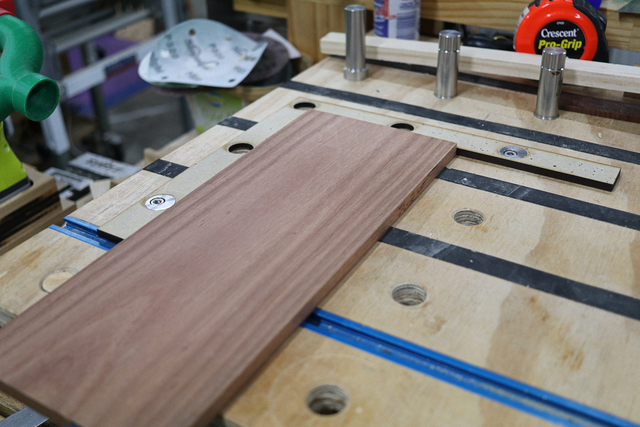
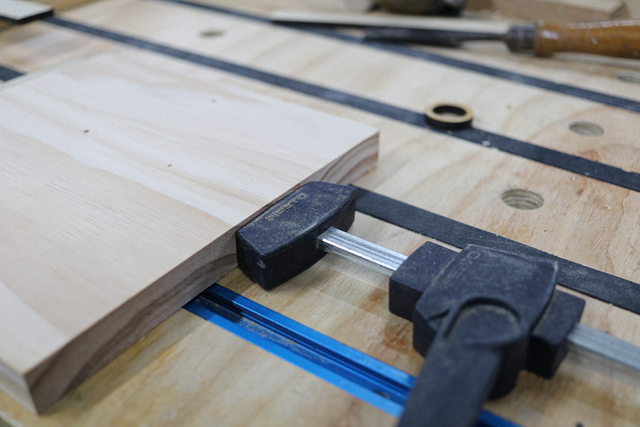
The stops can be “jacked” up using the spacers (or a combination),
The work piece can be pushed into the fence using a Fe$tool push clamps,
however, if they are too high for the workpiece, a Rockler push clamp (with a modified 3D printer tip),
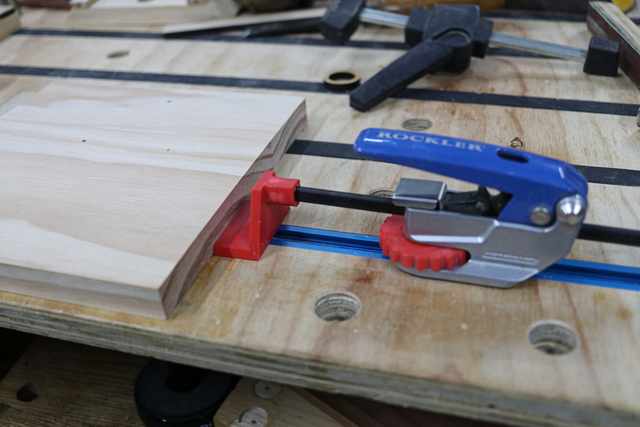
can be used.
The corner ones will require a 3rd dog at the apex,
to steady it.
The different fences are interchangeable, and can be located anywhere on the MFT style table with corresponding dog holes.
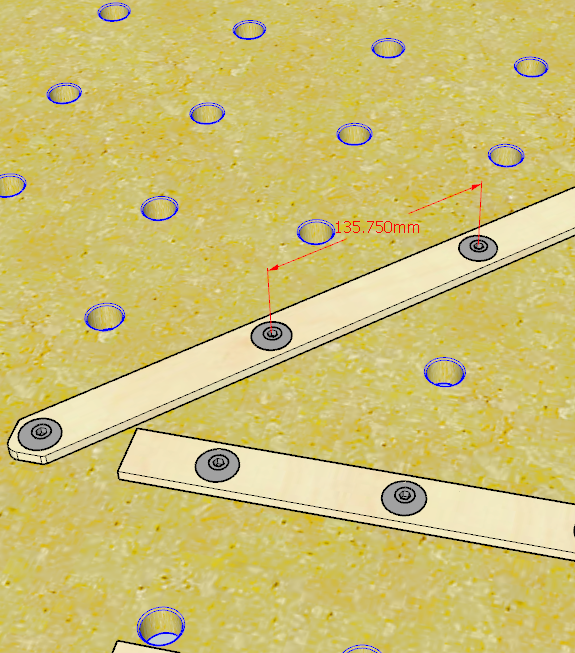
As I was drafting this blog, I realised that Pythagoras wasn’t as smart arse as everyone thinks… his formula didn’t provide for a 45° angle which is the next most used after the 0° and the 90°.
A quick visit to SketchUp and I produced this diagonal,
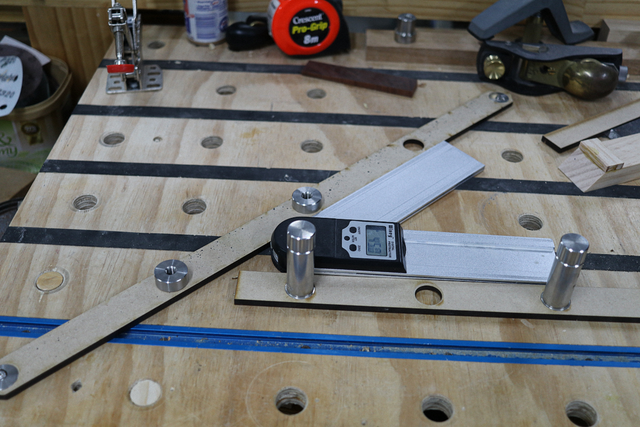
with 135.75mm between centres (dog holes)
and the angle finder showed 45°,
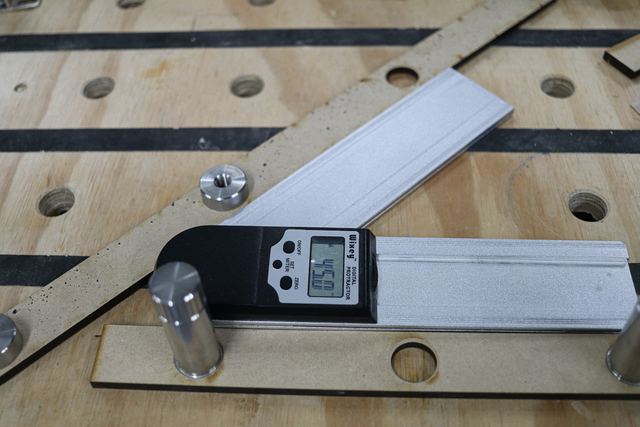
when properly seated between the 2 stops.
Now I know many don’t have a cutting laser or CNC, however, with the availability of my designs and you supplying the MDF, there are many laser services that could cut it for you for just a few shekels, as far too often the cost is tied up in design and material(s).
Alternatively use your DP fence to ensure the holes are all equidistant from a common edge and exactly 96mm apart… they don’t have to be directly down the centre… just take care when using in parallel. The spacers don’t need to have exactly 20mm holes, however, the OD must not be greater than the stop’s width and should not protrude if not centered (if you use them as lifter spacers on top of the bench and under the stop).
The UKJ Parf Guide System is a worthwhile investment to create a foolproof 96mm x 96mm repeatable grid and a couple of the TSO dogs will change your life forever.
Now all I have to do is find somewhere to park these,

and not forget I have them.
As always, when I make a video, it is unrehearsed and I hate reshooting, so I ramble on and drag it out. To make it a tad more bearable (a tad more), I have split it up unto 4 sessions,
1. Dog Stop Fences...
2. Non-Laser Creation...
3. Set Up and Using...
4. Late Addition...
Keep Safe Crafties!
As always, when I make a video, it is unrehearsed and I hate reshooting, so I ramble on and drag it out. To make it a tad more bearable (a tad more), I have split it up unto 4 sessions,
1. Dog Stop Fences...
2. Non-Laser Creation...
3. Set Up and Using...
4. Late Addition...
Keep Safe Crafties!
If your first cut is too short... Take the second cut from the longer end... LBD
5 Comments

Nice write up ducky.
Ryan/// ~sigh~ I blew up another bowl. Moke told me "I made the inside bigger than the outside".

Sorry I couldn't help myself
Regards Rob
https://www.google.com/search?client=firefox-b-d&q=dogs+that+look+like+their+owners&tbm=isch&source=univ&fir=WkeZ4I5UlqHaUM%252COto0EU7ouPz53M%252C_%253BsEymKgSRMnohjM%252CELQzmBpL9GnMDM%252C_%253ByunAUBbR7HbxHM%252C8vgQ9ExPMrCd8M%252C_%253BEx2113nqA4PdoM%252C9WOq61zLP1k9GM%252C_%253BItVWsO6HSUbSpM%252COto0EU7ouPz53M%252C_%253BtkWJPzfhuvmzYM%252Cc05p5JrvVO7VqM%252C_%253B1ULhlOFVow13jM%252CVoYFADJbfuYeOM%252C_%253BKpxGCslomPo8BM%252CovWMXqSmfMT3yM%252C_%253BPKeLPmgLt1ppyM%252CzywF1EGBWiHQWM%252C_%253BL4rGHbnI_oev2M%252CPGXM7U0wqpsWIM%252C_%253BLk3_XxvDFfPeIM%252C10JIUu6bdZcFHM%252C_%253Bqm5O5tnPH0MjBM%252C528p7k8-FduVZM%252C_&usg=AI4_-kQ06a9Da5eJuqn2b22dsalrCfihTw&sa=X&ved=2ahUKEwj22fekldb-AhW47DgGHcpiA3EQjJkEegQICRAC&biw=1360&bih=615&dpr=1#imgrc=oLK9jDJYzj_gWM
Regards Rob

Some fine accessory work for your table D!
My only problem is if I had all that stuff, I'd either loose some critical parts or forget where they all were. Matter of fact, I'd forget I even built any of it and therefore never bother using it. Then again I'd probably think about making something similar when I could sure use it (the circle is round and the wheels on the bus circumnavigate...) and make a second copy.
My only problem is if I had all that stuff, I'd either loose some critical parts or forget where they all were. Matter of fact, I'd forget I even built any of it and therefore never bother using it. Then again I'd probably think about making something similar when I could sure use it (the circle is round and the wheels on the bus circumnavigate...) and make a second copy.


If your first cut is too short... Take the second cut from the longer end... LBD
More from LIttleBlackDuck
Hints and tips that some may not have heard of. #54: Creating a New Blog Series
Hints and tips that some may not have heard of. #53: Dust extraction made easy(er) with remote control.
A collection of Clamps. #30: Irwin Quick-Grip Handi-Clamp.
Hints and tips that some may not have heard of. #52: Dis_CORD in the workshop.
Hints and tips that some may not have heard of. #51: Glass Jars for those recalcitrant chems.