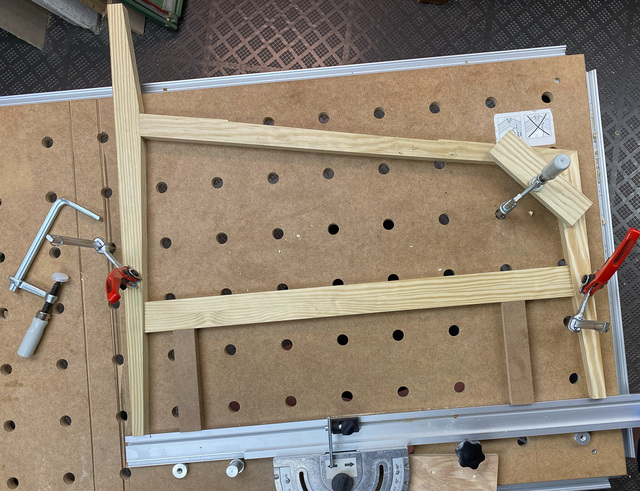
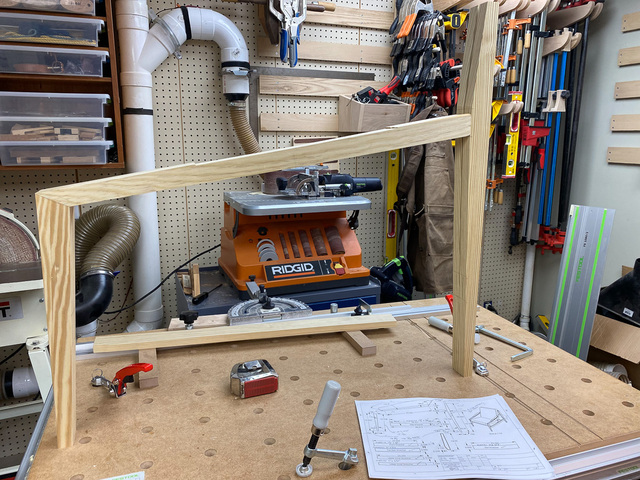
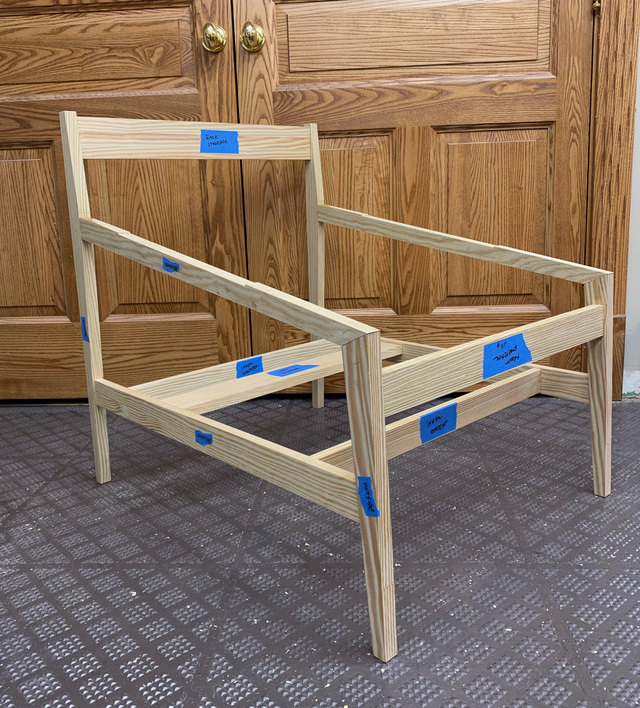
Simultaneously aligning all 4 components of a side assembly gave me fits. Very slight errors in length and/or angles meant that as I sequentially fit one part to the next, by the time I was fitting the 4th, it didn't exactly meet the 1st at the expected location. What compounded the difficulty was that there were no right angles anywhere to serve as a reference. Even the outer edges of the legs have a 1° rake. What I ended up doing was setting the 1° rake on the front leg and clamping it in place. Then I aligned the arm to the front leg at the miter and clamped that in place. Then I aligned the rear leg to the arm at that miter, and clamped it in place. Then I could adjust the length and miter angles of the side stretcher so that it would fit snugly at the proper location, parallel to the floor.
It took a while going back and forth between two sets of parts to convince myself that they were suitably identical and that I could finally mark the mortise locations. Whew! I'm sure there's an easier way to have done this, but it worked.
With the mortise locations marked, I used my mortising jig for the side assembly mortises. The mortises will be 1", 1-1/2" and 2" by 3/8"
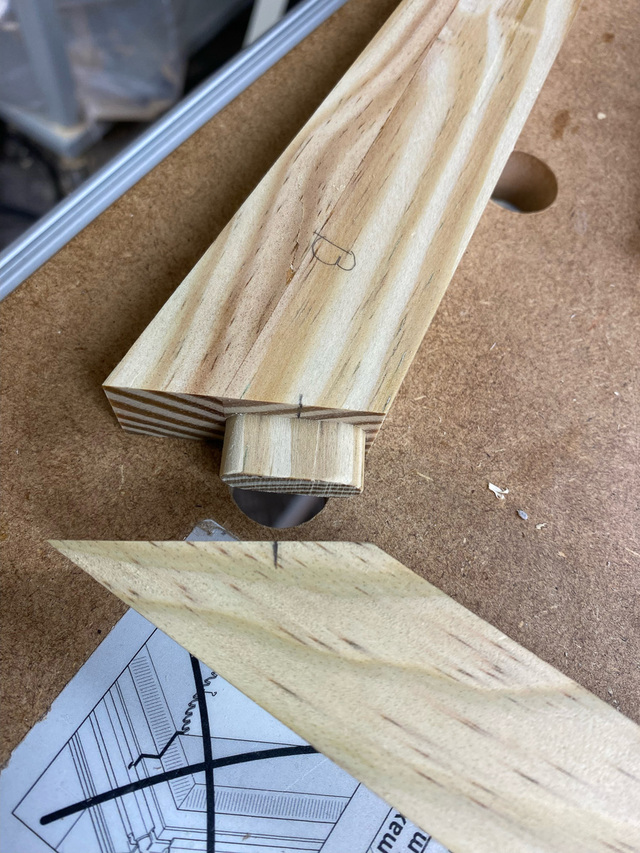
Here's the mortise for the rear leg where the arm attaches. (I marked parts for one side assembly with A, the other with B to each set together through assembly.)
The corresponding mortise in the arm. The remaining mortises were cut in the same way.
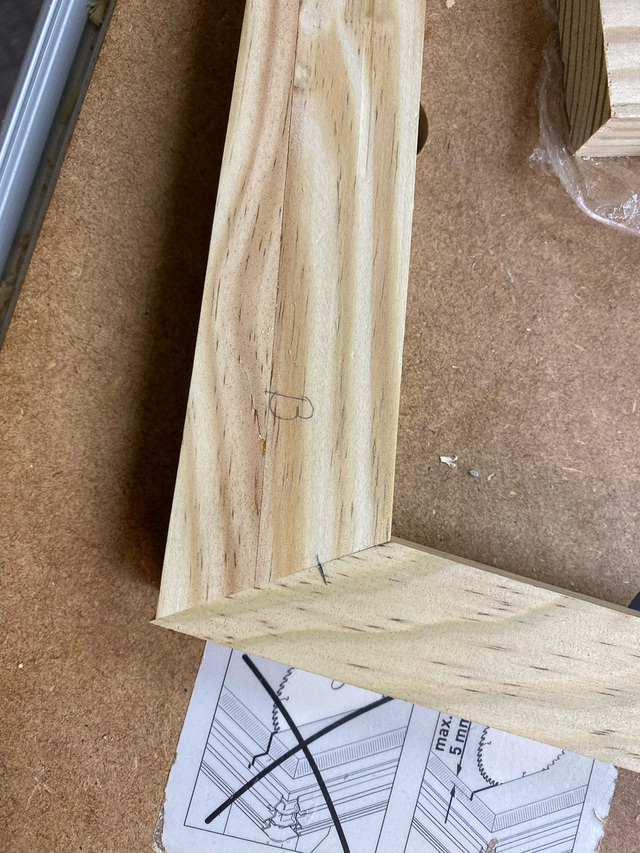
The front leg/arm joint:
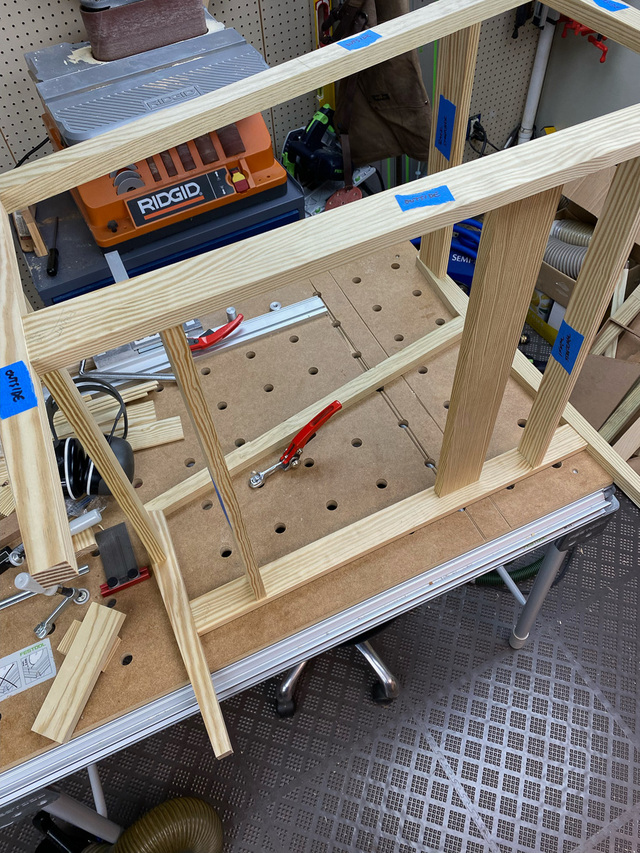
A test fit prior to cutting the stretcher mortises. This gave me a chance to confirm their fit before committing to a mortise. Fortunately, everything fit great.
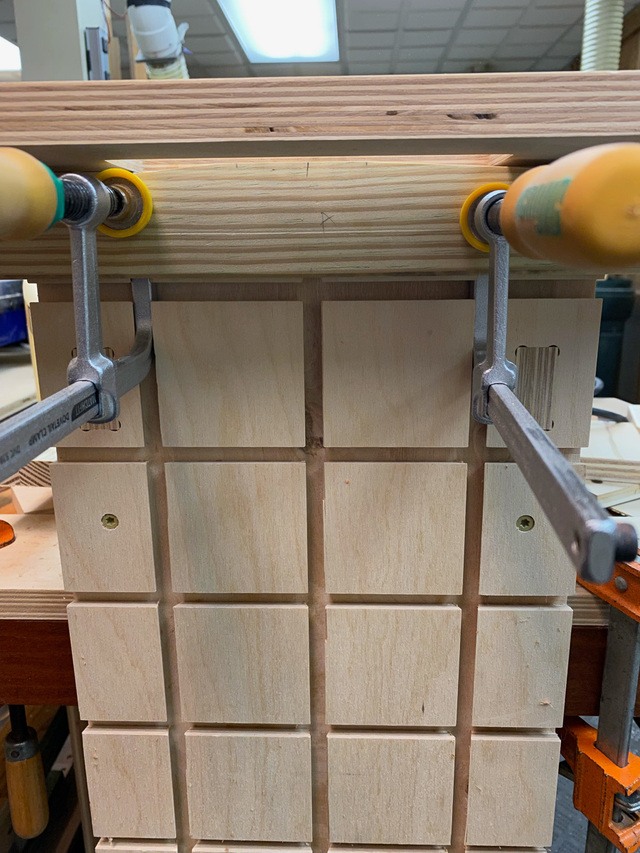
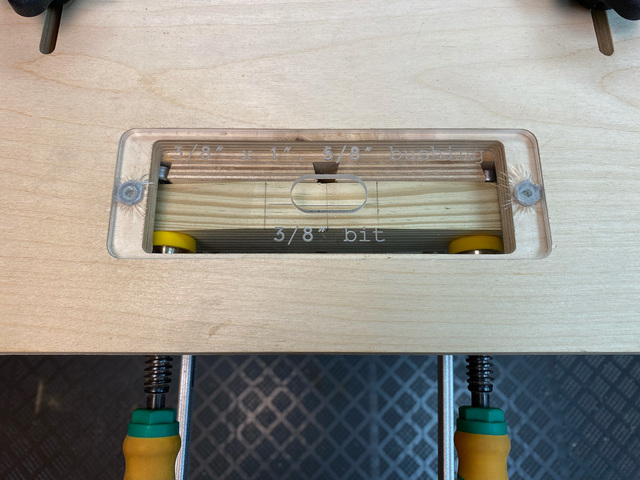
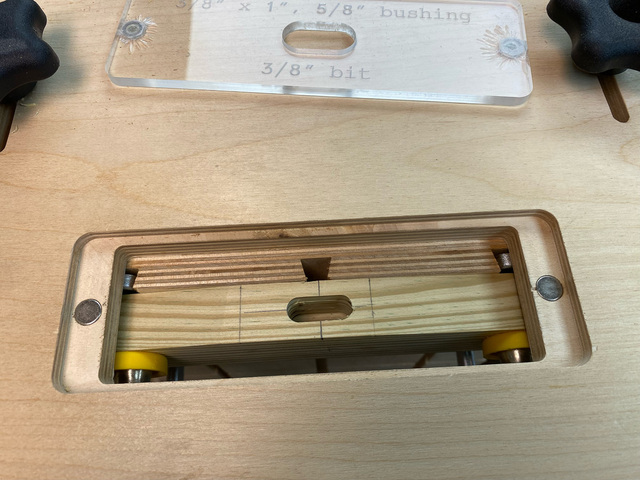
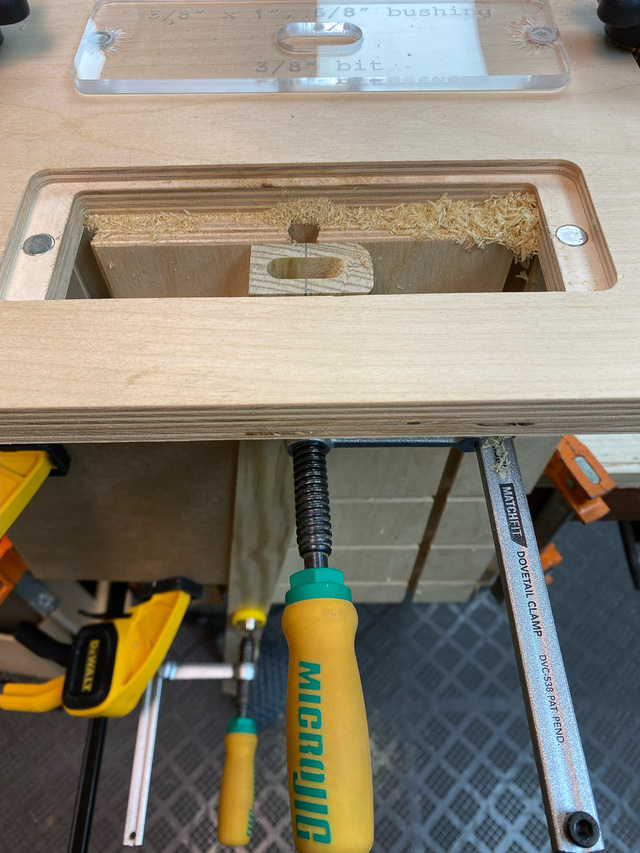
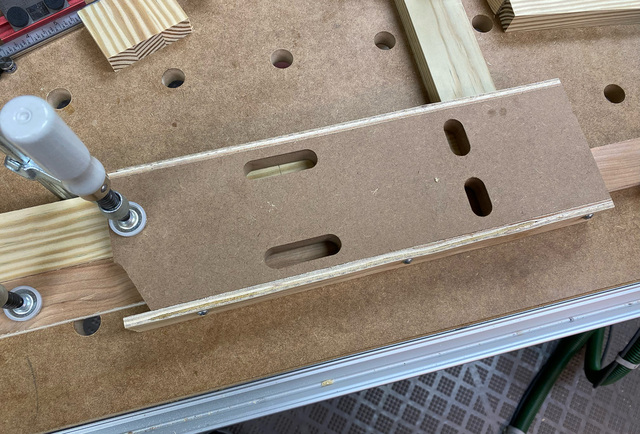
The mortises in the ends of the stretchers and the mating mortises in the front and rear legs were done on the mortising jig above. The mortises on the inner faces of the side stretchers would be difficult or impossible on the same jig. So I made a dedicated jig for those - a CNC cut piece of MDF with router guide bushing slots with a fence screwed to each side. The double set of slots allows it to be flipped to handle both right and left facing mortises. The fences set the distance from the top edge of the stretcher. The pair of vertical and horizontal slots along one edge are spaced for the rear 2 mortises with the jig aligned to the end of the stretcher. With the rear mortises cut, the jig could be flipped and used to cut the front vertical mortise.
Then I could do another dry fit with all the parts.
Next it's on to cutting the lacing channels in the back, seat, and front stretchers.