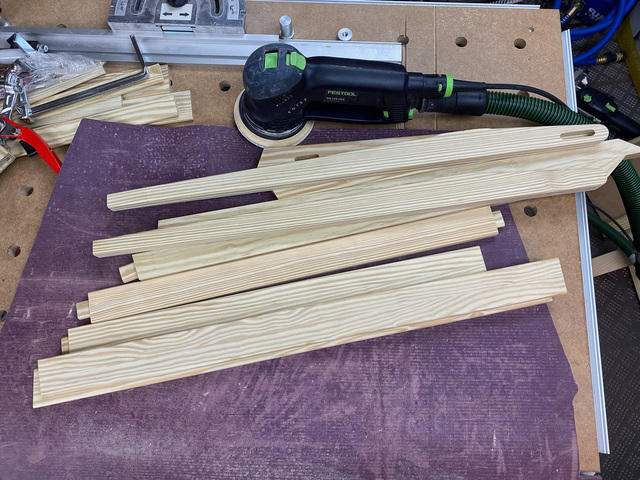
With the mortises complete, I put a 1/8" edge round-over on most of the parts and sanded them all smooth. It's easier to get this done prior to assembly so that I only have some light hand sanding to do after assembly.
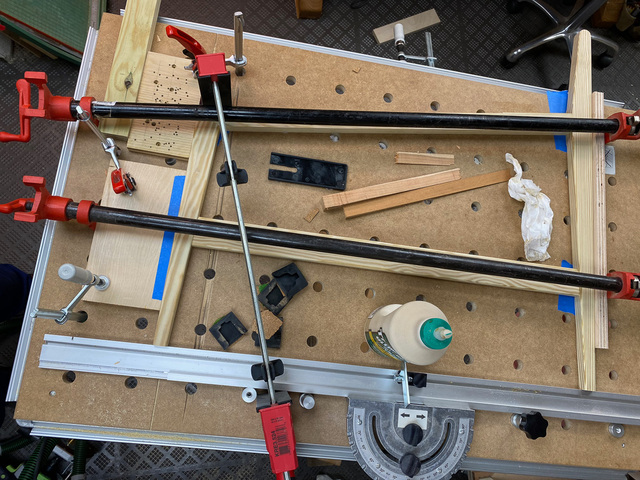
For the side glue-up, I clamped one side at a time, keeping it flat on the MFT to make sure I didn't introduce any twist. I started out trying to do this with wedges against stops clamped to the table, but the wedges were overcoming the clamping pressure, so I switched to pipe and bar clamps. A bit of a Rube Goldberg clamping session.
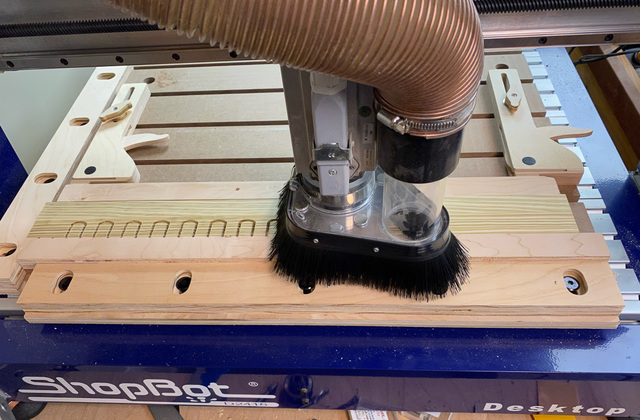
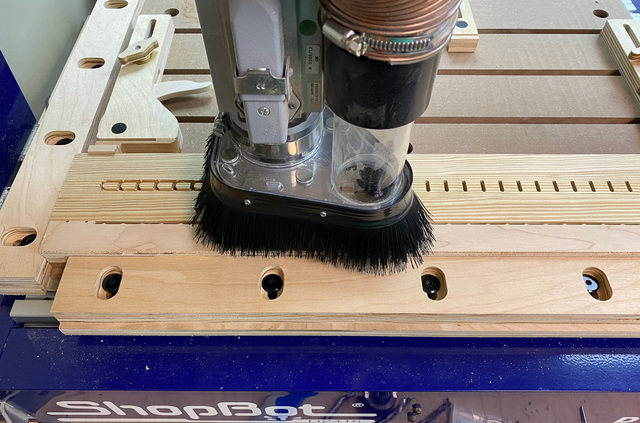
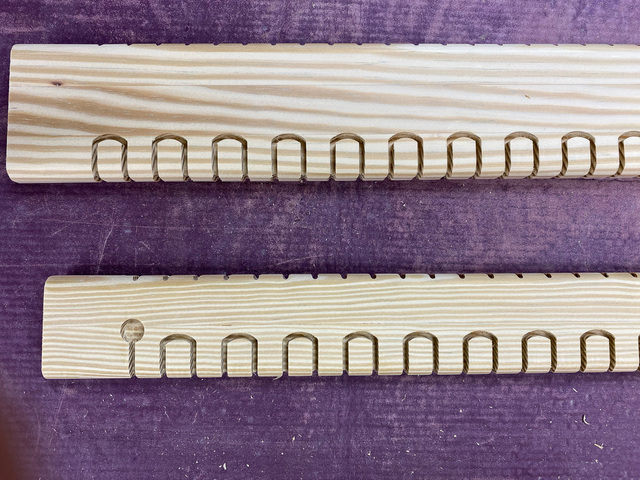
While the glue was drying on the side assembly, I setup the CNC to cut the paracord lacing channels in the front, rear, and seat stretchers.
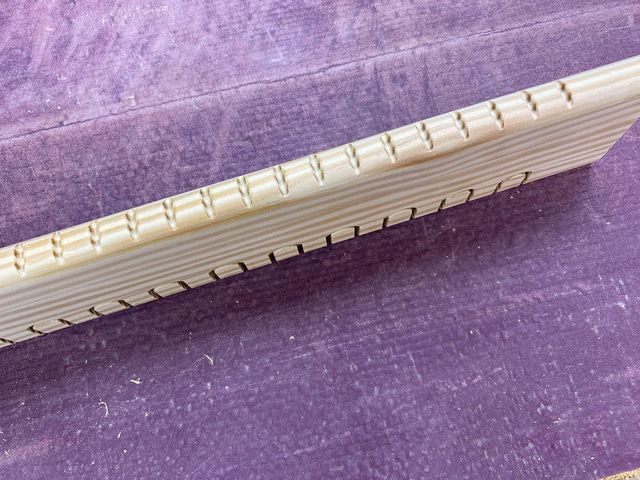
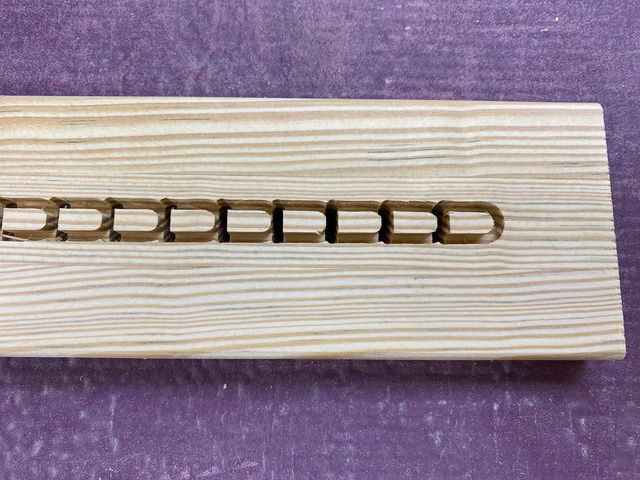
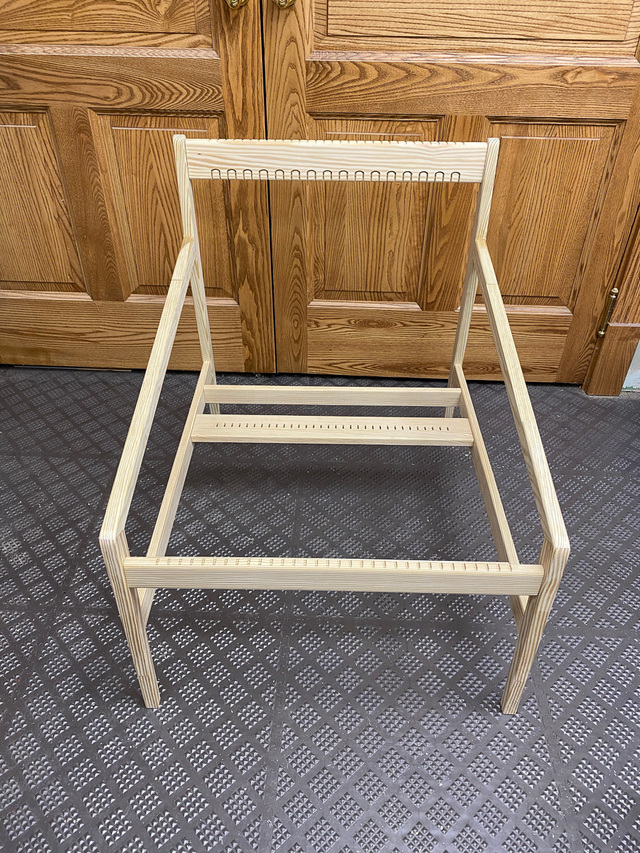
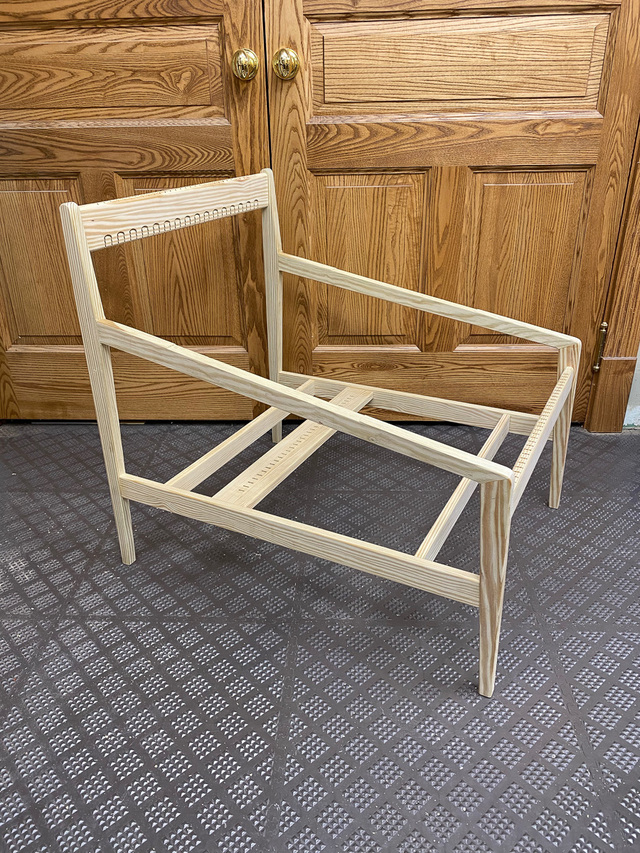
The front and rear stretchers each have a regular set of notches on the top and bottom edges and a U-shape channel on the inner face connecting adjacent notches where the paracord will reverse direction. The edge notches ensure that the paracord will maintain an even spacing on the outer face of the stretchers. They both received a larger radius round-over so that the paracord wouldn't wear on a sharp edge. The U channels are offset between the front and rear stretchers, so the paracord will follow a serpentine pattern as it's being laced. The paracord will start and end on the hidden side of the front stretcher. Each end has a circular recess for the stopper knot at the beginning and end of the cord.
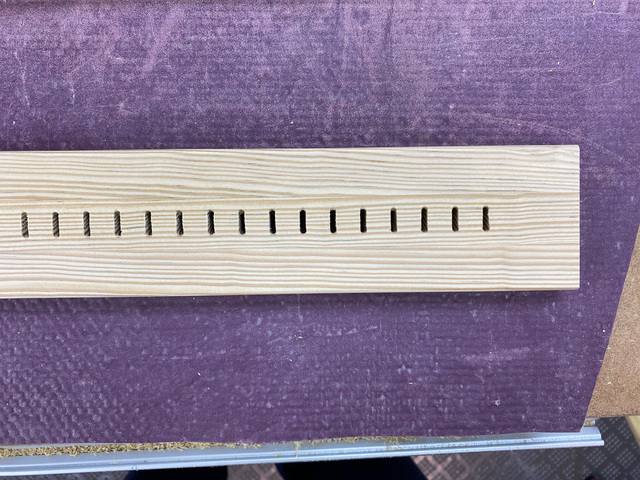
The seat stretcher has a series of slots where a loop of paracord can be pushed through, pulled taut, and be looped over a U-shaped channel on the underside to anchor it.
With the side assemblies glued-up, I could do final dry fit. Before gluing the stretchers, I want to make sure that the paracord lacing idea will work out and support cushions and a person's weight without failure. Better to find out now than have to retrofit something later.
That is looking comfortable Ross. Some great ideas are coming out of this, paracord that is some strong stuff (in the Military we called it 550 cord, always had a good length in the ruck). As for sanding before assembling, I agree makes life so much easier.