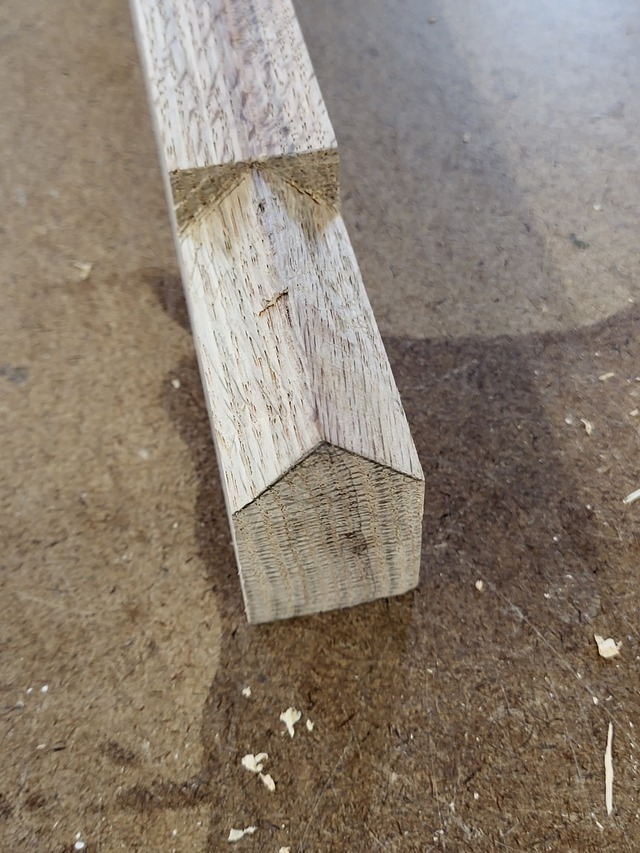
I will back up a bit to start. This is what the bottom of the post looks like.I will be able to lock it in place to the layout line.
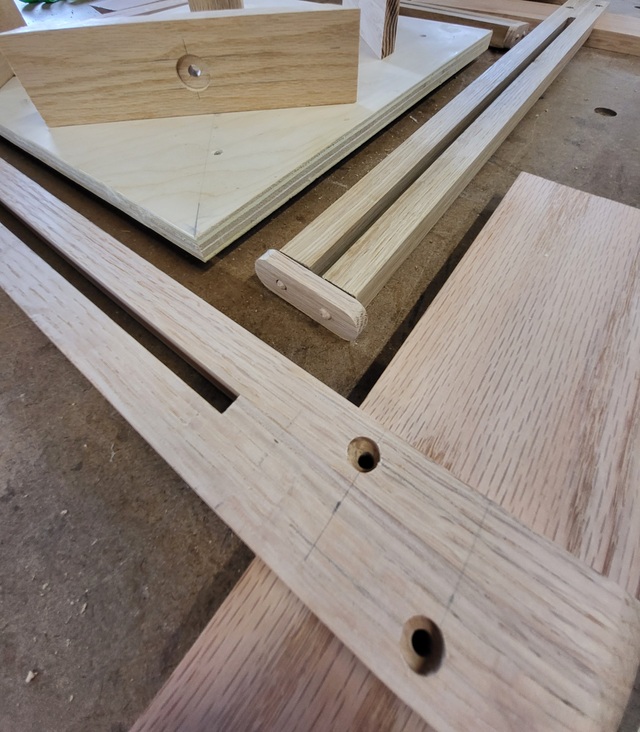
I wanted to incorporate a type of a clamping system. Tossed a few ideas around, some would just not be feasible. So, I came up with this. The jig frame will have 4 post that are fixed to the sides in a shallow dado both in the side and on the post, this will be bolted instead of being glued, just in case it does not work as planned. The post is made up of three pieces, two that extend upwards and one short one in the center bottom, this allows me to create a slot from the base to the top.
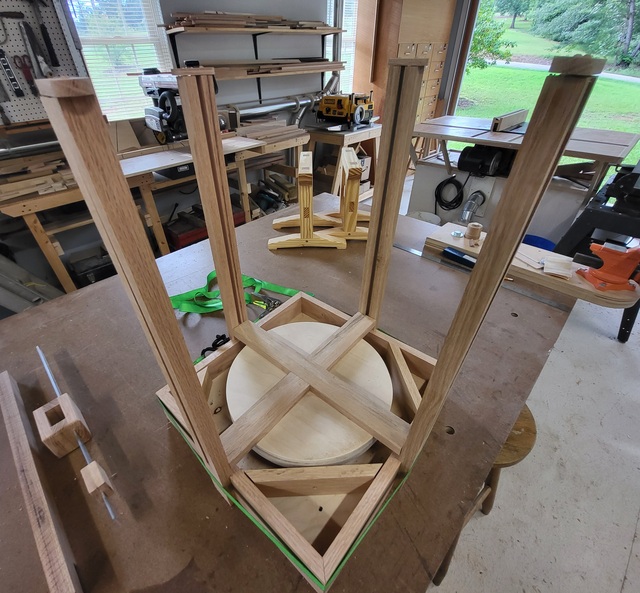
At first, I was thinking about adding a block at the top center, that was not going to work, it would be difficult to get the clamping brace in place. The clamping brace crisscrosses in the center and will fit between the post, with hanger bolts extending out of the ends to slide into the slots.
The post started out with 3/4" x 7/8" stock for the two outer pieces, and a 5/16" x 7/8" for the center. I drilled for a 1/4" pin on one end of the longer pieces, to glue a dowel in later. I glued these up in a few stages to ensure the glue did not slip much. Also marked the glued surface to match the post. The first stage:
Then the second stage.
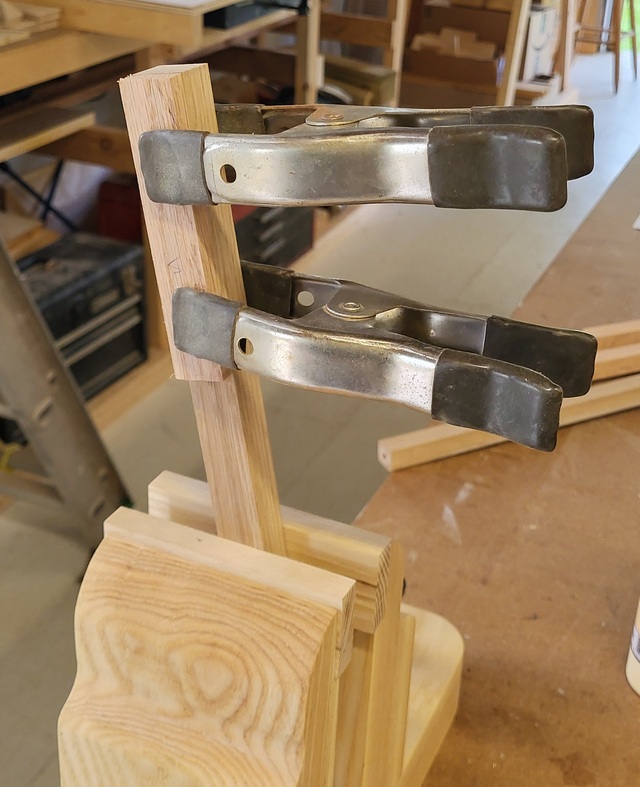
And I have tuning forks. A couple of the pieces apparently had some tension in them. I know how to fix that.
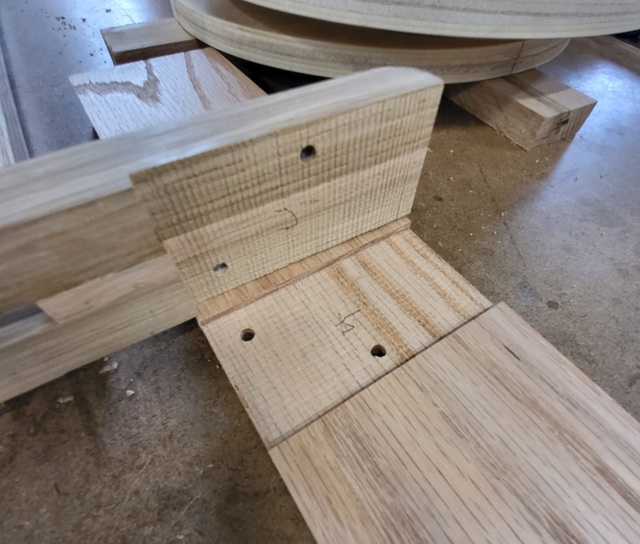
Next up was to cut the dados in the frame sides and the post bottom, I did not want these to twist. and it will make it easier to mount later. then it was to the drill press to drill and counterbore for some small bolts through both pieces. Almost goofed by putting the hole in the center, that is a small piece, so it is centered on the outer two pieces.
For the top of these post I wanted the slot to be even and parallel, the reason for the tops to have a 1/4" pin. I cut some dowel rod and some small pieces for a plate then drilled holes to fit the pins at the top.
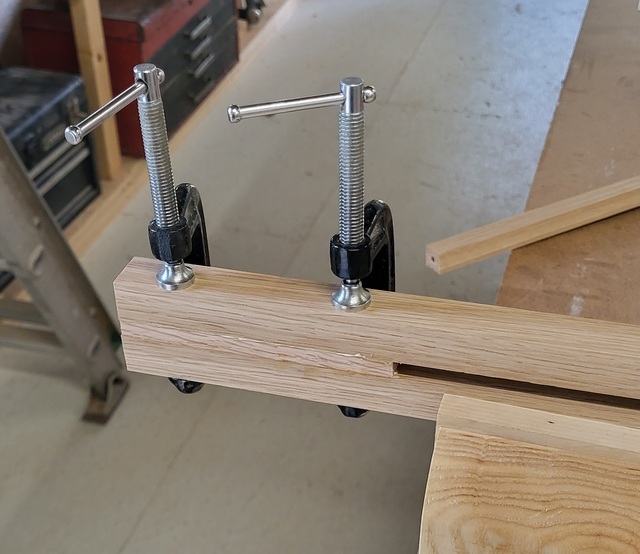
Now I needed a crisscross frame, made from 3/4" x 2" stock and fitting between the post. I cut a lap joint in the center, and drilled holes in the ends. The idea here is to install hanger bolts, which rides in the slots and locked in place with wing nuts. I also cut another 13" diameter circle to attach to the underside of the crisscross. That will allow even pressure on the rings being glued.
Looks like all the pieces are cut, drilled and fitted, and ready for a final sanding before assembly.
Still waiting for the large circular protractor, then I will cut a spacer to attach on top of the corner block for the acrylic index plate.
Thanks for reading and following along, comments are always welcome and appreciated.
Splinter, thanks. I'm getting there, received the large protractor today, that is going to work great. Just giving the guys some additional eye candy. And someone out there will be building a vise.