I decided to start off with a little prep for this build and make a few samples.
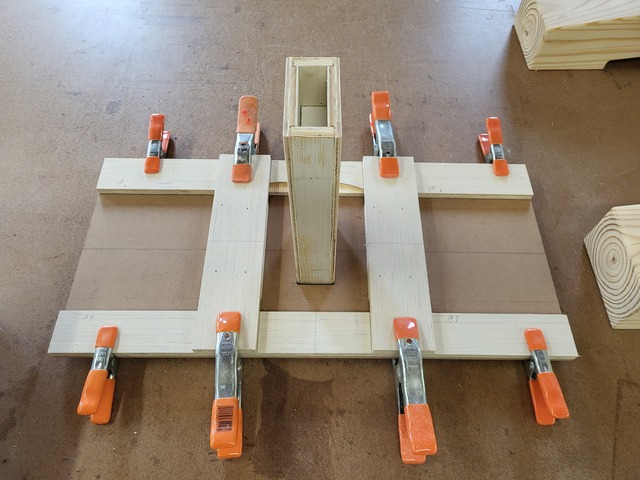
The Kayak will be built with an Internal frame which consist of forms attached to a beam that runs almost the length of the craft. I could use a 16" 2x4, but finding a straight one, nope. In my reading, it was mentioned about building a plywood box beam with an actual measurement of 2" x 4", so that's what is. I built a small sample 12" long out of 1/2 plywood, cutting a rabbet on 2 sides of the 4" strip and then a narrow strip 1-7/16" to be used as spacers for the sides. I also included some internal blocking as additional suport. As you can see in the end view of the sample beam. Actual measurement is 3-15/16" x 1-15/16" that will be explained later.
Up next was a jig to be used to cut a rectangle in all of those forms that will be used in building this craft. The Forms are like bulkheads in a boat, that make the shape of the craft as it appears from the outside. Well, these forms need to slide onto the beam and held in place on all three axis, plumb, level and square to the beam. All but the very end forms need to have a hole at the proper position. Centered from side to side and the bottom at the reference waterline. That hole needs to be 2" x 4" (hence the 1/16" short measurement on the beam, so there is room to slide them along the length of the beam).
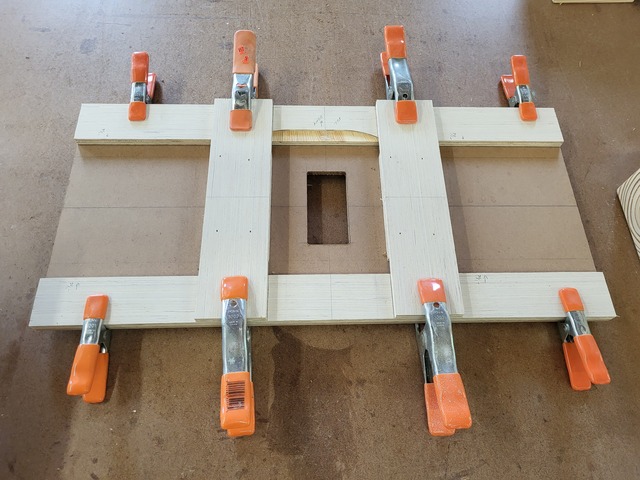
The simple jig consists of a piece of hardboard, and 1/2" plywood runners or guides. I sized this to use my little Colt Trim Router with a 1/4" straight bit to create the 2" x 4" hole in the forms. The top and bottom piece came up first, I had to trim a tad bit off the top piece to have clearance for the knob on the router (oh well). Then I doubled the side pieces. I took the time to layout all of my marks on the hardboard ensuring that everything was square, measured each quadrant for the center lines both vertical and horizontal. A must to alien the jig on the form center marks. I ensured the guides were square and just nailed them in place, just in case, I can run some screws in through the bottom later.
After using the scroll saw to remove the bulk of the material. I used the router to clean up all the edges to create a nice rectangle to slide onto the sample beam. (I did round over the edges of the beam with a 1/4" bit). This will work nicely when I get to the forms later in the process.
Thanks for reading and following along, comments are always welcome and appreciated.
Box beam definitely seems like a great choice. I would suggest though that instead of putting the internal supports like you have them, how about running an internal piece down the center the full length? I don't know that there's any real structural advantage but it sure would be less cutting and gluing.
Kenny, that is a though, but the inside measures 1" x 3" so I'll stick with the blocks, (simple rip and a stop block over at the RAS). Besides I need to narrow the end and reduce the height at the ends. The plan is to use a 1x4 shaped as needed, that can slide inside the box beam. Advantage of that will allow me to slide it in further to release the forms from the ends and pull the frame out after it's built.