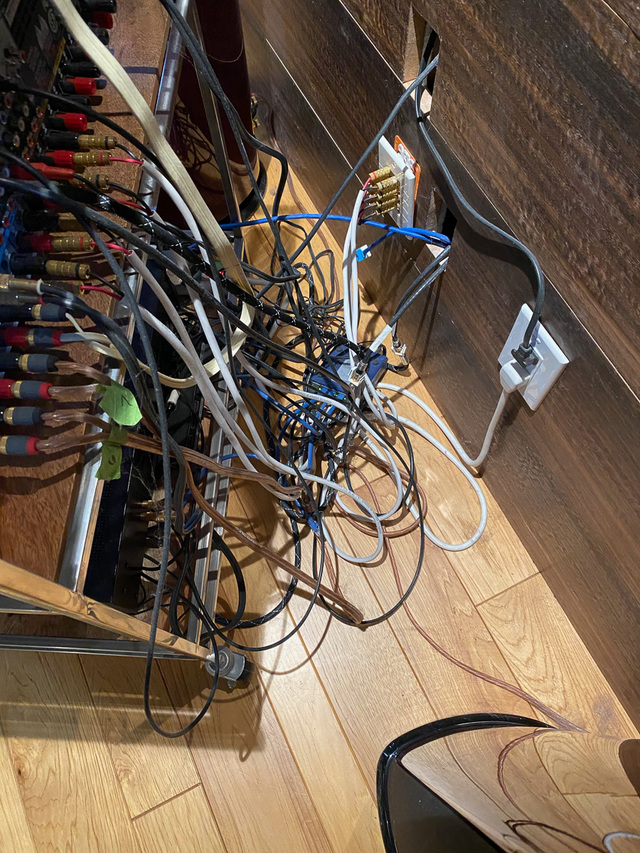
Pulling back the curtain reveals a hideous sight. Strewn cables, dust bunnies, an ethernet switch, missing wall plates, etc. Some really nasty stuff. I'll will need to think more about cable management within the cabinet, but first I'll tackle cable entry/exit from the cabinet.
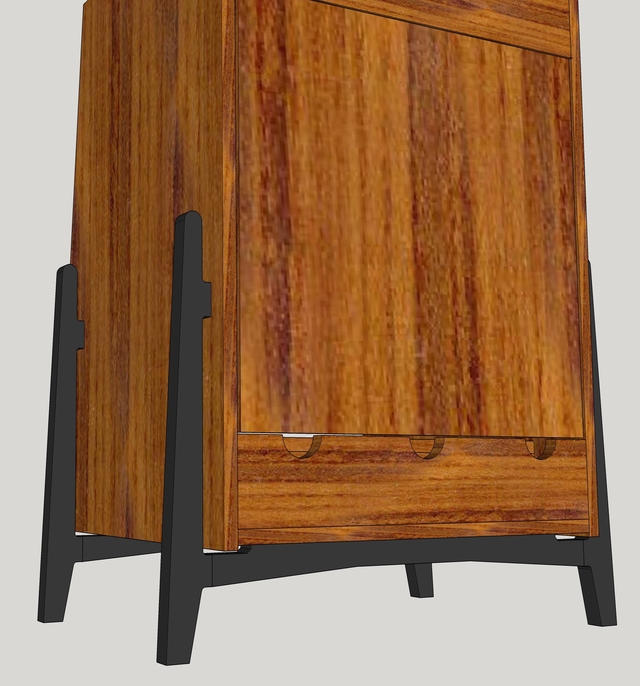
Initially, I thought I'd simply cut a few scallops along the top edge of the lower stretcher to let the cables pass through. I've not discarded this idea, but I don't like the idea of exposing the plywood. I could make rectangular notches instead and then edge them with hardwood. So this is still an option.
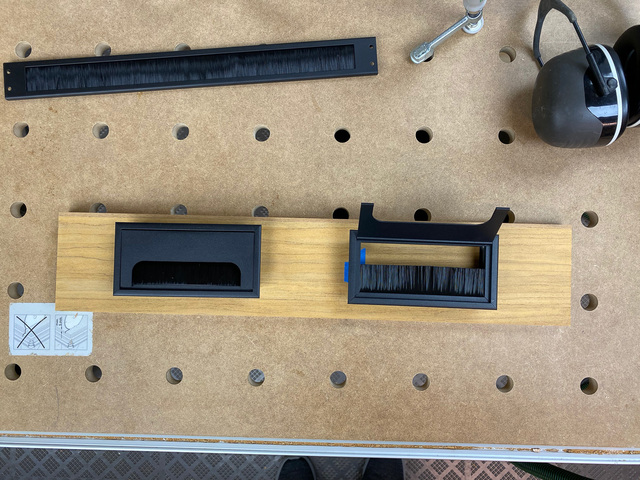
I also checked out some brush panels. The narrow one would not pass the power strip plug - the slot just wasn't big enough. The larger ones would pass the plug, but they kind of looked clunky, were thicker than the plywood, and the hinged plate swung freely - no catch, just an annoying rattle. That's the last thing I need when I turn up the volume.
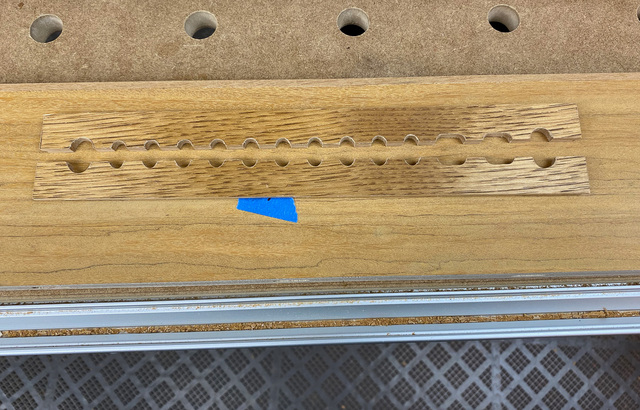
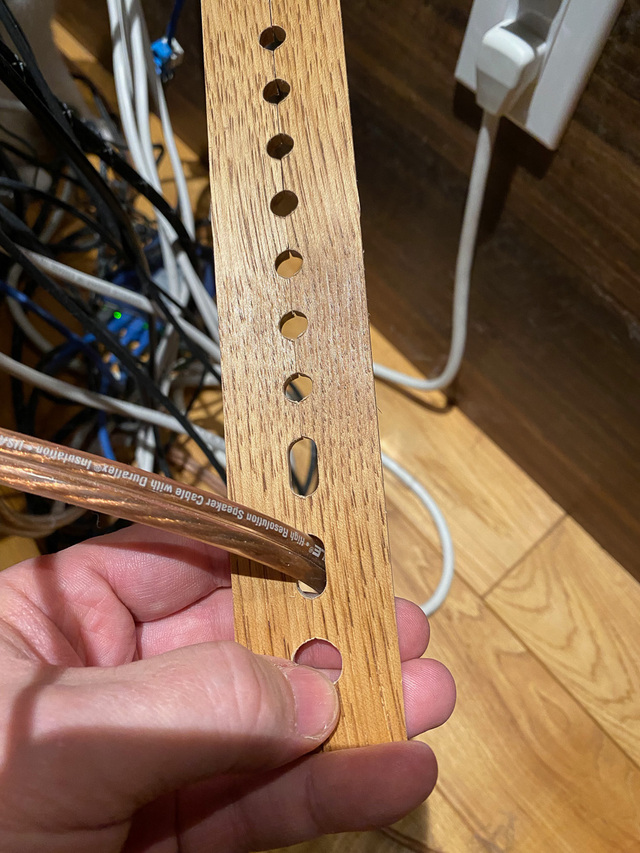
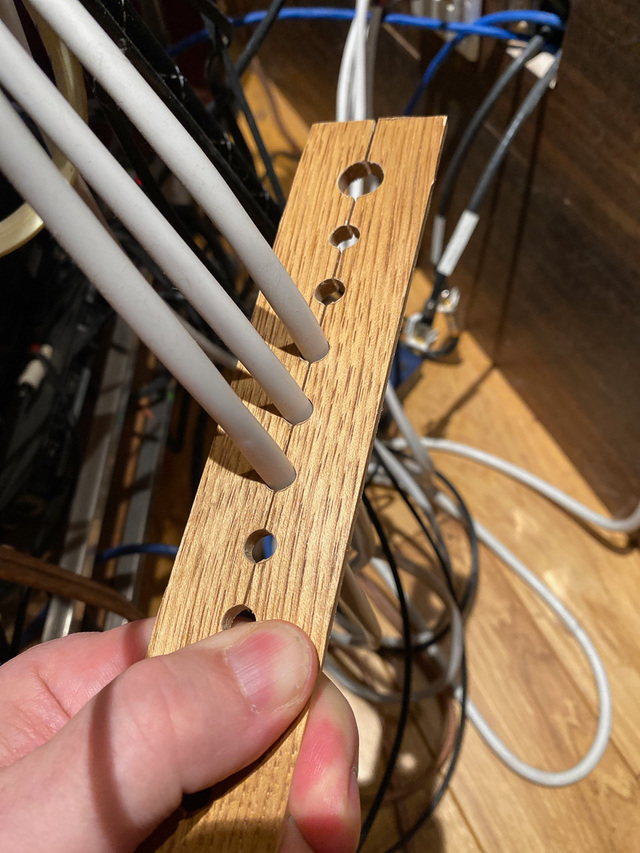
Being an engineer, I had to tinker around with making my own sort of pass-through. Here is a prototype of a split panel that has a few different sizes of holes based on my current cables. The two-piece panels can be removed to pass the power strip plug. With the lower half of the panel then installed (I'm thinking probably magnets), I can still pass the remaining cables in/out. When the cables are all in place, the top half of the panel is installed to keep the cables captive. If down the road I need a different configuration, I can make a different panel to fit the recess.
I had some salvaged 1/4" stained ash that I used for the prototype.
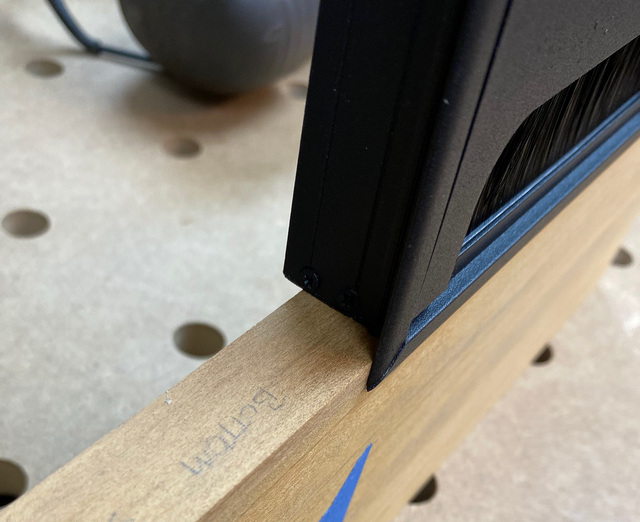
There's a 1/8" lip that will conceal the opening in the plywood.
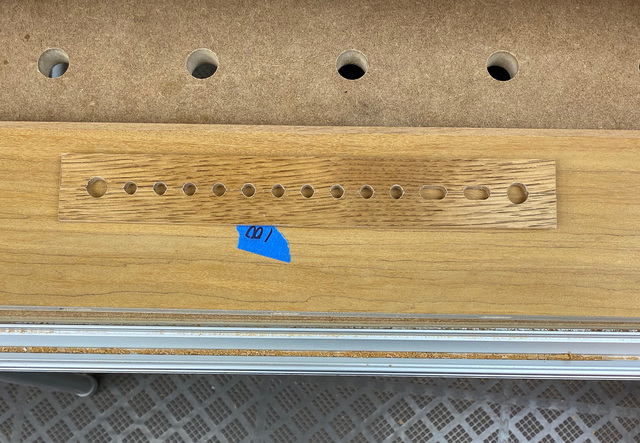
I made the appropriate recess and hole in a scrap of plywood.
Both halves fitted in place.
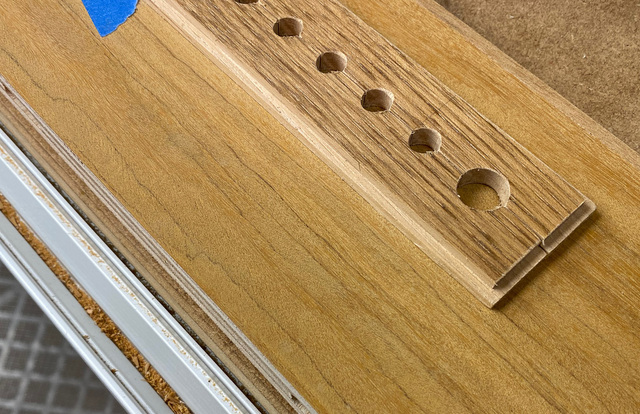
The inside view.
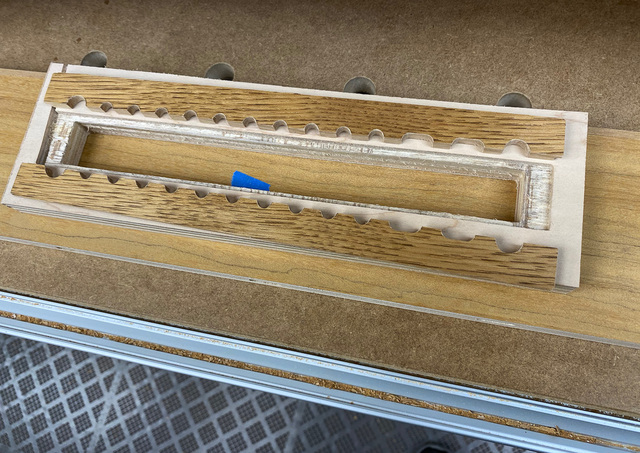
Checking against some cables in the rat's nest.
I've not made my up mind yet on what to do. Please share your opinions on this approach. Overkill? I like the potential for exterior tidiness (regardless of what's going on under the hood). 😀
oh damn ross, i thought mine was bad ! i like your idea with the split panel using the same wood blending into the cabinet rather than some black plastic thing that will stand out sorely !
working with my hands is a joy,it gives me a sense of fulfillment,somthing so many seek and so few find.-SAM MALOOF.
I like your split panel idea, but it probably is overkill. Still, as you mentioned, it will keep things tidy. It’s also one of those nice touches that will make the cabinet uniquely yours, even though nobody but you will ever see it.
Your scallop idea seems sufficient. If you go that route, you could always use a strip of veneer to cover the exposed plies.
The scallops look like something I'd do since it is effective and quick to make, however your custom job is very thought provoking. Has a lot going for it, especially the way it will lie flush and is easy enough to make. Of course you'll need spare holes/plates for future proofing. Also has a nice medieval torture device vibe 🤠
Wonder how well it'll stay put when loaded up, might need some turn tabs, like used on picture frames that can be rotated for locking or maybe more meat that gets sunk into the case. Another thing might be keeping all the cables in place as you put the other half in place and into the recess.
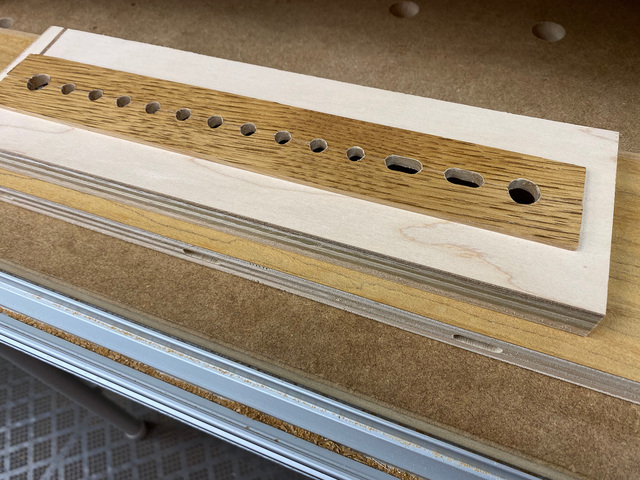
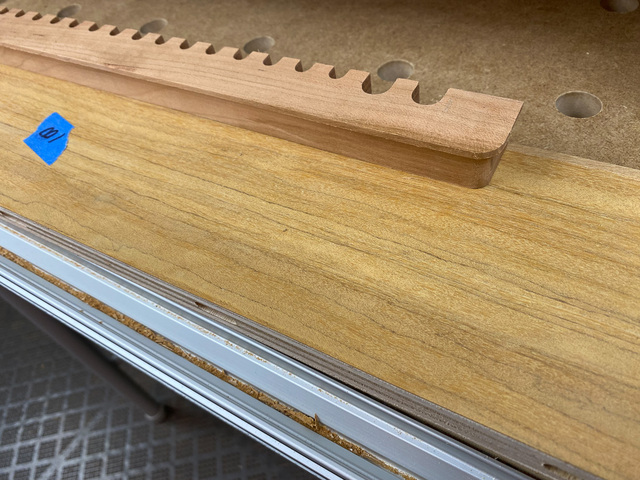
Thanks for the comments, guys. I made another design iteration that I think is an improvement. I'll make a long notch in the top of the stretcher and fill it with a same-sized hardwood panel that has vertical cable slots along the top. It will be held in place with two screws, one at each end, driven vertically down into the stretcher. I can always remove it if it needs to be modified or replaced. Once cables are in place, the lower edge of the removable back panel will keep them captive. It's a simpler, less-fussy design than the split panel, and I like that.
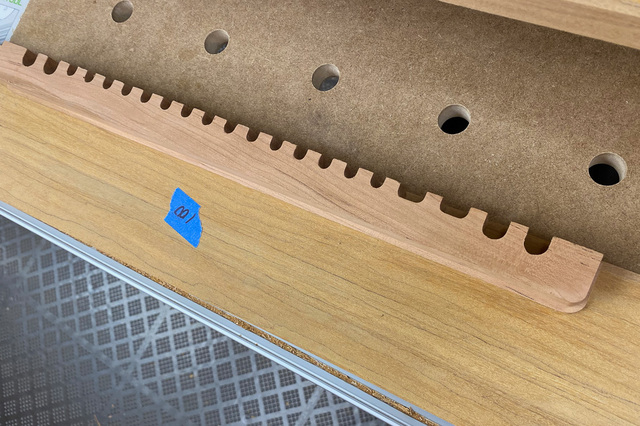
I went ahead and made it longer and with more slots than I currently need - just in case. Since it won't ordinarily be seen, I'm okay with using a piece of cherry for the insert. I'll post more photos once I have it fitted into the stretcher.
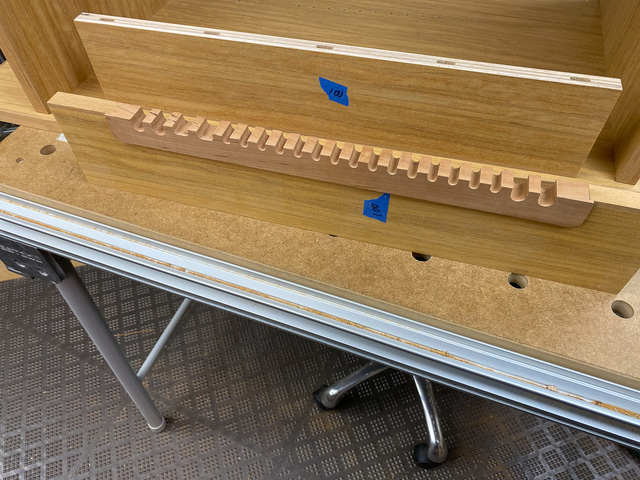
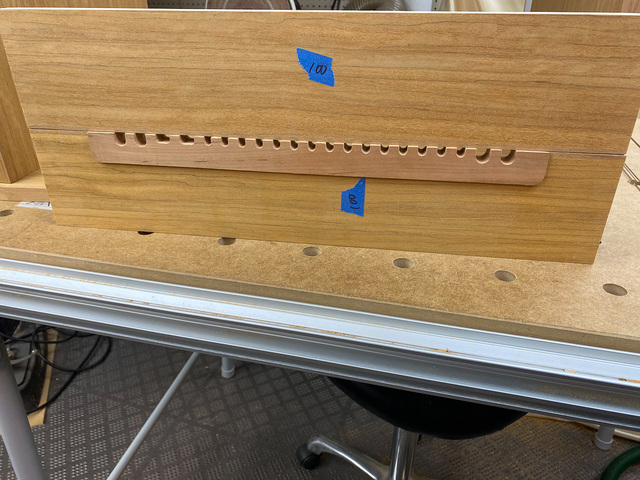
Thanks, Ron. I cut the matching notch in the lower stretcher, so I'm committed now. 😀
I used the upper stretcher to get a visual of how the cable entry insert will look like with the access panel sitting on top. I may need a matching 1/8" thick lip on the lower edge of the access panel just for symmetry. I do need to keep in mind that nobody is going to look at the back (unless I point it out).
Duck - yeah, I don't want to back myself into a corner, which is why I made the cable manifold replaceable. I could easily make an insert that is just a couple of wide slots if I need a lot of room. With the inaugural insert, I'll already have 1/3 to 1/2 again as many notches than I currently need, so I should be okay for a while.
It's not the slots I am concerned about... it's getting to the physical back of the device. Don't know about others, but with my dodgy hands, it takes an age for me to physically insert a HDMI plug... throw in an angle and it's a cask of vino chore... only to take the edge off my frustration.
If your first cut is too short... Take the second cut from the longer end... LBD
Duck - the back panel (which will rest on the cable insert) will be removable, so I'll have good access to the back of the components. But that's no reason to skip the vino. 😀
If you can get to the back, I see no issue... far too many people, including me in the past, jam their cabinet against the wall and find they have trouble accessing the back for those cables and plugs that will inevitable need replacing/changing... unless you manage to stay clear of made in China stuff (if it's at all possible nowadays).
If your first cut is too short... Take the second cut from the longer end... LBD