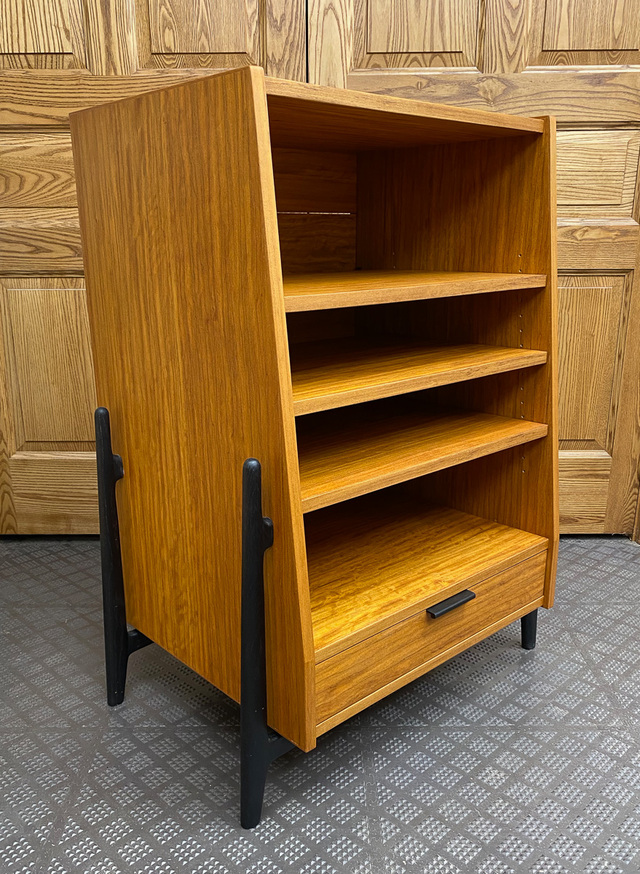
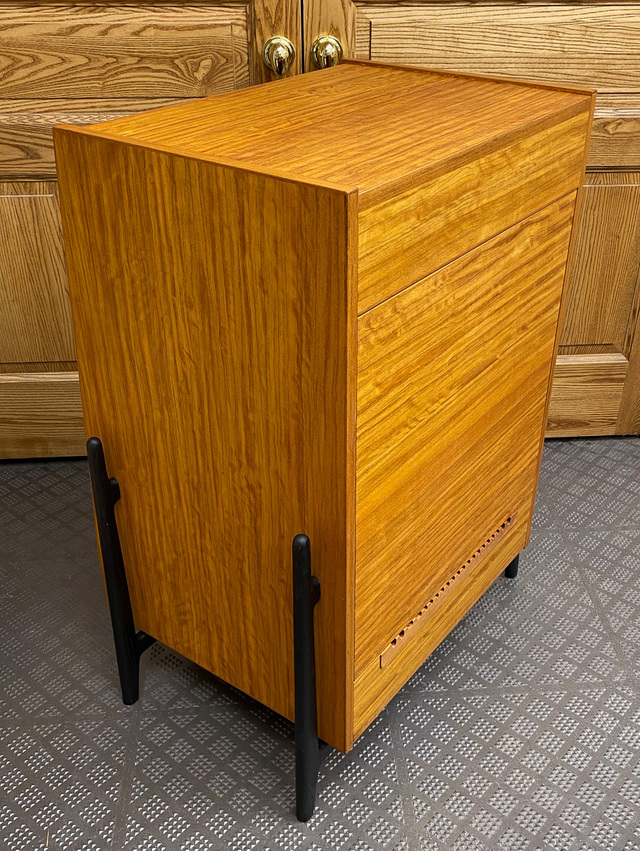
After about 2-1/2 months, the cabinet is finished and ready for use.
Media cabinet project summary:
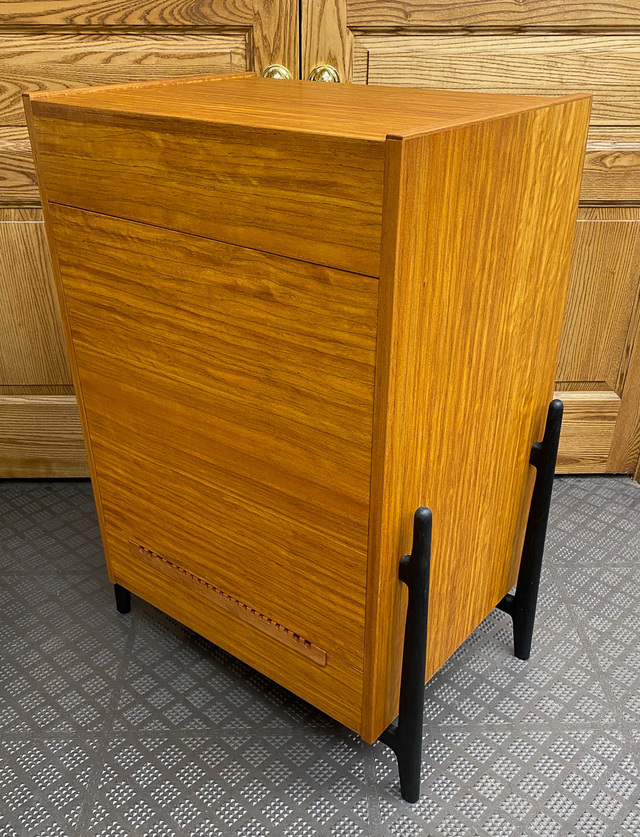
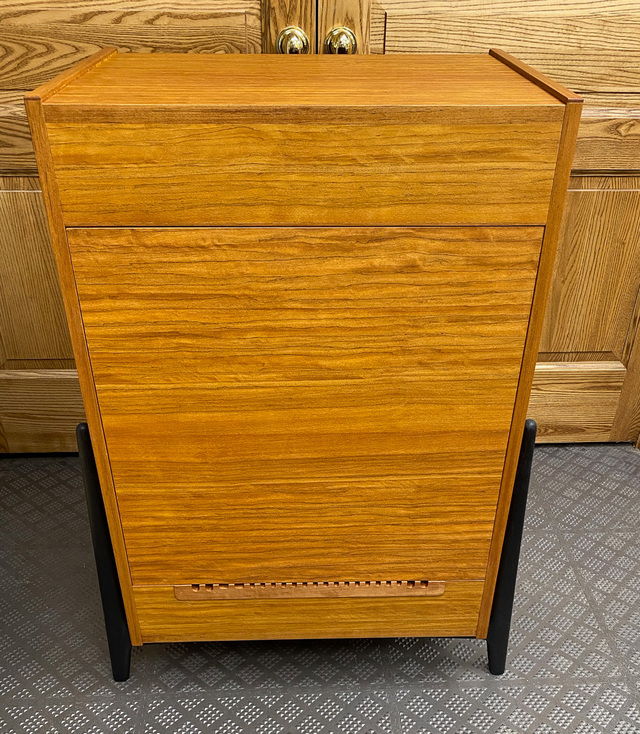
Baltic birch plywood with Izombe veneer and Izombe hardwood edging
Ebonized red oak legs and base
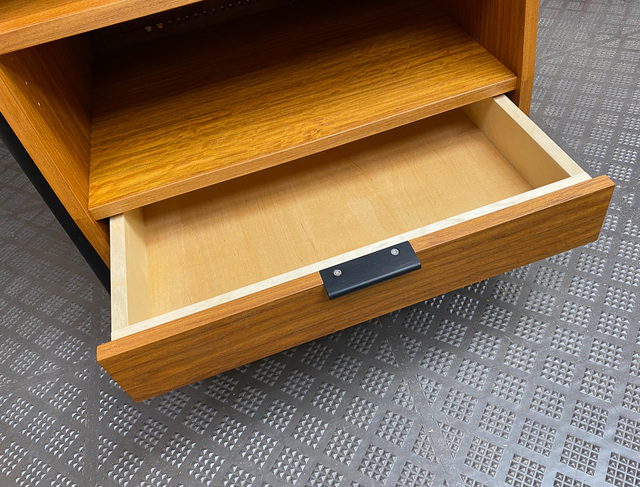
Gaboon ebony drawer pull
Cherry cable pass-through
Rubio Monocoat Pure finish
Things that worked:
Ebonizing. This was my first experience with the process, and the combination of tannic tea and iron acetate produced a nice deep black.
Angled rows of shelf pin holes that parallel the tapered edge. The detents on the underside of the shelves keep the shelf locked in place at a uniform inset from the tapered sides.
Izombe veneer. It's really striking considering its price. I like the orange/amber color that makes it a teak substitute.
Leigh jigs. Both the mortise and tenon and the dovetail jigs can be fiddly to setup, but they can produce great results.
Rubio Monocoat. I really like the ease of application of the oil/wax finishes, and the Rubio was great on the Izombe.
Things I would do differently next time:
Apply the hardwood edging first, then veneer the faces. I was reluctant to do this on the main panels because of the brittleness of the veneer. However, I did try it on the rear panel (which nobody will see) and the drawer front (which is easy to replace). I like the results better even though it exposes the veneer edges.
Plan ahead for a rabbet to receive the rear panel, at least on the top. This would eliminate the sliver of light you can see from the front. This is a small nit since the cabinet will be up against a dark wall.
Cut the two side panel tapers as a unit. I don't know why I didn't do this in the first place, but I found out late that one side was out by 1/16" at the top. This prevented the tapers from being reference edges.
Make sure Dominos are fully seated on one side of a joint before gluing the mating panel. And in case they may not be seated, when using a mallet or clamp to close the joint, try to apply the force directly over a Domino. I blew out the rear edge of the top panel because I missed a high Domino. (Fortunately, you can't see the repair)
Here are some photos of the finished product. I'll create a project post once I have it in the living room and loaded up. Thanks for following the build!
Wow, does look fantastic and the color combo really works well. Details are well thought out, only "bad" thing is the size (for all my stuff). Of course a pair of these would look excellent as well.
I'll have to check out that veneer, lots of potential!
SplinterGroup commented about 22 hours ago Wow, does look fantastic and the color combo really works well. Details are well thought out, only "bad" thing is the size (for all my stuff). Of course a pair of these would look excellent as well.
I'll have to check out that veneer, lots of potential!
Except.....
Keep thinking of this:
Splinter - thanks for the comments. Yeah, it is on the smaller side for a media cabinet. I was constrained by the narrow wall where it will live. And fortunately, I don't have too many components to house. I will admit, the wood name is unfortunate. 😀
Pottz commented about 20 hours ago wow that came out real nice ross. that veneer is just gorgeous. hell even the back is nicer that most cabinets fronts !
Thanks, Pottz! I'm really pleased with the look of the veneer. I bought a bunch, so it will show up in future projects.
Thanks, Ron. I like the two colors together, too. My only worry is how it will look surrounded by so much other wood (wall, speakers, floor). I will find out soon enough.
A beautiful media console with some nice ideas. Although I like your solution, I would not have done the row drilling parrelel at the front, but perpendicular to the bottom.
Thanks, Steve! I'm glad you enjoyed following the build.
Dutchy commented about 1 hour ago new A beautiful media console with some nice ideas. Although I like your solution, I would not have done the row drilling parrelel at the front, but perpendicular to the bottom.
Much appreciated, Dutchy! Yeah, I did ponder the shelf pin layout for a while. I had some requirements that kind of made the leaning lines of pins a necessity: Detents on the bottom of each shelf to lock them in place on the pins, identically-made shelves, and shelf front edges equally recessed from the sides regardless of position. If I had eliminated the detents, then lines of vertical shelf pins would have been just fine. (and more straightforward to make!)
Looking sharp Ross! You realy attend to both details and the piece as a whole. Have enjoyed reading along, and hope it will bring joy in your home for many years to come
"The good chair is a task one is never completely done with" Hans Wegner
Thanks, Ty. It is a big improvement over the bar cart, although that could be said by just about any substitute stand. This one does make me smile, though. 😁