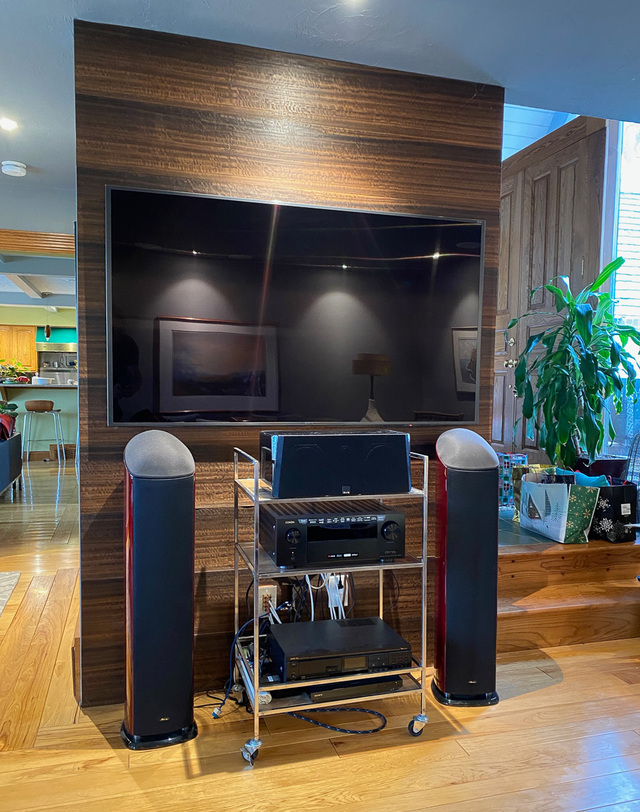
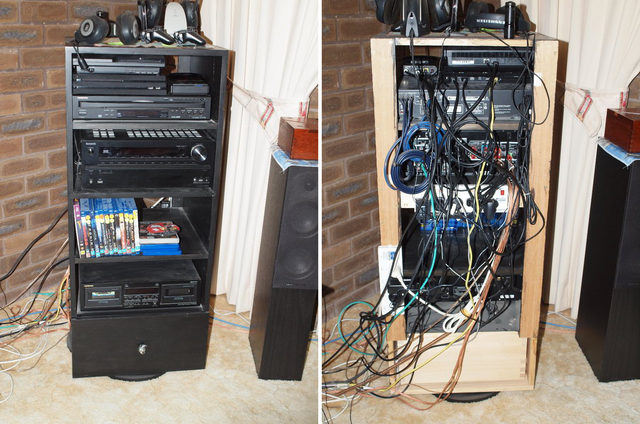
A number of years ago, I turned this narrow wall into a home for the TV, components, and speakers. I didn't have a cabinet/console that would fit the space, but I had a bar cart that would work as a stop-gap console. Five or six years later, I'm still using the bar cart, proving the old adage that there's nothing more permanent than a temporary solution.
I finally hit the pain threshold of seeing all the wires hanging out all over the place, and started working on a design for a dedicated media console. It will have a few adjustable shelves, a shallow drawer for remotes, etc., a rear cubby for a power strip, ethernet switch, wires, etc., and a removable back panel for access to connections.
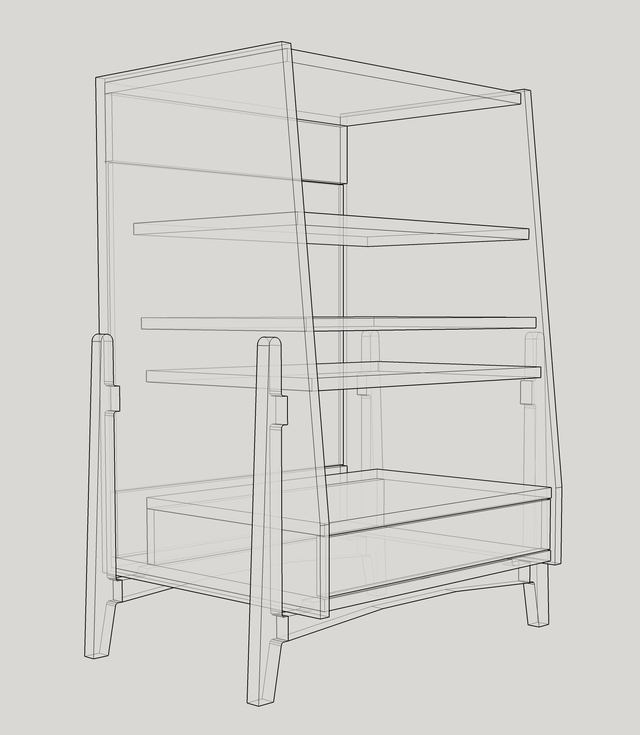
If you've seen some of my other projects, then there will be no surprise at the mid-century modern influence in the design. The sloped front was used on hutches and display cabinets. The external legs were used on some end tables and sideboards. I wanted the console to look like a piece of furniture so I have the option to re-purpose it as a bookcase sometime in the future.
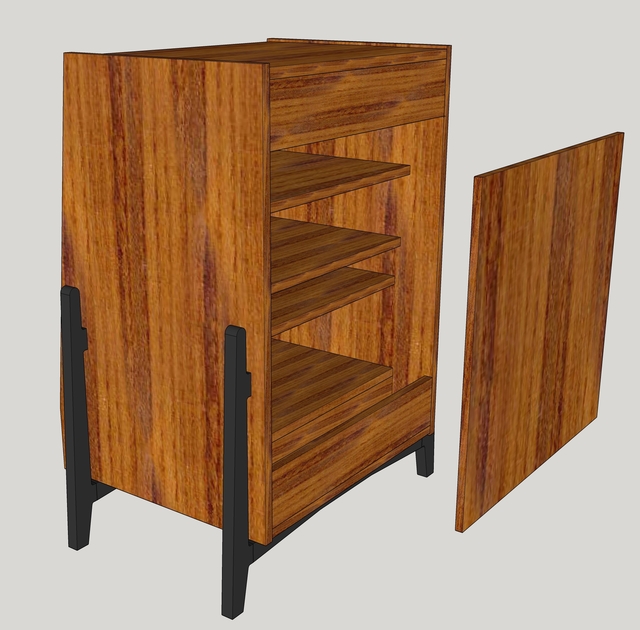
Here's a Sketchup image of roughly where I'm headed. I'm still working on the leg design, so the final version will likely be different. What's nice is that the support structure is almost its own project, so I can begin work on the casework while I'm finalizing the design for the legs.
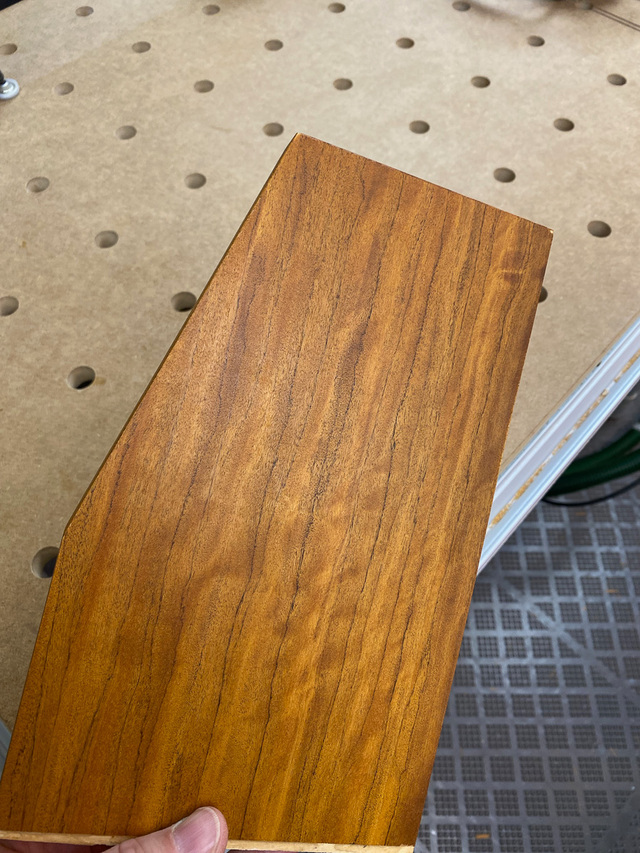
Teak was commonly used for mid-century furniture, at least for pieces built in Europe. I want to mimic the look of teak, but without the expense. My casework experience is limited, and I do not want to sharpen my skills using a load of expensive wood. Instead, I'll be using veneer over birch plywood for the casework. Even teak veneer is expensive, so I'll be using Izombe as a substitute. I had a few sheets already, and I made this test panel and finished it with Rubio Monocoate Pure. Yeah, that'll do.
I get most of my veneer from certainlywood.com, and they had a great deal on Izombe at $0.50 sqft. I bought a bunch - enough for this project and plenty extra for future projects.
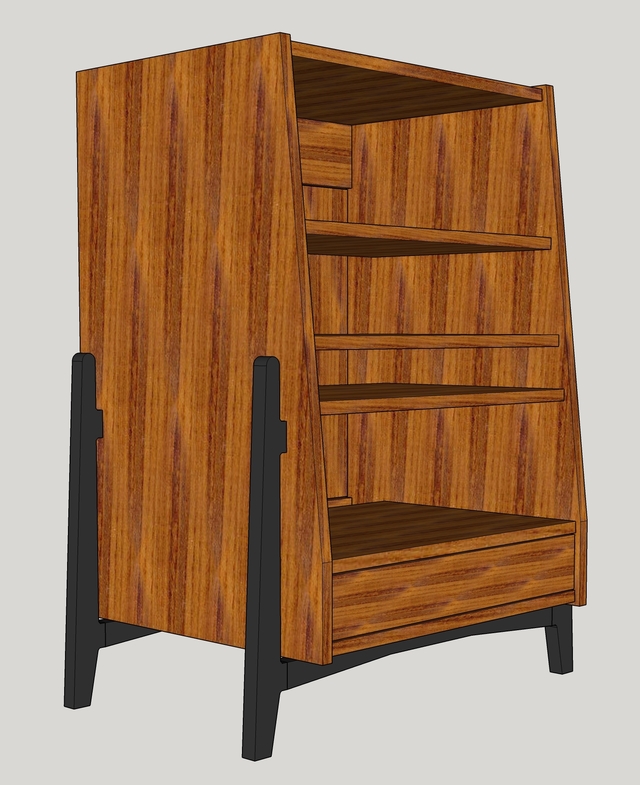
The legs will be from oak that I'll ebonize with iron acetate (something new for me). The finished console will look something like this:
This project is going to require lots of prep work - to break down the rough panels, joint and join the veneer, glue the veneer, cut panels to size, apply edging, etc. And there's some pre-prep before I can get too far into all that, which is up next.
Also a 👍 for the expected final product. You never fail to come through!
Nice looking veneer.
I feel the same way about "temporary" solutions and think it is much better to finish it and enjoy it versus starting late and being annoyed by the previous solution. Sucks realizing you could have been enjoying the proper solution for many years.
I feel the same way about "temporary" solutions and think it is much better to finish it and enjoy it versus starting late and being annoyed by the previous solution. Sucks realizing you could have been enjoying the proper solution for many years.
Thanks, Splinter. I've not mapped-out the all of the details of the design, but hopefully I'll arrive at something that is close to the general design. To avoid temporary solutions, I either need to work much faster than I do or get more time to work on projects. C'mon retirement!
Thanks, Nathan. There's a lot of wood going on in that area already with the fumed eucalyptus wall panels, rosewood speaker veneer, hickory floors. Hopefully, throwing two more species into the mix won't be too overwhelming!
I’m sure you have a plan, but now is the time to devise a cable management scheme.
Thanks, Ron. Most of the cables are exiting from the amp, which will be on the lower fixed shelf (7.2 speakers and HDMI). These will immediately exit the console and go to the wall. (I'm thinking I'll cut some scallops at the top edge of the lower rear stretcher for cables going in/out, and the removable back panel will then keep them captive while it's in place).
There aren't a lot of inputs dropping down to the amp, and my hope is that they won't be visible from the front, and I won't need any special cable management system. However, I've left enough space behind the shelves that I can retrofit some sort of insert if I find that it's needed.
Ron - I'm rethinking my stance on cable management. I do believe I'll add something after all. It may go in after the cabinet is complete, but I'll have a plan prior to glue up.
I’m guess I’m just very hung up on cable management in A/V furniture (and computer-bearing desks). I remember having to take a drill to an expensive armoire-style TV cabinet my mother-in-law bought because it had no holes between cavities for routing power and signal cables. My rule is that there must be a way to route cables from any cavity to any adjacent cavity, and from any cavity through the back panel.
Your cabinet’s removable back will make it easy to retrofit a solution if needed.
On an unrelated note, have you switched back to SketchUp from OnShape, or do you use them both depending on what you’re doing? A few months ago, I played around with Blender as a potential SU replacement, but I didn’t get very far. It seems like I could potentially model anything I needed with it, but it felt way more complicated. It does seem like it could be great for conceptual design, where precise dimensions don’t matter, or for post-modeling rendering with realistic materials and lighting. One day I’ll play around with importing and rendering SU models.
Ron - I've left space behind each shelf so that cables can be routed vertically with no trouble. What I hadn't accounted for at the beginning is a way to keep them tidy. I now have an idea for that, but it's still not clear if it would be overkill for the small number of components.
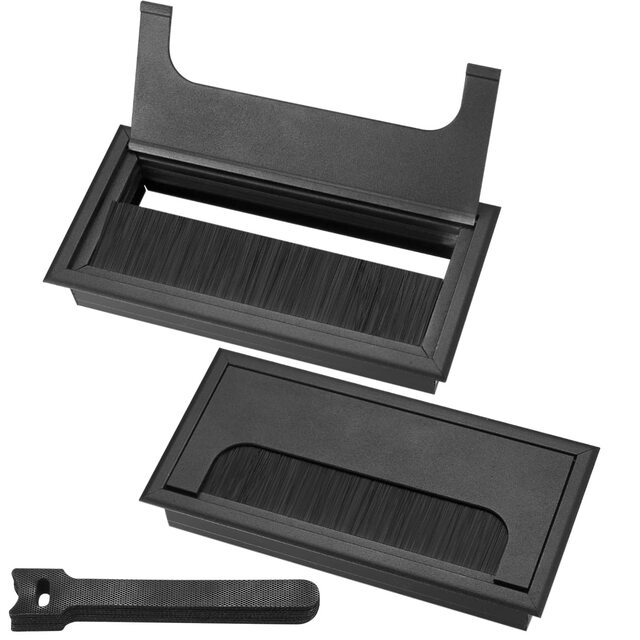
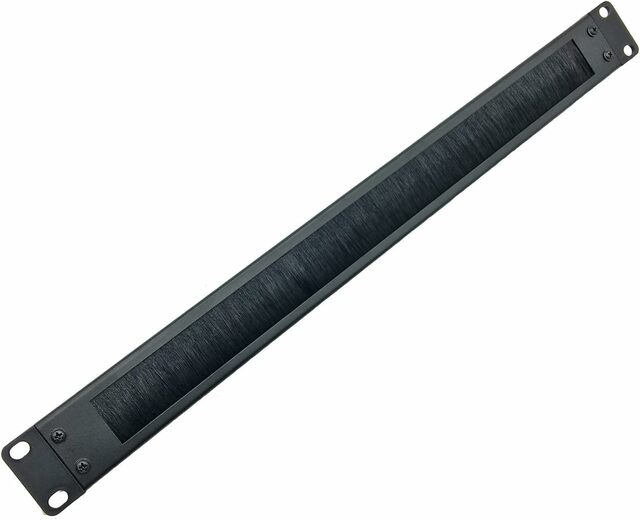
Cables will enter/exit the cabinet through the lower rear stretcher. I haven't settled on the details, but the current idea is to recess a brush panel or two. I have a set ordered to evaluate. If they're not appropriate, it's an easy Amazon return. They're a bit bulkier than I'd like, but there's some question on whether a 1u rack-mount brush panel will pass a large power cord plug. But I'm going to order one of these to check out too.
Regarding SU vs Onshape, I hop back and forth. Given my limited proficiency in both, I find that SU is better for a quick model, where Onshape is much better for refining a model, especially when curves are involved. Of course, I'm using the free version of SU 2017, so maybe it's improved since then.
For a built-in stereo and AV equipment cabinet I built. I used moveable shelves (on pins), but left the cable slots on the sides (cut away about 4" x 1" section biased toward the back). The idea was I could rout the cables to the side and then have them drop down to avoid seeing them when the cabinet is opened. The back side of this cabinet is opened to a closet on the opposite side of the wall so access to the cables is easy.
I like the hatch you show that exits through the stretcher. You certainly are limited in options with a free standing unit but if you can find a way to stash a power strip inside, it'd reduce the power cord count to just the one exiting the base.
One with good surge protection may be a little big for mounting inside. Since the unit will be against a wall, you can mount the power strip on the back.
--Nathan, TX. Hire the lazy man. He may not do as much work but that's because he will find a better way.
Splinter - I'm envious of your wiring access closet. That would open up a lot of options. I do plan to house a power strip inside - it will sit in the well just inside the lower stretcher.
Lazyman - My power strip does have surge protection and should fit okay. The wall-warts might give me some grief.
Ron - The brush panels seemed like a good idea, but after getting them in-hand, I'm not sure they're ideal for this purpose. I'll comment more in a future blog post.
Sorry, came in a tad late... haven't read the rest yet, so this is my knee jerk reaction.
Good looking proposed cabinet RL... though I like the old one (only for the wheels). After initial setup all is great, but if you're anything like me, upgrades are inevitable and then the cable exchange takes place, and we get family, neighbours and friends to help out.
Have you (or is it worth) considered a lazy-susan to get to the back of the cabinet? though a little neater.
If your first cut is too short... Take the second cut from the longer end... LBD
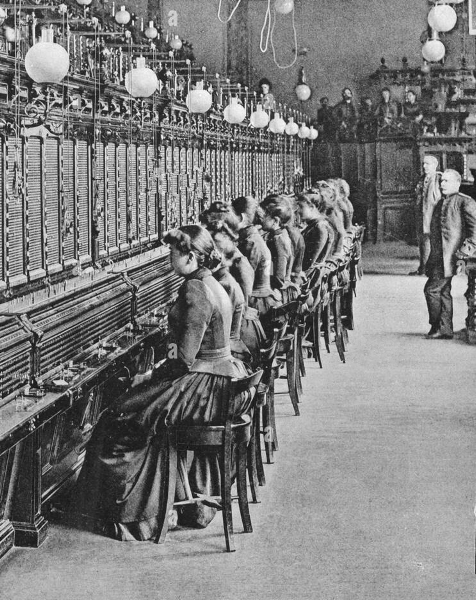
Duck - I love the old switchboard analogy. 😀 I rarely need to access the back - my list of components has settled-out, so unless one breaks or I "need" an upgrade, the cable routing will be pretty static. But, I will put leather pads on the ends of the legs, so it will slide fine on the hardwood floor if/when I do need to make a change.