Yeah, she's a single mom, in a little older style home. (1200 sq ft I think) She said she doesn't use her kitchen much, just trying to update the old golden oak cabinets that are falling apart. It's a textured dark woodgrain exterior with grey interiors. I'll post some pics tomorrow. We ordered doors which won't be here for a few more weeks yet.
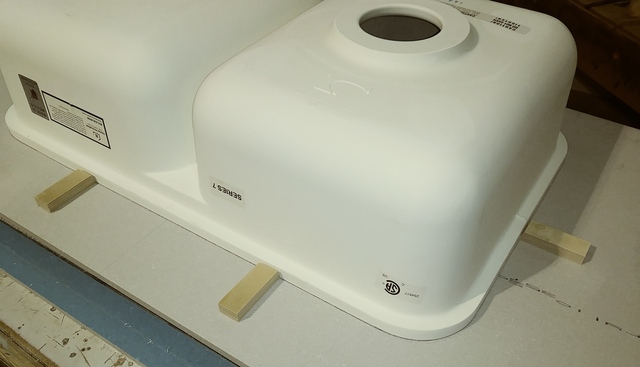
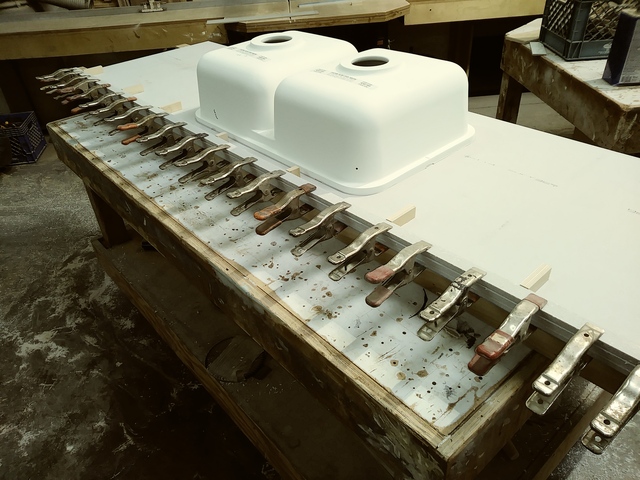
The process: Started with hot gluing blocks to keep the sink where I want it.
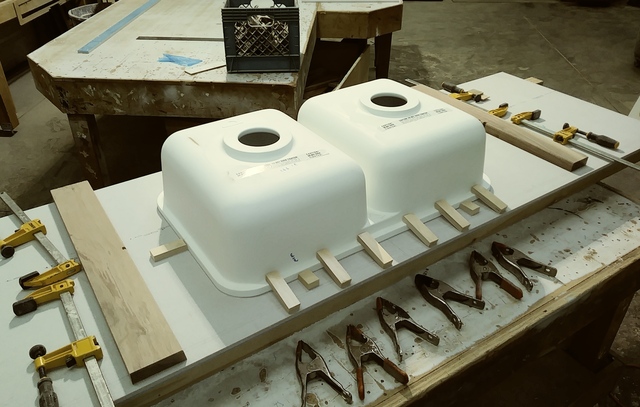
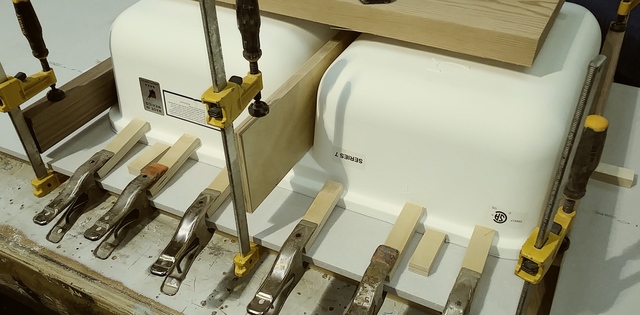
Next I prepare all the pieces parts to clamp it in place,
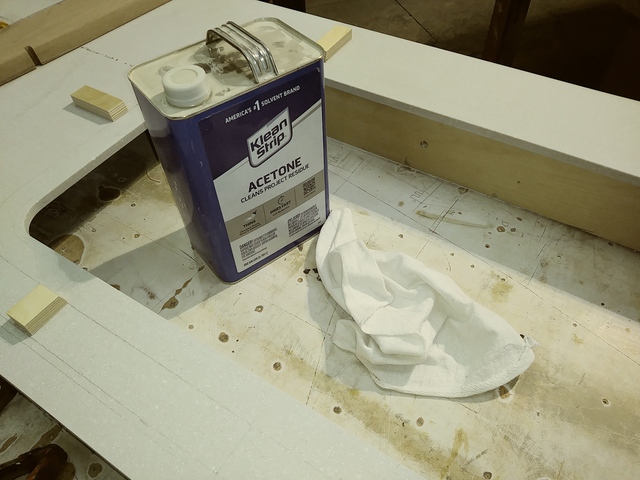
To prep the surfaces I sanded the surface with 80 grit block and cleaned up with acetone.
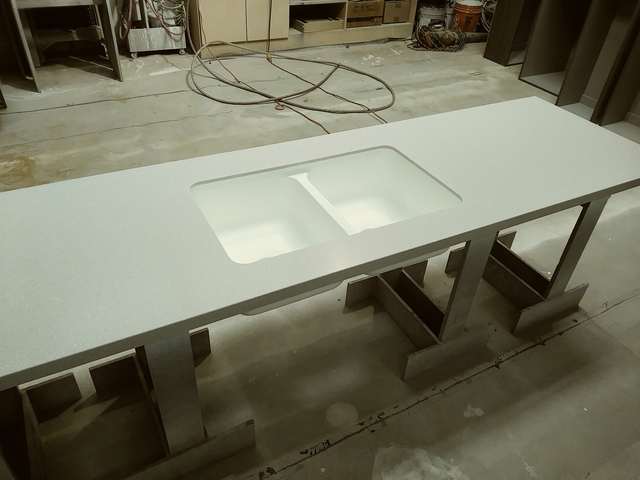
Next was to get the adhesive ready. Pulled out my old glue gun, purged the adhesive before putting on the mixing tip, then purged it again. No pictures of the adhesive being put on the sink rim, but I put a small bead on the inside hoping for minimal squeeze out, and a normal bead around the outside, then turned it upside down and put it in place and applied the clamps. I also ended up sliding some blocks underneath the side to force the top up to the sink better. I think my side boards were only applying most of the pressure to the ends. Now I wait and see, cross my fingers that the inside won't take much clean up. Once it's cured I will go on to the front build up. Material is 1/2" thick, so I will add to layers to make the front 1 1/2"
My first thought was this was a small display kitchen at the lumberyard, but I think your comment means it's her personal kitchen and you're not actually making all the cabinets from scratch??
We ordered doors which won't be here for a few more weeks yet.
That looks like some pretty clever clamping techniques! L/W
“Those who would give up essential Liberty, to purchase a little temporary Safety, deserve neither Liberty nor Safety.” Benjamin Franklin
Thanks L/W, I did build the cabinets. She gets a deal on the doors from work because they distribute their product. (And I don't have to mess with them.)
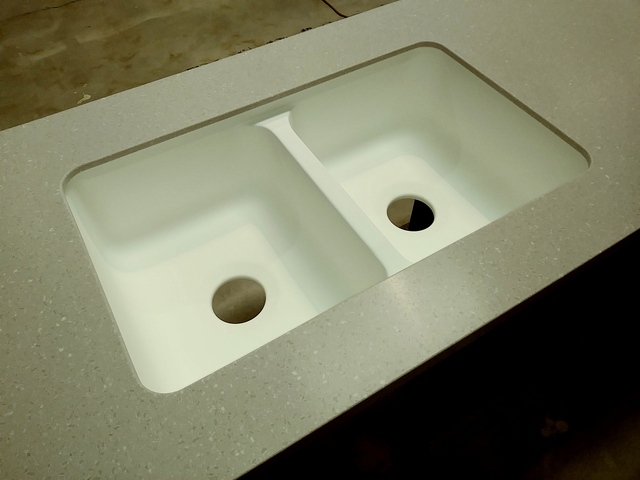
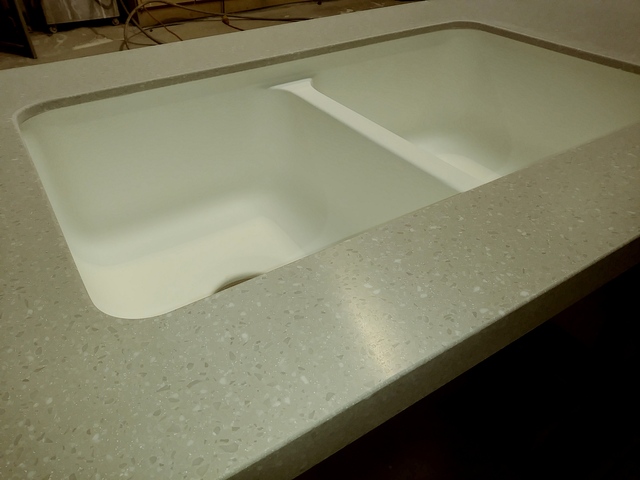
Tops just need a quick buff on the front edges and they will be done.
Thanks Mark, You always find something complimentary to say, I appreciate that. If you look at the picture with the acetone, you can see the bevel on the edge of the blocks to guide it down. (Bevel is about 3/4 of the block then flat on the end.)
Solid surface is just like wood. All the same tools and easy to do. Just harder, and makes a mess like mdf, except the particles fall to the ground quicker.
I had thought it would be more interesting, since nobody ever shows it.
Don't see to many houses use it as a counter any more. When I renovated my kitchen I couldn't wait to get rid of it. I have seen them use little pieces of stone to hold the sink onto a granite top the same way. Those inside radius corners aren't as easy as they look. Only one shot to get those right
The lumber company had 5 sheets from an old order that had been written off. She got them for 10 bucks a sheet. I'm using 2 on her job, and keeping the other 3 for myself. Maybe out of style, but new counter tops for 30 bucks sounds like a win win for me.
Ahh come on now, you're gonna use these for counter tops in your house? Maybe for the shop or the basement but the kitchen? We gotta start a gofundme to get you some stone counters?