Norman Pirollo
in over 5 years
More from Norman Pirollo
Handplaning Stop
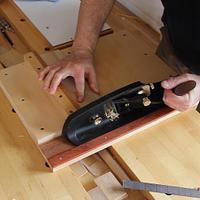
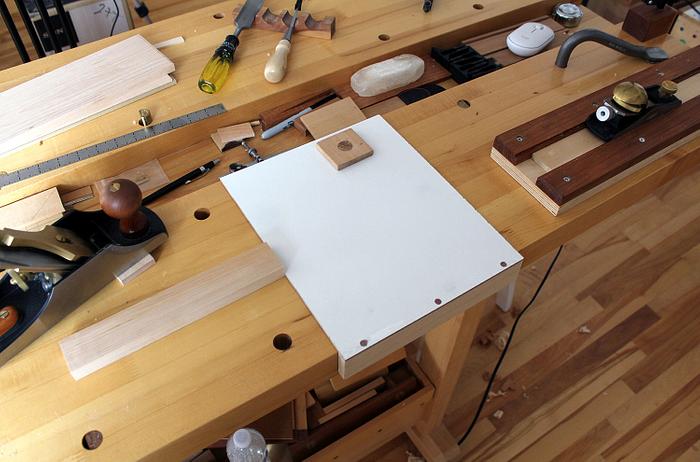
I have been experimenting with a new style of handplaning stop. I much prefer wood planing stops so there is no need to worry about the handplane sole hitting metal. The handplaning stops I currently use are exclusively of wood, Baltic Birch, or man-made material. Essentially, nothing that would damage or scratch the sole of a handplane. I also favor planing stops that are plug-in through the existing dog holes in a workbench. A design exclusive to me has one edge of the planing stop overhanging the edge of the workbench which then locks to the workbench as seen in the images. I have had success with this design over the years and applied it to this new style of thin planing stop.
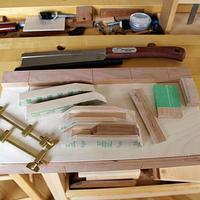
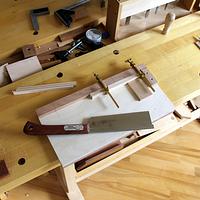
The criteria for the new handplaning stop design include the bare minimum thickness, in this case 1/8 inch thick. This is likely the thinnest wood I would handplane without resorting to a planing board or thicknessing jig. The thicknessing jig can be seen at the right in the images. The thicknessing jig works primarily with narrow pieces in the order of a maximum 1.5 in. wide.
Keeping the planing stop dead flat and secure involves a locking dowel in the upper left hand corner and the overhanging edge. Three iterations are shown with the final one the most successful. There is much force applied against a planing stop with hardwoods that are inherently hard to plane such as maple. The first two versions work best for lighter work and softer hardwoods. The final version is by far the strongest and most stable. The final version has its thickness increased to 3/16 in. to increase rigidity when planing denser, harder boards.
The first version is 1/8 in. thick melamine board with removable, locking dowel at top left with edge applied that locks to side of workbench. Fairly strong and stable but only with lighter hardwoods. It does slightly flex when handplaning with the hardest of woods such as maple. I would need to strengthen the planing stop.
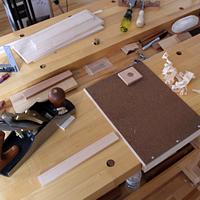
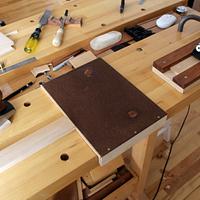
The second or middle version is 1/8 in. thick with removable, locking dowel at top left with edge applied that locks to side of workbench. The material is masonite which does flex under increased force. Fairly strong and stable but only with lighter hardwoods. Because it also flexes when handplaning with the hardest of woods such as maple, I worked on a third version. A hardwood edge has also been applied to the leading edge of the planing stop for wear.
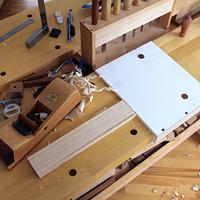
The third or final version has been increased to a 3/16 in. thickness with (2) locking dowels that attach to the workbench surface through 3/4 in. dog holes. The edge locks to the side of the workbench just the same as the earlier versions. I beefed up the thickness with very thin ply glued to the underside. This version is by far the strongest and most stable regardless of the wood I am handplaning. The protruding block at upper left has also been removed creating a cleaner, low profile. Since the thickness has been increased to 3/16 in., the 3/4 in. locking dowels have sufficient gluing area to the horizontal board.
I have added a fourth version. This is essentially the first version but with an upgraded base. I found the original base at 1/8 in. thickness was not solid enough and would flex with harder woods. A 1/16 in. Baltic Birch ply added to the base strengthened and made the assembly so much more rigid much like the 3rd version above. An extra length of dowel has also been added to lock into a dog hole. A hardwood edge has also been applied to the leading edge of the hand planing stop to keep the edge from wearing and rounding over.
The conclusion is that three attachment points are necessary to keep the planing stop strong and immovable when handplaning the hardest of hardwoods. I like that the planing stop simply plugs in to the workbench and is therefore quickly removed when no longer in use. This handplaning stop design is customized to your workbench and dog hole spacing. I like to design my own woodworking jigs and workbench accessories, and you can see how a design evolves through this series of images.
My IG: @woodskillsmag Website: www.woodskills.com
Norman Pirollo
2 Comments
Simple design but so useful.
woodworking classes, custom furniture maker
Thanks. I have made (2) now. One for each workbench.
Norman Pirollo


