


Share your craft projects
Make new craft buddies
Ask craft questions
Blog your craft journey

Ron Stewart
953 posts
and
24 followers
in over 3 years
in over 3 years
More from Ron Stewart

 - Project by Ron Stewart")


JessEm 8350 Doweling Kit Storage Box (or Drawer Insert)
")
")
")
")
")
")
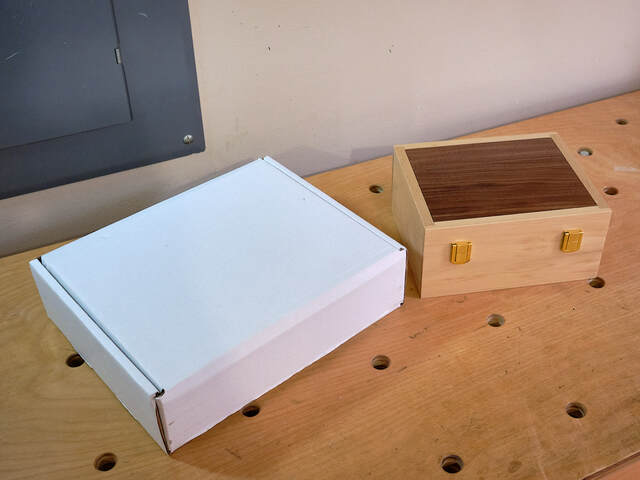
Originally posted on October 9, 2020 (LumberJocks). Since then, I seem to find a reason to use this jig on nearly every project I work on, and this box makes it very convenient.
I'm really impressed with JessEm's 8350 doweling jig. I bought the master kit earlier this year, and I've used it to glue up wide panels, attach shelves to cabinet sides, and build drawer boxes. It allows me to work faster and with more precision, and it's designed and built so well that it just feels good using it.
On the minus side, the kit does not include a useful storage container. The box it came in is well-designed for shipping, but it's very inconvenient for actually usage. (I'll show you why I say that below.) Other woodworkers have noticed the need for better storage, and there are several nice box designs on the web. Bob Penoyer has a very complete set of plans, LumberJocks member manuka documented a more compact and very attractive box, and LJer transer's review of the jig includes a photo of a box he built.
I decided it would be more fun to design my own storage box, with several goals in mind:
- Make it as compact as possible.
- Provide easy access to the jig's components.
- Store drill bits with their depth stops positioned for the dowels I use (no need to slide them to the top of the bit, etc.).
- Protect the kit's components by avoiding metal-to-metal contact.
- Make it possible to use the internals in a drawer instead of a box.
I didn't prioritize making the box strong enough for shipping or rough transport or including storage for dowels or other related materials or accessories.
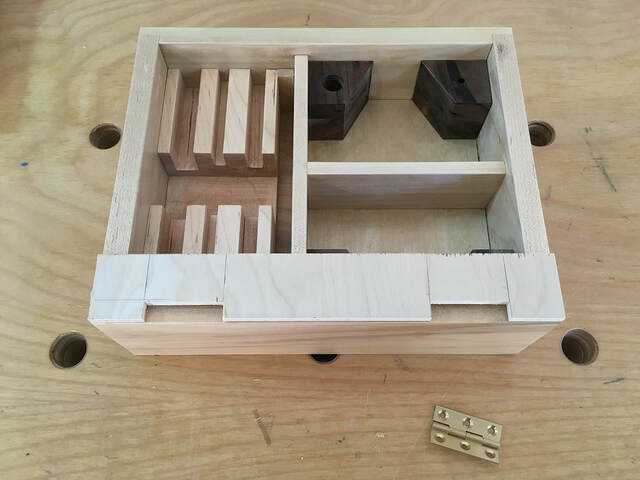
I built my box from scraps of walnut, maple, and maple plywood. It's approximately 9" long, 7- 3/8" wide, and 4-1/4" high. The internal storage parts are about 8" long, 6 3/8" wide, and 1- 15/16" high. It's finished inside and out with Arm-R-Seal.
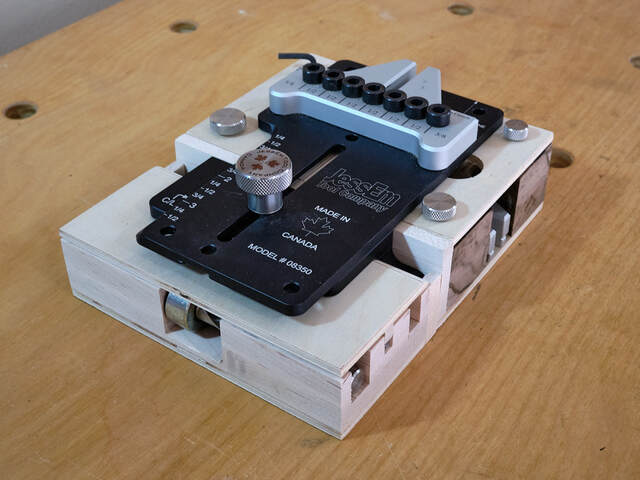
The jig's fence must be set to the 2-5/8" (or 2-1/2") position for storage. The 3/8" and 1/2" bushing guide blocks store underneath the front of the jig, and the drill bits store underneath the back. Thin covers protect the guide blocks and bits. Indexing pins and a 1/8" hex wrench fit into vertical holes in corner support blocks. The pins hold the guide block covers in place and indirectly identify the sizes of the guide blocks below.
I left enough room inside the lid to accommodate storing the jig with either the 1/4" or 3/8" guide block installed. I didn't leave room for the 1/2" block, because it's not a size I'm likely to use.
Typically, I design my projects in SketchUp before heading out to the shop. For this one, I spent a lot of time rearranging the kit's components until I found a layout I liked. Then I just started building, figuring out dimensions and angles as I went along. I did create an as-built SketchUp model, though. I haven't dimensioned it, but the model is complete and accurate.
I'll describe specific parts of the project in more detail below. Thanks for looking!
What's Wrong with the Factory Box?
Earlier, I mentioned that the factory box is good for shipping, but inconvenient for usage. Here's why.
The factory box is very sturdy and encloses three smaller boxes.
I built my box from scraps of walnut, maple, and maple plywood. It's approximately 9" long, 7- 3/8" wide, and 4-1/4" high. The internal storage parts are about 8" long, 6 3/8" wide, and 1- 15/16" high. It's finished inside and out with Arm-R-Seal.
The jig's fence must be set to the 2-5/8" (or 2-1/2") position for storage. The 3/8" and 1/2" bushing guide blocks store underneath the front of the jig, and the drill bits store underneath the back. Thin covers protect the guide blocks and bits. Indexing pins and a 1/8" hex wrench fit into vertical holes in corner support blocks. The pins hold the guide block covers in place and indirectly identify the sizes of the guide blocks below.
I left enough room inside the lid to accommodate storing the jig with either the 1/4" or 3/8" guide block installed. I didn't leave room for the 1/2" block, because it's not a size I'm likely to use.
Typically, I design my projects in SketchUp before heading out to the shop. For this one, I spent a lot of time rearranging the kit's components until I found a layout I liked. Then I just started building, figuring out dimensions and angles as I went along. I did create an as-built SketchUp model, though. I haven't dimensioned it, but the model is complete and accurate.
I'll describe specific parts of the project in more detail below. Thanks for looking!
What's Wrong with the Factory Box?
Earlier, I mentioned that the factory box is good for shipping, but inconvenient for usage. Here's why.
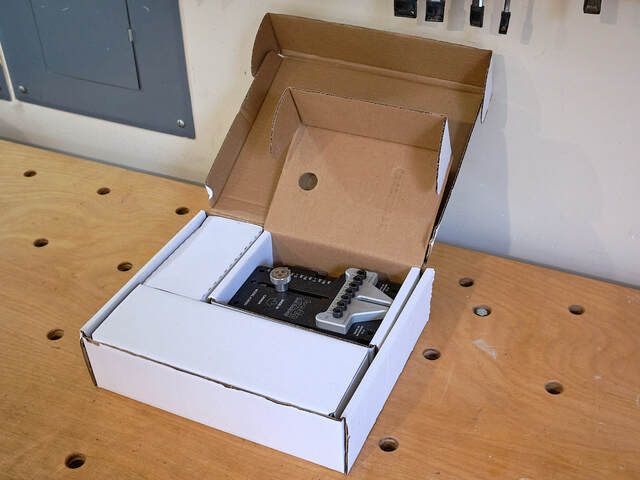
The factory box is very sturdy and encloses three smaller boxes.
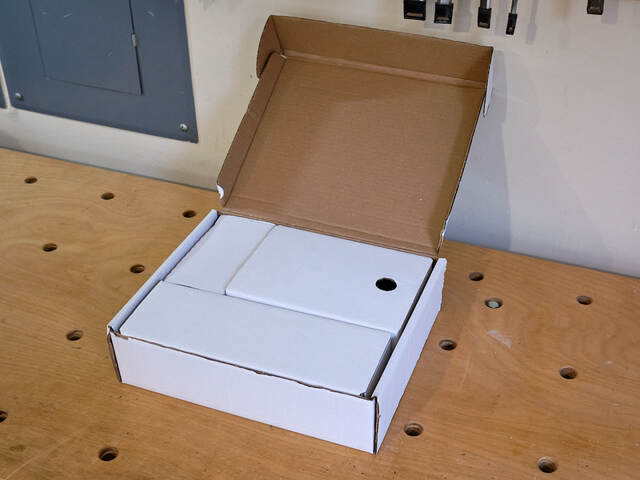
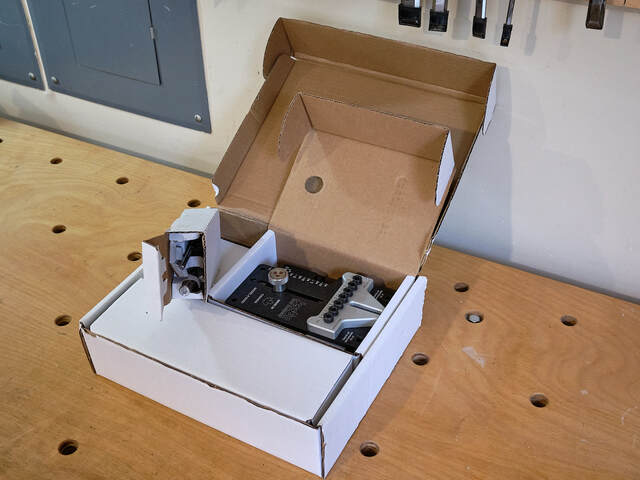
You have to remove and open one box to access the jig.
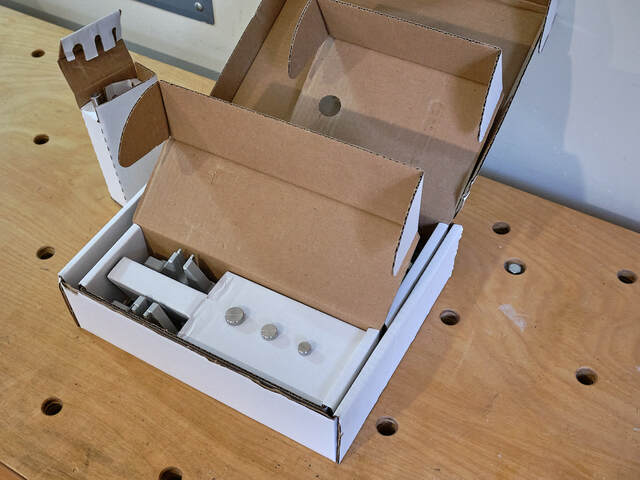
Then you have to remove and open a different box to access the drill bits.
Then, if you need an indexing pin or different sized drill guide block, you have to remove and open a third box.

Finally, after all of that, you still need to find the 1/8" hex wrench (used to set the drill bits' depth stops or swap drill guide blocks). I kept mine in a zip-lock plastic bag that came with the jig.
All of the above may sound petty, but it's a lot of work to complete before you can start using the jig. You also get to reverse the steps when you're finished.
The original box is pretty large too. The new box is considerably smaller (but admittedly a bit chunkier).
Two Mini-Projects
I approached this project as two smaller projects. The first was building the internals that actually store the jig and other components. The second was building a basic box that fit snugly around those internals.
If someone were to use this design to store the jig in a drawer, he or she would need to build just the internals (and could omit the guide block and drill bit covers).
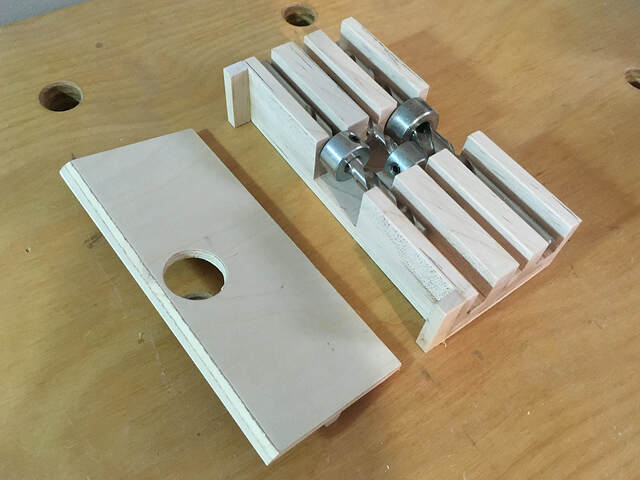
The internals are composed of two subcomponents. One holds the guide blocks, indexing pins, and wrench.
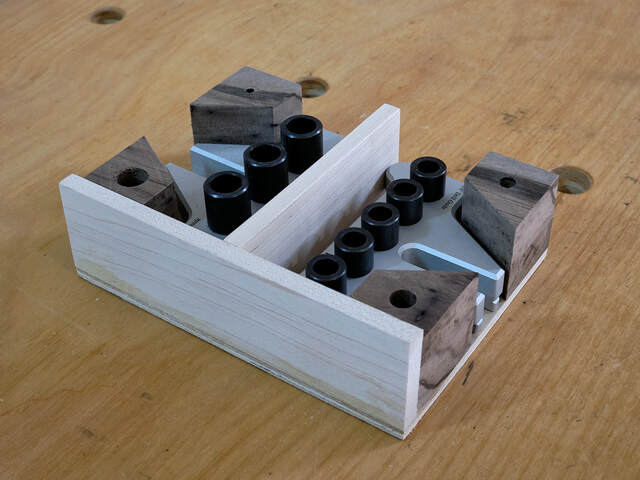
The other holds the bits with their stops mounted.
Thin separators connect these two subcomponents (and enclose the jig's fence to keep the jig in place).
Guide Block Storage
The guide block section is very simple. It's just a 1/4" plywood base with a 3/8" thick back wall and center divider, and four beveled corner blocks. The center divider also acts as a support for the front part of the jig.
I used butt joints between the base, divider, and back wall. As I mentioned in the introduction, I didn't design this storage box to tolerate rough handling, so I didn't feel the need for reinforced joints.
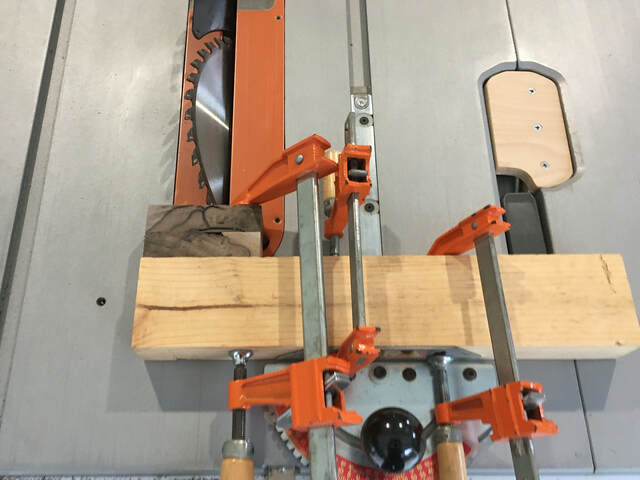
The only slightly tricky part was sawing the beveled corner blocks, which I cut from a small (4" long or so) chunk of walnut formed from two glued scraps. They required a 30-degree bevel cut, and I don't have a crosscut sled for that angle. So I just clamped the block to a makeshift fence on my miter gauge and cut the block in two.
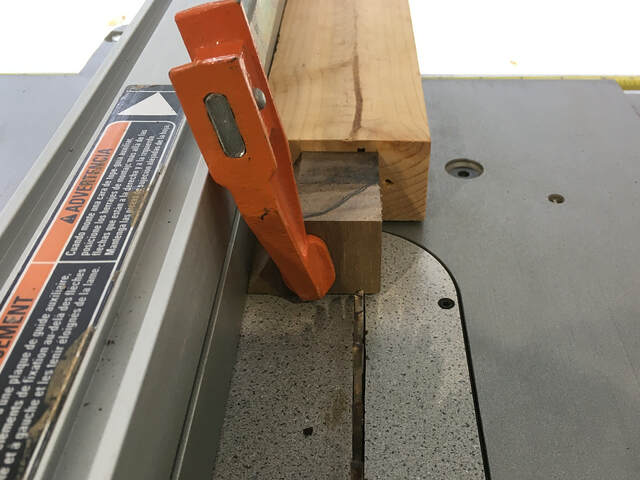
Then I had to trim the blocks to size. I used my rip fence for that, clamping the beveled blocks to a piece of scrap 2×4.
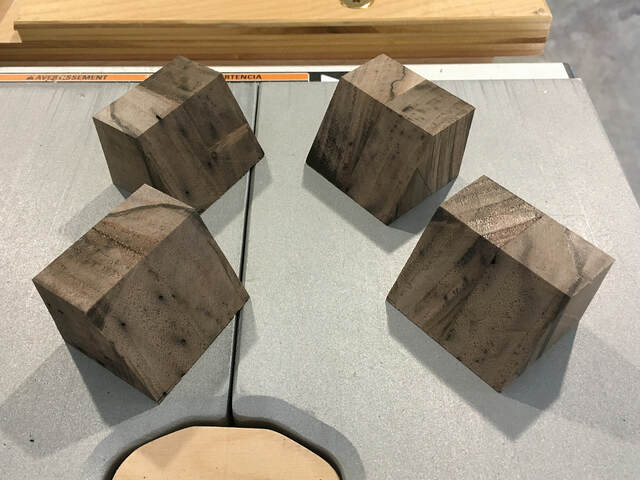
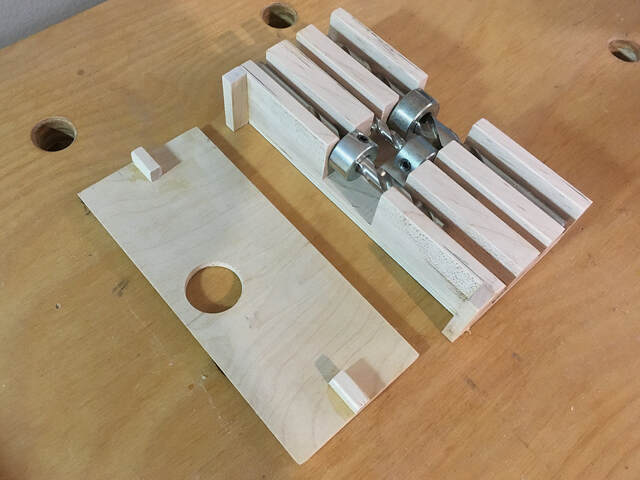
The height of the blocks is approximately 7/32" (the actual thickness of my 1/4" plywood) shorter than that of the divider and rear wall to account for the covers. When installed, the tops of the covers align with the tops of the divider and wall.
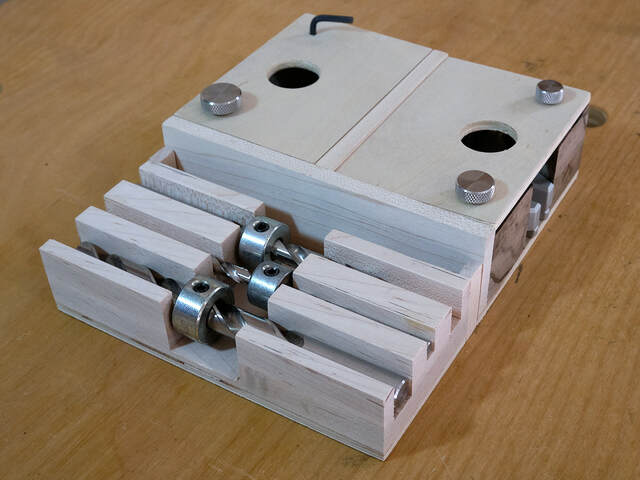
I used dowels through the base into the blocks to keep them aligned during glue up. Then I cut the covers and temporarily installed them before drilling the holes for the indexing pins and hex wrench. I used a drill press to make sure the holes were perfectly vertical. The holes go all the way through the covers, the blocks, and the base so the indexing pins insert as far as possible.
Drill Bit Storage
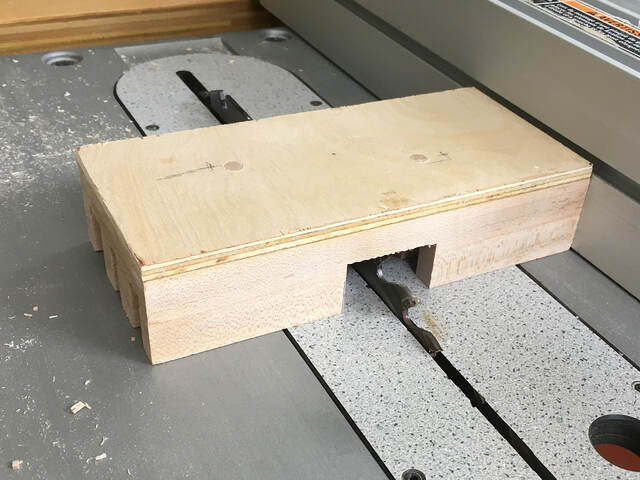
The drill bit storage block is just a 1-7/16" thick chunk of wood (a lamination of 1/2" plywood and two pieces of maple) with slots cut into it. A set of three slots holds the drill bits. A wide (1-3/8") slot running perpendicular to the bit slots provides room for the drill bit stops.
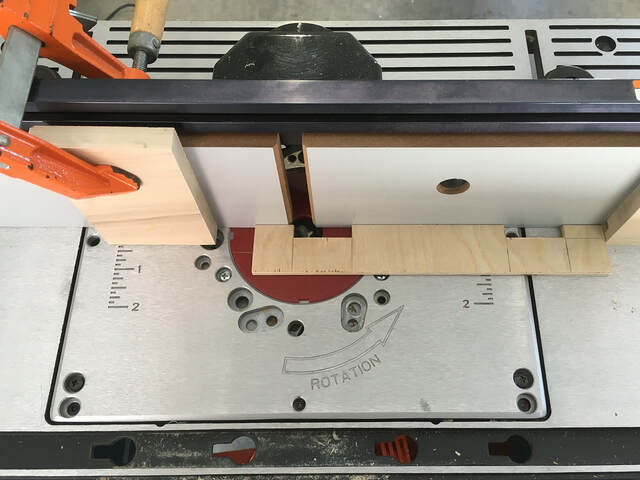
I cut the drill bit slots using my table saw and rip fence. I cut them all to the same depth (1-1/16", slightly deeper than the diameter of the 1/2" bit's depth stop).
I started by cutting both sides of all three slots.
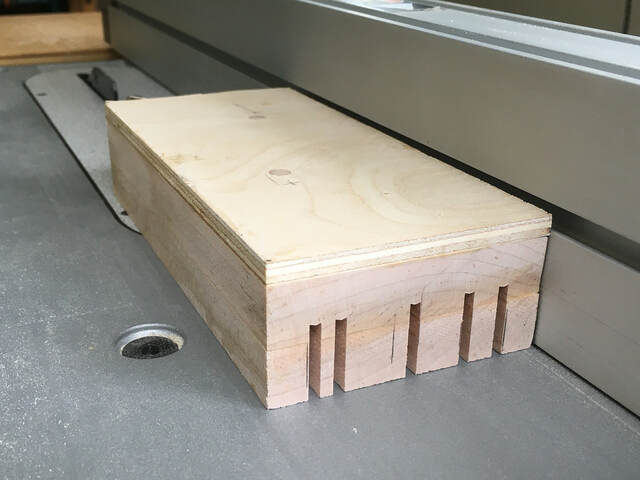
Then I removed the wood in between by progressively moving the fence.
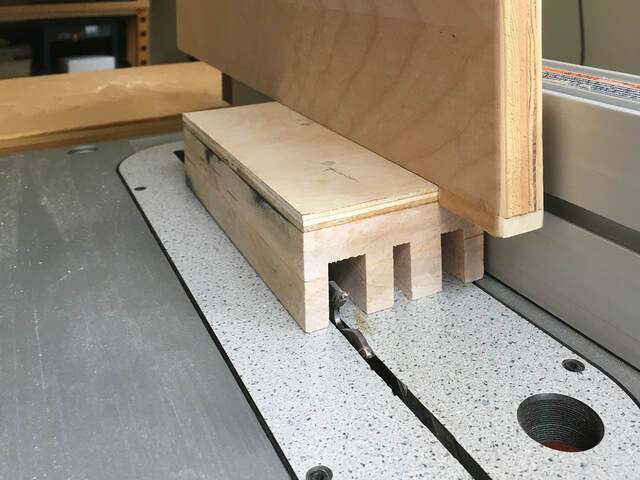
I cut the slot for the depth stops similarly (leaving the blade height as-is).

When I tested the bits, I didn't like how low the 1/4" bit sat. It's the bit I use most often, and I wanted it to be easier to access.
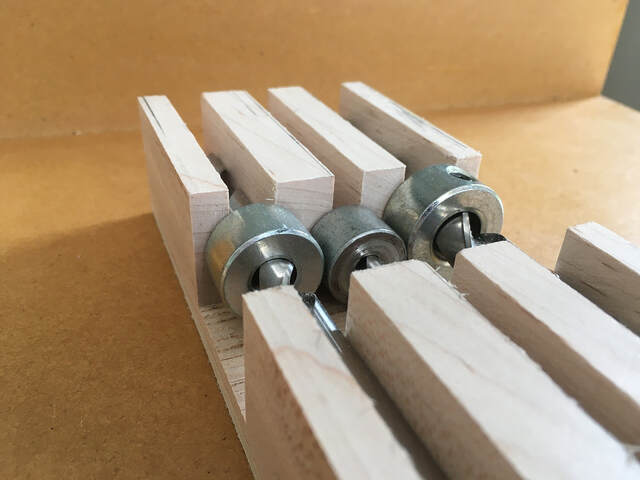
I addressed that problem by cutting pieces of scrap to lift the 1/4" and 3/8" bits so the tops of all three depth stops were at roughly the same height. That makes all the bits equally accessible.
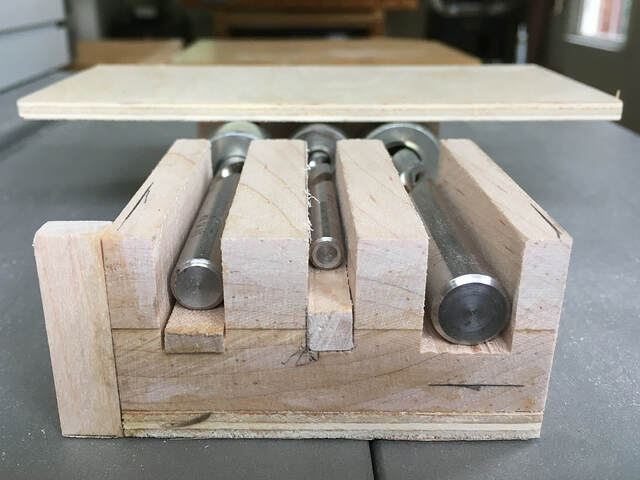
With the risers in place, all that remained was cleaning up the ridges from the cuts and making the drill bit cover.
This cover is slightly more complicated than those for the guide blocks. I had to round the front edge of the cover to conform to the fillet in the jig's fence, and I also had to position the cover's finger hole to accommodate the jig's fence adjustment bolt and nut. I also added alignment blocks/tabs to the bottom of the cover that fit into the 1/4" bit's slot and hold the cover in place.
This cover is slightly more complicated than those for the guide blocks. I had to round the front edge of the cover to conform to the fillet in the jig's fence, and I also had to position the cover's finger hole to accommodate the jig's fence adjustment bolt and nut. I also added alignment blocks/tabs to the bottom of the cover that fit into the 1/4" bit's slot and hold the cover in place.
Note that this is the only place I didn't meet my "no metal-to-metal contact" goal. When stowing the jig, I have to make sure the 3/8" bit's depth stop is shifted to one side or the other to stay out of the way of the jig's bolt and nut, and there's no way to prevent the stop and nut from touching. I doubt this will cause any problems, though.
The Storage Box
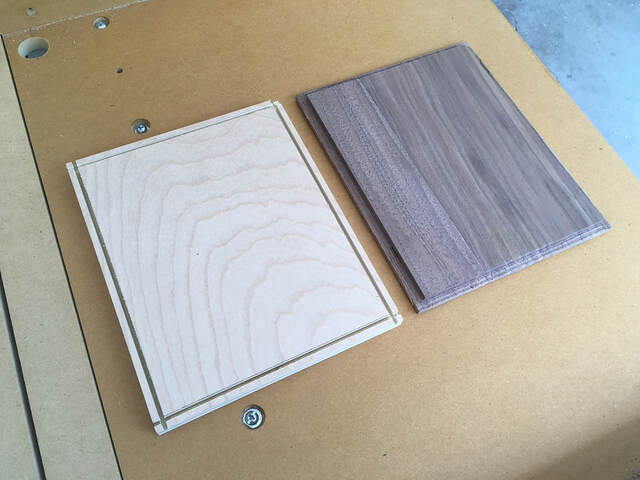
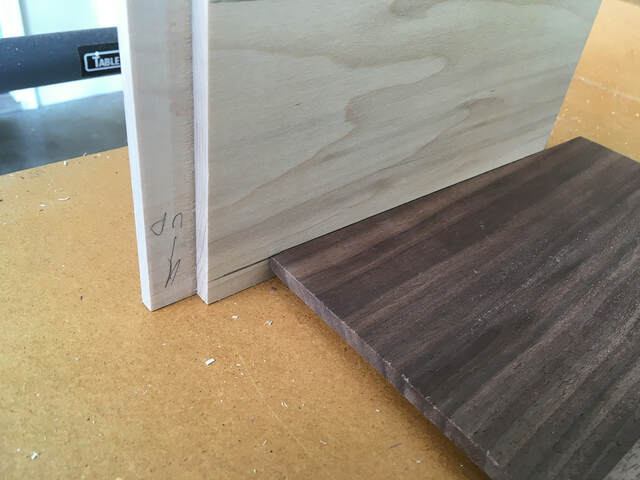
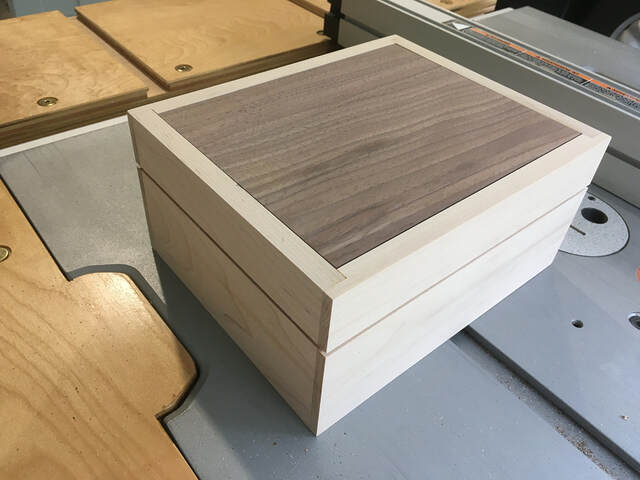
The box is just a basic box with inset floating panels (3/8" thick walnut on the top, 1/2" birch plywood on the bottom). I used rabbet joints at the corners for added strength.
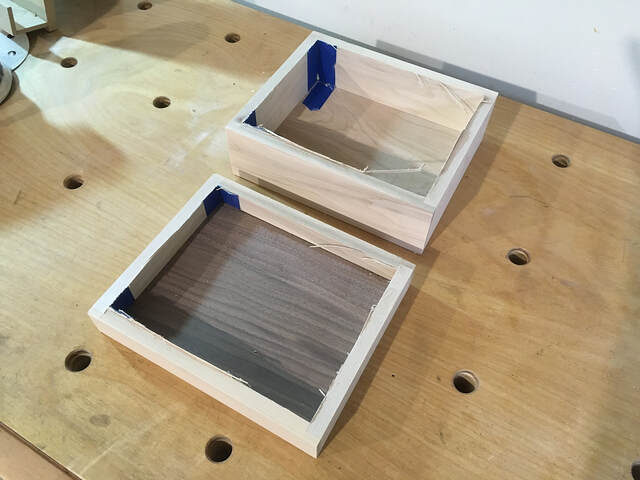
The top and bottom panels have a rabbet on all four edges. Here, I've finished the rabbets in the top and started the ones in the bottom.
I used the rabbets to mark the slots in the sides, which I cut with my table saw and crosscut sled.
I glued the box together and cut off the lid afterward. To do this, I set the blade to penetrate nearly all the way through the sides.
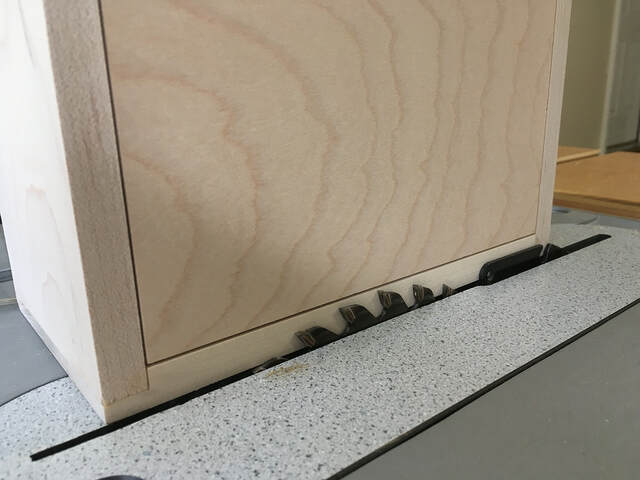
I ran all four sides through the saw.
I finished cutting off the lid with a hand saw.
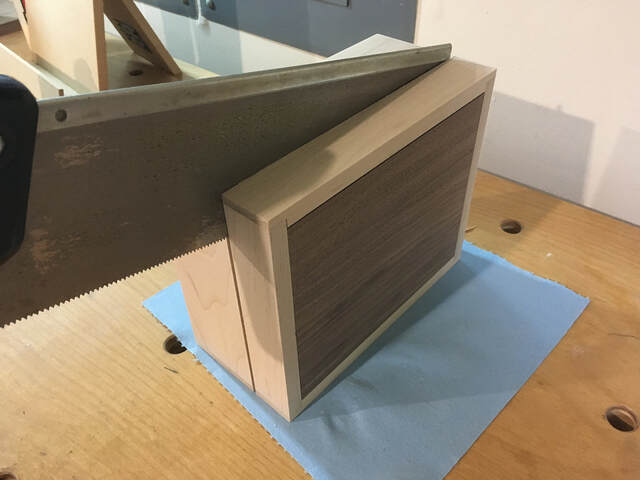
That left a small amount of material that I removed easily with a chisel and sandpaper.
I applied finish to the box before mounting the hinges and latches--just a few coats of Arm-R-Seal. I also finished the inside, applying the poly with a disposable brush.
For this box, I used butt hinges. To mount them, I made a story stick and used it to set up my router table fence and stop blocks. Then I cleaned up the mortises' corners with a chisel.
I cut my initial mortises too shallow, so the box wouldn't close. I overcompensated and deepened them a bit too much, so I added shims cut from a cereal box until the lid closed tightly. No one will ever see them.
After that, I installed the latches, which didn't require mortises, and the box was finished.
And Now, for Something Completely Different (for you 3D Printers)...
I met a guy on Reddit who created an STL file (of the insert only) from my design so people can 3D print it instead of building it out of wood. That may be of interest to some of you, so here's a link to his post at Maker World. That's pretty cool...
20 Comments

i definite improvement from the cardboard box it came in. nice organization.
working with my hands is a joy,it gives me a sense of fulfillment,somthing so many seek and so few find.-SAM MALOOF.

Ron, great engineering and execution. Your box elevates tool removal and replacement to a ceremony.

Great write up Ron! Lots of storage boxes on here as of late, I love it! Very nicely executed. Got me thinking about a couple boxes I need to build. 👍🏼
Ryan/// ~sigh~ I blew up another bowl. Moke told me "I made the inside bigger than the outside".
Thank you, guys. I appreciate the comments.

Neat, clean well designed storage box., Great job.
-- Soli Deo gloria! ( To God alone be the Glory)

Great storage solution and so much better that the original box. Well done.
Main Street to the Mountains
I've got one of these doweling tools. Your project is a great inspiration!
Thanks sigung, and welcome to the site! (And thanks also to Eric and oldrivers.)

A nice box for a nice tool.
I'm just adding a note here to say I added a short section at the very end of the project description that contains a link to a 3D-printable adaptation of this project (the insert part, not the box).

Real nice storage box- custom made to fit all the pieces!!!!!!!!!!!!!!
Cheers, Jim ........................ Variety is the spice of life...............Learn something new every day
Thanks, Jim. I’ve been pleased with how well it has worked out.

I missed this previously.
Another well-thought-out and designed project. And nice to have this make your future projects more efficient as well.
Another well-thought-out and designed project. And nice to have this make your future projects more efficient as well.
Thanks, Barb. And it uses a bit of walnut… 😁
Great project, write up, and pics. Well executed.
Jeff

Awesome pic post, well done.
And it uses a bit of walnut…
That's always a good idea 😉
Thanks, Jeff and George. And I agree, Barb.

Function and form!
Superb work Ron!
Superb work Ron!
Thanks, Splint. Much appreciated.
More from Ron Stewart