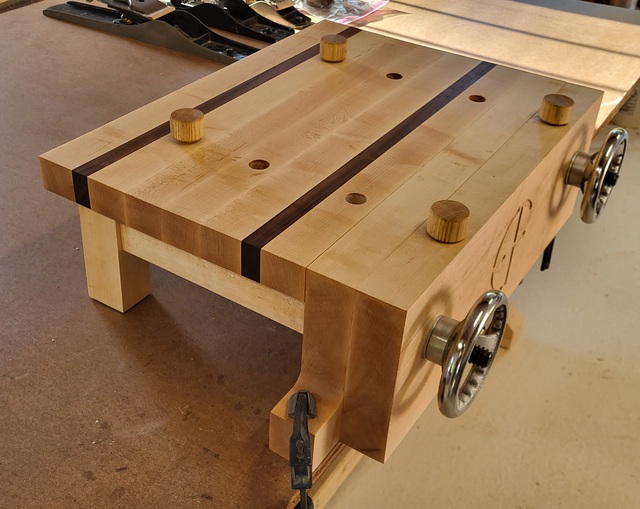
My version of a Moxon Benchtop Bench, made from 8/4 Hard Rock Maple, 4/4 Hard Rock Maple and 4/4 Walnut. Ash was used for the Dog Pins. The top surface including the front chop is 22" x 17" x 7-1/4" high. the dog holes are on a 12" center. The hardware is from WindRiver.
I needed a good woodworking vise so this is my solution. All of the lumber was rough cut edges, with the wide surfaces somewhat smooth. Had to true up an edge with a hand plane prior to cutting down to size.
I milled up the top blanks by ripping at 1-5/8" then ran through the planer to remove saw marks and flipped the 8/4 stock 90 degrees so each strip is 2" wide. Also added the 4/4 Walnut as accent strips in the top. I used the full 8/4 stock for both the front and rear chops. Also the rear legs.
Prior to gluing the top together I drilled the dog holes with a fostner bit, using stop blocks on the drill press. So much easier. And while I was at it I drilled the holes for the hardware in the chops.
The top was glued up in stages, to prevent sliding to much. After getting two halfs glued up it was off the the thickness planner the shave a tad bit off each side. Then glue the last joint in the center, followed by the rear chop.
The aprons are 4/4 with a sliding dovetail which fits into the legs, the front of the side aprons are a standard tenon. (No pin yet, may have to install a few down the road, need to turn some small ones out of Walnut.
I had to take a break and make a few accessories for the table saw. A auxiliary fence which made it higher. A tenon jig, first time making tenons on this saw. And extended the miter gauge with a stop block.
The legs are attached to the top by means of a sliding dovetail. Wanted to allow for movement during the weather changes.
Front tenon an mortise Note the hexagon mortise to secure the nuts for the hardware.
Glue up was just a small puzzle to assemble, and had to work fast. First was the put the aprons into the legs then slide the assembly into the top which included inserting the tenons into the front chop. There is no glue on the top of the aprons.
I needed to fire up the lathe to make a set of Dog Pins, I chose Ash for those. A simple turning. I may change the material down the road. Not fond of the dark streaks after the finish.
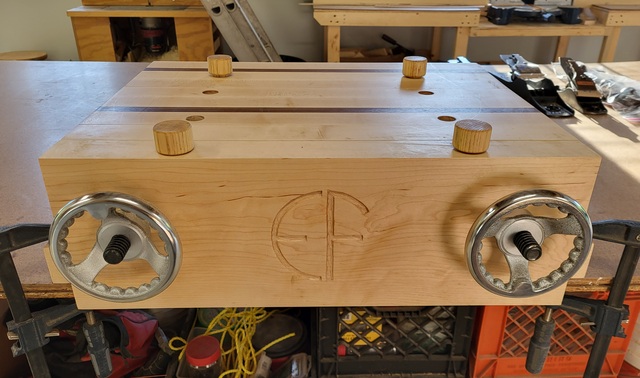
The last bit was to carve my makers mark in the face of the front chop. I even used the bench to clamp the chop down for carving.
Every thing was finished with Natural Danish Oil, nothing was finished between the chops. Still need to find some chubber or a simular product to glue to the inside of the chops. I will probably have to recoat the finish every now an then. But the grains stood nicely.
Overall, very happy with the project. And it's already been in use, has a good grip.
Works great for my uses. Trying to migrate things over, and having issues with the photos and it appears that I have lost some of them on the PC, Arrrrr....
Cool build Lofty. What's the travel/opening of the vise? Unfortunatelly I could probably buy 10 Fe$tool items for the cost of that hardware here in Australia. Just browsing the internet for one saved me the purchase for the 'peckers tool.
The "mm" is a neat finish. Have you considered making a routing template for it? FAIW, distance inhibits, but a local laser service could make a perfect/smooth template.
I may change the material down the road. Not fond of the dark streaks after the finish.
You'll need a good parting tool for that exercise.
If your first cut is too short... Take the second cut from the longer end... LBD
Nice build Eric. It has a lot of what I am putting into my newest Moxobench, I call it Frankenstein. I really think for most "blended" woodworkers a solid utility table to do layout, assembly and whatnot is the most practical build. Then adding a Moxo on top, you can lift up that handtool work so it's right in your face, no more bending over and ruining your back at one of knuckle dragging height. Your looks substantial enough to even do a bit of hand planning, provided you anchored it well to your work table.
Thanks Ross, I was a decent build project, I used a hardware kit from WindRiver.
Thanks LBD, this one has about 3" travel which is good enough for my uses. A laser would be nice, but I'll stick to carving the maker's mark.
Thanks George, It is nice to raise the work from the table height, and it is clamped down to the main bench which is a 4' x 8' sheet on top of the base frame. I can use the hand planes with it stock up to about 3' so far.
Petey, thanks. It was actually a nice build and I enjoyed building it.
Barb, thanks. As for using, yes, I enjoy using it and not always for a vise. I use it as a small desk at times and to set tools on. It is a at great height for me.
That is a great looking vice on bench. This site is always triggering my de ja vue. Have I seen and commented on this before? Then I shrug my shoulders and thank... Does it matter? I enjoy seeing them whether I've seen them before or not. 😂
Swirt, maybe you did. I am gradually bringing things over. And it has been like Christmas seeing projects again or ones that I have missed in the past. Also, the new one, gives me new ideas, and I can collect them again!!


 - Project by Eric - the \"Loft\"")