Designed to magnetically attach to your refrigerator door and also capture the bottle cap after opening.
I've made a few generations of these over the years, always trying to improve the magnetic capturing ability while reducing the quantity of magnets as they make up the largest part of the material expenses (I sell these).
The body
I've tried three basic designs (shown in the intro photos) About 10"x 5"
Laminated/striped bread board style
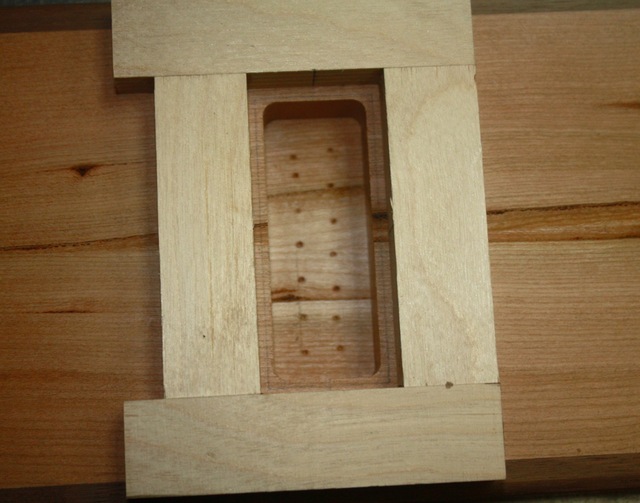
Framed body
Framed body with rounded ends
Each has its challenges but variety is the spice of life (note: spice is not a variety of beer, EVER)
The magnets
You can always just inset a honking big magnet in the center that will hold it to your refrigerator door and capture the caps, but that'll run $30+ bucks right there.
I use smaller magnets, either stacked or in other formations. If you don't want to attach this to your fridge, you can skip this step and just use screws or whatever is appropriate.
For the best grip with the fewest magnets, you need more at the top than at the bottom. The torque from un-capping pulls at the top .
I create a recess for whatever magnet I will use and secure it with a flooding pour of epoxy. A (waxed) metal strip is used to keep the magnets flush with the back while the epoxy dries.
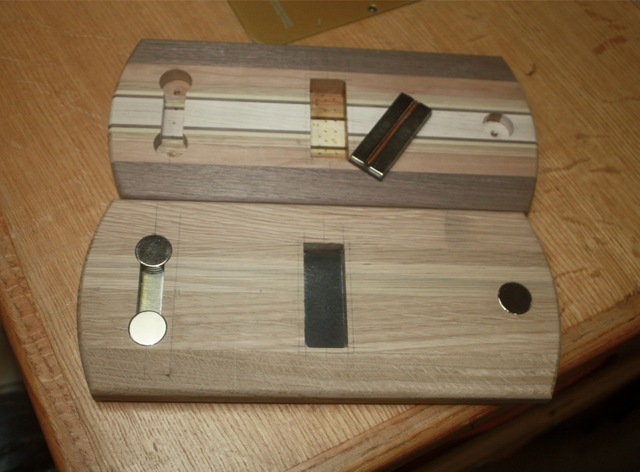
These are two triple stacks of 3/4" x 1/8" discs. To maximize the attraction, a metal plate is installed underneath the stacks that joins the two magnetically together.
The cap capture magnet is set up the same way except it needs to be a close to the front face as possible. I drill a recess with a forester bit that has the center "nib" ground away so it doesn't poke through. To save time with rectangular magnets that need a bigger space, I use a router template and mortice bit to clean the area out.
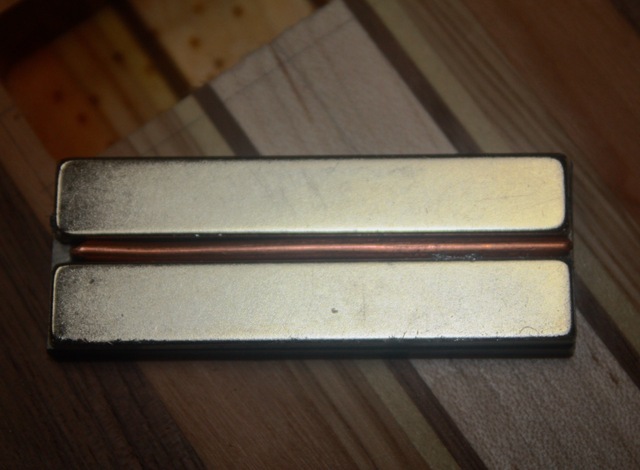
Currently the "best" deal I have found for magnets are these 60mmx10mm magnets. I stick them to a 1" wide piece of 1/8" steel strap.
The copper wire is needed to keep them separated so they don't magnetically "short out". These are stacks of two's
Same deal, held in with a pour of epoxy.
You can see the top pair and single bottom stack. Best way to pour the epoxy for the cap capture is lay the wood on the table saw face down, add some epoxy, then lay the pair of rectangular magnets, magnet side down, into the recess. This holds the magnets toward the face where they are needed. Top off the cavity with epoxy.
Recently I have begun using the same rectangles for the top and cap positions and the discs for the bottom.
I used a poplar body and veneered the face off some of these (require a frame to hide the sides). Nice thing about this is I install the cap magnets from the front instead, leveling them as I did with a waxed metal strip just like the top magnet. I'll then apply the veneer giving the least possible gap between the magnet and the bottle cap.
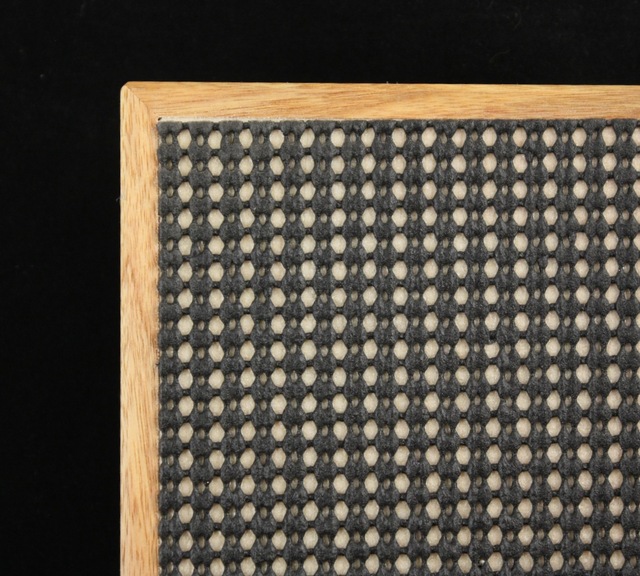
For the back, to help protect the fridge door and hide the epoxy work, I use the foam mesh drawer liner attacked with 3M77 spray adhesive
It compresses over time and keeps the opener from sliding around on the fridge.
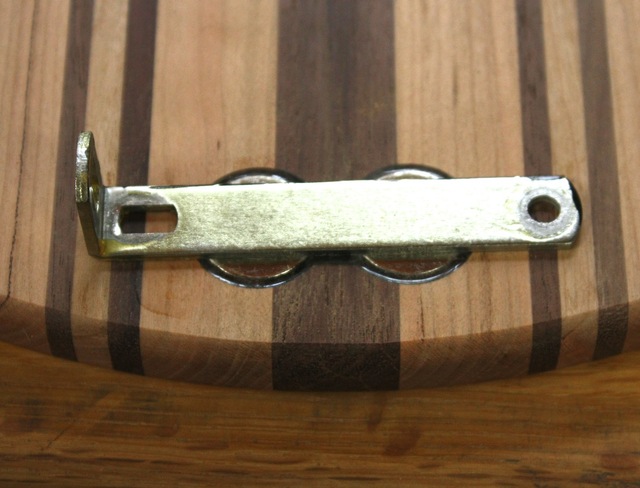
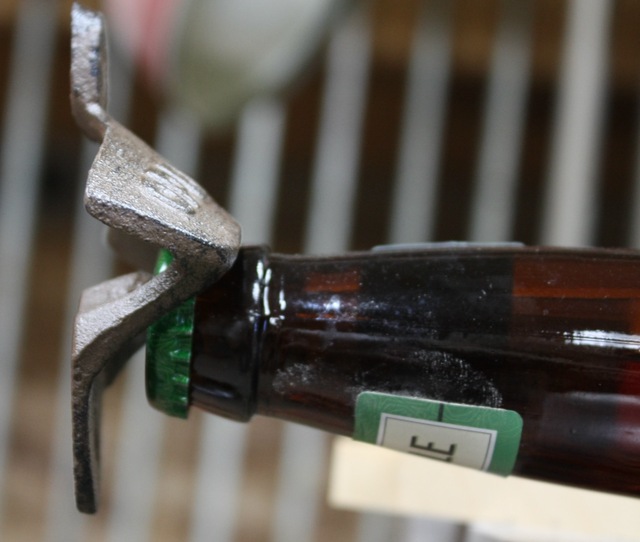
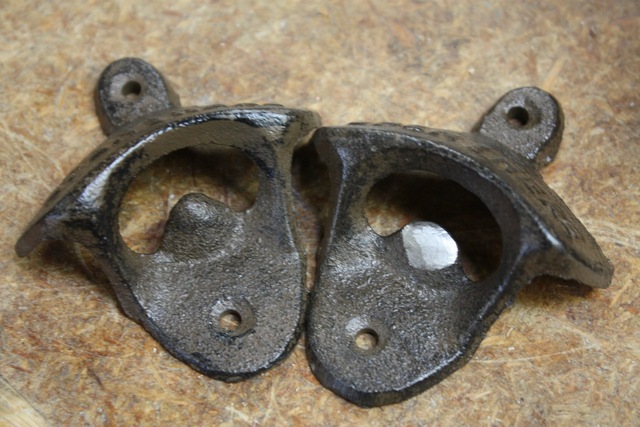
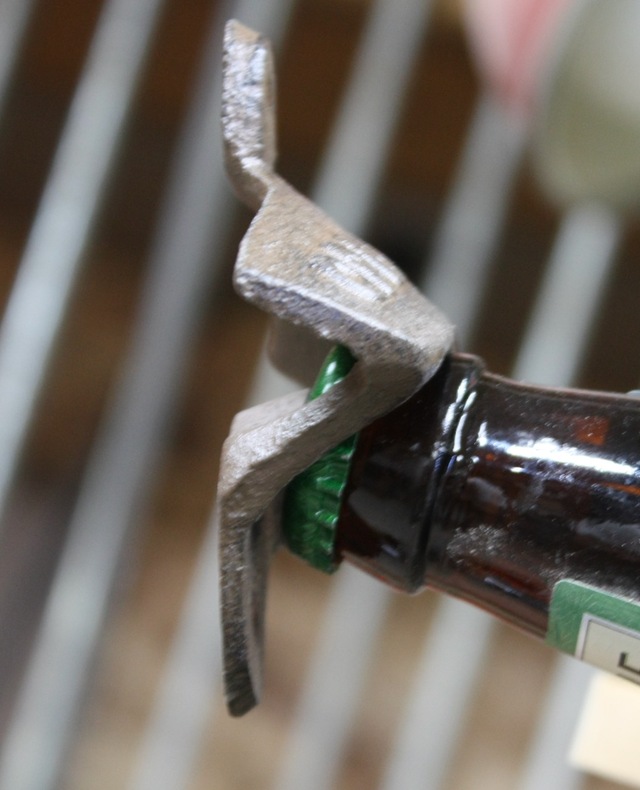
For the actual decapper, you can buy just about anything at any price point. I like the style of these cast "open here" units and at a bit over $1/ea., the price is great.
Unfortunately they are cast wrong and make the angle of the bottle too "flat" when opening (causes the beer to spill out some) Some slight modification of the "button" to change the angle of action is required (I'm am OCD perfectionist on these type of issues!)
Better!
Save the Dremel grinding and just spent the extra for a better quality opener!
Also a "rescue project" moved to a more comfy site 8^)
These do sell well, but I ask $30 and the expenses with material and commissions only give me maybe $10. Not bad but they take time, especially with the framed units.
I try to keep them clean 'n' classy for peoples kitchens otherwise I'd just DS tape a magnet to a flat board and call it finished (but then I couldn't sleep!)
Well Tony, there are electricians who are trained to respect electricity and then there are kids who loved to play with anything that would do something "cool".