


Share your craft projects
Make new craft buddies
Ask craft questions
Blog your craft journey

SplinterGroup
9073 posts
and
68 followers
in over 3 years
in over 3 years
More from SplinterGroup


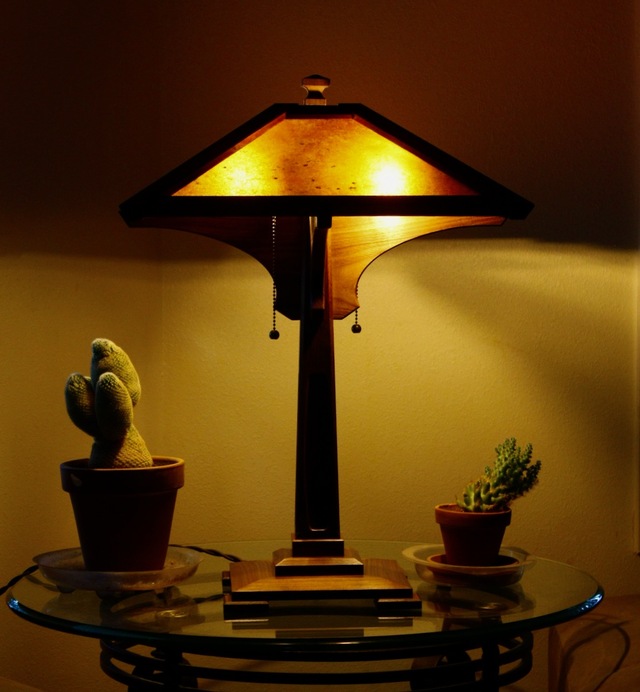
Craftsman Table Lamps


Project Information
Hello again!
Total of four lamps here, made a few years before this post.
Hello again!
Total of four lamps here, made a few years before this post.
They are very similar to the previous lamps I built with a few exceptions so I won't deep dive into the details as much. That probably will be another post (working backwards in time here)
I've changed a few of my jig designs and added several more, but this will be the last of this inlay design I make for a while as I dream up new and more painful challenges 8^)
Glam photos follow below.
I made four this time since they are good sellers and with the sometimes complex tool and jig setups, it just made sense to batch them out.
I certainly saved some time, but OMG, cutting all these parts was mentally draining!
Here are some numbers:
Total wood parts per lamp
shade: 32
stem: 21
base: 21
total: 74
That's almost 300 parts to cut, shape, glue, sand, route etc. Ugh!
I keep fairly careful records and the material costs for everything runs about $120 per lamp
The mica, lamp cluster, and fabric wrapped "vintage" power cord make up nearly 1/2 of this.
Anyhoo, enough complaining.
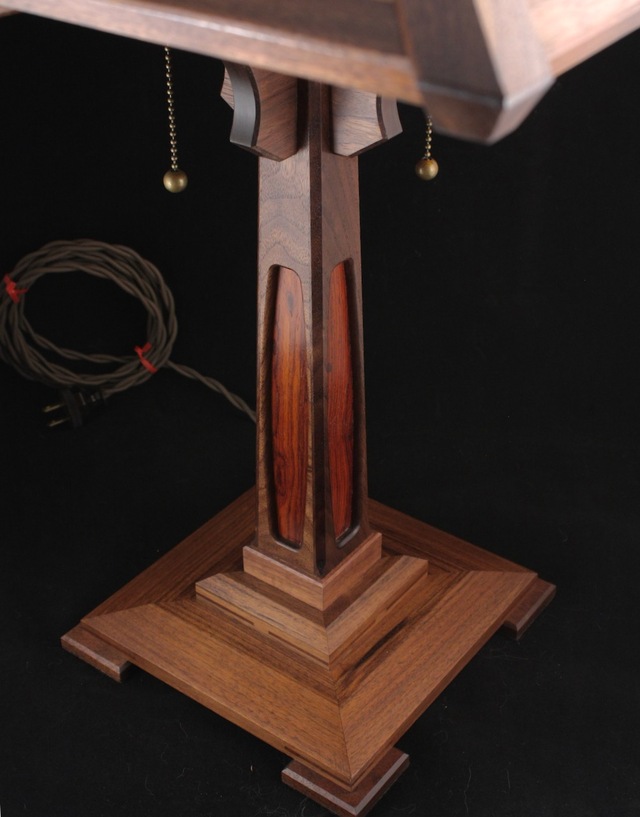
The two inlay wood types are birdseye maple and Bolivian rosewood. Lamp body is walnut, mostly rift sawn.
Poplar makes the stem core and a plug for the base just to save some coin on expensive walnut.
A difference this time is I saved many hours by not applying a top coat finish, everything was oiled and waxed. This has convinced me to give some of those "hardwax oils" a try in the future. This was just plain Watco and Minwhacks "special" dark paste wax. I went through some pains to avoid getting any oil on the inlays since the oil would really darken and obscure the woods, especially the rosewood.
I used splines to reinforce the base sections, probably overkill but since I want these to last a long time and the base is all mitered sections, splines it would be.
They are made from the same wood as the inlays, serendipity!
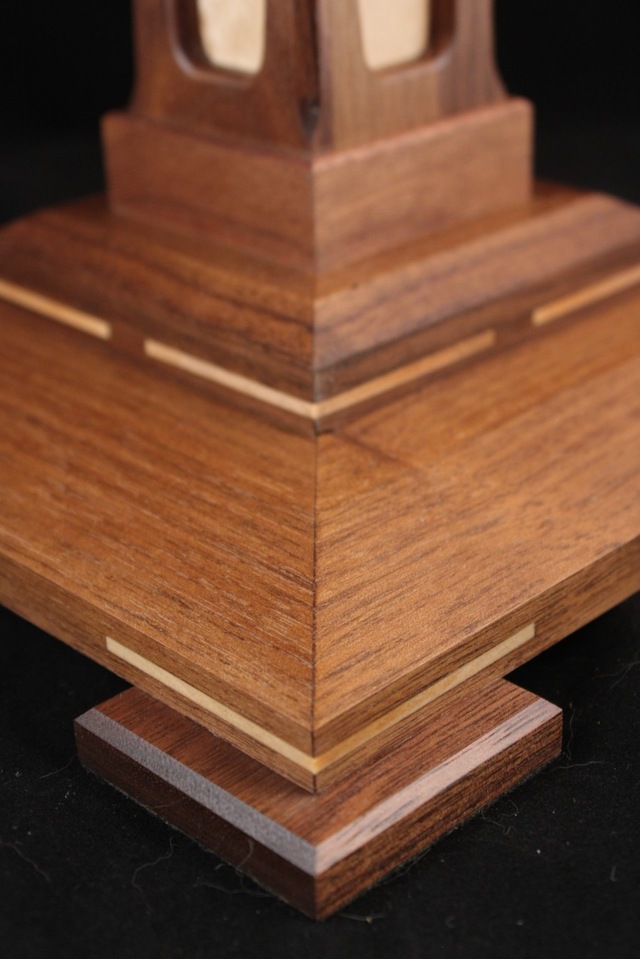
The above photo really shows how the light angle changes the woods appearance, it was all cut from the same board.
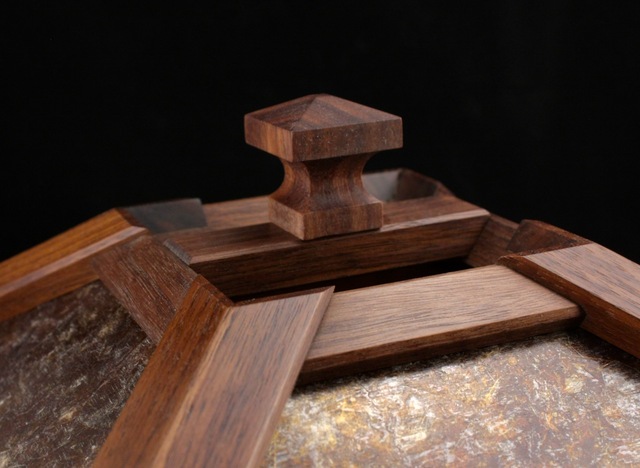
The shade hold down is super solid and the top finial nut was actually easy to make. A tip o' the hat to Dave Polaschek. and Pete (PPK) for suggesting the finial style last time 8^)
I've experimented with different stay designs on each iteration, knowing full well that the style I used here is really what I should have used all along:
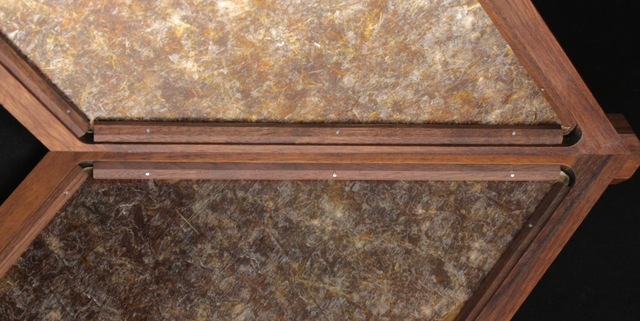
Even though they are effectively hidden under the shade, these "class up" the exposed edges better than a bead of silicone or hot melt. They are made from 1/4" walnut with a chamfer along the face so the brads used to retain them penetrate the frame at a useful angle.
I drilled 176 total pilot holes through all 64 stays (three brads per stay, two on the top) using the drill press and a very tiny bit. The 5/8" brads were pressed into the pilot holes and with some grunt work, pushed into place with a small nail set (no hammering required).
Thanks for looking and any comments!
11 Comments

oh man another beautiful lamp splint.
working with my hands is a joy,it gives me a sense of fulfillment,somthing so many seek and so few find.-SAM MALOOF.

I'm a big fan of this design. Hope to make something like this someday.
Mucho Garcia's Pottzy!
Steve, for me the shade was the one thing where I looked for guidance in eating all the angles right.
The rest is what makes it all unique, no limits!
Steve, for me the shade was the one thing where I looked for guidance in eating all the angles right.
The rest is what makes it all unique, no limits!

So awesome! So very awesome…
Ryan/// ~sigh~ I blew up another bowl. Moke told me "I made the inside bigger than the outside".

Beautiful lamps and they give off a nice lighting in the photos, well done.
Main Street to the Mountains

Pretty, and I remember talking about the finial. Glad it was a good idea! ;-)
May you have the day you deserve!

I really love this.
--Nathan, TX. Hire the lazy man. He may not do as much work but that's because he will find a better way.

Really beautiful work, SplinterGroup! Every edge is clean and perfect despite the complex geometry.

Killer work Bruce. 300 pieces, and all that attention to detail. Well done my friend.

Beautiful wood and finish, great design. Great job. Mike

Beautiful. The number of parts is hurting my brain to even consider. And then four of them. Great projectS.
More from SplinterGroup