When I look for ideas for common wood projects, I often scan through images to find elements I like.
For frames, I've always paused on images of the "famous" John Hall frame from the Gamble House. Typical Greene & Greene styling.
Mirrors a fun to make since you make the frame the way you want, then cut a piece of "art" (i.e. mirror glass) to fit.
The plans I used were directly from the Wood Whisperer's website Here is the construction article (thanks Mark!).
The Wood Whisper templates take out all of the guess work and I decided it was time to just do it and git 'r done!
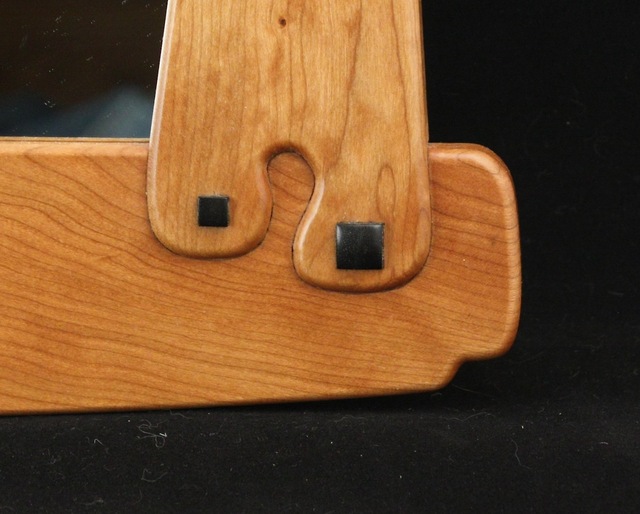
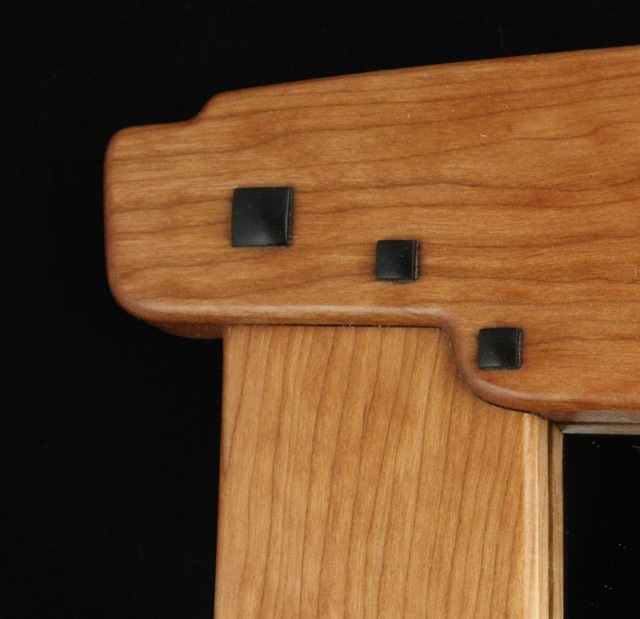
I made two frames, the first frame (prototype) is cherry with ebony plugs.
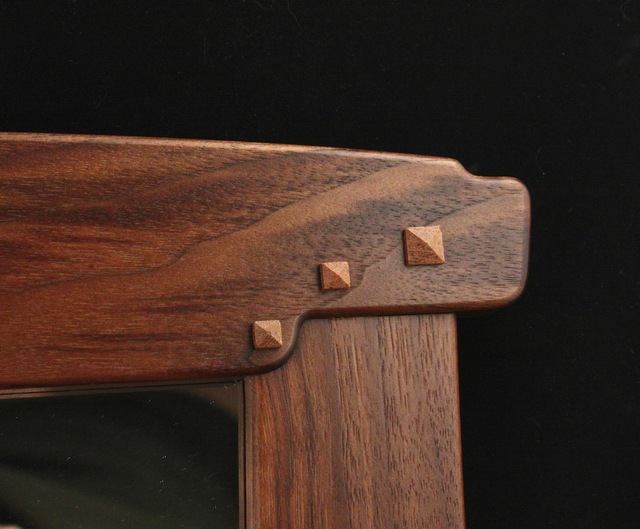
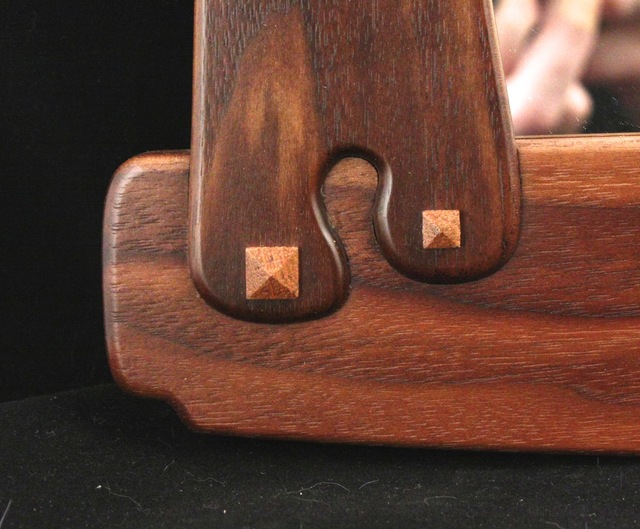
The second frame is walnut with jatoba "pyramid" plugs. These plugs are much easier to make and install 8^)
I made a few changes to the Wood Whisperer's procedure to speed things up.
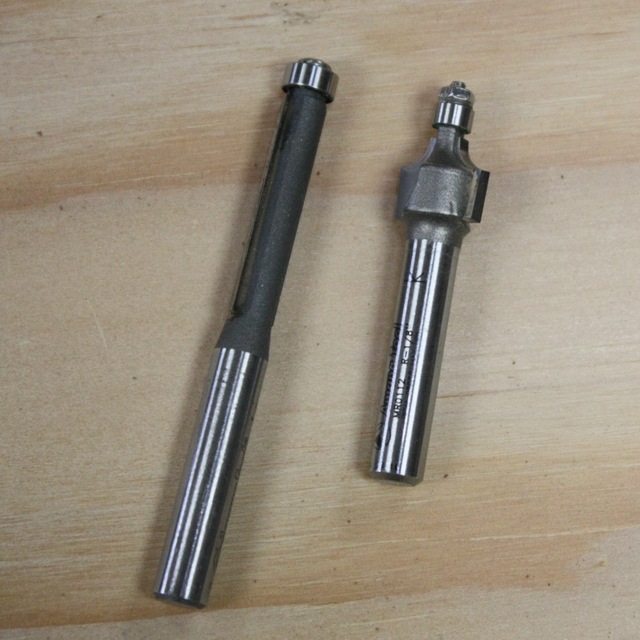
To eliminate a lot of the hand work, I used a 1/4" flush trim and 1/8" radius round over (with 1/4" pilot bearings). these bits allowed me to get into the tight corners and recesses. The frame was scaled to 70% while printing so I could use a standard 12" mirror tile and cut it to fit. The mirrors are under $2 each. Getting a mirror cut locally to fit the full scale version would have cost over $50.
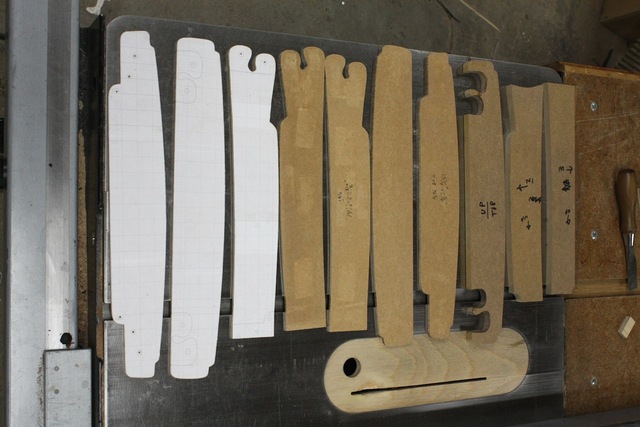
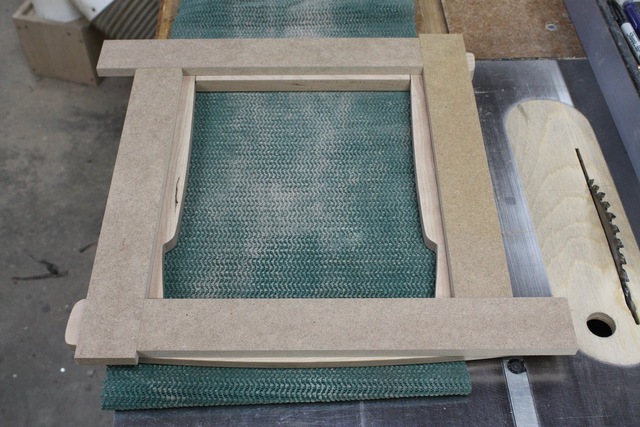
These patterns were spray-glued to hard board and shaped, then working templates were cut from this master set.
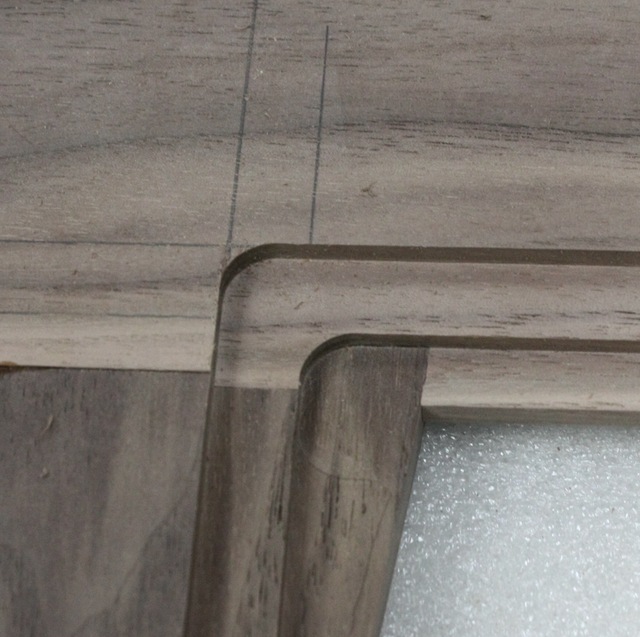
I went ahead and made additional templates for the puzzle piece shape and upper mortices to eliminate 99% of the hand fitting required for these connections. The mirror and back panel rabbets were cut after the frame was assembled. The corners for the mirror rabbet were squared up so I could cut a simple rectangular mirror from the 12" mirrored tile. A wider rabbet was cut for a hardboard back.
Once these template were made, the entire mirror can be knocked out and assembled in hours.
The finish is danish oil with spray can polyurethane.
Popping that into my Picchur frame resource. I hate to make frames, however SWMBO presses me into service as her frame maker. I keep an electric file with pics, and info for a number of frame styles to use for her as a catalog, and me as a reminder of what each frame actually looks like. That way we've found there is no confusion.
I know it's not the dark Oak of G&G dreams, but I really prefer the Cherry with Ebony plugs. A lot more warmth for my $$$$$ :-)
Late entry here. I just stumbled across this mirror frame(s). Absolutely love it. Great work. Thanks for all the pics and link to the project. Man, got to add this one to the ever-growing bucket list. Nice job...
Making the templates so the "puzzle pieces" fit together just right was the game changer. Once I had the templates, the mirrors were quick to knock out.
If course now that I can use a laser to cut the templates, it would have saved hours with all the hand fitting of the original templates.
These frames are quite elegant, the soft edging, the perfectly aligned & oriented plugs, doesn't get much better than this. Nice work. One question Splint, why do you say the pyramid plugs are easier to make than the pillow plugs?, I would have thought the reverse. Just curious. Thanks.
For the pillow plugs, I then need to round off (pillow) the end with a fair bit of work and switching between machines and sanding grits. Then I need to cut to length and have a square mortise ready.
The pyramids just need the ends cut to a pyramid shape by using the table saw and a miter gauge with a stop set up. I can cut both ends of multiple square blanks in one setup, then set the blade to straight up and cut a narrow tenon which will fit into a round hole (or leave square and put into a square mortise)
Here are some in-process from another project.
Actually the big savings is in profiling the end, Lots of fine hand sanding versus four passes over a 10 degree blade with a miter gauge and stop block.
Thank you for clearing that up Splint, I was perplexed and thinking the pyramids were cut by hand with chisel. Doing it on a table saw makes sense for accuracy, but not having a TS, I didn't think of that.