Every time I try to delude myself of letting sleeping dogs lie,
something comes up to make me consider changing my mind.
This time blame RC on some silly blog where he claims, “I have to say I have spent more on consumables than the initial purchase price…”.
So, this Project is intended to save our buddy RC a few shekels, to enable him to buy another umbrella for his outdoor tools… this bloody rain in Aussieland, ain’t going away.
Migrated from LJ, originally posted on 13 September, 2016 (5 months and 1 day after my birthday… that year).
A quick peek at the SketchUp model from the 3D warehouse,
and a video of the jig in use (click on this link if the video below hangs... sometimes an issue with Firefox),
In the video, I got the tension right, which I seem to do most times with a new paper... it's the reruns on a paper change that most issues arise for me. This is when I need to re-tension the paper... usually after the first feed through and resort to the doubling over the end end, as describe at the end of the blog.
This article is aimed at people that claim they are a proud owner of a drum sander and those that tell the truth and fess up to owning "one of those bloody" drum sanders. If you haven't had the pleasure of changing out a drum sander's belt you don't know what you are "missing" and for all those that say it's not an issue, I'd like the name of the mechanical genius who changes yours.
If anyone out there (in the sane world) knows of a simple, foolproof way of mounting the belt on your first 5 tries, please make me a tutorial video… I'll pay… Text explanations will not be accepted as they only emphasise how it doesn't work for the reader.
The article is not in the how to use but rather the how to make…
In my preparation for my forthcoming T & J build, one cannot have enough 1/8", 1/16" and 1/32" thick timber. Consequently while building up my stockpile, I had to load a new belt of sandpaper onto my drum sander (at this point I will mention I hate sanding nearly as much as reading). I had to cut a new belt and as an after-thought, decided to make a presentation for all those that follow a non-regimented ordeal.
In the past, every time I needed to cut a belt from bulk stock roll (I am too cheap to buy individual belts), I am reminded of all those TV adds about rebellious tangled garden hoses and the poor housewife struggling up some stairs with a recalcitrant vacuum cleaner so I was determined to make my life easier (... no not vacuuming… sanding). While now days I still face the challenge, the struggle is less arduous than it used to be.
If you are content in using an old, bought, pre-fab roll as a template, then your next wardrobe habiliment might finish up in the form a white cushioned jacket with shiny metal buckles and heaps of leather straps
and you should ask your therapist to read the rest of this article to you… s l o w l y. . .
Armed with my trusty ruler (which was not long enough so I relegated it for my not-so-trusty tape measure), I measured up a pre-fab roll of paper and dexterously drew it up using SketchUp. From that, I designed a layout and cutting jig/template.
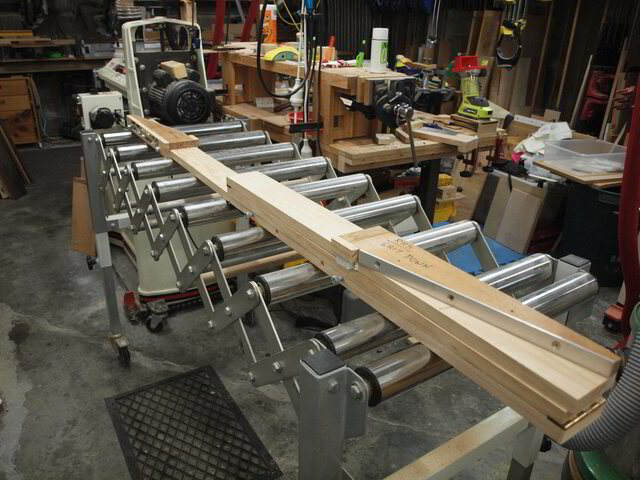
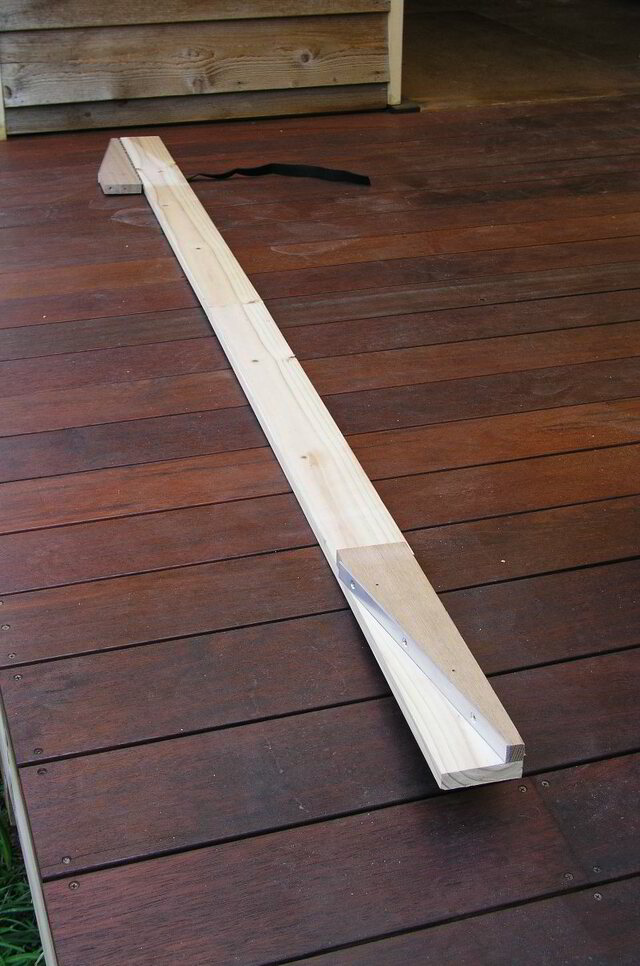
It turned out NOT to be too pocket sized so I placed a hinge in the middle (the hinge eventually fit much better after I cut the plank in 2). The jig was still big but it enjoyed it's piggy back on my mobile 16" drum sander cabinet.
Being a masochist, I thought that if a 16" drum sander can give me nightmares, I'd hit the jackpot with a 22" upgrade. I bought a 22" Jet (I'm still talking drum sanders) and quickly found that no matter how hard I pulled on either end, the 16" belts would not fully cover the 22" drum. Looking at a ruler (preferably the imperial side) I realised that 22" is 6" longer than 16" (even on a metric ruler) and being a mathematical genius, I quickly realised that the new sander's belts would need to be maybe 1 or 2 inches longer (or maybe even more). Plagiarising the measurements of a 22" pre-fab belt I updated my SketchUp model. After lengthening my fabricated template I quickly realised I created a "Game of Thrones" monster…dragon on the ground,when folded in half. I had to sacrifice two more butt hinges to be able to fold it into bite sized pieces. This in the link to the SU model anyone interested (just reply "no thanks" when prompted to create an account). It does include dimensions for both 16" and 22" belt creation. One of the "cutting heads" is relocatable depending on size of belt required. Here is an animation of the jig in use I was just getting into SU at the time and was stoked by its "animation" capabilities and my creative juices (hey I was younger and open to radicalization back then).
The jig brags the following features:
3 hinged operation for near pocket sized storage that fits into the minimal drum sander's base compartment.
2 pieannie (foreigners might call them piano) style hinged head for end shaping with 1 head movable to 16" dimensions.
Hinged heads have aluminium reinforcement to assist in blunting your cutting implement.
English written prompts to confuse non-English speaking people.
Magnetic latches to stop the hinged heads from flapping like the lips of my…. I'll stop here for self preservation and I'd like to eat tonight with all my teeth.
Sexy velcro straps instead of boring bondage ropes.
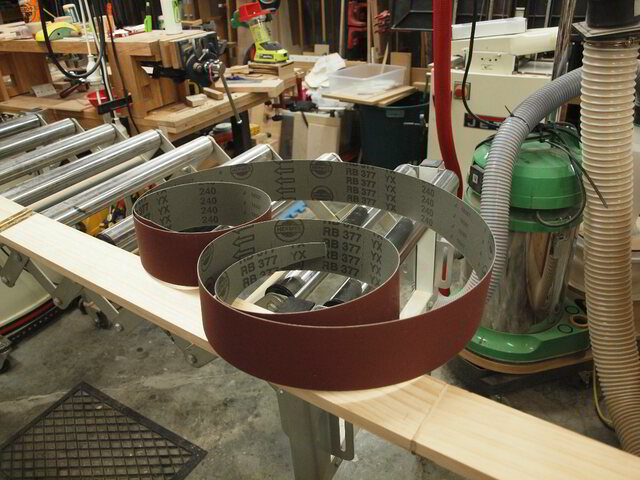
Here are a few pickies of it in operation.
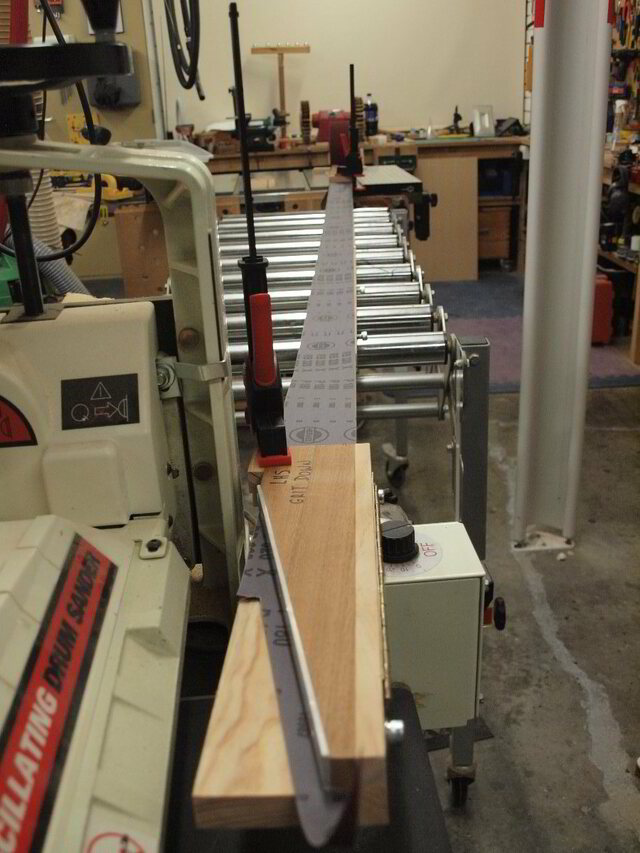
First you roll out the jig. Your workshop must be big enough.
The other end is way over there in the distance. Hate to own a 34" sander. The end would be 2 blocks away.
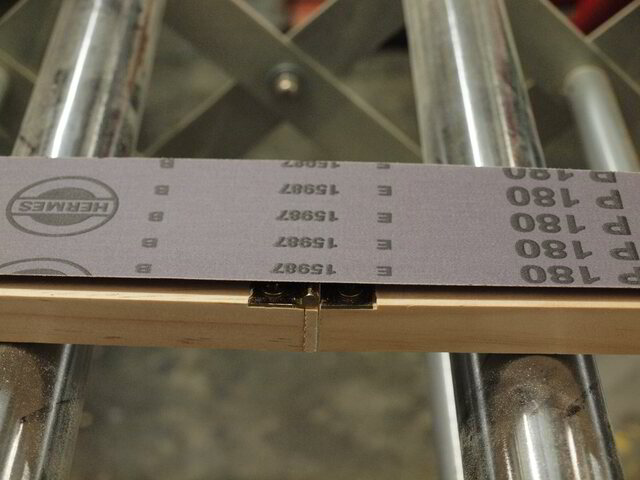
Observe the precision of the machining and construction. Close tolerances prevent the hinge's bulging profile from adversely distorting the precise length of the belt.
For accurate belt lengths ensure you use a sharp box cutter to minimise the need for the blade's kerf allowance.
The final product. A good impersonation of that tangled vacuum hose syndrome. This picture still makes the missus cringe.
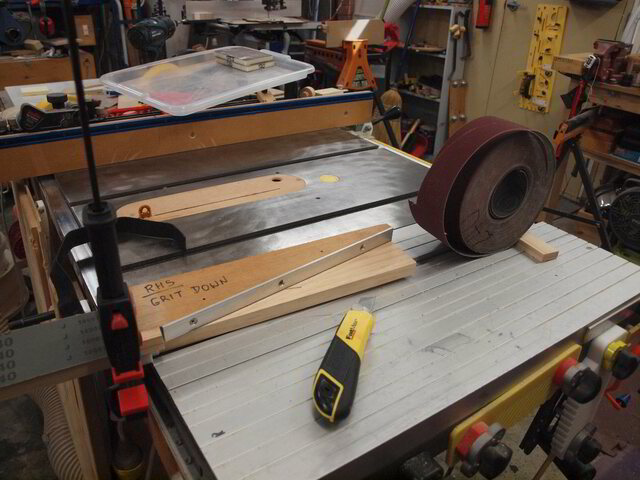
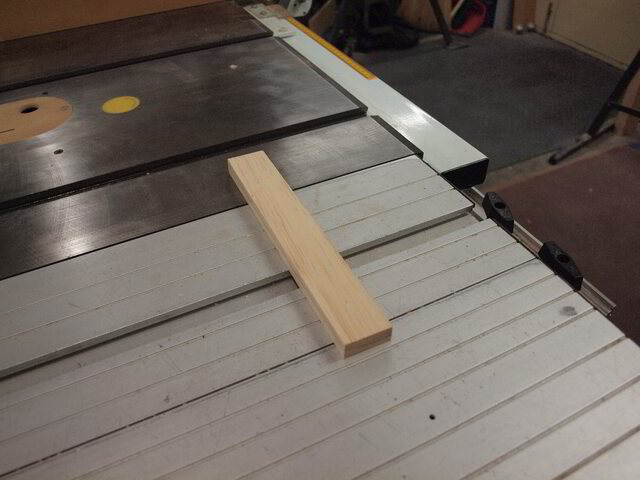
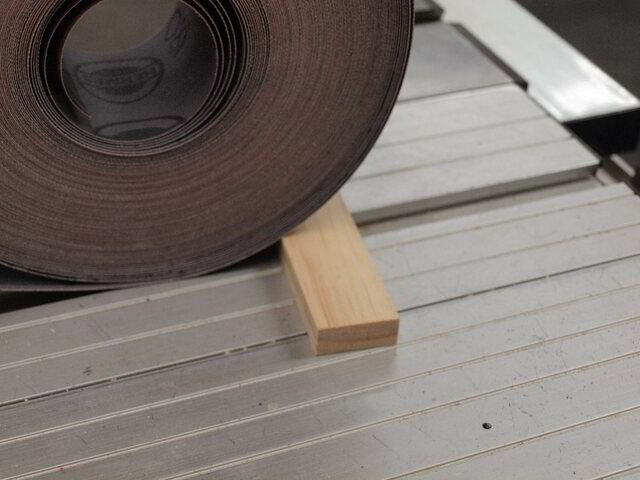
Secrets revealed… This is THE magical optional extra, but must have accessory.
It stops the roll from rolling off your workbench
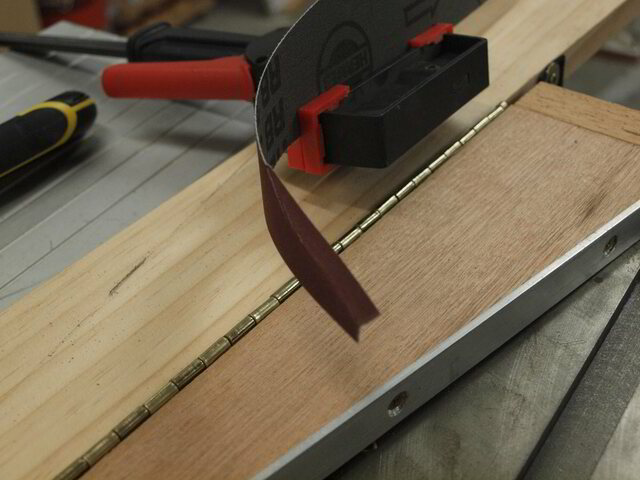
If you bothered to read this far, here is a very handy hint as a reward for perseverance (if you don't already know it).
To stop then end from slipping out, bend it over itself before you manouver it into the tensioning clip.
the sandpaper face on both sides inhibits slip
If your first cut is too short... Take the second cut from the longer end... LBD
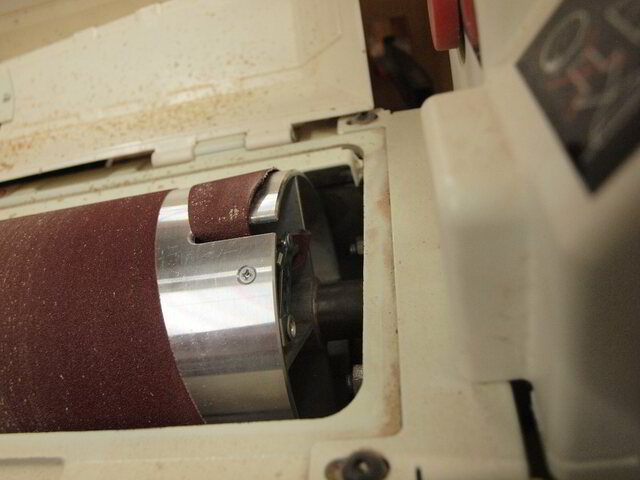
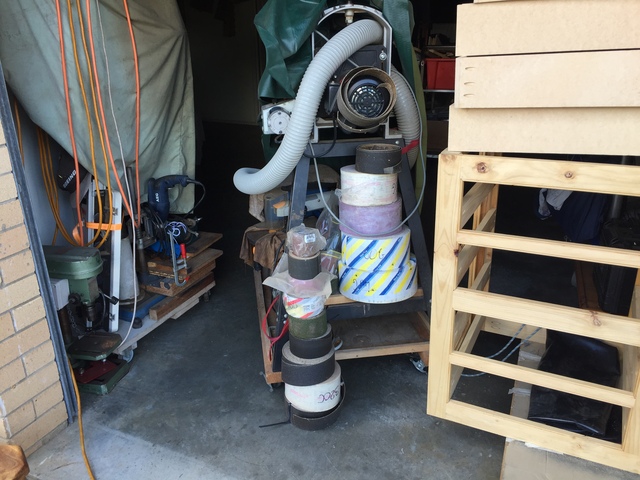
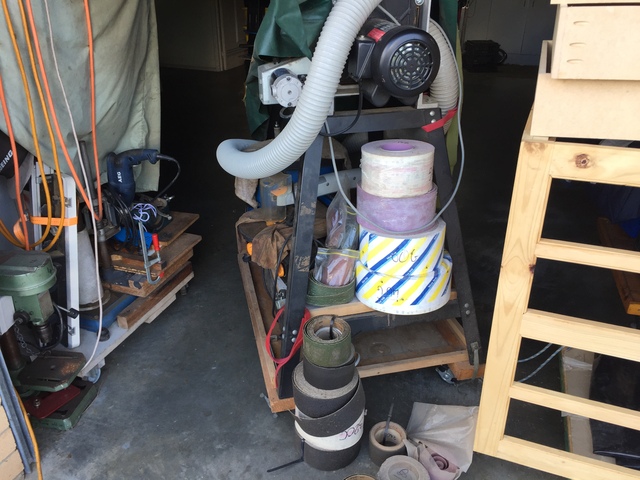
That green one is 36 G try getting your finger or snozzle near that when its running! The green cover is my anti dishwasher flack jacket! Plus if you look closely you can some of my wheels! How about that drill Press!
I usually drum at 120G, 80G lowest... if i need coarser there is the thicknesser. Those rolls look monsters... 100 or 110? The profile of the paper would need to be dramatically changed... but I bet yours is shorted than mine.
If your first cut is too short... Take the second cut from the longer end... LBD
That's a huge commitment to cut rolls of paper. When I first saw this posted last decade, I was ready to shamelessly copy it, bu then I realized that if I did, my sander would crap out and I'd be left with 50 feet of idle jig-ness (story of my life).
Still, a big 👍 for your pluckiness in simplifying an ongoing chore. We both have discovered the need for the "keep the roll on the table top" jig 😀
You can save bucks by buying the 50 meter rolls from Klingspor's. You can even get rolls that have the cutout marks stenciled onto the back. Works out to about $4.50 per roll sized for a 16" sander.
Never changes their paper cause the either have trouble with those end gadgets or just too lazy.
Have a reliable supply of pre-cut paper on demand.
Get an employee discount from their boss.
You don't need this jig to cut from bulk... it just makes it a tad easier... and most people usually toss their old paper out or canbibalise it for other processes which kinda interferes with their template potential... and the only template available is the one on the sander which they,
Never changes their paper cause the either have trouble with those end gadgets or just too lazy.
Have a reliable supply of pre-cut paper on demand.
Get an employee discount from their boss.
With individual prices here in Aussieland, the savings are much greater, however, with me it was more about availability than the shekels.
If your first cut is too short... Take the second cut from the longer end... LBD
Thanks guys.... I'm one that usually doesn't quibble about shekels for consumables, however, where I live the cost of pre cut vs bulk was so far out even I couldn't ignore. Furthermore, I believe that diffrent suppliers must use bloody imperial tape measures as they never fir my metric machine properly. The jig caters for both 16 and 22... friends often come to use the jig, however, I draw the line and insist they bring their own bulk.... yeah some (now ex-friends) seemed to think that as it's my jig, I have to supply the paper... yeah I'm a tight arse.
If your first cut is too short... Take the second cut from the longer end... LBD
I made up a template then I first got the Flatmaster for similar reasons. Of course that’s easier to swap over than a proper drum sander…but still very useable.
Ryan/// ~sigh~ I blew up another bowl. Moke told me "I made the inside bigger than the outside".


")
")
")
")
")
")

.png)
.jpg)