Grasshopper Pull Toy

817
23
Albert just posted his version - here's mine.
The last few years have seen me doing a lot of animated toy builds. This is the one that started the series back in 2018.


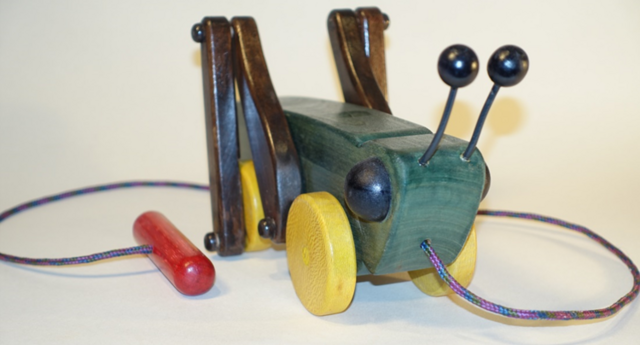
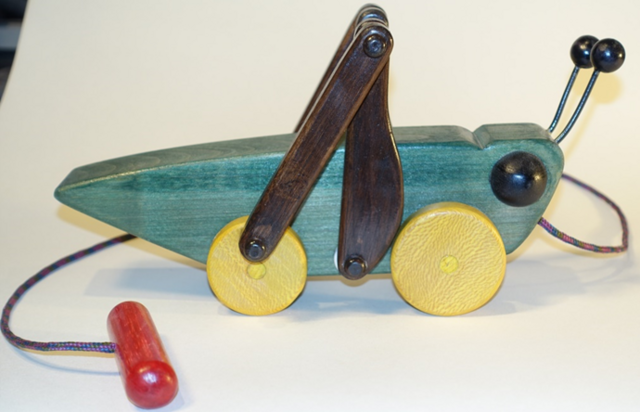
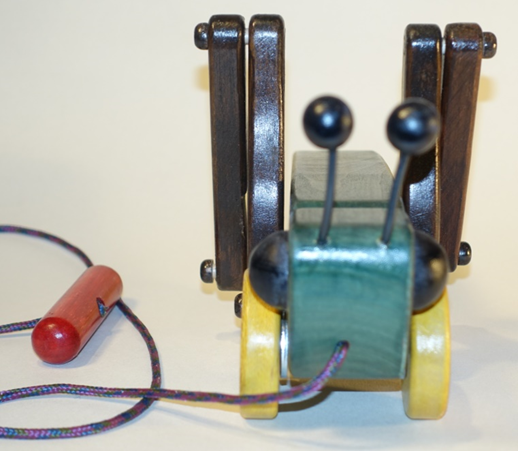
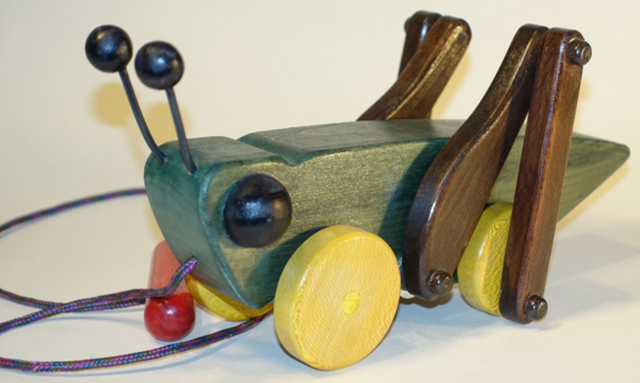
This is another one from Jim Makowicki's Making Heirloom Toys . I did modify the design a little bit by giving the upper part of the back legs some shape. The build is from some cherry harvested from a local forest. The Wheels are from a scrap of sycamore. The axle pins, eyes, and antennae balls are from craftparts.com.


As this was my first animated toy I had some trouble with getting the thing to move when I took it for a test pull. I had size the holes for the pins with a minimum clearance – just enough for a smooth action. It turns out that final assembly with parts not perfectly square.


The slight misalignments and minimal clearances meant the poor grasshopper just slid along the floor. Rather than destroy all the glue joints and rebuild it, I held a back wheel against the rubber drum of my drill press sander attachment and ran it for about 15 minutes. Eventually everything got nicely worn and sloppy. I found out in future builds from another book that a clearance of about 1/16” is typical. It works fine now.


This past year the little fella came back for repairs. A toddler had pulled the antennae off and a puppy had chewed the handle. To be fair to the toddler, I used electrical wire for the antennae stems and the glue did not hold very well. And the puppy was – well, a puppy. I replaced the wire with 1/8” dowels and put a new handle on and it’s good as new.

23 Comments

nice toy steve.

working with my hands is a joy,it gives me a sense of fulfillment,somthing so many seek and so few find.-SAM MALOOF.

Thanks Pottz - I've quite an inventory of toy builds to post
Looks nice, Steve.  I like your mod on the legs - very grasshopper-like!  😀
I don't think I've seen this one yet. Very nice.

https://dutchypatterns.com/

Thanks Ross - I picked that idea up from another set of plans I had seen.

Dutchy - you're right. This is not a migrated post but one I had been planning to do.
Cool toy eRasmus... hate seeing wood painted, but for these type of toys it is a gimme... and I could imagine the reaction of any child... GIMME!

This is the perfect application of the mechanisms displayed on my Automata board.

If your first cut is too short... Take the second cut from the longer end... LBD

Well Done, Steve. placing a smile on a child's face. And the pull toy looks good too. I remember my dad making a pull toy for a niece years ago, a caterpillar with a bunch of wheels attached to it, I think there must have been around 12 sections in the body, if I remember correctly, he used a burlap fabric laminated between the body parts to make it follow the curves.

Main Street to the Mountains

LBD - I don't mind the color as long as the grain shows through. In fact the yellow dye shows off the grain in the sycamore wheels quite well.

Thanks Eric - That sounds like a fun toy to make and use.

 Steve Rasmussen 
 commented less than a minute ago 
new
LBD - I don't mind the color as long as the grain shows through. In fact the yellow dye shows off the grain in the sycamore wheels quite well.

Don't get me wrong... it's a gimme ("my" colloquial for a given and/or give me)... I kept ducking out on my English class at skool. 


If your first cut is too short... Take the second cut from the longer end... LBD

Steve, I should draw one up and create it out in the shop, I have a few younger grandkids that would enjoy it. Need to keep the shop going early for future gifts instead of waiting until the last minute and get behind. (So, the thought is there).

Main Street to the Mountains

LBD - actually I just need to read better - your message was quite clear :)

Eric - I try to get a head start but the best I can do is to get started in November.

 Steve Rasmussen
.....
Eric - I try to get a head start but the best I can do is to get started in November.

Easy fixed, but maybe just near the start,

If your first cut is too short... Take the second cut from the longer end... LBD

LBD - once an image is on the internet it's had to tell what happens next!
Sounds like me, starting in November.

Main Street to the Mountains

One of the challenges is that is takes a while to figure out what the grandkids are interested in. Start too soon and they will have moved to a new topic.
These are a top toy Steve just need to be careful with one’s measurements and drilling. Well done sir!

Life’s Good, Enjoy Each New Day’s Blessings

 crowie 
 commented 7 minutes ago 
new
These are a top toy Steve just need to be careful with one’s measurements and drilling. Well done sir!

I kept reminding my dentist about that... now I'm on full dentures!

If your first cut is too short... Take the second cut from the longer end... LBD

You are so right Peter. 1/16" clearance works wonders!

LBD - I had a crown put on and the drilling wasn't deep enough. A few years later that turned into an implant.
I had my crown

pulled... now I'm just a lowly duck,
.

If your first cut is too short... Take the second cut from the longer end... LBD