Here's a TV console/cabinet I finished building in July 2011.
At the time, we had an armoire-style entertainment center in our family room. It was beautiful but, despite being roughly the size and weight of a Mini Cooper stood on end, could hold only up to a 40", thin-bezel, speakers-on-the-bottom, flat screen TV (and I had to remove its doors for that).
We decided that we wanted a lowboy/console-style TV cabinet and looked at the local furniture stores. We didn't really like anything we saw, and we didn't want to spend $1000+ anyway. My wife sort of liked a cheap looking (to my eyes) TechCraft console at the local hhgregg store. (This from the woman who surprised me by not wanting to name our son Ethan Allen…)
I really didn't want to buy that console, so I started scouring the web for better options. I thought I found the perfect piece: the Oxford 72" console by Abbyson Living (apparently no longer in production). It was a little wider than I wanted, and it was expensive, but it looked nice. Then I looked at the dimensions of the side cavity doors--17.5" x 17.5". If the doors were that size, the cavities were smaller--too narrow to hold the typical 17" wide (or so) AV component and therefore useless to me.
My hopes were dashed… Then I thought to myself, "I can build something like this with wider side cavities…" I had received a Kreg pocket hole jig for Christmas, and I wanted to try my hand at building doors and drawers, something I'd never done before. Five months of weekends and evenings later, I was done. I was happy with it, and my wife loved it, which was the most important thing. We’re still using it today.
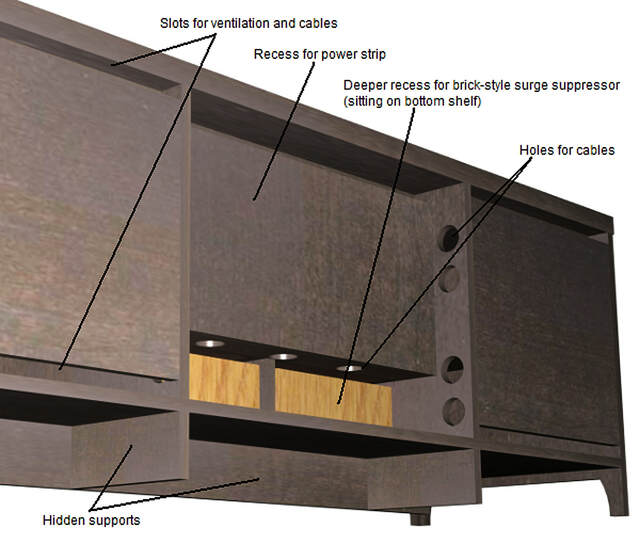
The overall dimensions are 68.5" wide by 24.5" high by 21" deep. The side shelves are 19" wide x 17.75" deep, and the center shelf is 27" wide by 15.25" deep. (I sacrificed some depth for the center cavity so I could recess the back to accommodate a power strip. I also shortened the drawers front-to-back to accommodate a brick-style surge suppressor (the kind with two rows of outlets).
Most of the case is made of maple plywood. The face frames and shelves are maple hardwood. The top panel is MDF covered with maple veneer.
The finish is Zar Moorish Teak stain over TransTint dark walnut dye, topcoated with satin Arm-R-Seal wiping varnish. I prefinished the interior surfaces, then took care of the exterior surfaces after assembly.
I paid a lot of attention to cable routing (and heat dissipation). This rendering shows routing holes and slots, plus the hidden cavities for power strips/suppressors that I mentioned. I can run cables from any cavity to any other cavity.
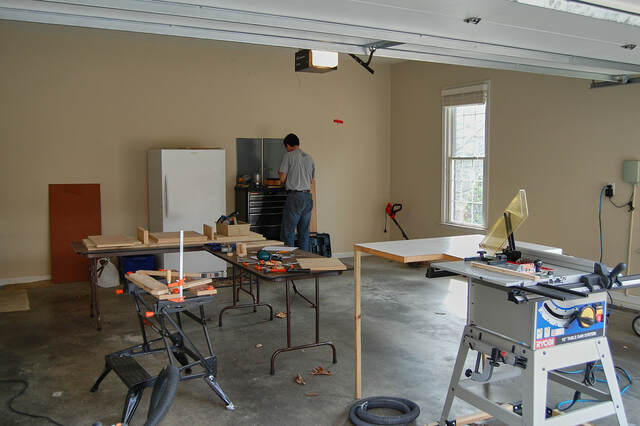
I didn’t take any construction photos myself, but my wife took a few.
Here’s my “shop” in its full glory, with my state-of-the-art workbenches (AKA folding cafeteria tables and my trusty WorkMate, all of which I still use), my old Ryobi BT3100 table saw, and every clamp I owed. There’s one premium product visible, an Incra miter gauge that I bought because I never could dial in the saw’s sliding table.
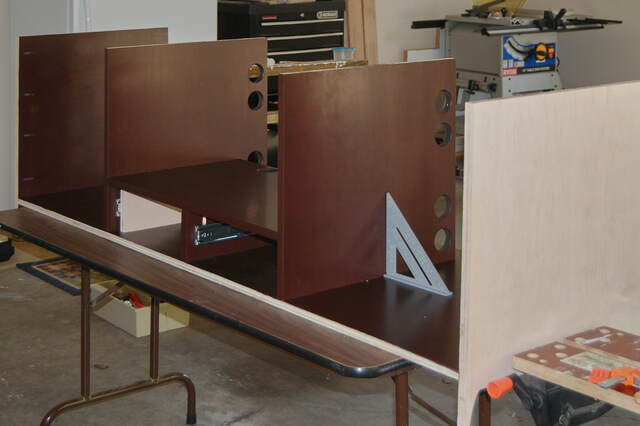
Here’s a younger me verifying the alignment of the various cabinet panels.
Here’s another photo of the console as I was assembling it with pocket screws. (The unfinished piece inside the left-side drawer cavity is a spacer block.) The entire console is held together with screws—no dados, rabbets, or support cleats. I did learn to cut half-laps for the door frames because I didn’t want to see the pocket holes when I opened the doors (and I didn’t want to plug them); that's the only real joinery in the piece.
Back then, I used MicroStation to model my projects, so I don't have a SketchUp model. I do have some 2D plan sheets (PDFs) that would let me create a SketchUp model, and I may do that just for fun at some point.
Long live the pocket screw!!! In the right application, I'm a fan. I do agree that I like to keep them out of sight, and the plugs never seem to really "fit" so creative placement is part of the planning for me.


 - Project by Ron Stewart")