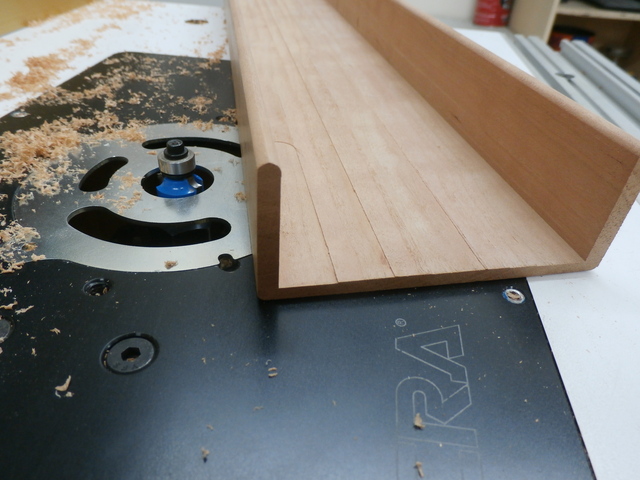
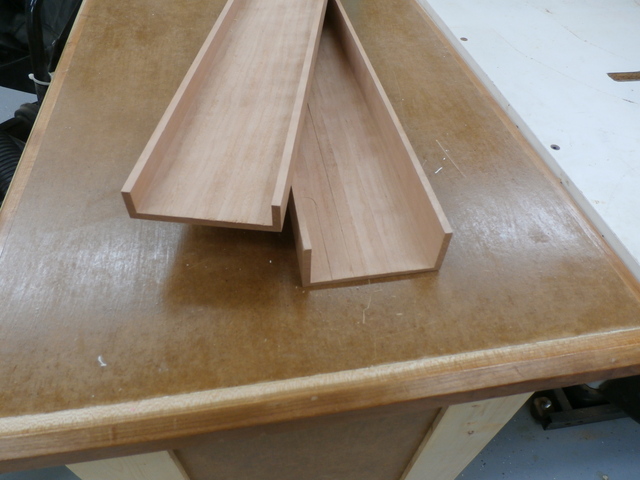
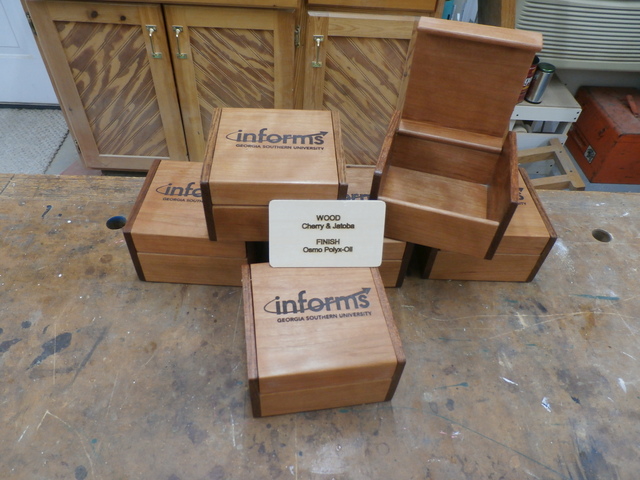
Made a few of these one year for Christmas presents. DIL ask if I could made 5 of these for a Univ. Symposium that she and the son are hosting 5 guest speakers. Of course said yes. Plank of Cherry was 4" wide. Cut into two planks one 1 5/"8 thick and one 7/8". Onto the router table to make these into U shaped channels with 1/4" wall thickness
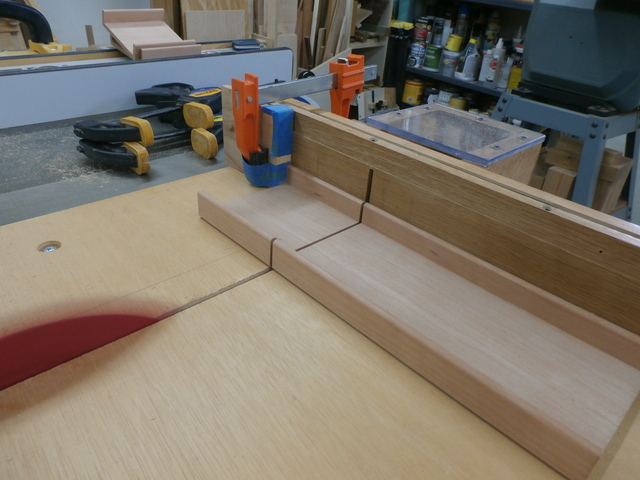
Onto the table saw to cut the deep one into 6 3 5/8" pieces to be the bottom of the boxes. Shallow one cut 3 9/16" pieces, also 6, top of the boxes. This was done on the table saw with a sled.
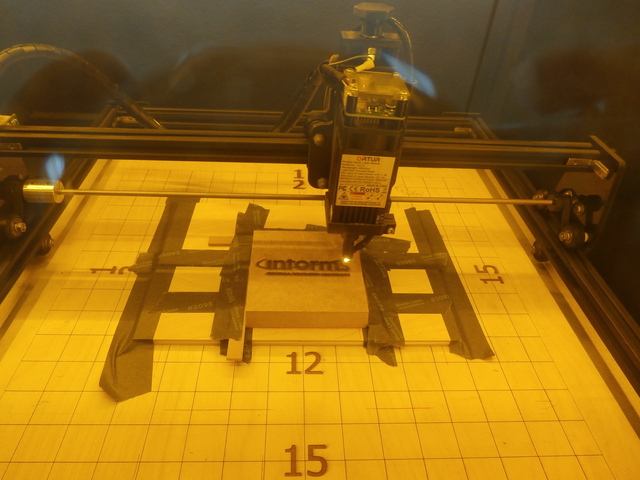
1/4" thick Jatoba was cut to be the sides of the boxes. Size determined by the top sitting on the bottom. These pieces then glued to the bottoms. The tops were then taken to the laser and engraved with the symposiums logo and the University name. Next sand, finish applied (Osmo Polyx-Oil) 3 coats. buffed and the boxes assembled. Added a business size card with the Wood species and finish type to each box. DIL was happy, made 6 to cover for any mistakes but all came out fine. Extra for her. Also engraved the logo and Univ. name on some blocks for desk ornaments. Fun project. Comments?
Nice work Ron, really liked to see how you gang-cut the bottoms. Really a great idea for production efficiency. I see some shallow grooves on the inside bottoms?
Nicely done Ron, great combination of wood and the engraving is really nice. I like the shallow grove on the bottoms to help with standing up the cards. As Spliter said, gang cutting is a great idea too.
The shallow grooves were sanded out. Not meant to be card supports this time. Good idea though may try to incorporate that if I ever do more of these. Thanks for the comments.
(NIce job 987... nice results... nice method... nice write up... nice description... bloody waste of timber, unless SWMBO wanted compost (that doesn't work on the garden).
Because of the cost of cherry here in Australia, you'd be lynched (though I nealy got lynched, oops *******d (censored) for using that aggressive verbotten word at LJ) for such swarf wastage.
If your first cut is too short... Take the second cut from the longer end... LBD
dang duckie i dont see you for a few days and you come back all aggressive and potty mouthed ! hey id trade you all the cherry you want for some of your exotic beautiful AUS. woods you have !
working with my hands is a joy,it gives me a sense of fulfillment,somthing so many seek and so few find.-SAM MALOOF.
The "hinge" is a 1/16" dia. pin on each side. Hole drilled through the side pieces into the bottom area of the back of the top. You can see the pin head on some of the pictures. It enters the top piece about 1/8" above the bottom edge. Kind of tricky not to get to near the edges of the top or to near the bottom of the back vertical of the top.
Ron - that's what I thought when I saw the pins on the list of supplies. I would have gone through the edge for sure!! Love the clean design - I'm sure the speakers were very pleased to be gifted these.