Share your craft projects
Make new craft buddies
Ask craft questions
Blog your craft journey

Brian Benham
34 posts
and
13 followers
in about 3 years
in about 3 years
More from Brian Benham
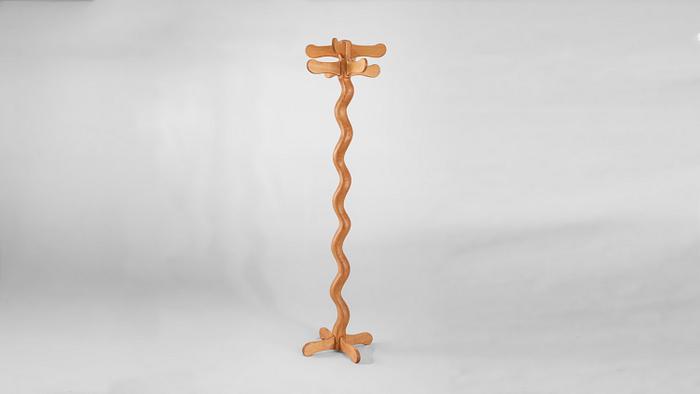
Sculpted Coat Rack
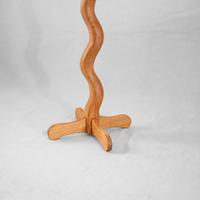
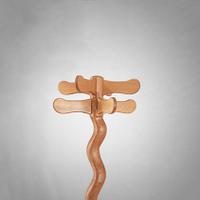
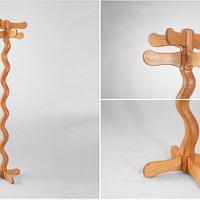
Today’s Furniture Design came from wanting to Explore a new technique. About a decade ago, I was watching a TV show called Redwood Kings. They made crazy tree houses from redwood stumps and other salvaged Items. While watching that show, one of the guys demonstrated how he made these crooked posts form a straight 4x4 on the bandsaw by basically turning the 4x4 inside out. I immediately knew I wanted to try this in some kind of project. I’ve seen other people demonstrate this on YouTube but never incorporate it into a project. The technique in itself is fairly simple, but coming up with a use case on how to use it in a piece of furniture was a bit of a challenge. So, I decided to incorporate it into a coat rack that looks like it belongs in Whoville. This was a fun exploration of using a technique to help design a piece of furniture.
If you want to watch it be built
https://youtu.be/bV0NC2Ga7Eg?si=-x8qr9cUIQHmFW3d
Thanks for watching
Brian Benham Building Furniture in Colorado
If you want to watch it be built
https://youtu.be/bV0NC2Ga7Eg?si=-x8qr9cUIQHmFW3d
Thanks for watching
Brian Benham Building Furniture in Colorado
Thanks, Brian @ Benham Design Concepts
8 Comments
I like it!! Hope your wife has a change of heart and it can stay!
And had to explain to my husband that I REALLY do need more clamps, and that using rope for clamping is only for the professionals 😉 (although that did seem to work perfectly in this project!)
Question - how do you determine the base size to keep the stand steady?
And had to explain to my husband that I REALLY do need more clamps, and that using rope for clamping is only for the professionals 😉 (although that did seem to work perfectly in this project!)
Question - how do you determine the base size to keep the stand steady?
very whimsical. great video as usual brian.
working with my hands is a joy,it gives me a sense of fulfillment,somthing so many seek and so few find.-SAM MALOOF.
@BB1 Thanks, she is warming up to it!!! I hope you have clamps on your Xmas list.
For the base size, it was trial and error, I figured if the base was at least as wide as the hooks I'd probably be safe. All said and done, it stands stable, but visually, I wish I had made the base just a bit larger. ...Next time
For the base size, it was trial and error, I figured if the base was at least as wide as the hooks I'd probably be safe. All said and done, it stands stable, but visually, I wish I had made the base just a bit larger. ...Next time
Thanks, Brian @ Benham Design Concepts
Well, I may have ordered some clamps last week that were on sale (my dogs like to get me gifts so who am I to say no?). 🤷♀️
Everybody needs a coat rack with character - great job!
That is another great design. Stepping away from typical object comfort zones can really turn up some cool new ideas.
For base dimensions, I agree that the feet should be a bit wider than the top hooks just for balance when a load is placed. Problem is if the base gets too big, it becomes a tripping hazard.
I'll probably have to settle for a steel pipe embedded into the foundation.
Nice work Brian!
For base dimensions, I agree that the feet should be a bit wider than the top hooks just for balance when a load is placed. Problem is if the base gets too big, it becomes a tripping hazard.
I'll probably have to settle for a steel pipe embedded into the foundation.
Nice work Brian!
What I’ve found, that works pretty well (although not perfect), is to be sure the starting width of the base is wider than the widest measurement of the hooks when loaded up. If you’re hanging something bulky on it, that measurement is obviously wider. From there, very very roughly, for every foot of height, add about two inches more to the radius of the base.
So, if it’s 5 feet tall, the radius of the base would be something like the widest measurement across the top (with things hanging on it) plus 10 inches. At some height, you need to add a few more inches to the base width. The taller it is, the more mechanical advantage the weight hanging on the top gains. It’s just a long lever. You can counter that by adding weight to the base, maybe corbels or something, or a false base with a weight inside!
Besides that, the other alternative is to just be careful with hanging or removing items! Using graceful hooks that limit items getting caught on them helps too. I’ve screwed up a couple of these…and found a heavier base is really your best bet. Keep the weight low on the lever…
Ryan/// ~sigh~ I blew up another bowl. Moke told me "I made the inside bigger than the outside".
Nice work!!
Cheers, Jim ........................ Variety is the spice of life...............Learn something new every day


