


Share your craft projects
Make new craft buddies
Ask craft questions
Blog your craft journey

RyanGi
9043 posts
and
59 followers
in over 3 years
in over 3 years
More from RyanGi


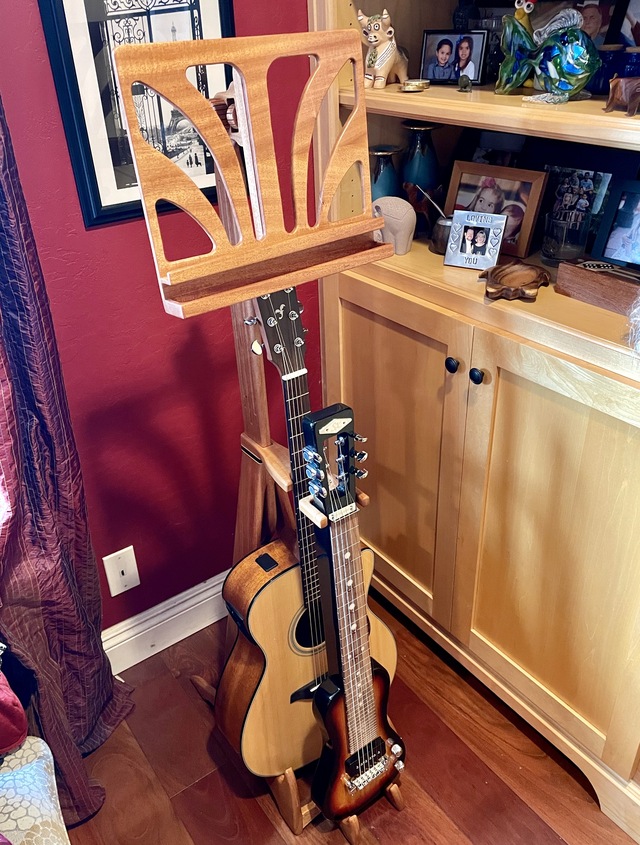
Music Stand


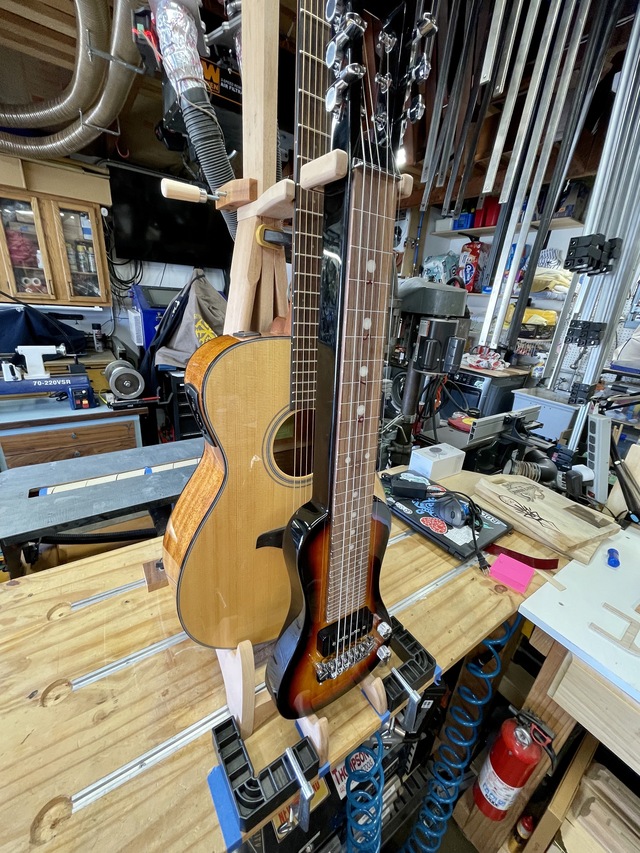
Anyone who owns fretted instruments knows they somehow multiply…like rabbits. Anyway, I wanted a nicer way to keep a couple of them out (so I’ll pick them up and play them…badly, but still) but I also needed a way to stack a couple of the wily buggers since I don’t have a lot of room for them, and I don’t have a music room.
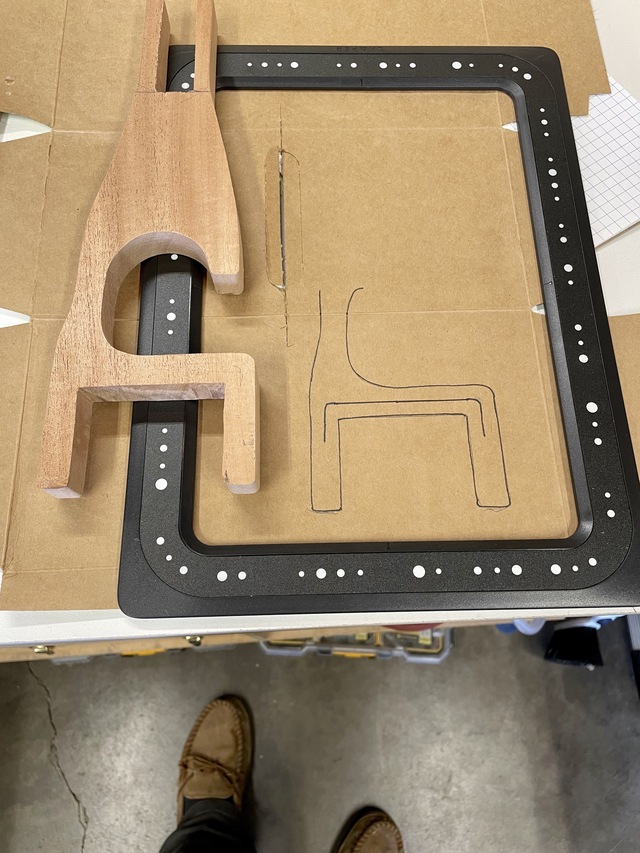
A little research helped me land on a kind of nested, or stepped model. I was also hoping to add an integrated sheet music stand to it. In my mind, the guitar stand(s) end up as a standing triangle, with a center stave coming up out of the top to attach the sheet music stand potion to. I kind of started doodling and cruising the Google machine and got some ideas, so I started laying out curves on cardboard as templates and winging it. I wanted a bit of taper to the legs, and semi-flowing lines. In my mind, the center stave would have some detail work to it such that it kind of resembled a music staff.
A little research helped me land on a kind of nested, or stepped model. I was also hoping to add an integrated sheet music stand to it. In my mind, the guitar stand(s) end up as a standing triangle, with a center stave coming up out of the top to attach the sheet music stand potion to. I kind of started doodling and cruising the Google machine and got some ideas, so I started laying out curves on cardboard as templates and winging it. I wanted a bit of taper to the legs, and semi-flowing lines. In my mind, the center stave would have some detail work to it such that it kind of resembled a music staff.
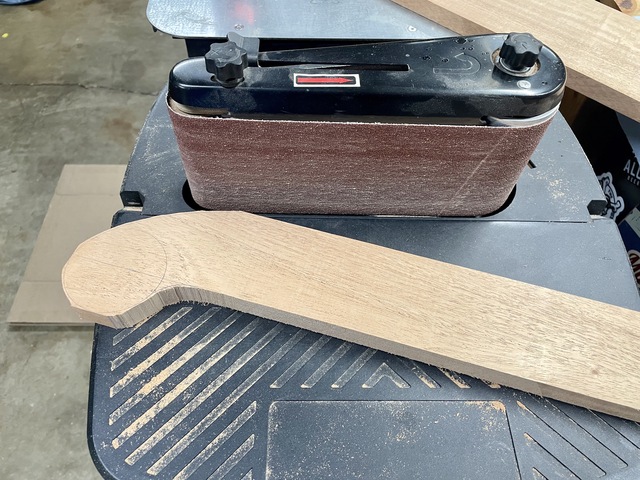
I mated up the feet and finished sanding their profiles on the spindle sander so they matched.
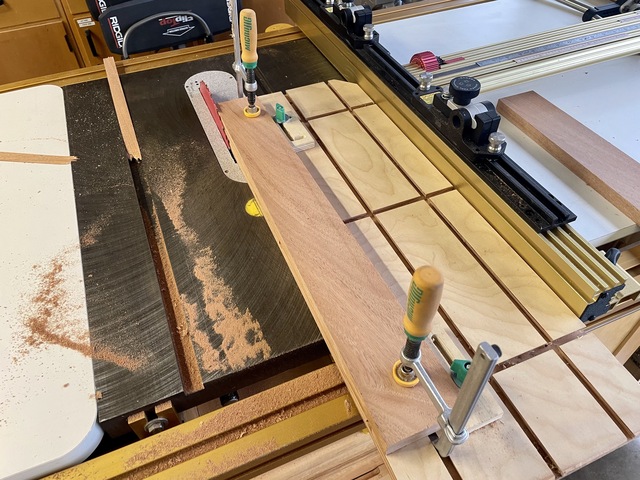
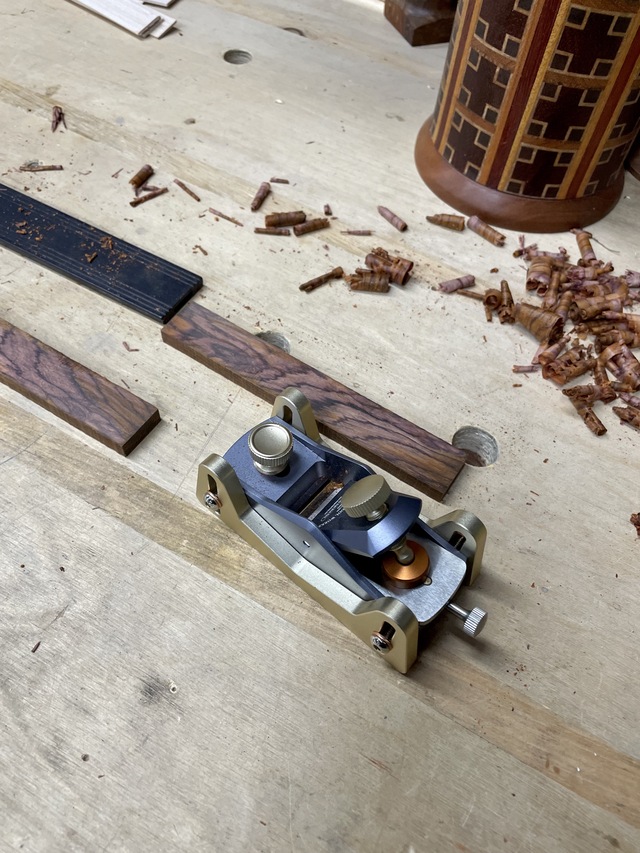
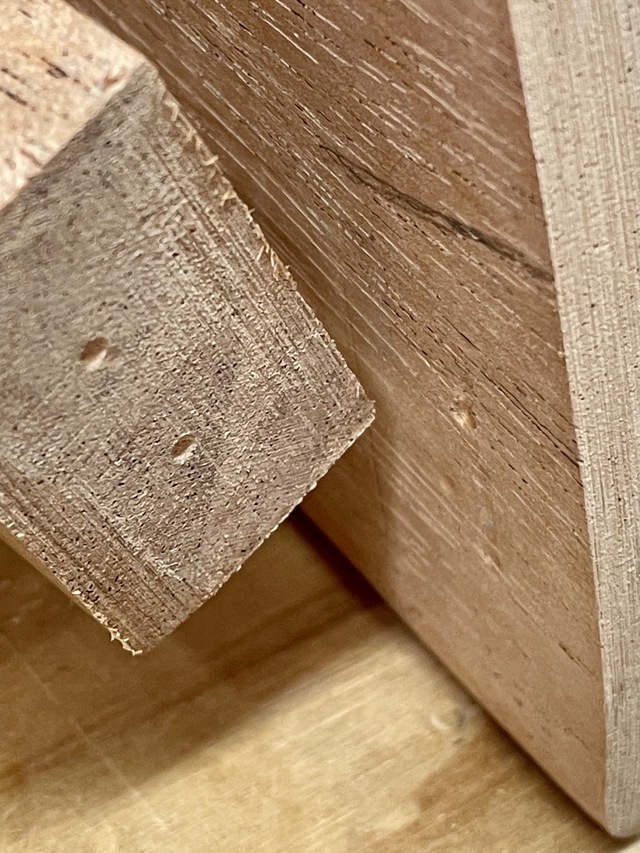
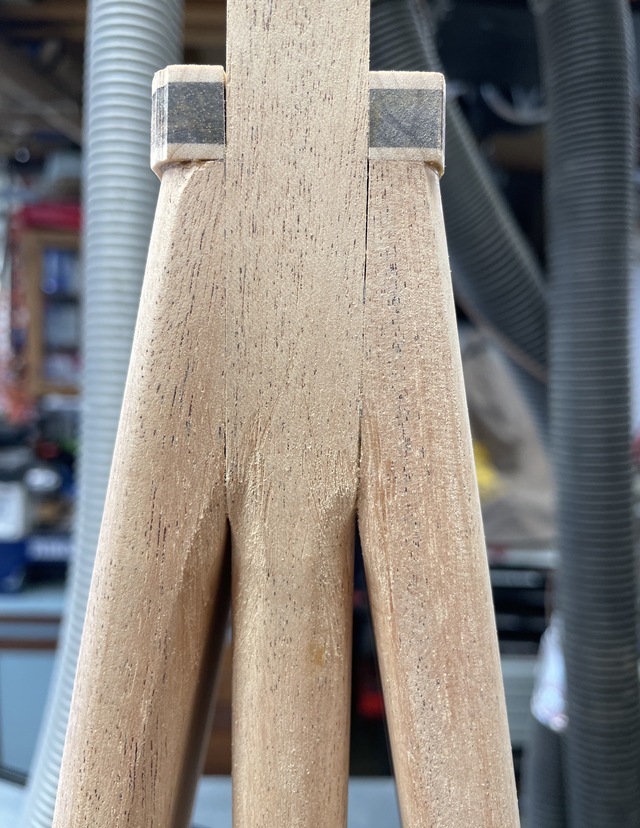
I knew I was going to have the grain change direction, and I wanted an oil finish on this, so I added some laminated detail pieces at the bottom joint where the legs met the feet. The primary wood on the project is Sapele, so I did the detail in Maple and Cocobola. Used the Bridge City Tools mini block to get the laminate details exactly the same thickness. It worked great because of the depth stop legs, and because the detail pieces are so small. Knowing I was playing with several angles, and that I wanted to blend them later on, I wanted the pieces milled to identical specs so that (hopfully) everything came together without gaps.

Next I mounted the legs to the feet. I did this with dominoes hidden inside for added support since I was gluing end grain to side grain.
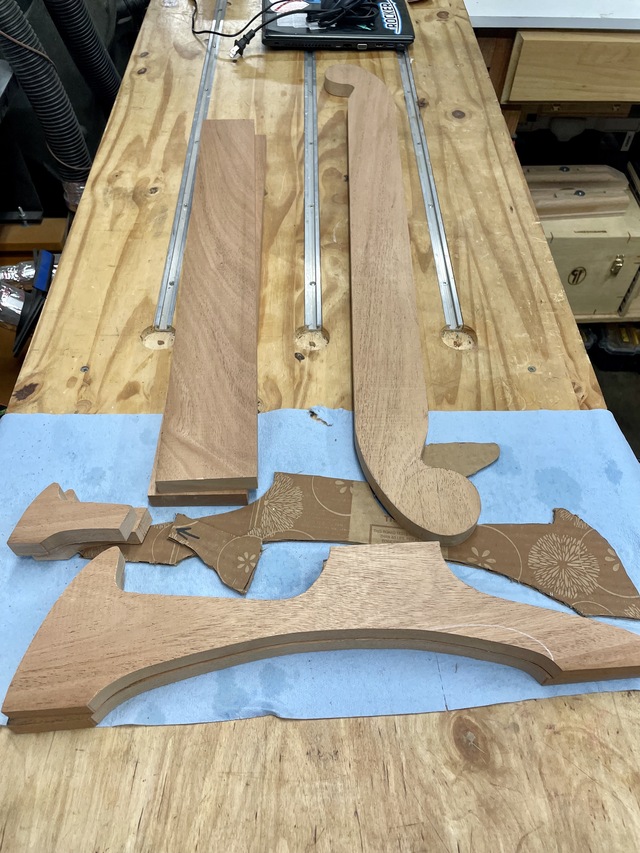
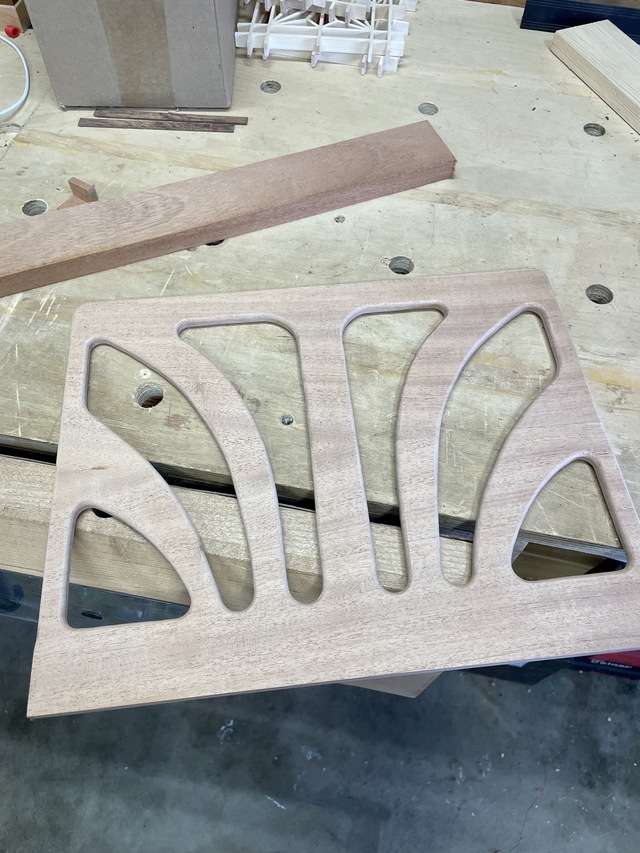
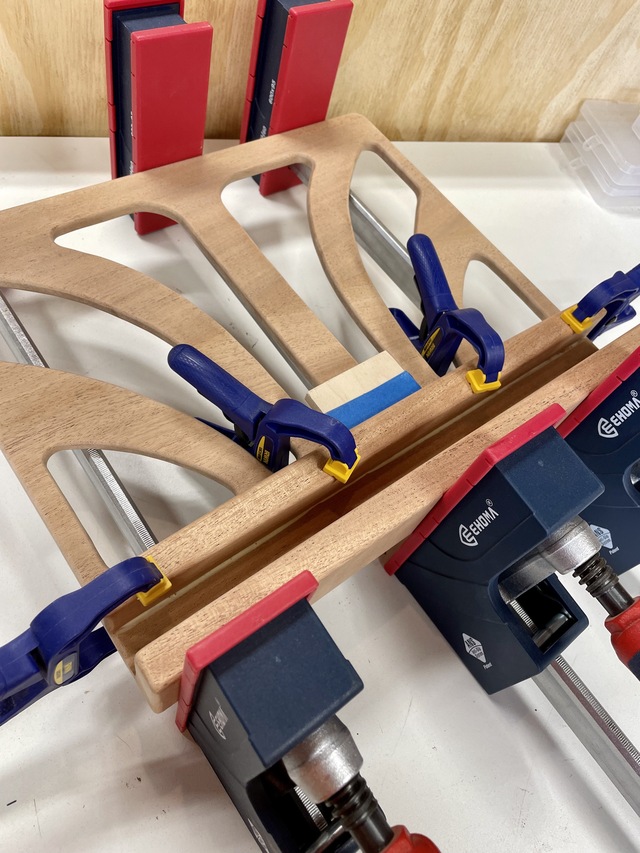
I left everything just a little chunky so that I could blend it all later. At this point, since things needed to dry, I book matched a panel that would become the sheet music stand. Since I intended to make this piece able to be raised and lowered in height, as well as tilted for a proper reading angle, this became almost a separate project. Again, I hit the Google machine for some images to get ideas with the intention of laying out a pattern and letting loose the Shaper Origin on it. It turned out that was going to be more complicated than I needed it to be, and I ended up just laying out a handsome series of curves that somewhat match the curves in the feet. I drilled some starter holes and cut it all out on the scroll saw.
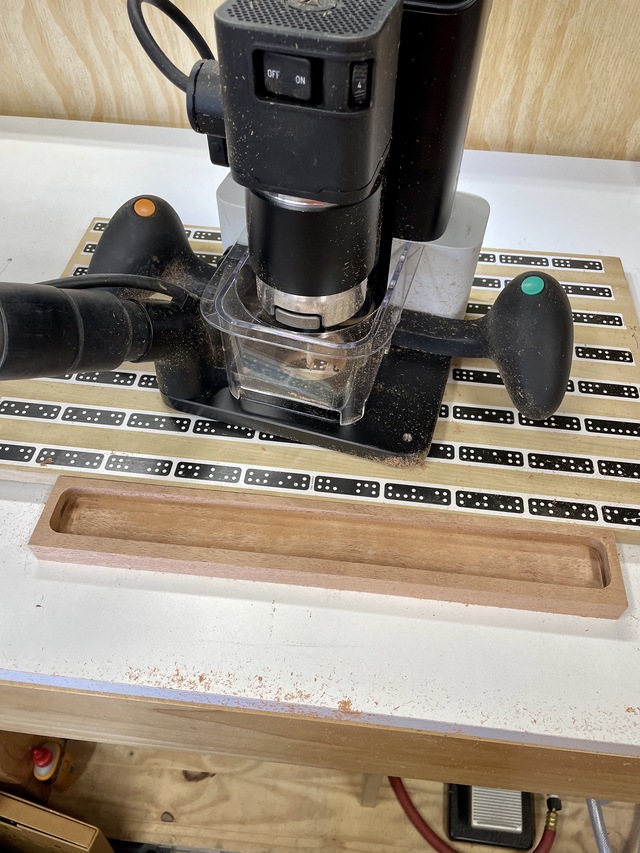
I did use the almighty Origin to create a small tray built in beneath the lip that holds back the sheet music. Since one of intended instruments to find a home on this stand is a lap steel guitar, I needed someplace for a bar, finger picks, etc… Once I detailed in a few more curves, I was ready to put together the business end of the sheet music stand.
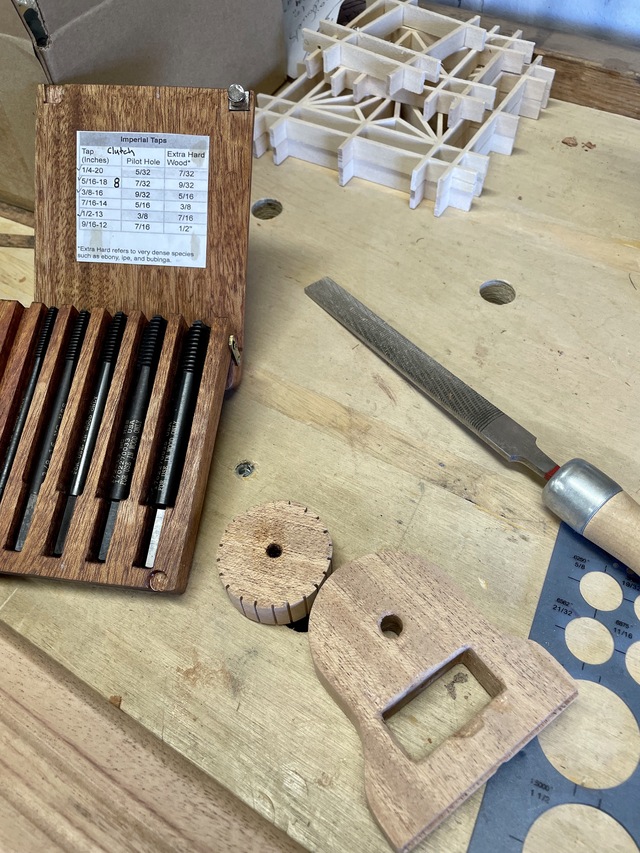
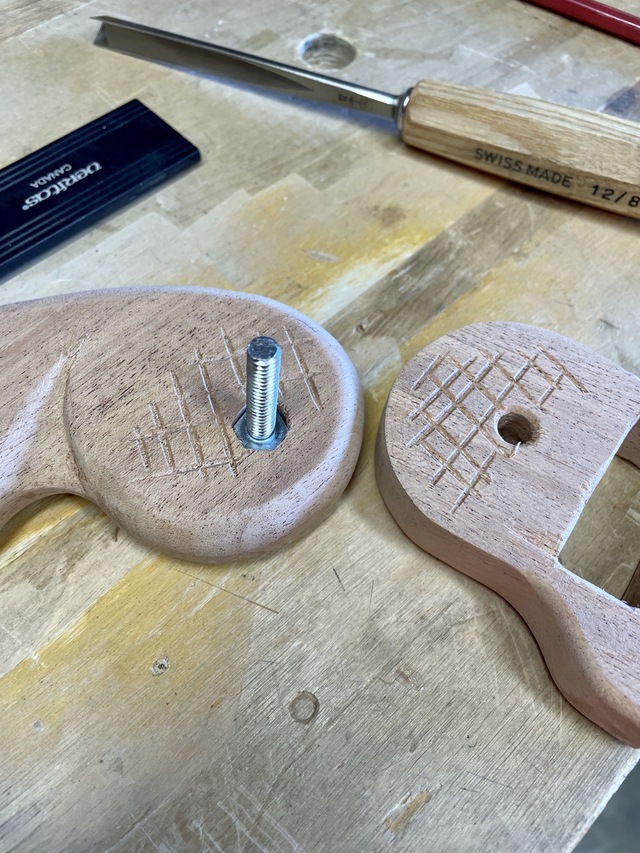
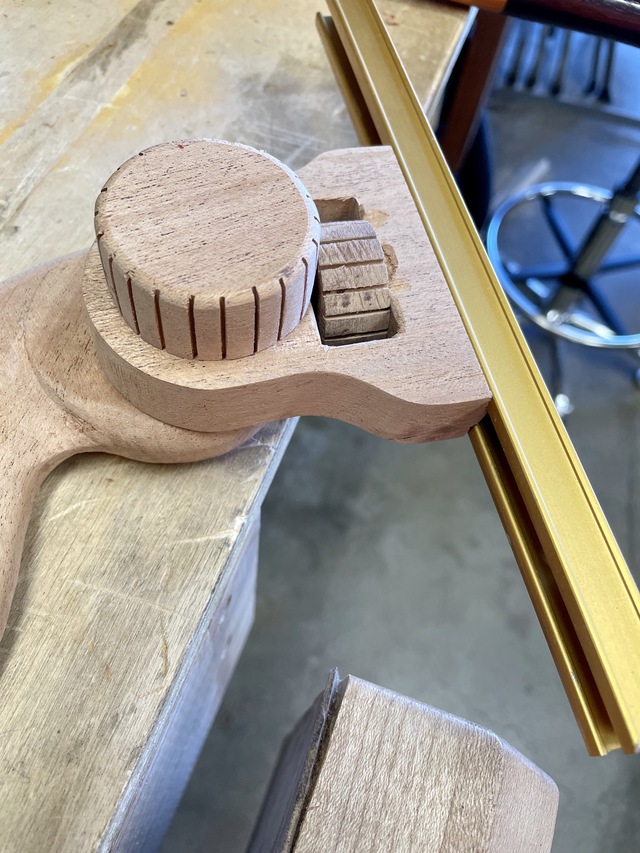
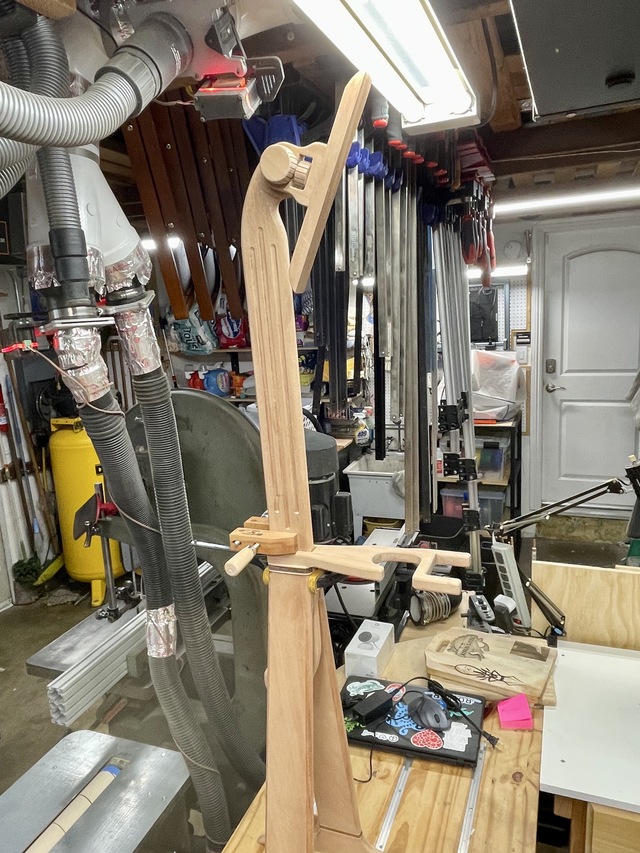
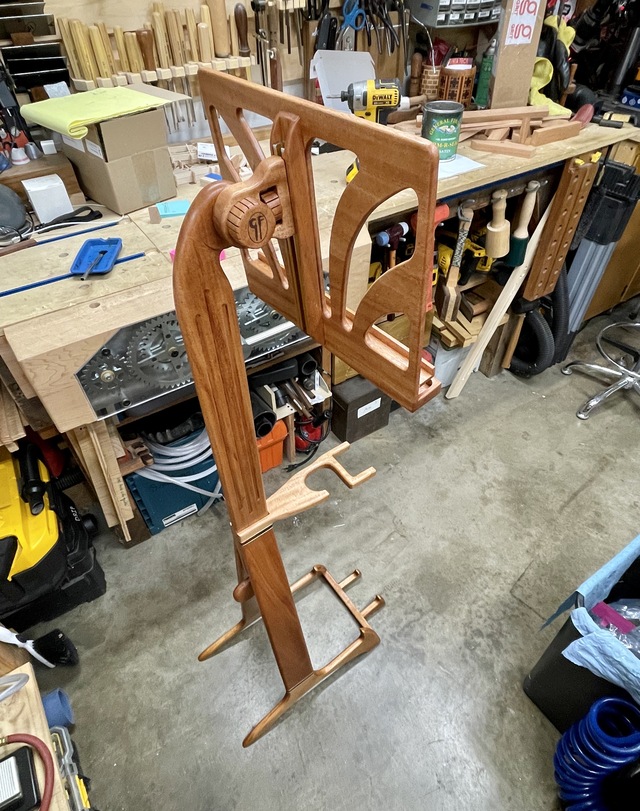
I had a game plan for the slide/tilt mechanism for the back of the sheet music stand: it just involved some plastic knobs and T-bolts. I was explaining my idea to SWMBO who promptly said ‘I thought this was a wood project? Why would you use plastic?’. Yup. Ok. So I crafted up a pivot point that utilizes a captive wooden ‘nut’ to retract a bolt head that bights against a small section of T-track to anchor it, which provides the height adjustment. Sorry honey, a sliding dovetail/captive nut/angle bracket was outside of my capabilities on this one. The T-track lives in a hollowed out mounting stave that’s centered in the back of the sheet music stand. The pivot point anchors against the riser coming up off the guitar stand portion using an imbedded bolt and captured by another wooden knob. Altogether not an inelegant solution. Some chip out to repair, but no biggie. That’s why I left everything chunky to start!
I tried to add some rough checking to help the pivot not slip when tightened in place. Turns out that didn’t work, and I ended up adding a small patch of PSA grippy material around the base of the imbedded bolt..works just fine now!
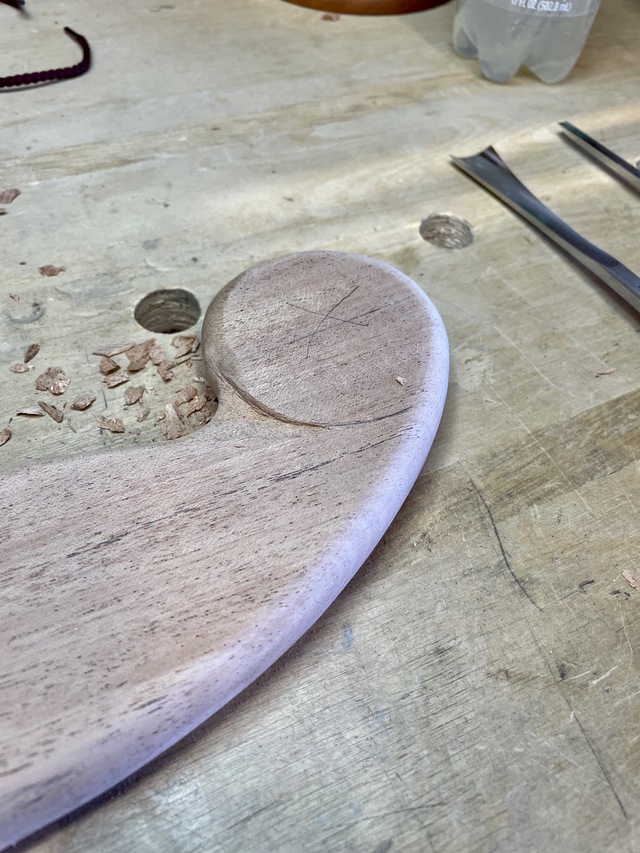
Throughout this build, I tried to think ahead about where I wanted rounded edges and curves. I don’t usually do a lot of round overs on my projects, and if I do it’s usually at the end. Since I knew it was going to be damn near impossible to get some of these parts on the router table, or even under a trim router because of the angles involved, I tried to do a fair amount of that work as I went. Much easier that way…as long as you can get your brain to see the end product and work it out in reverse. Stupid brain.
I had also detailed the riser’s head a little bit by this time. Just wanting to give a little dimension…
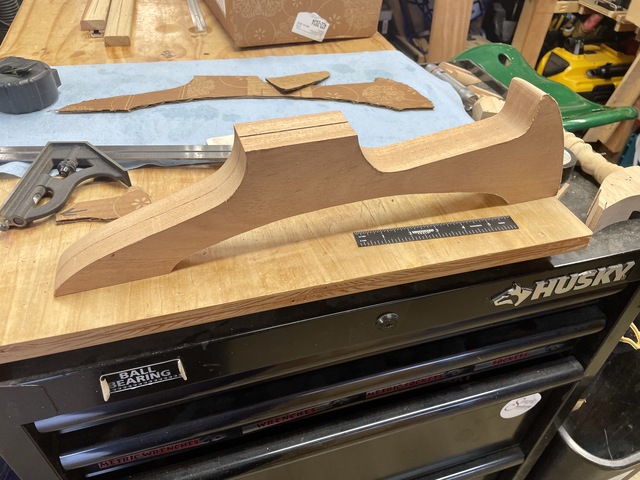
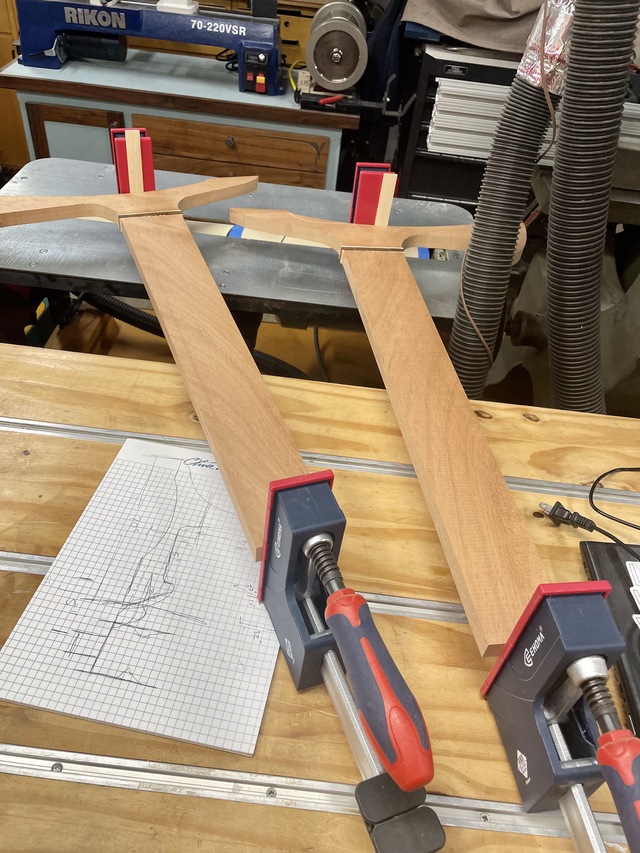
So now I needed to get back to the rough assembly of the guitar stand portion. I built a jig into my assembly table to hold the parts in place and allow repeated trials to fail and still get the pieces back to their original positions. The angles made everything hard. I had a clamp pinching the riser so I could position in and try to better lay out the angles where the legs meet the riser, as well as to start designing a two-in-one neck support to capture both guitar necks. This got me halfway there and at least let me visualize what I was going to need to adjust. I started with sanding down the angles at the tops of the legs where they meet/blend into the riser.
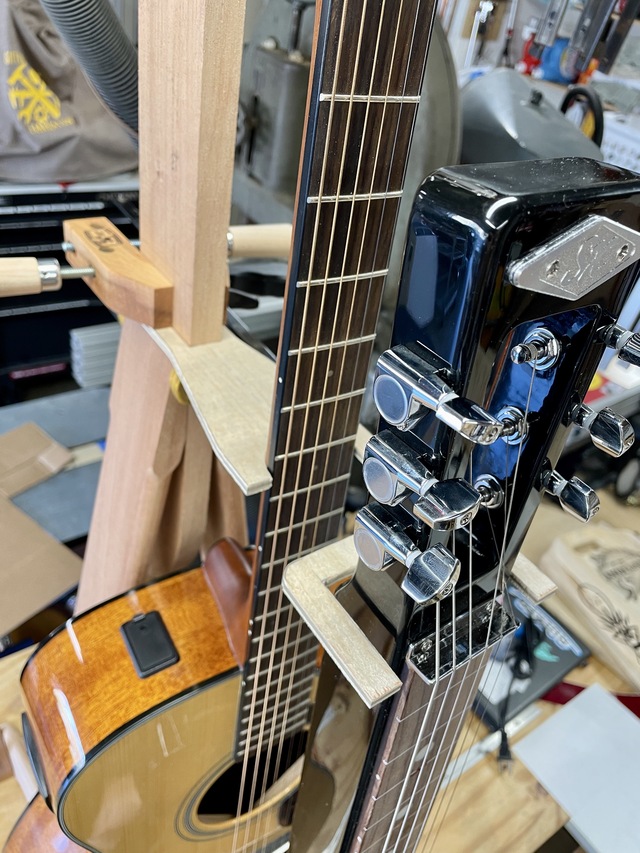
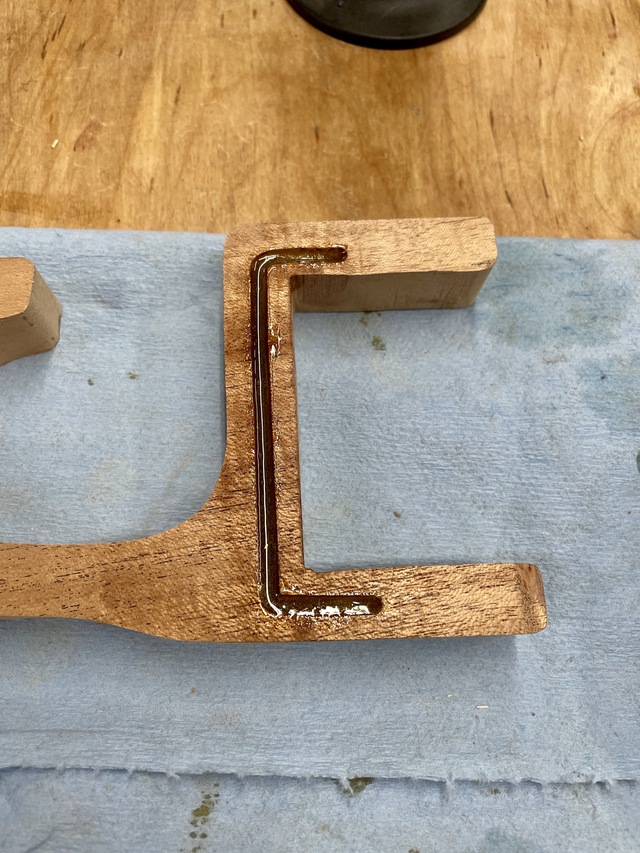
Once I felt like I had a shape that worked, I cut out the neck piece from a single board. But I knew I was going to run into issues since I had forces going both with and against the grain. The last thing I wanted to do was snap one of the fingers off at a narrow cross-grain section. I decided to reinforce the narrow cross grain section by routing a narrow slot across the joints I was worried about (on the underside of the neck piece) then installing a bent section of welding rod and back filling with epoxy. I’m sure I didn’t need the welding rod, but better safe than sorry!
I got a new piece of kit called Shaper TRACE for the Origin. It’s basically a frame with marking on the edges. You can draw whatever you want with a pen on a piece of paper, set the TRACE frame on top of it and take a picture with the Shaper App. The app uses the marks on the frame as reference points and creates dimensionally stable cut paths of whatever you drew. The cut file is automatically loaded into the Origin from the app, and Bob’s your uncle. Since I had made a ply template for the neck piece, I just traced it onto a piece of scrap cardboard and drew in where I wanted to cut the reinforcement channel. Snap the pic, and plop it down to cut. Dropped in my welding rod and glooped in some epoxy.
Now that I had the neck piece sorted, I needed to shore up the cross section on the bottom of the stand to tie the feet together. Ultimately I think I could have skipped this, since I would have large, well fit, face-grain to face-grain glue joints where the legs met the riser, but since I wanted this stand to hold two guitars, and the lap steel is much smaller than the 6 string, I needed a cross member to connect the feet, off of which I planned to mount another set of smaller feet projecting forward to cradle the bottom of the lap steel guitar. I laid out the cross tie and the baby feet, then spent exactly 3.25 years working on the joint angles where each would tie into the other. Since everything is at an angle, and many are compound angles, I just kept at it with a fine rasp and sand paper until all the joints and angles were correct.
Shoot me. Seriously.
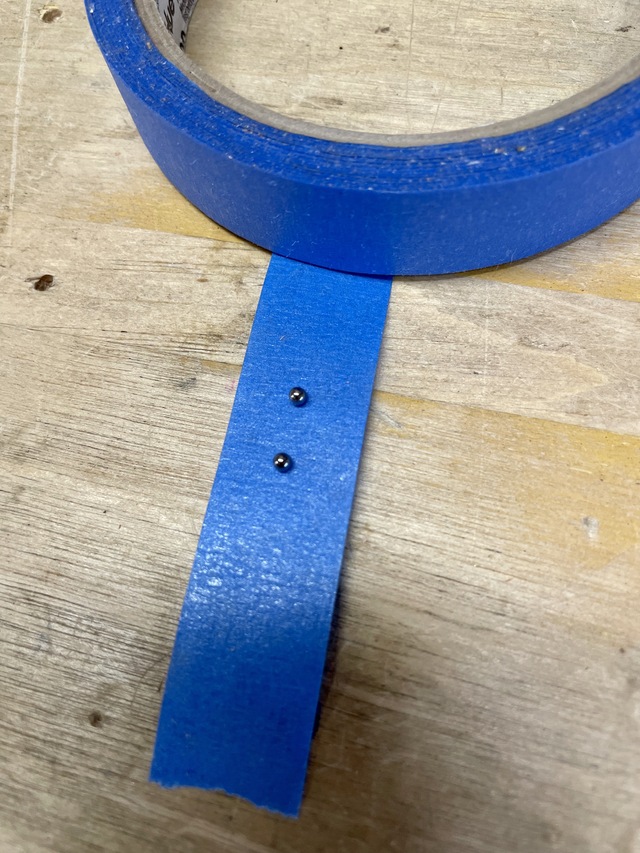
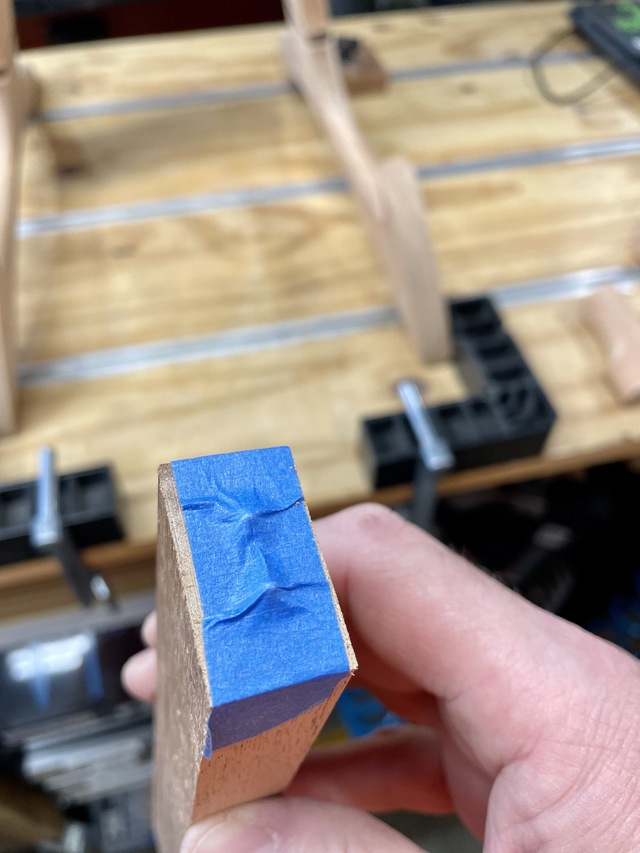
I planned to mount the cross tie to the inside of the big feet with some loose fitting dowels, which were really there more to help maintain alignment than anything else, but added some probably-not-necessary strength. I used a trick someone on here thought me to create line ups for the dowel holes using a couple small ball bearings stuck to some tape. They’re taped to the end-grain of the cross tie, which is then fitted to where I wanted it inside of the feet. Once it’s all just right, you squish the feet towards each other and the ball bearings leave dimples on both the feet and the cross tie. Just use the dimples as a starter for a brad point bit, and drill out the dowel holes. Once again, Robert is your Father’s brother. I inserted the dowels, but left them dry until I mounted the baby feet.
The baby feet I just glued on to the cross tie at the appropriate spacing and angle (which was a good trick), end-grain to face grain, but then went back and drilled a hole through the back of the cross tie into the back of the baby foot and installed a dowel there for strength. I backfilled the hole with filler, but you can’t see it, since it’s on the rear facing aspect of the project and angled down. Then I did some shaping and breaking of the edges before gluing the cross tie in place…but not quite yet.

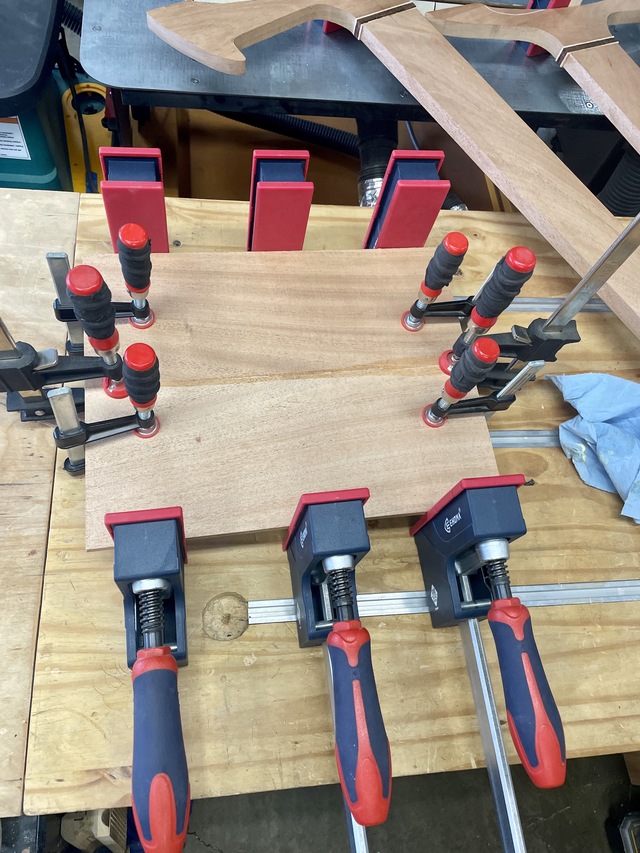
So I was close to being ready for the final glue up. I had everything in the jig and was looking at it and noticed the lower Maple-Cocobolo detail was just kinda lost in the project. So I whipped up another set of details and mounted them a the top of the legs, where they met the riser. Again, left chunky. Then I did the big glue up. It actually came together pretty clean.
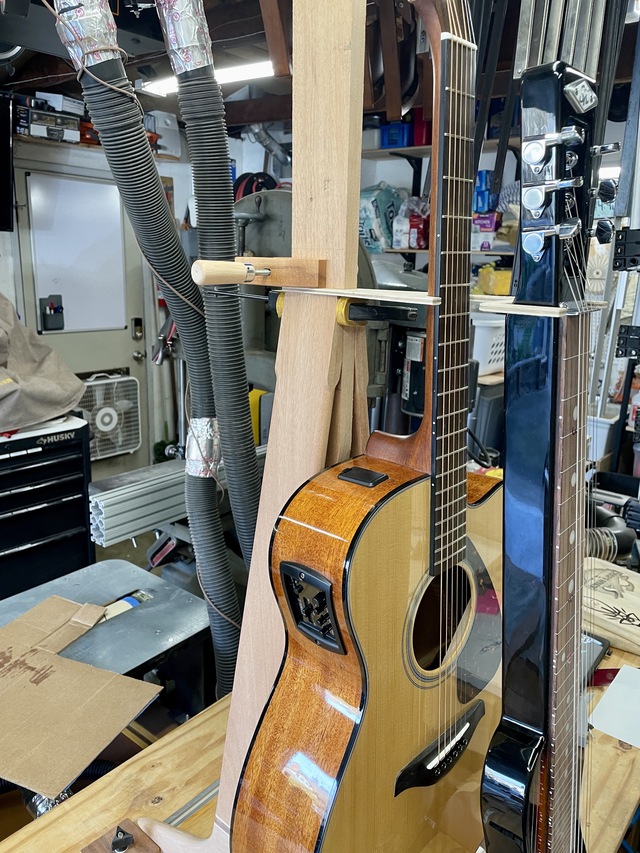
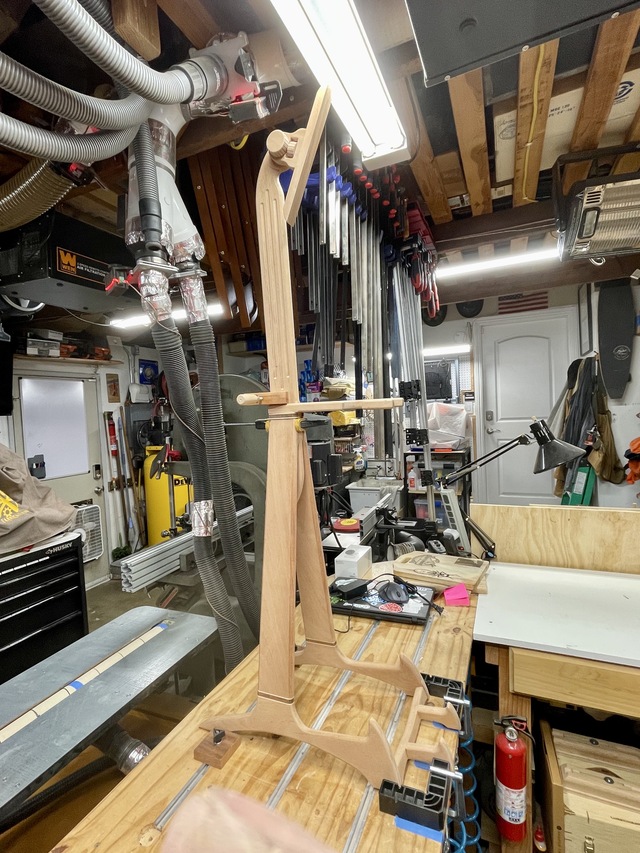
Below are the final fit-up shots before the Big Glue.
Once everything had cured up for a couple days, I went back and started refining and blending all the joints. Lots of rasp and file work, lots of sanding. That little Festool 90 sander with an extra soft backing pad made short work of the major blending, where it would fit. The rest was by hand. I was mostly really happy with the joints, mostly…even before they were blended…not terrible for complex, long angles.
Once more full assembly with all the pieces, then it was off to finish.
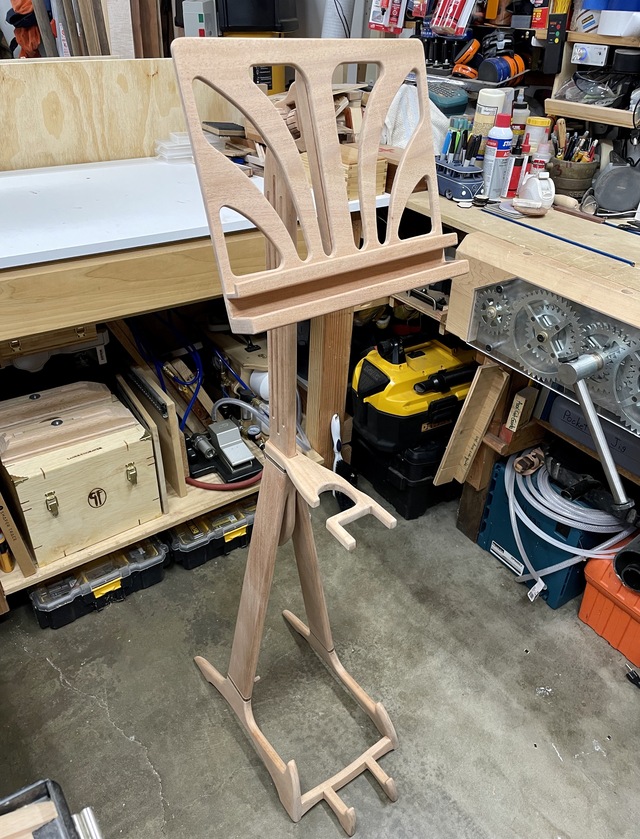
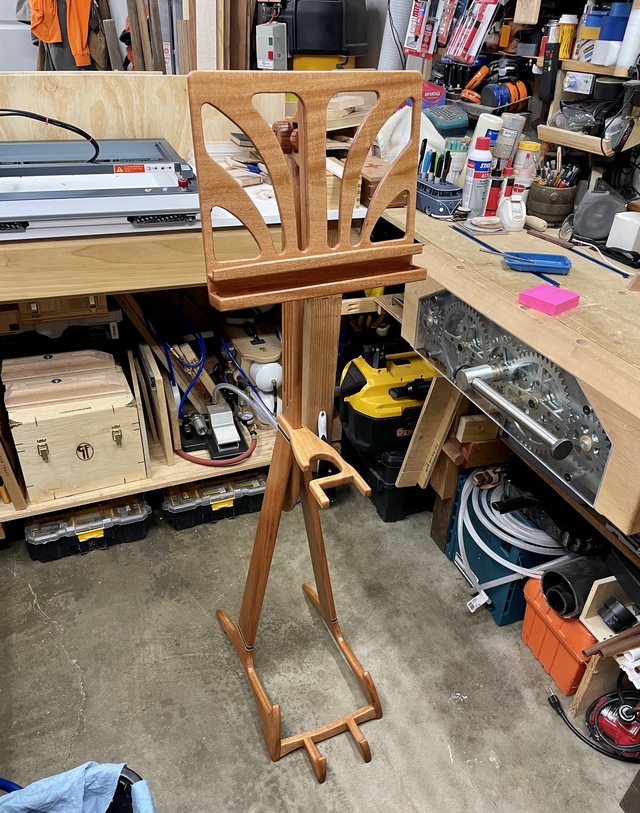
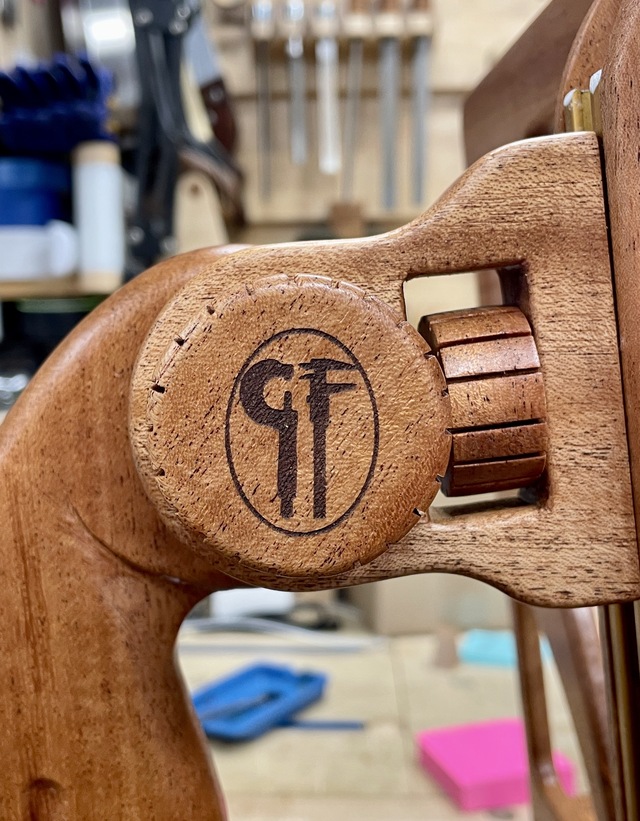
I decided to use Arm-R-Seal Satin on this. It’s the first large project I’ve done with that finish and I’m very happy with how it came out. Sanded everything to 320g, then foam brushed on 4 coats over 4 days. Buff Sanding with 320g after the first coat, a maroon pad after coats 2 and 3, and a white pad after coat 4. I gave it a few days, then buffed on some Ren wax and added a maker’s mark on the knob.
Y Roberto es su Tijo! Gracias!
Ryan/// ~sigh~ I blew up another bowl. Moke told me "I made the inside bigger than the outside".
30 Comments

beautiful stand ryan. nice job with the pic's and description of your process. i see a little maloof style blending of the wood going on here.
working with my hands is a joy,it gives me a sense of fulfillment,somthing so many seek and so few find.-SAM MALOOF.

What an awesome stand both in function and design!

Beautiful project Ryan! I enjoyed the informative and entertaining write up!

Very nice stand, Ryan! Got everything you need there but the Marshall stack. ;-)
May you have the day you deserve!
Thanks folks. It was a fun build. I do love functional furniture…
Ryan/// ~sigh~ I blew up another bowl. Moke told me "I made the inside bigger than the outside".
Got everything you need there but the Marshall stack
Ha! That’s funny because my only amp is a Positive Grid Spark Mini.
I’m not a rocker 🤣 🎸
Google it and you’ll see what’s funny about your statement…!
Ryan/// ~sigh~ I blew up another bowl. Moke told me "I made the inside bigger than the outside".

Very beautiful and great

Downright gorgeous Ryan!

That’s an impressive project, Ryan, as much sculpture as traditional woodworking project.
I think your wife made the right move by nudging you to make a wooden elevation/tilt mechanism. Plastic knobs would have cheapened the look of the piece.
I think your wife made the right move by nudging you to make a wooden elevation/tilt mechanism. Plastic knobs would have cheapened the look of the piece.


Great stand and write up R'Gi....
But you had to spoil it (for me) with that shot of the Shaper...
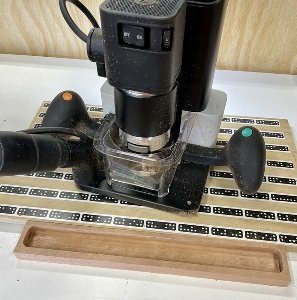
after seeing that, I was green with envy and found it hard to maintain my composure.
If your first cut is too short... Take the second cut from the longer end... LBD
Thank you all.
Ducky, I keep telling you I’ll send you one!
Ron- she’s normally right…impressively, sometimes she right even when she doesn’t know what she’s talking about. Scary…
Ducky, I keep telling you I’ll send you one!
Ron- she’s normally right…impressively, sometimes she right even when she doesn’t know what she’s talking about. Scary…
Ryan/// ~sigh~ I blew up another bowl. Moke told me "I made the inside bigger than the outside".

Looks beautiful and I like the carving. It's been on my list to make for a long time for my mother law....
No name noobie here

What a beautiful stand. And not only a beauty, also very handy. Playing wrong notes is now completely out of the question.
Really nice stand!
Thanks for sharing the process
Thanks for sharing the process
Petey

a really nice stand GR8 JOB 😍😎👍
*TONY ** Denver * ALWAYS REMEMBER TO HAVE FUN

Looks good. Nice work on all the fitting parts.

Love the outcome Ryan, I enjoyed the process writeup and especially how you designed and adapted on the way.
Something like this with all the small details that can make or break it needs that ability.
Wonderful stuff!👍
Something like this with all the small details that can make or break it needs that ability.
Wonderful stuff!👍

Beautiful instruments on a beautiful stand. Well done. Nice design and loved the write up on the process of making the stand. Thanks.
Ron

Wow, what a superb project Ryan! The finished stand is something special.
"Duck and Bob would be out doin some farming with funny hats on." chrisstef
Extremely well done....I would have expected nothing less tho.....Excellent write up, too. The design is as good as the execution! I play both the traditional and lap steel too! In fact I started when I was so young I could not get my little fingers around the neck, so I started on the lap steel....I still have one, but not my original..I wish I had it. Stringed instruments, bagpipes, woodworking, you are very talented!
Mike
More from RyanGi