


Share your craft projects
Make new craft buddies
Ask craft questions
Blog your craft journey

RyanGi
9017 posts
and
59 followers
in over 3 years
in over 3 years
More from RyanGi


Music Box


One of my guys first daughter has an upcoming birthday. I thought it would be fun to make her a music box.
I had a nice piece of zebrawood, and found the music workings online. I did some basic outlining for shape and size, then went to resawing. Since I wanted thin walls, I opted for mitered corners. Resawn, milled, sized, shaped and mitered, I laid them out to accept the floor piece. I had a thin piece of cherry that was almost the right size for what I wanted so, after fitting it, I laid out and drilled mounting holes for the music workings.
I had a nice piece of zebrawood, and found the music workings online. I did some basic outlining for shape and size, then went to resawing. Since I wanted thin walls, I opted for mitered corners. Resawn, milled, sized, shaped and mitered, I laid them out to accept the floor piece. I had a thin piece of cherry that was almost the right size for what I wanted so, after fitting it, I laid out and drilled mounting holes for the music workings.

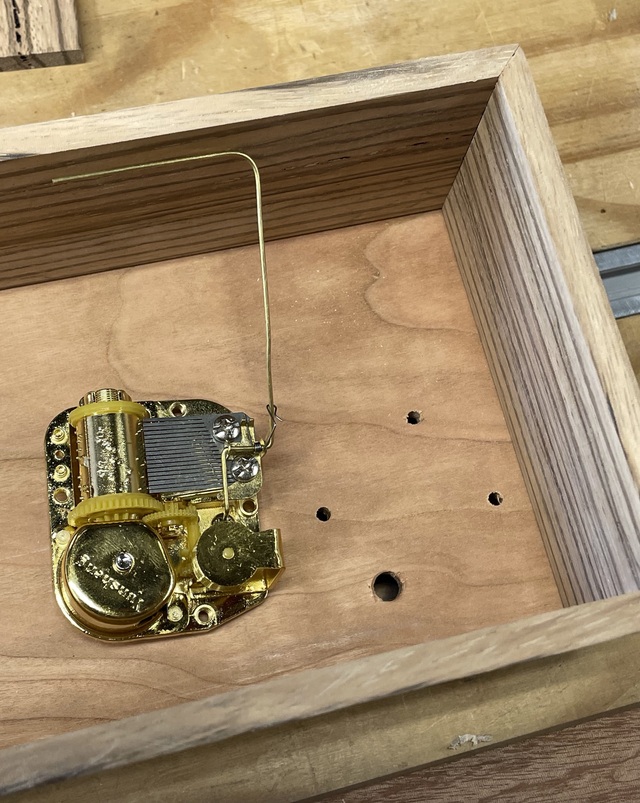
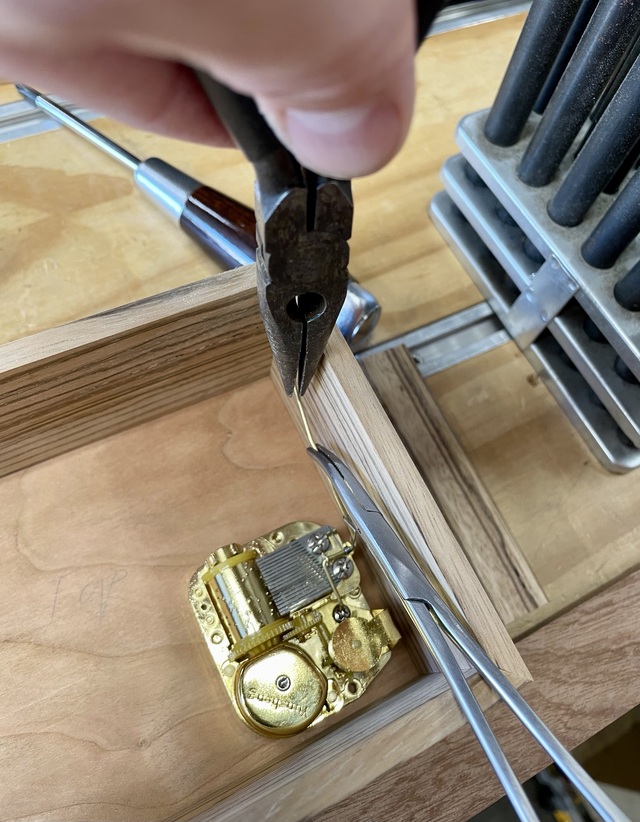
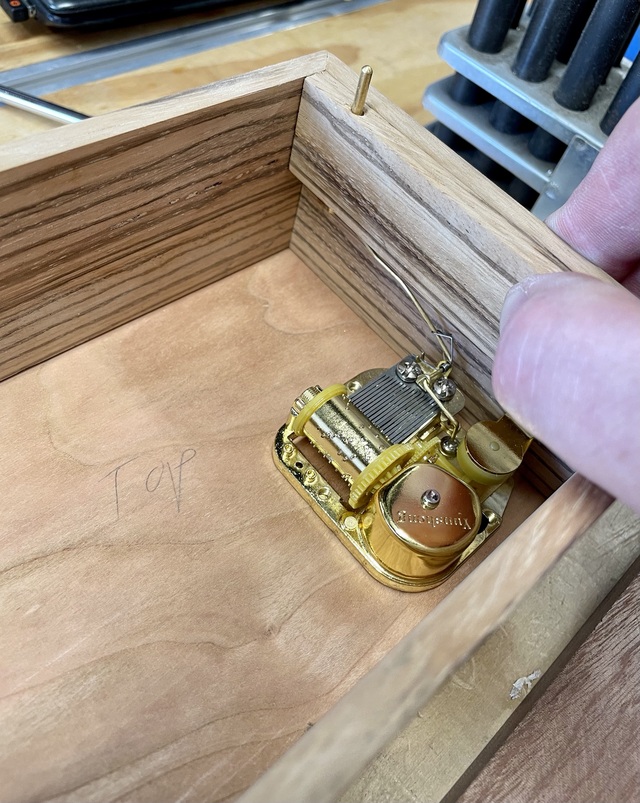
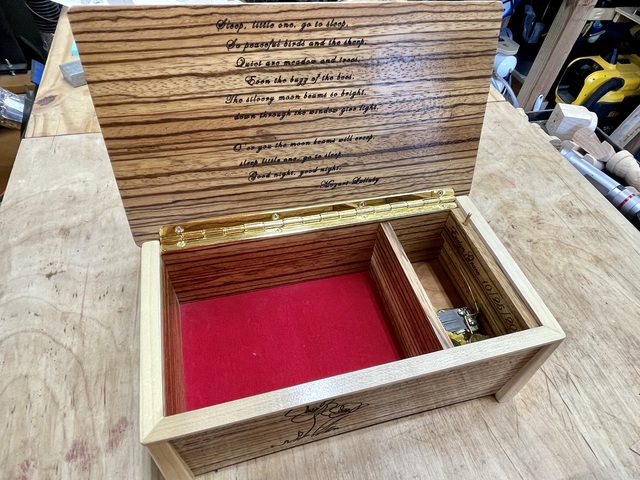
The music movement I bought had a couple different ways to start/stop the music, one of which is a piston that can be mounted through a wall and depressed by the lid. I needed to add a wall extension to house the piston, then did some primary fitting to make the whole thing work.
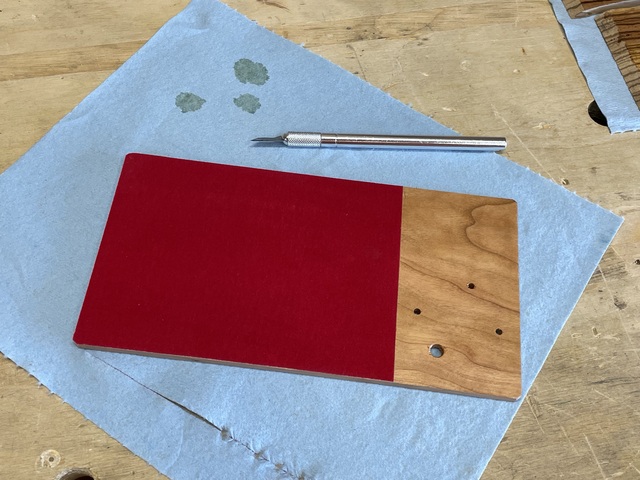
I planned to line a majority of the base with adhesive felt, so I needed to pre-finish the interior. Wouldn’t work to apply finish with felt in place! I masked off the glue joints and pre finished with several thinned coasts of wipe on amber shellac. After it dried, I applied the felt and trimmed it.
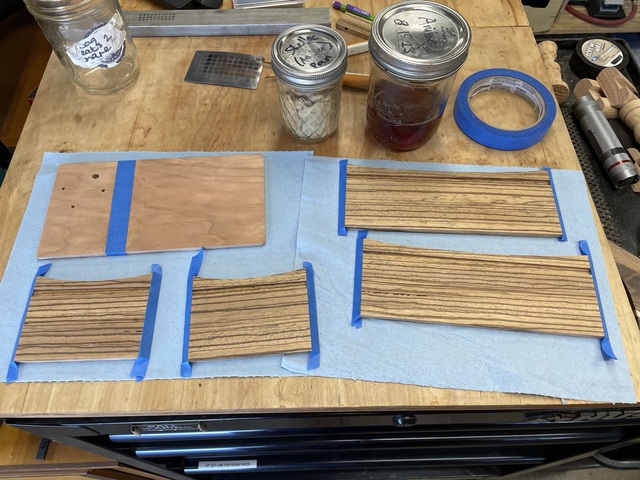
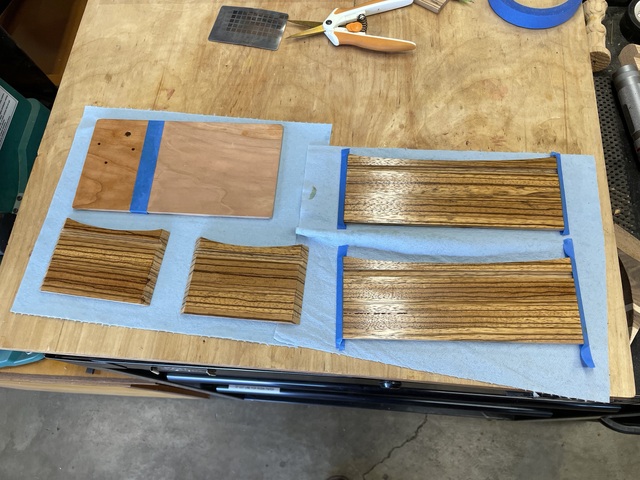
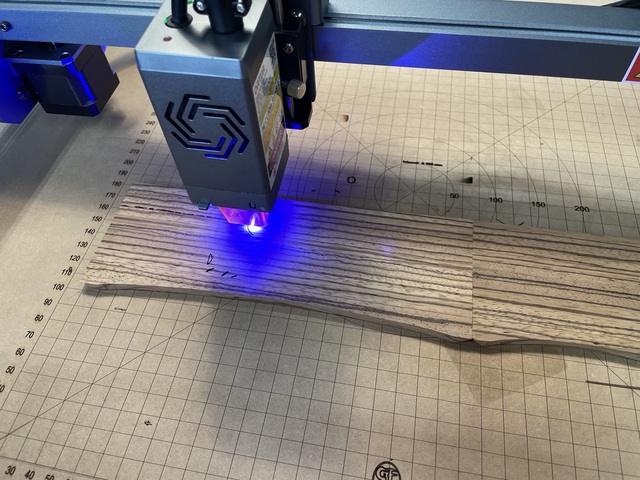
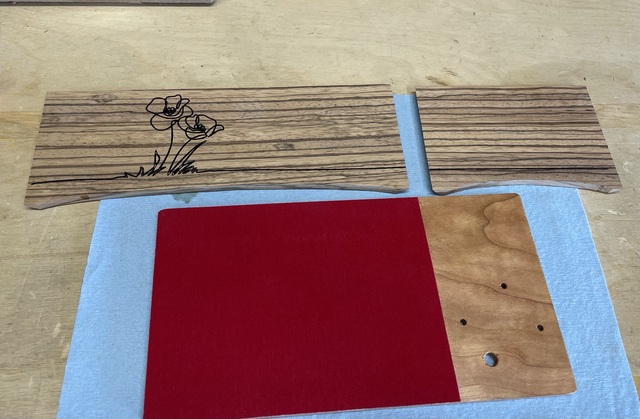
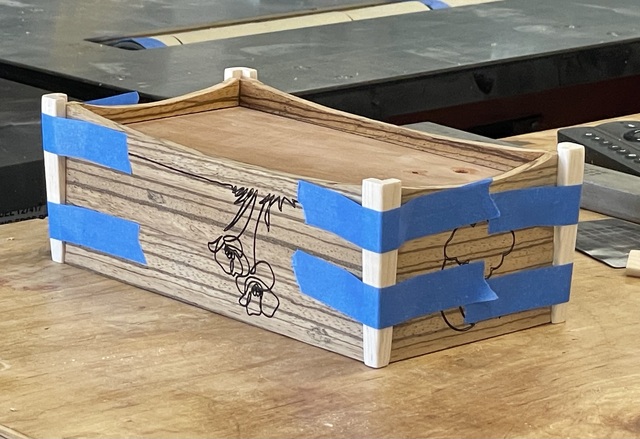
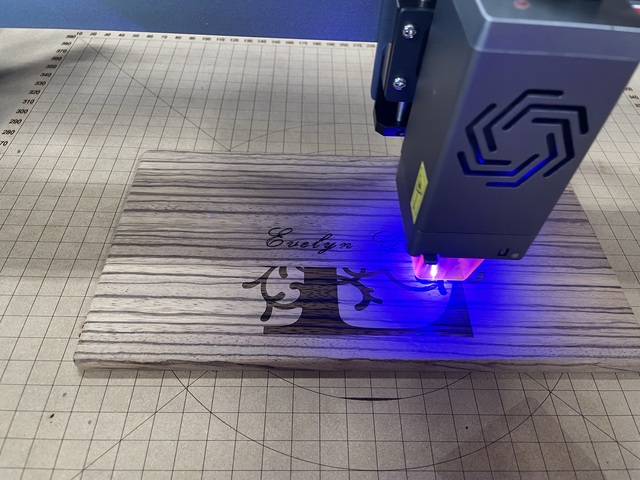
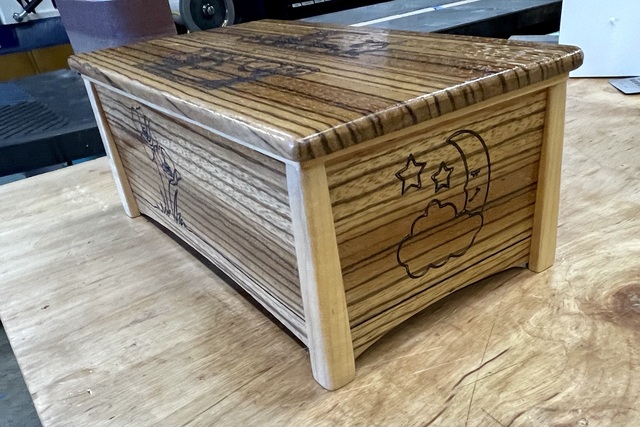
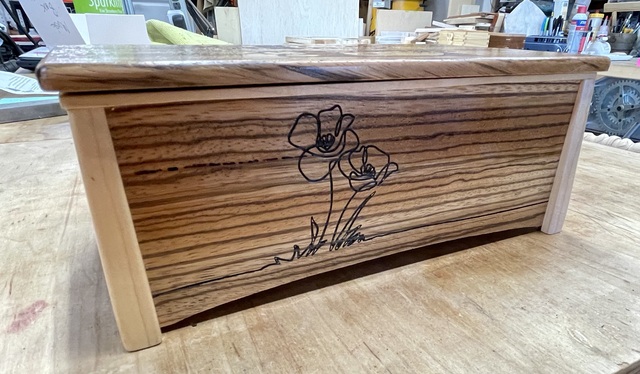
Part of my plan was to cover my mitered joints with legs that would run up the length of the joint, providing a little elevation, replacing splines for strength, and maybe adding a little color. More on that later. With the shellac dried, I wanted to add some decoration to the exterior walls. This is most easily done with the pieces flat, and the designs I wanted to use run off the edges, and I wanted those ends hidden behind the legs. Laser away!
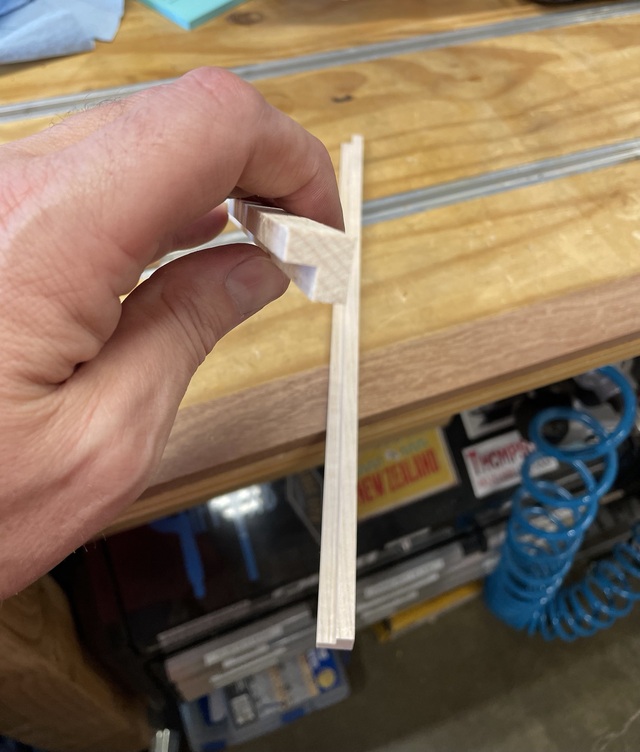
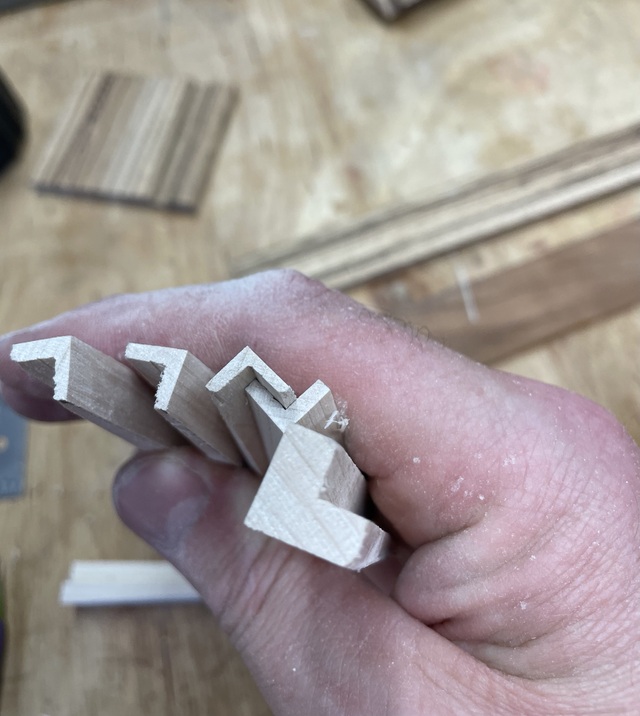
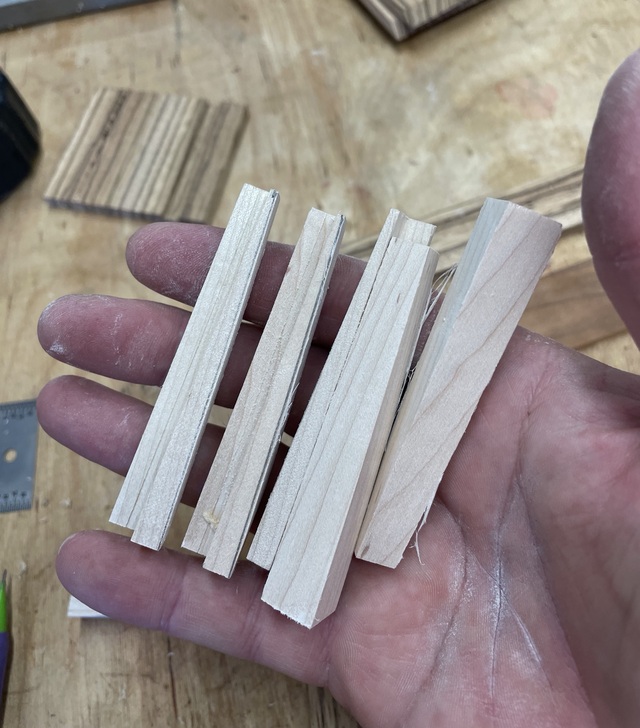
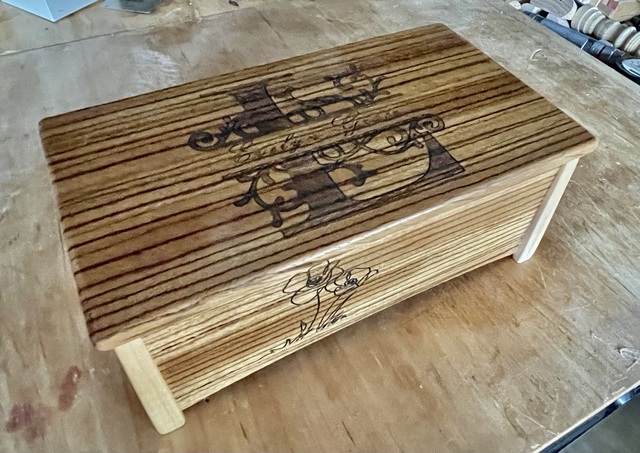
With the exterior decos done, it was time to assemble the carcass and glue it up! Then I turned my attention to the legs. I thought maple would be a nice contrast against the zebrawood. I wanted the legs to cover the miters, and I wanted to add some dimension to them to break up the flat box walls. I started with cutting the maple down to 1/2” square stock, then I cut out one corner, leaving 1/4” thick ‘Ls’. Those I cut to length, then tapered them each down on the belt sander. I did some basic layout lines, but most of it was pretty much just eyeballing it. The legs ended up 1/4” thick on the bottom and a fat 1/16 on top. I rounded out the edges by hand to give them a nice shape. I made several extras, because I was sure some of them wouldn’t come out. Turns out I didn’t need them. Amazing!

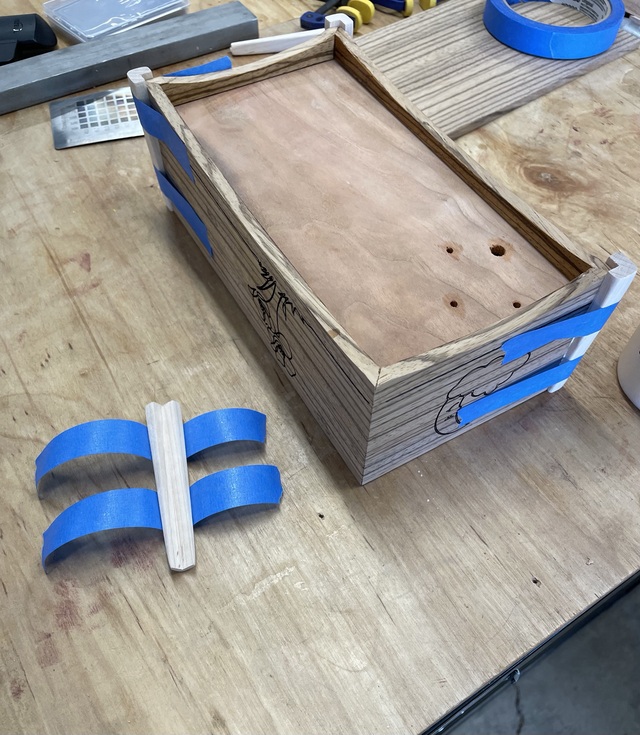
I turned the box upside down to keep everything flush on top and glued them up using blue-tape-clamps.
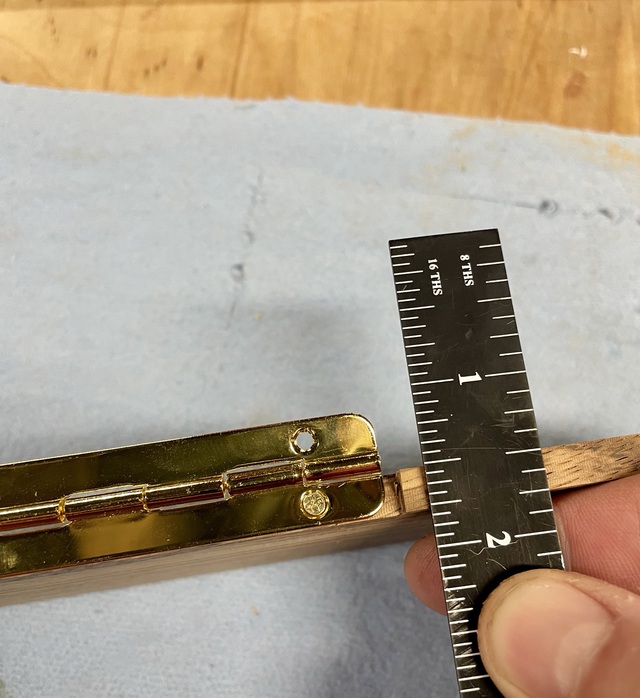
At this point I started wrestling with the lid and how to mount it. I had initially planned on using a couple small quadrant hinges, but the walls were just a little too thin for these to work right. So, I figured a small piano hinge would save the day…ever tried to find a piano hinge with a 1/4” leaf? Lemme tell you, not a lot out there. I managed to find some online…and when they arrived they were about perfect! But, to get everything to fit up cleanly, I was going to need to recess the leaf into the wall. A couple test cuts on the router table in a couple different configurations showed me it was going to be a bit of a challenge. I could use a wide upcut and trim down the top of the wall by routing it with the box upside down, but I was worried the rotational force of the spinning bit might tear up the wall. This would have been an easier gig if I’d planned this out before assembly! C’est la vie!
Chatting with you all here in the forums yielded another option: build up the top of the three non-hinged walls with decorative strips to make up the difference in height. Brilliant! Not only would it be easier to mill the strips to the perfect thickness to offset the hinge depth, but I was able to make them from maple matching the legs for yet more contrast. Before mounting these top rails, I installed the false wall for the music workings piston (decorated with the young lady’s name and DOB), as well as a divider wall to keep trinkets out of the music workings. I glued on the maple strips and shaped them slightly after everything was dry.
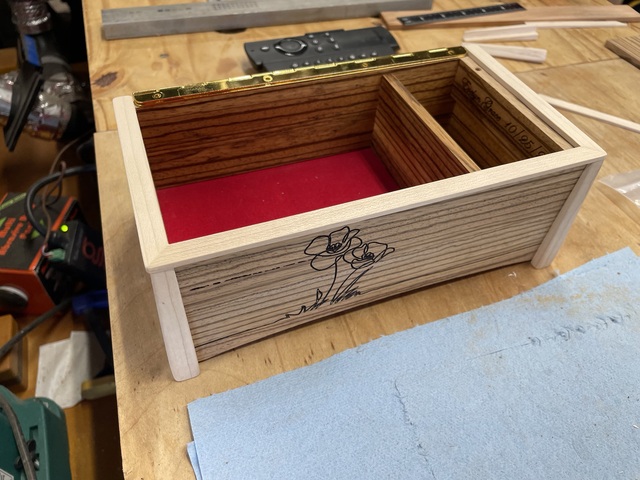
Initially, I wanted to bevel the edges of the lid back like a panel, but keeping the thin-wall theme made that impossible. As it was, I was going to need to cut down the brass mounting screws to keep them from breaking through the top of the lid. So, I decided to go with just simple round overs. The whole project needed soft edges, I figured, since it was going to a three year old!
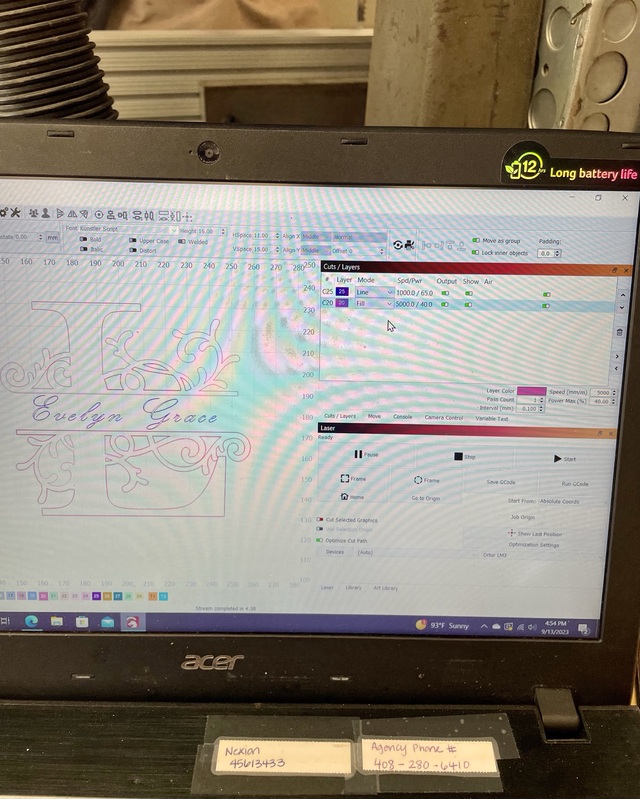
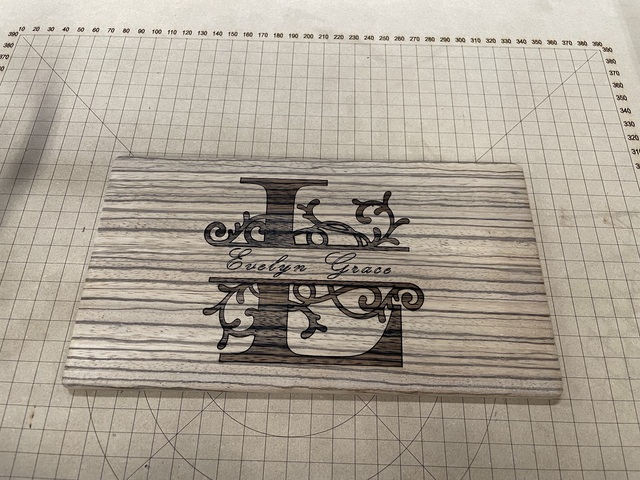
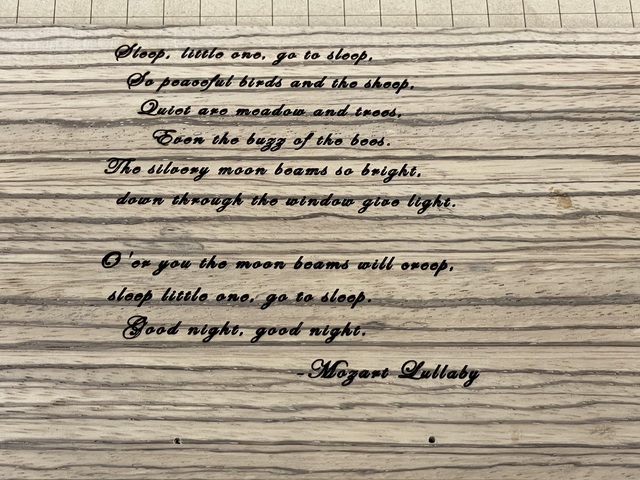
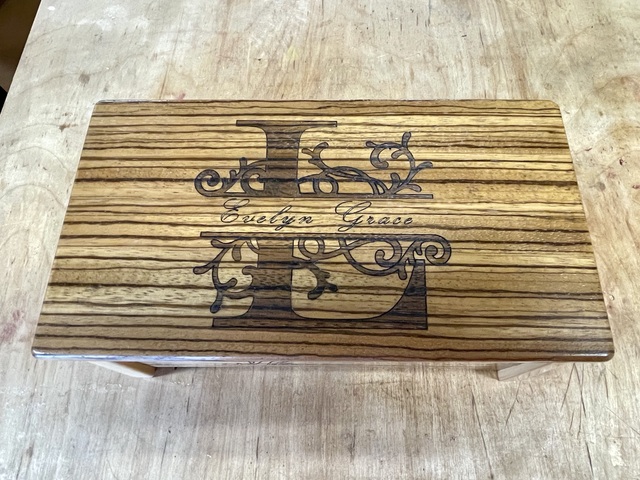
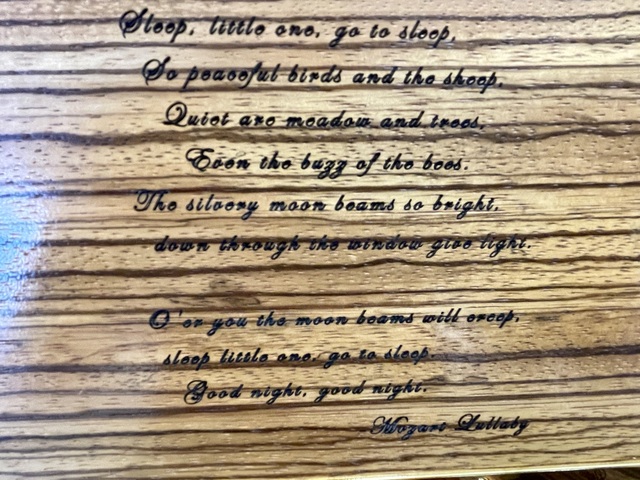
I decorated the top of the lid with her name imbedded in the first letter of her family name. Inside, I engraved the lyrics to the song the music box plays. Called (the) Motzart Lullaby it’s, surprisingly, not written by Mozart. The lyrics are a translation from German. I checked several references and they all show the same words…missing what would be a more common English sentence structure and prose but, when you sing along to the music, it actually sounds right for some reason!
After final fitting, I masked off the inside and shot three coats of Amber shellac, followed by 7 coats of lacquer (5 gloss and 2 satin… the satin didn’t dull down the gloss as much as I expected, but still came out nice). After letting is cure for a few days, I buffed it up on the Beale three wheel system. Final assembly and we’re all done! For some reason the glamor shots didn’t come out as nice as they usually do. Bad lighting somehow!

Ryan/// ~sigh~ I blew up another bowl. Moke told me "I made the inside bigger than the outside".
26 Comments
Great post, Ryan. That was some intricate work. Pretty impressive.
Half of what we read or hear about finishing is right. We just don’t know which half! — Bob Flexner

Beautiful box and I really like the grain and printing on it. Good job.

Well done, box looks great

lucky girl GR8 JOB 😍😎👍
*TONY ** Denver * ALWAYS REMEMBER TO HAVE FUN

Very special box for sure.

beautiful box. wll done.
working with my hands is a joy,it gives me a sense of fulfillment,somthing so many seek and so few find.-SAM MALOOF.

Nice work, Ryan! Hinges on thin stock can be challenging, and I usually end up mounting them on the outside of the box so I can tape the box shut and ensure alignment.
May you have the day you deserve!
I used double sided tape for placement Dave, but the piano hinge was (luckily) almost the perfect size to begin with…maybe only 1/16” gap per side!
Ryan/// ~sigh~ I blew up another bowl. Moke told me "I made the inside bigger than the outside".

Nice looking box Ryan - those maple strips set it off, so lucky you couldn't get the quadrant hinges to fit

Contrasty woods and neat embellishing really make for a great box. Bravo!
Really well done Ryan..what a great gift! She will have that forever.
Mike

Nice box Ryan, what a great idea for the little girl!
"Duck and Bob would be out doin some farming with funny hats on." chrisstef

Really beautiful work Ryan. Great gift for a little girl!

Very nice box Ryan. Love that contrast of the Zebra with the Maple.

Well done and a great how you did it. Lovely box.
Ron

So lovely project!!
...woodicted

Well thought out and beautifully done. The laser work put this over the top.
.................. John D....................
I like your technique. Did you cut the side moldings on the router first before you tapered them?
I cut them on the table saw, then shaped them on the belt sander.
Ryan/// ~sigh~ I blew up another bowl. Moke told me "I made the inside bigger than the outside".

That's right purdy box! Your recipient will be sure to enjoy it.
The Other Steven
More from RyanGi