RobsCastle
in over 10 years
More from RobsCastle
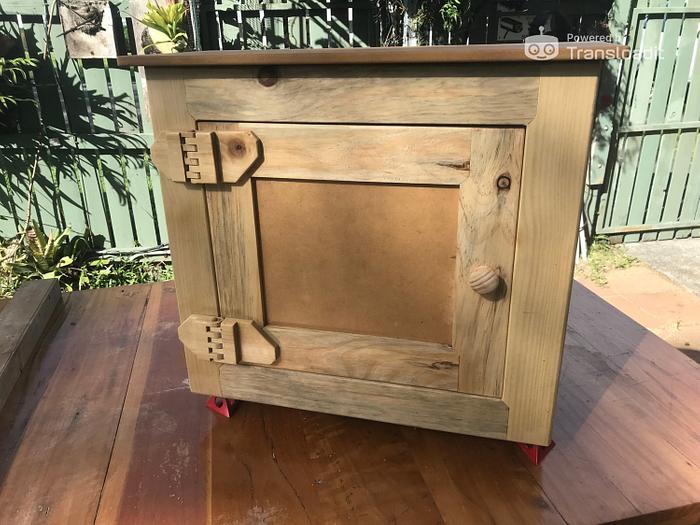
Garage General use Cupboard
The Items are still under consideration however the cupboard was of an interest to me so I decided to build it while they were deciding.
The dimensions required for the small cupboard were 500 mm high 200mm deep and 550 mm wide
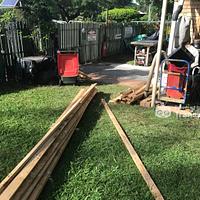
I used some of the rough sawn Inglass timber I had, and finished it to 68 mm wide and 21 mm thick.
I decide to use the Kreg notched beaded face frame concept without the beading or pocket hole screws choosing to use biscuits instead.
This is the back
this is the front and door. A few nail holes plugged up which will be inside.
This is the two sides
For the internal Top and bottom, I used 12 mm MDF and milled a 10 mm tongue on them.
The construction was able to be done screw free by using "0" biscuits and the combination of a biscuit cutter and slotting bit for the recesses in the notched areas.
Fairly conventional procedure here.
However to get into the notched areas a slot cutter was used.
To ensure this method would work I had a test pieces available for almost every step to check the concept
Care had to be taken to ensure the cutter did not encroach outside the notched areas.
The individual panels were assembled and glued up.
next came the final finishing and dry assembly.
As the front and back were attached to the sides using T & G a few trimming of the tongues edges was required and it was glue up time.
Next came the door fitment.
I had intended to use face frame euro hinges but as no metal products had been harmed so for I decide to waste a day making two wooden hinges!
Now this was an exercise in itself as I encountered heaps of Opps's when attempting to get them to work effectively
However managed to pull it off to my amazment!
They looked absolutely too chunky, so I set about attempting cosmetically modify them
Eventually this was the best I could do for a first attempt result.
A little edge profile sanding and on they went.
Finishing with a final rounding of the external edges of the cupboard and door, this had it looking like a professional had made it!
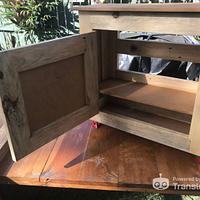
Used my Kreg shelf pin jig to provide 7 positions for the shelf
Stuck a lid and a knob on, applied a coat of sanding sealer and its finished.
Regards Rob
22 Comments
Ron
Ryan/// ~sigh~ I blew up another bowl. Moke told me "I made the inside bigger than the outside".
Joinery was great to follow along with, the router work makes me interested in that bit for frames. Glad you fought through with those hinges as well!
Cheers, Jim ........................ Variety is the spice of life...............Learn something new every day
working with my hands is a joy,it gives me a sense of fulfillment,somthing so many seek and so few find.-SAM MALOOF.

Finished up looking great for scrap timber... Like the hinges... and a great write up on howto... the hantool guys should be wetting themselves if you don't mention use of power.
Now off your rrrs and play Nadia... or give it to your neighbour.
If your first cut is too short... Take the second cut from the longer end... LBD
Life’s Good, Enjoy Each New Day’s Blessings
Here we go:-
789Ron, RyanGi, SplinterGroup, Jim Jakosh, Pottz, Steve Rasmussen, Hokie Ken, LittleblackDuck, Crowie, MikeB_UK and also 1 x anon, she knows who it was.
Gasp and that was without taking a breath
I was really taken back by all the supportive replies.
One of the noticeable common comments was very obviously regarding the wooden hinges.
Of which incidentally was just an after thought.
Now because of all of them, I will produce another pair exactly the same and document my bumbling effort to replicate them. So all can see how it was done, there was no special tools used just ones commonly used in all of your workshops.
They don't have to be as big and ugly as the ones you saw but they came about as you have possibly realised from off cuts of the cupboard frame timber.
Again thanks for viewing and providing encouraging replies
Regards
Rob
Regards Rob
Rob
Regards Rob
Going good....Just been very busy. Hoping to be back in the shop soon.
Regards......Cliff.
Regards Rob
damn i miss the old days with you and the duck ! we had some good fun ! the 3 stooges.........................😢
working with my hands is a joy,it gives me a sense of fulfillment,somthing so many seek and so few find.-SAM MALOOF.
*TONY ** Denver * ALWAYS REMEMBER TO HAVE FUN
Ron


