Share your craft projects
Make new craft buddies
Ask craft questions
Blog your craft journey

Dave Polaschek
2182 posts
and
43 followers
in over 3 years
in over 3 years
More from Dave Polaschek
Small box for veneering practice
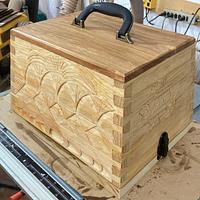
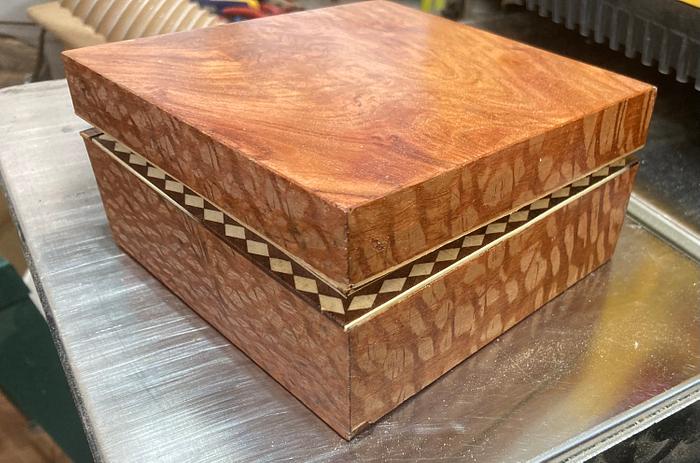
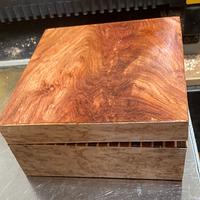
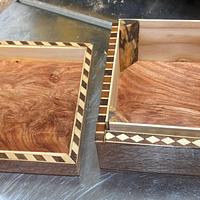
I recently built a small box and used it to practice my veneering. Turns out I needed the practice, but can do a decent job if I take enough swings at it. The full story is here if you’re into all the gory details.
Pine box, veneered with pretty things from a sample box of veneer from Veneer Supplies, and some inlay banding from Inlay Banding. Given away to the winner of a drawing on mastodon who thinks it’s “beautiful!”
Will be doing at least one more, probably bigger box to practice more so I can maybe try to veneer our 5’ round table top next summer once it’s warm enough to work outside because I don’t have enough room to work on a five foot diameter piece in the shop.
May you have the day you deserve!
25 Comments
I agree with the "beautiful" descriptor. I've never tried veneer but this makes me think I should give it a try at some point.
Awesome! I need to do something similar.
Ryan/// ~sigh~ I blew up another bowl. Moke told me "I made the inside bigger than the outside".
That's pretty impressive for being a practice piece!
What gorgeous timber and detail in that box, beautiful 👍
Life’s Good, Enjoy Each New Day’s Blessings
A great read Dave. I followed all the links, and it was something of a journey. Anyhow it brought back some memories.
I had learned at the hand of a Master some years ago, and back then did quite a few pieces, but I had a cheat where I could ask Rob what he thought at every turn. Learning seems like so many steps, but you hit on what some of the finer points are.
Glue has to be right, if not it's a lot more work. Hide is the only way to fly for me. Any and all PVA types are a liquid mess, and the Hide is reversible, so errors can disappear.
Cutting your veneers need to be right, too much sounds like you might sneak up on it, but it's harder to do that. Too little is obvious, it won't cover.
Clamps, well I try to avoid them at all cost. If you are still in the trying mode, try a hammer, and see if hammering on the veneer isn't easier?
Any way ya do it it's a journey, and can actually be a lot of fun. Frustrations are the problem spot, so if you didn't, try Hide, and a Hammer.
Rob did a bunch of videos for Pop WWing, SAPFM, and other places. Here are 2 on hammer veneering.
Dave, this box looks really good, nice work.
Like George commented, I followed the link to your veneering quest, nice read.
Like George commented, I followed the link to your veneering quest, nice read.
I'm not in for veneering (yet), but will have a look at your journey. Thanks for sharing.
Good write up and the box looks really great.
Ron
Thanks, folks.
One of the big challenges is that burl veneer is often wrinkled and needs to be softened with veneer softener. As this point, it’s pretty wet, and glue won’t stick especially well to it. And then given the dry air here, it dries unevenly, and will curl as it dries if you let it. So I’m working on figuring out ways to deal with that.
Also, as pointed out, cutting it to the exact right size ahead of time is important. And that needs to happen with the veneer dry, rather than wet and bigger than it will be when it dries.
I’ve been pondering setting up a press to try some relief printing at some point, and I think I may end up using the same press for veneer, trying to press it flat, then let it dry in the press so it stays flat so I can cut it to size accurately.
We’ll see. This winter is hopefully time for more practice so I can tackle the real deal in the spring.
May you have the day you deserve!
Sweet box, Dave!!!
Cheers, Jim ........................ Variety is the spice of life...............Learn something new every day
I like it!!
There's roosters laying chickens,and chickens laying eggs... John Prine
Dave,
Nicely done.
Nicely done.
daveg, SW Washington & AZ
Coming along Dave! I think you are approaching the practice phase the best way, just think about it then give it a try.
Are you cutting your pieces to fit, then applying or do you go oversize then flush up after it dries?
Edit:
Ahh checked out your blog 😬
Might try just doing two opposite sides at a time. Go oversized and trim when dry.
Tape the veneer where you'll trim and then you'll get a good masking down when you attach the next pair. keeps that glue from getting everywhere.
Thanks, folks!
Splint, oversize and trimming will work for a box, but for the table top I’m going to have pieces that need to fit exactly on three of four sides, so I’m going to need to work on my “cutting to the right size out of the gate” technique. Or leave oversize, and cut two layers of veneer at once so they butt up against each other perfectly, but that introduces new complications….
Note that I already have enough ash burl veneer to do the five foot diameter tabletop. And yes, burl is not as easy to deal with as straight-grained wood (and ash might not be the easiest, either), but I’m pretty sure it’ll look cool when I’m done, so it’s worth some fiddling about to learn what I’m doing.
May you have the day you deserve!
Yeah, that table is gonna be a challenge! I kinda gave up for now on getting clean and square edges for cuts. Don't really have a good saw for doing those fitting long edges where one is fighting the grain.
The laser takes care of getting perfect angles that are straight, but then there is the charing to deal with.
If the top is going to be wedges, at least if you can get the angles perfect, you can sandwich the parts between some steel angle and sand them square and flush.
The laser takes care of getting perfect angles that are straight, but then there is the charing to deal with.
If the top is going to be wedges, at least if you can get the angles perfect, you can sandwich the parts between some steel angle and sand them square and flush.
On your table top, when you go to cut for exact fit I was taught to overlap pieces, and using a known good straightedge, clamped down hard, cutting across both pieces of veneer. It leaves you with an exact line, and some small scrap from the overlap. Pull those pieces away, and it leaves the nicely laid out line. Experiment with some scrap on small box tops. On my own I found a rotary cutter worked best for me. A single point like an exacto can follow the grain, I hate veneer saws, so I tried a self healing mat, and a rotary cutter, and I guess due to the wheel it just rolled over grain, and with minimal effort I could follow the straightedge. Plenty of ways to true an edge for side by side lay down of veneer, but with a triangle like a round top, it's hard to depend on being able to true both halves at once. Laying them over each other, and cutting through was how I found the best result.
That’s about what I figured, George. I’m planning a radial pattern, but with a center so I don’t have super-skinny points to deal with in the middle. Haven’t bought the veneer for the center yet, though.
I’ve got a veneer saw, which I’m not especially enamored of. And a box-cutter wanders to follow the grain, so I had kind of decided on a rotary cutter, but we’ll see how it all goes with burl.
The nice thing I found on this one is that my Carter miter plane does a really good job of trimming the edge of burl veneer, so I can use that if I just need to take off a hair somewhere.
May you have the day you deserve!
Beautiful box, the grain on the wood with the finish you used really stands out. Excellent job.
Marc Adams has a video just on cutting veneer, and there were a few tools made that excelled in veneer slicing. One an Ulmnia? isn't made anymore because they went under, but secondary market has them, just costy. I think the other may still be available, but that video is about 8 years old, so probably 3 times what he bought at. I like the Ulmia?? It is sweet for cutting inlay widths. Once I looked for one on Flea Bay, and the cheapest I saw was more than I wanted to pay. BUT that was a while ago, and now everything is TURNING, so not sure how to inlay a turning, or especially veneer one, so market could be affordable. Like anything it ebbs and flows.
I've not seen a video with a rotary cutter, though I have heard of a few since I tried it. Rob laughed at it, he's a purist and mostly uses a veneer saw, but for quick trimming goes to an exacto.
I've not seen a video with a rotary cutter, though I have heard of a few since I tried it. Rob laughed at it, he's a purist and mostly uses a veneer saw, but for quick trimming goes to an exacto.
Given that my only tool for this besides razors is one of those crappy saws, I'm keen on reading up on the rotarys. I think Ross used one for his veneer panels blog which seems to excel.
I can get good edges with a chopper type paper cutter. but the shearing action tends to crush the veneer slightly at the edge so even if the fit is tight, there will be a slight dip and the joint.
One success I've had was using two 1/2"x3" sections of aluminum bar stock to sammich the veneer pieces between. Then a sanding block to match and square the edges to the bars. Any form of cutter always has produced flakes or chips from grain issues and the odds of having "downhill" grain for using a plane are near 0.
Anyway, the obvious solution is to become one of these experts!
Practice and then practice some more.


