Share your craft projects
Make new craft buddies
Ask craft questions
Blog your craft journey
Kelly
868 posts
and
19 followers
in almost 12 years
in almost 12 years
More from Kelly
Winding Stairs Over Original Rock Stairs
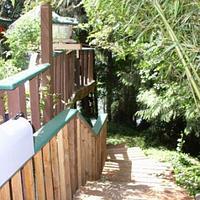
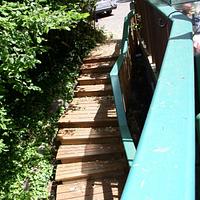
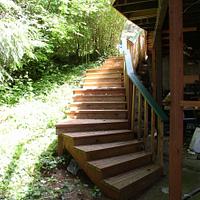
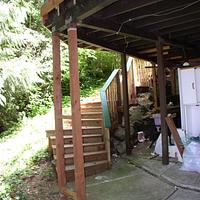
This was the first set of stairs I ever built. It was for a home overlooking Lake McKinney, near Lacey and Rainier, Washington.
The home became a months long project after one finished project would result in me being hired for another.
It started with me being hired to freshen a tarred roof. It was a very nice home, but the black tar detracted from it. For that reason, I asked the owners if it would be okay to, for a bit extra, toss sand [from a big box] on it, while the new coating was still wet.
The owners agreed to let me experiment, after I explained I’d done the same to a used, corrugated metal roof I’d installed on an addition (shed) to a house I was renting, to hid the tar I’d put on the rusty old metal I’d replaced the deteriorated fiberglass roofing with.
It made for a huge improvement to the appearance. Over the few years later, I'd drop by to visit the folks, when I was in their area, and the roof was doing fine. The sand contributed to a defense against the frequent rains on the Northwest coast.
Interestingly, professionals had touched the roof up several times before, but never suggested something so simple.
Because the owners like the improvement to their roof, they hired me do other jobs. I ended up painting the entire house (back-brushing and back-rolling, improving the appearance and quality of the job), repaired railing, installed a double French door downstairs (I still wonder at how I did that by myself, and we both survived), resurfaced a huge deck, leveled it using a method that allowed them to adjust it in the future (1" allthread, washers and nuts in the bottoms of the support posts) and so on.
Eventually, they asked me to build stairs over the existing rock stairs leading to the basement they were renting.
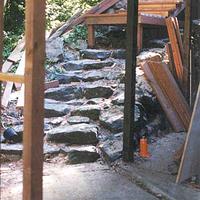
The existing stairs were well done, for the most part, and considering they were just built using big rocks. However, they could be treacherous. Especially because of moss build up in the rainy Pacific Northwest climate. I agreed and went for it. The photos are what resulted.
The stairs are four feet wide. I chose to only put railing on the dangerous side, to make it easier to move furnishing and appliances. It worked out well, according to the owners.
11 Comments
wow some engineering in that project. lots of twists and turns,
working with my hands is a joy,it gives me a sense of fulfillment,somthing so many seek and so few find.-SAM MALOOF.
Impressive build! Safety-wise that's a big improvement.
Nicely done. Certainly improves the look!
Ryan/// ~sigh~ I blew up another bowl. Moke told me "I made the inside bigger than the outside".
Great design work, stairs are well done. Nice work
Ron
Nice! Moisture on stone can be really slick. Building wide stairs over top looks to be a good solution.
Somewhere in the area of comedy, the hardest part, or the part I sweated most over, was, the railing. I wanted the compound angles to be perfect and flowing.
Too, even on the horizontal runs, I tried to drop the railing, say, 1/4", so water would never rest on those runs. Of course, that was picked back up on the next downhill run.
Too, even on the horizontal runs, I tried to drop the railing, say, 1/4", so water would never rest on those runs. Of course, that was picked back up on the next downhill run.
A big improvement IMO. those rocks looks great, but yes, accident waiting to happen.
If I was still a kid, I'd be planning on the RedRyder wagon ride down those new steps. Temptation is a powerful thing!
If I was still a kid, I'd be planning on the RedRyder wagon ride down those new steps. Temptation is a powerful thing!
That's some nice work!
The Other Steven
Nice work!!!!
Cheers, Jim ........................ Variety is the spice of life...............Learn something new every day
Kelly,
The stairs came out great. The railing adds a lot of safety. Got a pic of the sanded roof?
The stairs came out great. The railing adds a lot of safety. Got a pic of the sanded roof?
daveg, SW Washington & AZ
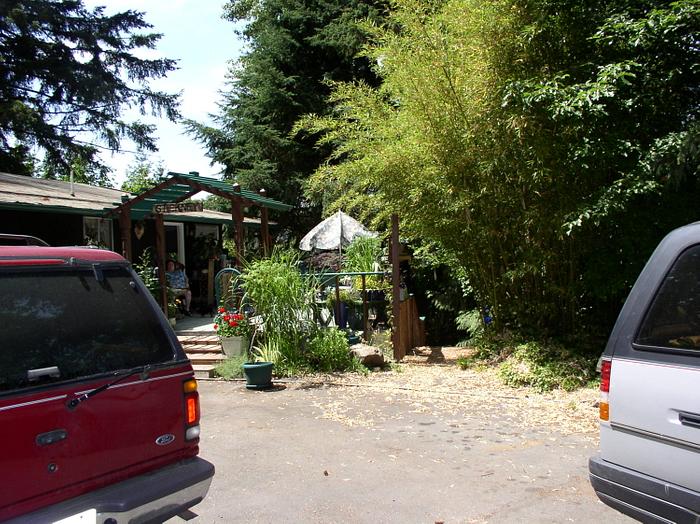
Unfortunately, the closest I can get to that is the first picture, which shows a bit of the roof, the entry to the deck and house, and the stair entry.


