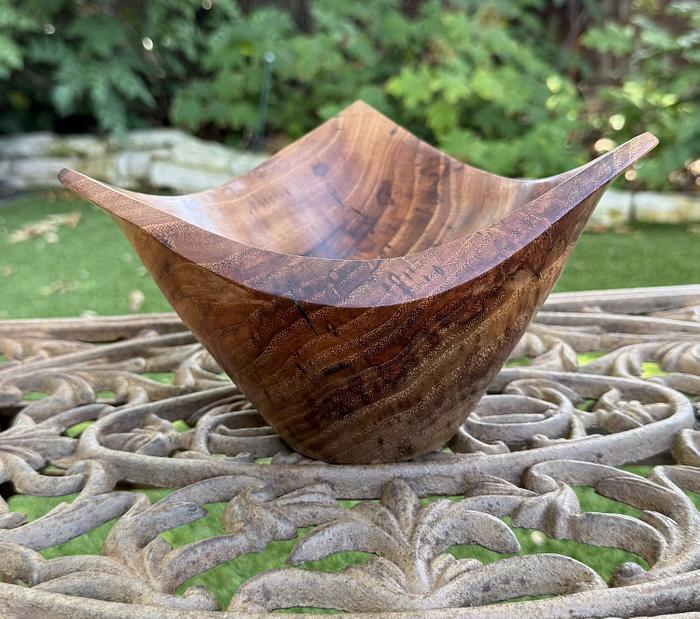
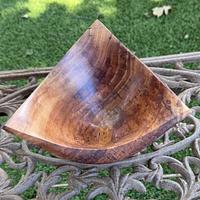
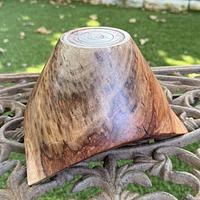
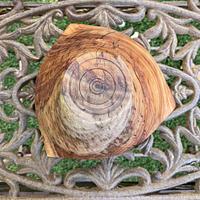
This was turned from another piece of the pecan log in my previous post. I've turned a couple of small tricornered bowls in the past that were mostly just to see how the process works and I've been wanting to make a larger one out of nicer wood. This is probably the hardest thing I have ever turned. Not only is this pecan some of the hardest wood I have turned but the process is pretty challenging, not to mention a little scary with corners whipping around at 900 rpm while cutting air.
You start with a perfect cube with 2 opposite corners between centers. In my case, I had a little bit of the live edge on one corner so making this the bottom of the bowl, this area gets turned away. I did have to cut the corner off so that I had a flat place to put the tailstock.
The first step was to put a tenon on the bottom of the bowl so that you can mount it in a chuck. My first tenon was too small so I had to turn it away and make another. I could not get it to fit well either and I must have dismounted and remounted it 5 or 6 times before I had a tenon I could mount in the chuck and started to turn. I went back and forth between shaping the outside and hollowing the top. You have to be very careful to retain the 3 sharp corners. Since you are cutting air, you have to take very light cuts as you get close to the corners. Not feeling too confident in my tenon, I kept the tailstock engaged as long as possible. Unfortunately, this makes it challenging to get deep with the bowl gouge so at about this point I decided to start working down the center core so that I could give myself a little more room.
I decide to use a carbide tool for this and got the only catch during the entire process and broke the tenon out of the chuck. After a little swearing, I called it a day and picked up the next morning. Fortunately, I had gotten just enough of the core turned down for it to act like a tenon that I could mount it in a chuck with the tailstock engaged to make a new tenon. Once I had it remounted the correct way in the chuck, I decided to drill a hole to set a depth and act as center should I need to flip it around again. Without the tailstock, hollowing was much easier. I put some marker on the corners to make them easier to see at 900 rpm and to sort of set a target wing thickness.
Once I got the outside shaped and the inside to depth. I decided that it was time to switch over to the 60 grit gouge to clean up tool marks.
There were some end grain checks so I decided to use a black CA to seal the cracks. I had it sitting at an angle using an end vise as a platform and the bowl fell to the ground and broke off a corner. More swearing and time to call it a day. When considering options the next day, I thought about cutting all of the corners off to match but the sharp points are part of what makes this cool so I decided to see if I could glue it back on. Surprisingly a rub joint is all it took. There was a slight gap where a small piece was missing so after the initial rub joint set, I glued in a piece of veneer from the same piece. I just used PVA glue but I used the same black CA I used to fill cracks to fill some minor gaps in the joint after trimming and sanding.
My initial plan was to use a Minwax poly sanding sealer as a finish that I would polish but I was not happy with how blotchy it looked after sanding. I think that I must have sanded through the sealer in some spots so I decided to completely sand away the sanding sealer I opted to skip the sanding sealer this time and simply polished it with Ack's sanding paste and finishing wax. I mounted it in a vacuum chuck to remove the tenon and finish the bottom.
Thanks for looking.
--Nathan, TX. Hire the lazy man. He may not do as much work but that's because he will find a better way.
first off the wood is gorgeous second the shape is awesome ! i wish i had the balls to try something like that. i can only imagine the "bruise" or open wound if your hand came in contact with one of the corners turning it ? ill just stick to simple bowls i think !
working with my hands is a joy,it gives me a sense of fulfillment,somthing so many seek and so few find.-SAM MALOOF.
The bowl is great looking but ( to me ) the compliments go to the skill and courage it took to accomplish this task. I really feel that the bowl is secondary to what it took to make it. That's my thoughts on this and I'm sticking to it - GREAT job Nathan
Thanks guys! BTW, on the left below is a prototype I did a couple of months ago from piece of Doug fir. The Doug fir was a little chippy and prone to tear out but it was a lot less scary. This was good practice and where I realized how light the cuts need to be on those spinning wings. If you want to give this a try, I recommend experimenting with softwood.
The square bowl was another interesting technique I tried where you get a square turning from the lathe. You basically turn a cylinder, rotate it 90°, turn it round in that axis, slice it in half and then hollow it. You can see how chippy the DF was.
--Nathan, TX. Hire the lazy man. He may not do as much work but that's because he will find a better way.
Great job, Nathan, believe it or not I was just about to start the same projects. The fact that you posted those prototypes lets me know we've been watching the same YouTube channels. 😀 The only wood I have big enough to do that is cedar from an old post from my deck. It's so soft. I'm not sure I'd be able to pull it off without the wings breaking off. That bowl is beautiful. I'm sure you're pleased.
Thanks! My wife claimed it before I could give it away so she is even more pleased than I am.
When turning the prototype from DF, the biggest problem is tearout on the edges of the wings as you are cutting air so it takes very light cuts. I imagine the cedar may be similar. I also found that I was not elevating my bowl gouge enough. When I positioned the gouge so that the bevel was tangential to the rotation cylinder, I got much better results. This was also easier with a curved tool rest.
--Nathan, TX. Hire the lazy man. He may not do as much work but that's because he will find a better way.