


Share your craft projects
Make new craft buddies
Ask craft questions
Blog your craft journey
kiefer
470 posts
and
61 followers
in over 12 years
in over 12 years
More from kiefer


CROSS CUT SLED ( VIDEO LINK )
")
")
")
")
")
I just uploaded a video if you care to watch it here is the link
https://www.youtube.com/watch?v=AyB9uA-Q9xY&feature=youtu.be
This sled is my new version of my cross cut sled that came to be because I got a different table saw and I am starting all over making new jigs etc.
One of the most important things I wanted accomplish with this sled design was to basically make it shop built as much as possible which I think I managed to do and very little was purchased in the way of hardware and recycled materials where used extensively like the LEXAN and the LED light along with the LIGHT MDF .The total cost of this project amounts to about $20.00 .
The other thing I wanted is to reduce the weight of the sled as much as possible but retain the strength and this sled weighs just over half of what my original design did .
https://woodworkingweb.com/creations/218-mitre-sled.

I have posted some pictures below to help understand the sled and accessories .


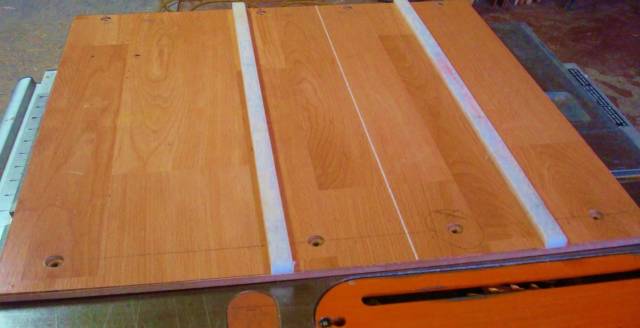


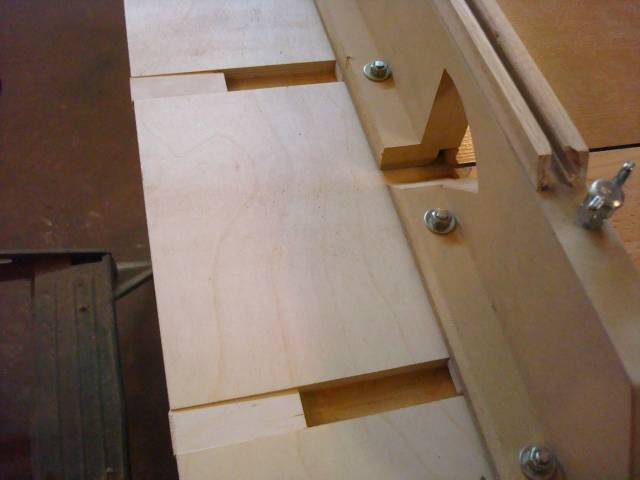
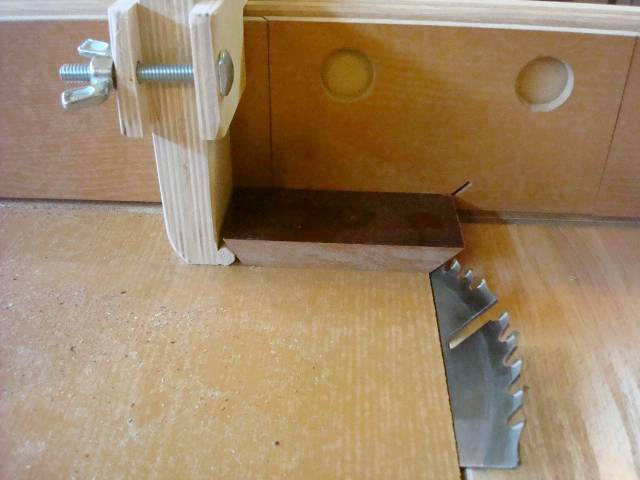
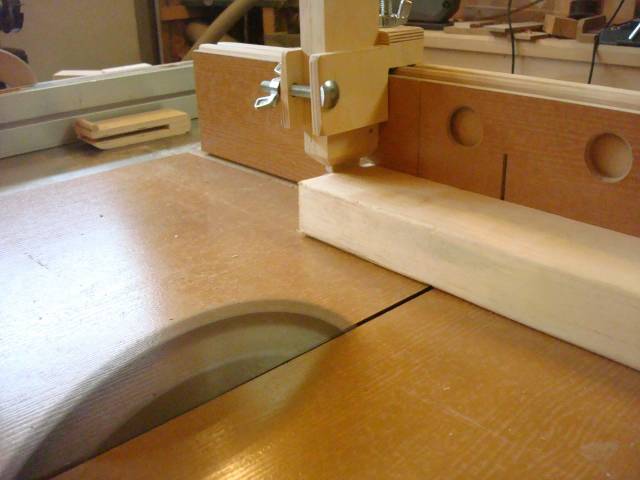
This sled is again a double bottom sled which gives me the ability to slide the top panels against the blade and create a zero clearance setup at any angle or blade width including a dado blade .
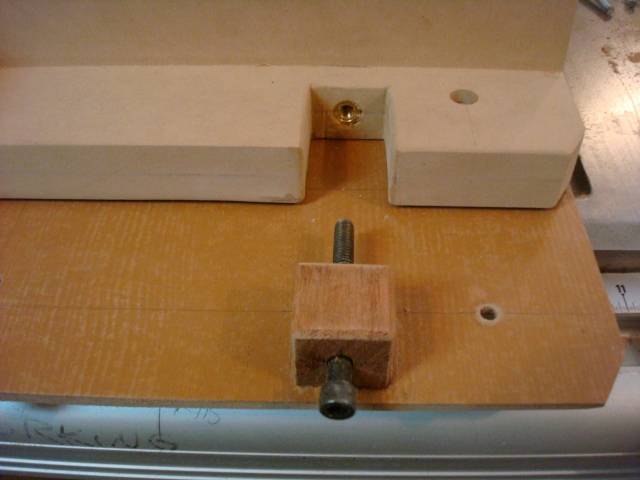
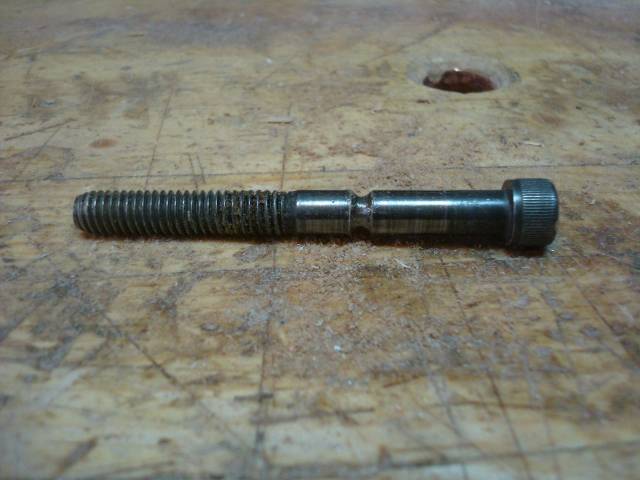
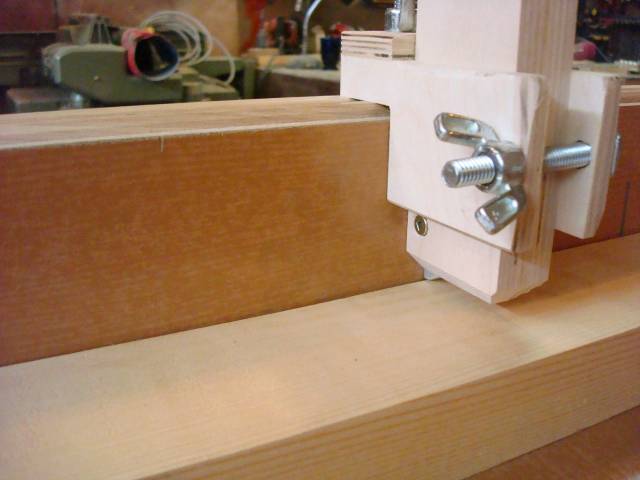
The back fence is adjustable by loosening the four nuts and using the adjusting mechanism at near the right end of the fence .This little mechanism is very simple and consist of a bolt with a groove that is held by a roll pin to the wooden block which gives me a zero backlash device ,this bolt attaches to a brass threaded insert in the fence and to adjust the fence it simply requires turning the bolt . the wooden block is attached to the sled base with CA glue. To square the fence to the blade I simply square the fence to the rip fence in the rough set up and tighten the nuts down which I follow with the five cut method and the result after three adjustments came to a on thousands error which is what I call perfect
The fence also has removable zero clearance inserts and I made a couple of dozen so I have one for every blade width and tilt angle ,the insert slides into the back fence dovetail opening and is very easy to install and remove .
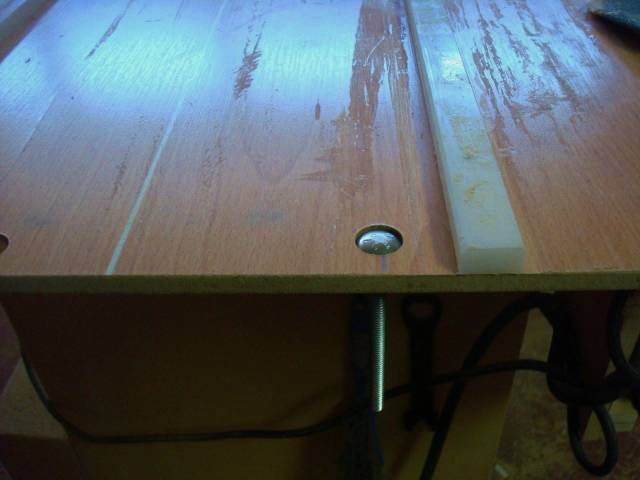
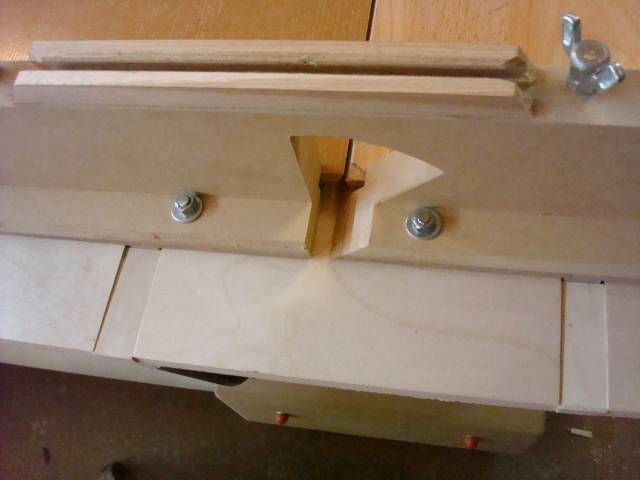
The next new feature is a dust groove that allows the dust that may collect between the work piece and the fence to be pushed into the groove and not interfere with the work piece coming against the fence creating errors .
A safety shield made from LEXAN with a LED light can be installed easily into the shop made tracks and the light you see is a great aid when dark coloured material is cut or the light level is low .
The sliding upper panels are held in place once properly located by two wing bolts in the front fence which is a better location then on my previous sled .
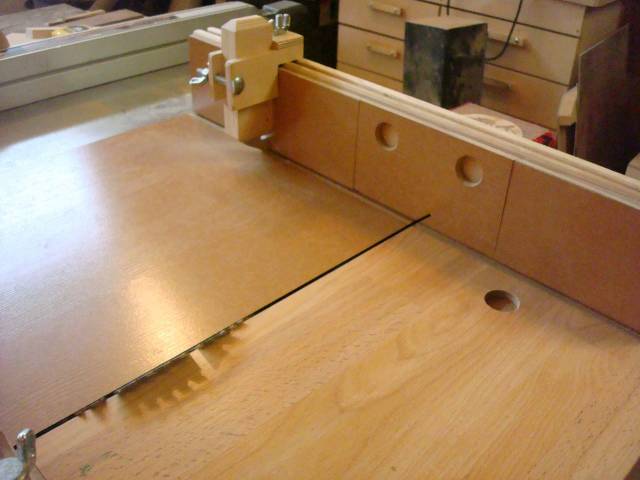
I also addressed the issue of cutting through the safety blade guard on the back fence by adding a small out feed table to the saw and screwing two stop blocks into the mitre grooves to which the sled UHMW slides come in contact with and stop the sled preventing the blade cutting through the guard . The reason I installed two stop blocks is to exactly stop both sides of the sled to prevent jarring of the sled which could cause it to come out of square and require a readjustment ,just a little foresight .
I also made two stop blocks which you can view in the attached pictures .
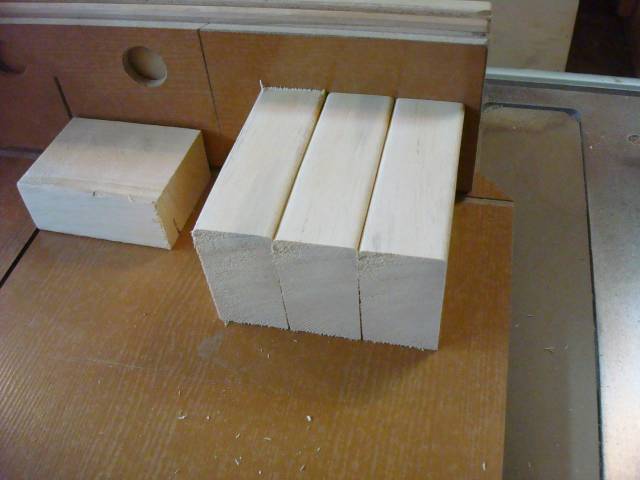
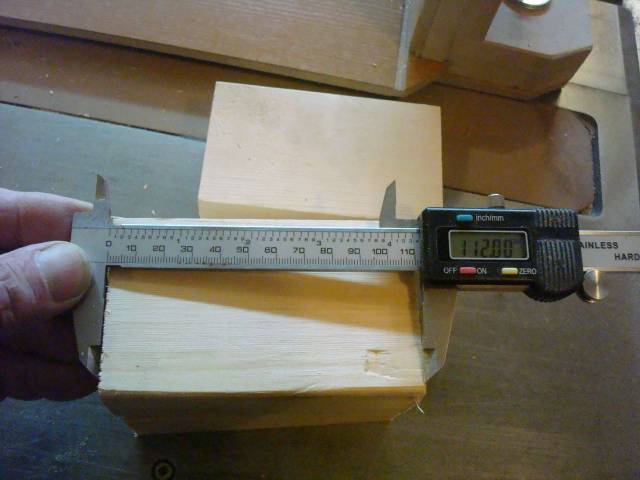
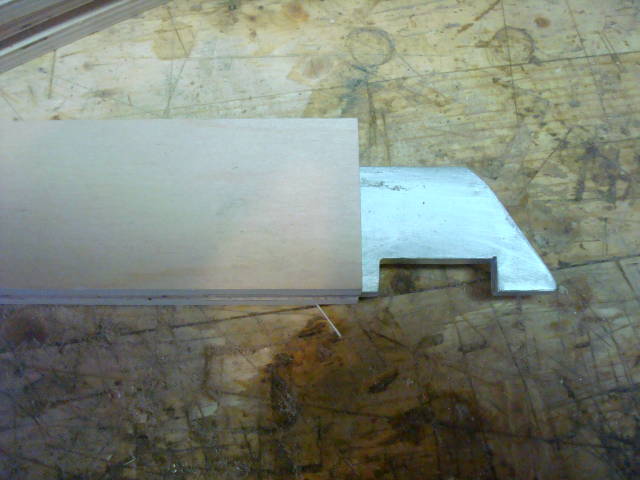
The first is a retractable stop which has a retracting aluminum finger that simply slides upward when the work piece it slid against the fence and serves as a stop block when the work piece is slid against it sideways .( see pics further down where I cut three blocks and measured with a caliper and observed no difference in length on all three pieces .
The second version is a mitre stop which is held by the same bracket that attaches to the track on the back fence .
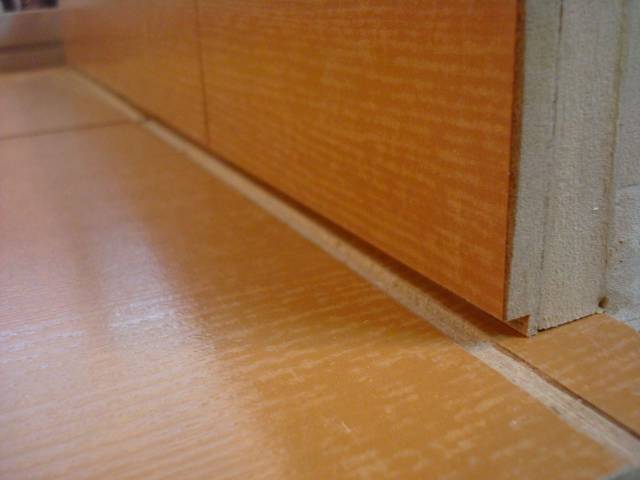
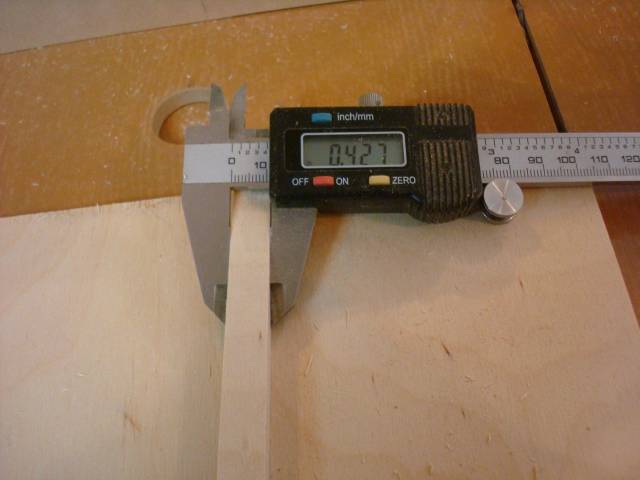
The stop can be slid up and down to adjust to the material thickness and the dowel glued to the face prevents the tip of the cut mitre to get damaged this is accomplished by letting the face of the mitre come into contact with the dowel and setting the height of the stop in such a position that the mitre tip does not contact the stop itself . (see pic4 below and look at the small gap between the stop and the mitre tip )
There are more attachments coming and I will post them as I make them .
I think this covers all the details of the sled so far but I am always happy to answer any questions you may have !
I will also make a video and post it here which will give a better understanding of the features of this sled .
Thanks for taking a look .
Klaus
6 Comments

Absolutely great sled. Even better timing, I am currently starting to build one. When we get a rainy day at the campground I go into the city to my shop to spend the day. Today I made up the runners and attached them to the bottom. Now after seeing this post so well photoed, I have my course laid out for me without having to think thru all the details I want to include, you have helped me imensly! I probably won’t have all the features but I have a direction now. Thank you very much Klaus.
CHRIS, Charlottetown PEI Canada. Anytime you can repurpose, reuse, or recycle, everyone wins!

The original was great. With a few tweaks it’s even better!
Good thinking and equally good execution.
Thanks!
The early bird gets the worm but its the second mouse that gets the cheese.

Another cool project Klaus ,an upgrade that looks like it has all the bells and whistles. .
woodworking classes, custom furniture maker

Very impressive accessory . Nice job
Wheaties

Klaus,
I desperately need one of these! This must have every conceivable feature to make it absolutely the best yet! Thanks for sharing.
L/W
“Those who would give up essential Liberty, to purchase a little temporary Safety, deserve neither Liberty nor Safety.” Benjamin Franklin

A fantastic sled and all of the extras are great. I really enjoyed the U-tube video. Thank you for sharing.
Larry C
More from kiefer