Kelly
in almost 12 years
More from Kelly
Band Saw Pocket Hole Plug Cutting Jig
POCKET HOLE PLUG CUTTING JIG FOR THE BAND SAW
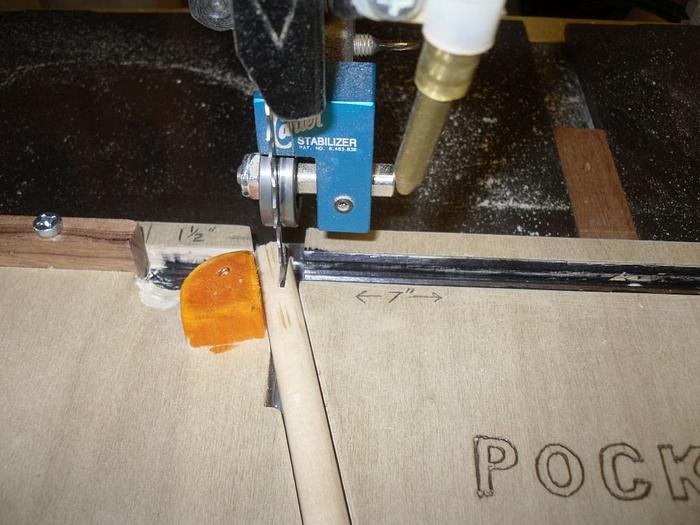
I’ve seen several well designed pocket hole plug cutting jigs for use on the table saw. However, I opted to perform the operation using the band saw, instead. This is the jig I built for the task.
The grooves are just wide enough to hold a 3/8” dowel. One runs at seventy-five degrees from the front center (from the stop) of the jig to the upper left.
To make the “seventy-five” degree cut, I placed about a one inch spacer between the jig and the fence. This insured the groove would remain flat at the back of the groove in the jig. Then, I set my miter box to fifteen degrees and ran three cuts, which gave me a groove wide enough to hold the 3/8" dowel.
I installed a stop on the front of the jig (distinguished by the darker wood in the photo). It drops down about a quarter inch lower than the jig. It isn’t necessary, but stops you from running well past the cut point, so helps efficiency and improves safety.
At the back of the jig, parallel to the front of the table, is another groove, also cut large enough to hold the 3/8" dowels. It’s used to cut the plugs to length.
The back, parallel groove has a stop (upper left). The stop allows quick positioning for cutting plugs to length. The stop has an elongated hole, which allows minute adjustments for plug length settings.
I carved a finger positioning groove, which drops down into the cut off groove. This is positioned just in front of the cut-off stop and makes holding the cut offs a bit easier. It also helps to position your finger away from the blade.
For extra safety, I installed what I call a doze block. It’s just to the right of the finger positioning groove and just before the seventy-five/fifteen degree groove. It’s just to help keep your finger out of the path of the blade when cutting the plugs to length and should help in event one is distracted during repetitious, monotonous cut off operations.
I mad a three pocket holes on the bottom right to allow tests of the end product. The enlarged holes from the smaller part of the pocket hole drill bit are so the plugs can be popped back out with relative ease.
One could use the fence as a guide, but I opted to use a follower guide, which rides in the miter slot.
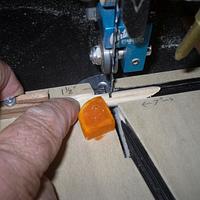
To use the jig, I lay a dowel in the groove and position it far enough into the jig to get a full angle on the end of the dowel. Then, run the jig into the blade, until the stop reaches the table.
Once the cut is made, a mark can be made on the jig to indicate where the dowels must stop to get consistent plug lengths for all future cuts.
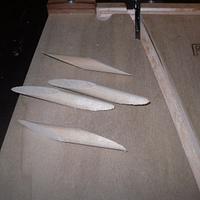
After the first cut, move the dowel forward and make a second cut, which produces a double pointed dowel. Continue this process to produce however many plugs you desire.
Place each double pointed dowel piece in the back, parallel groove with one of the points against the stop block. Hold it in position by placing your finger in the finger notch, referenced above, and run the piece into the blade to produce two pocket hole plugs.
When pulling back to clear the blade, avoid moving the long dowel piece remaining in the groove. This stops the waste piece from turning in the groove and reduces the times the waste piece will move and stop you from pulling the jig back from the blade (when the waste catches on the blade and the back grooves).
Making a single cut, then moving the cut off to the trim groove produces about thirty plugs and produces waste pieces that can be used for paintable projects where caulking is not a problem.
Making double pointed cuts produces forty-nine plugs.
4 Comments
OK now I get it. Cool jig.
Tor and Odin are the greatest of gods.
I was getting about thirty plugs from a dowel using the method above. As noted, the waste piece wouldn’t quite fill a hole, but would be usable, if you were caulking and painting. It would be a bit like using backer rod (foam bead rolls) for house painting.
By altering the method, I cut way back on the waste. Pretty much to a half inch
of the entire dowel, rather than a short plug for each pocket hole plug cut.
All I did was extend how far I push the rod in and make a second cut (I made a reference mark), before trimming for length. I set the cutoff, which now has two points, one on each end, in the parallel trim slot at the back of the table (up against the adjustable stop) and the cut gives me two full length plugs, with no waste.
Took a little time out and ran another dowel through using the simple, revised method. It produced forty-nine plugs.
Great idea ,a very cool jig
woodworking classes, custom furniture maker


