


Share your craft projects
Make new craft buddies
Ask craft questions
Blog your craft journey

kdc68
373 posts
and
22 followers
in over 12 years
in over 12 years
More from kdc68


New Workbench - sort of


Pictured below is what my bench used to look like. It served as a table saw outfeed table and as an assembly table. When I designed and built this, I had in mind replacing the laminate top with a solid maple one someday. I’m always trying to cram more “stuff” into my small workshop. I recently bought a midi lathe, so now this will be a future lathe cabinet top. The bench served me well with lots of storage with the 3 drawers, space above the drawers, and pegboard back.
v
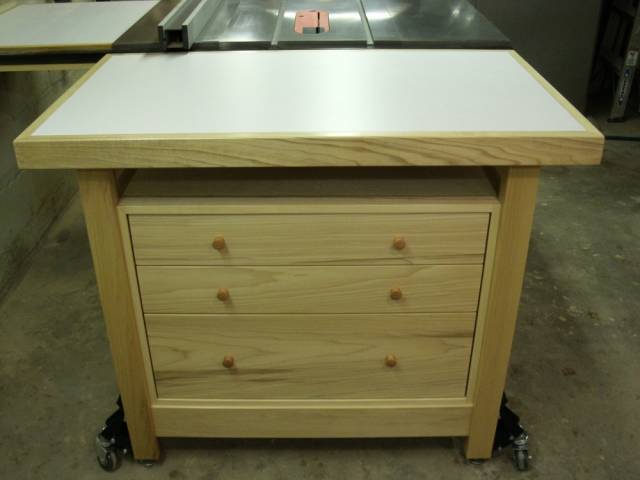
Project post below of the original bench for more details.
v
https://woodworkingweb.com/creations/38-outfeed-table-workbench-with-storage
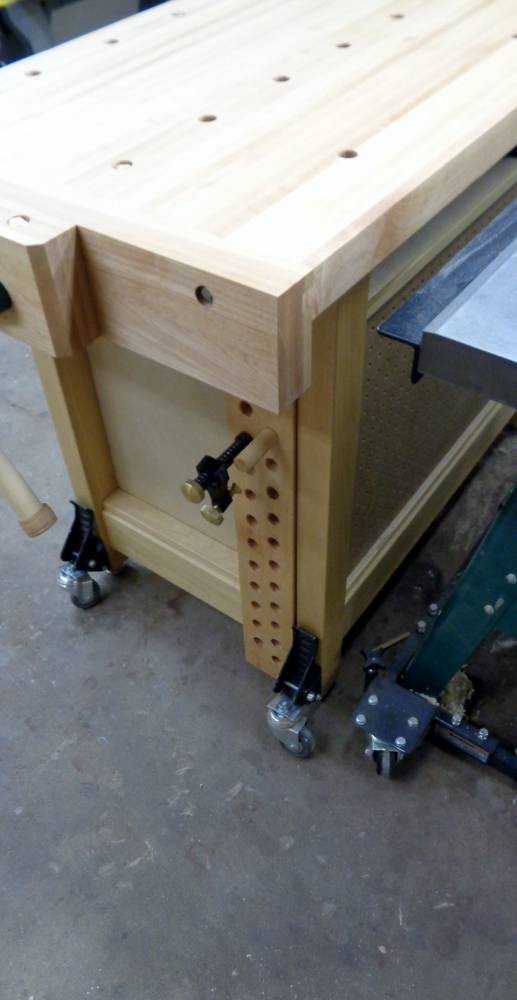
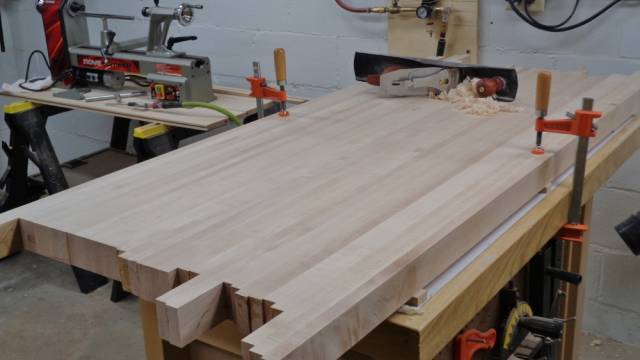
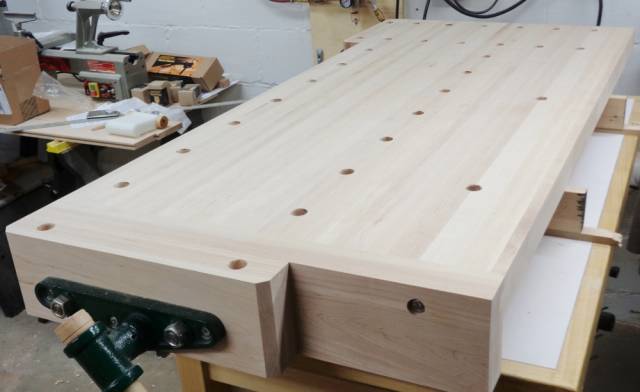
The new maple top is 2” x 24” x 52”. The finish is 1/3rd boiled linseed oil, 1/3rd varnish, and 1/3rd mineral spirits.
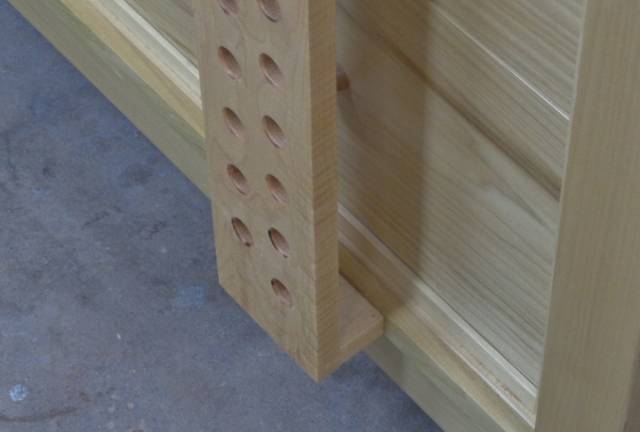
I got the idea of the deadman from Shipwright’s V-8 bench. Thank you Paul for the inspiration. Not only does it work, it’s a pretty piece of maple (first photo). The only modification I did to the existing bench was adding a rub strip on the bottom rail (second photo). The deadman stores out of the way on the end’s upper rail (third photo)
v

v
v
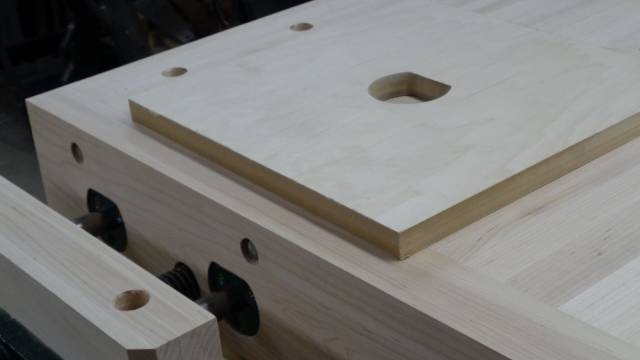
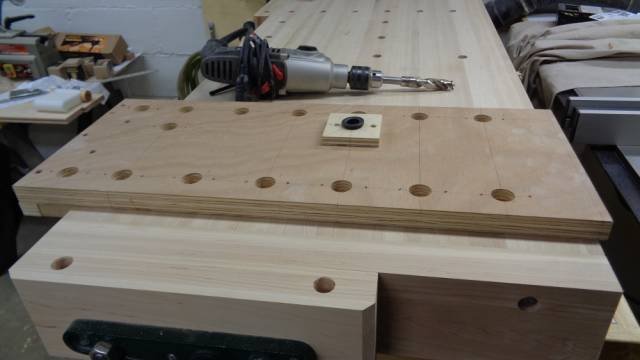
Jig for the large vise collars. I removed the bulk with a forstner bit, then the jig and a router with a top bearing pattern bit.
v
Jig for dog holes. I used a Lee Valley dog hole bushing and a 3/4” bit. Took some thought conjuring up this jig, but made drilling holes pretty easy.
v
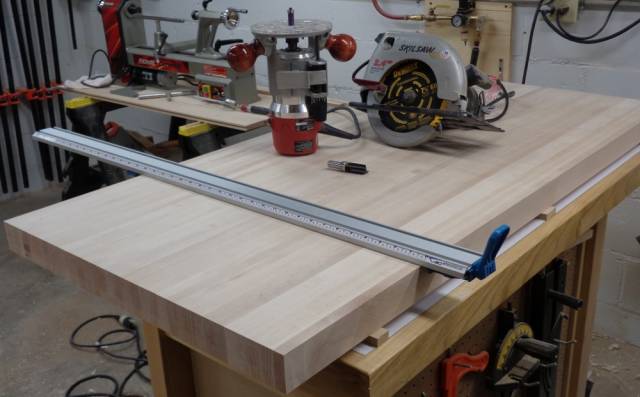
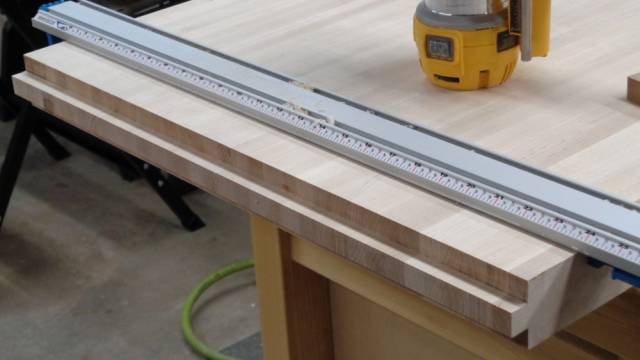
Assembly process photos below
v
v
v
v
The vices and other goodies are from Lee Valley. Thanks for looking !
Measure "at least" twice and cut once
14 Comments

Very nice workbench.
I am also a fan of Veritas hardware. they make good stuff.
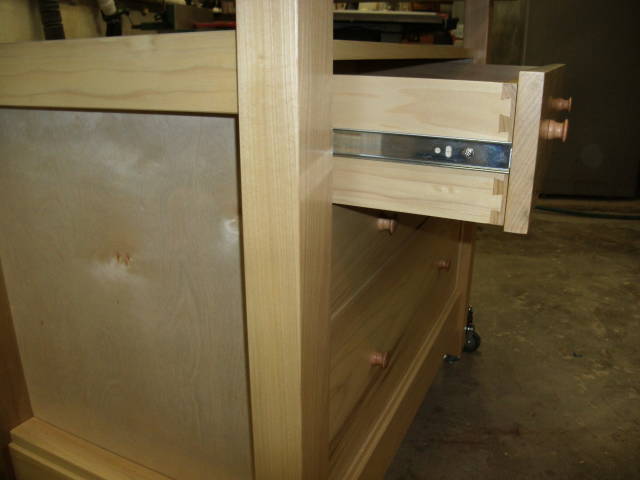
What kind of slides did you use for the drawers. Any dividers on the inside?
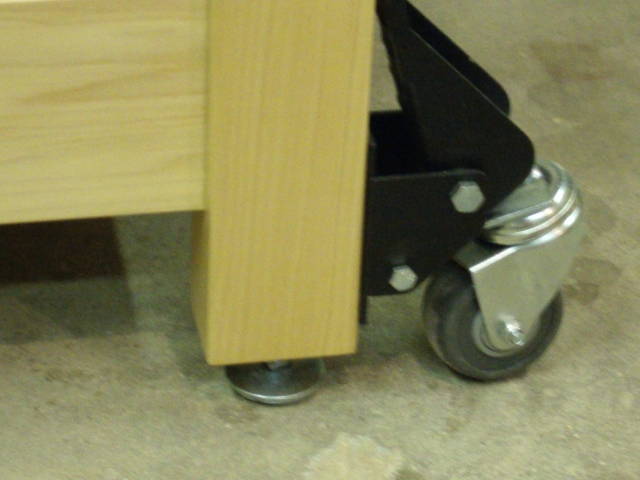
When I build mine (if it ever happen), I will have to use casters as well. I have been eyeing similar from Rockler. I do worry of stuff on the bench top will be all over the place since one side is lifted at the time. What’s your experience so far?
Great build,I like it.
Abbas, Castro Valley, CA

Super nice work bench , green with envy .
Wheaties
Hey thanks for the compliment !
I used 100 lb full extension slides. No dividers yet, still contemplating that, just big open space on the inside.
v
Although these come from Peachtree woodworking, I do like the Rockler set as well. The lift is around 3/4" off the floor (I think). Since you do one corner at a time, you have time to watch things left on the bench as you lift each one. Your tools could roll off but I haven’t had any problem with that.
You might reconsider these if you have a heavy bench. My experience is the motion upward is somewhat smooth and effortless. My bench isn’t that heavy though. If I had a monster Roubo with a 6" slab I might need to stand on the pedal to lift it up.
The thing that does catch my attention is lowering it back down. When you release it comes down pretty fast and thuds on the floor. That’s when I remove any chisels or whatever that may roll off.
I don’t find myself moving it around a lot. But when I do it’s nice. Turns on a dime on a smooth floor. Beats dragging it around, so for me it was worth it to install them
Measure "at least" twice and cut once
Thank you Bruce ! I have found myself just staring at it thinking wow what a difference between the old and new…lol
Measure "at least" twice and cut once
Thanks For The info. Very valuable to me.
My current HF bench, I bought when I started this hobby, with regular casters as I have to have everything stowed away when I am done so my wife can park inside.
Even with the regular caster, I get stuff rolling on the floor due to the unevenness and v grooves on the concrete .
3/4 of the floor sound pretty good. Maybe “embedded” permanent on one side and “lifting” caster on the other might work.
I guess I will have to try when I build.
Thanks Again!
Abbas, Castro Valley, CA
No problem and you’re welcome !
Measure "at least" twice and cut once

Very cool conversion from a outfeed to a beautiful and very functional. bench super photo layout too. Thanks for sharing.
woodworking classes, custom furniture maker
Thank you Jim for the compliment !
Measure "at least" twice and cut once

Great looking bench! It made such a difference for me to upgrade to a “real” bench, I’m sure you’ll really enjoy having such a functional workspace.
Rob, Sault Ste. Marie, Ontario
Thank you Manitario ! It has made a big difference for me as well.
Measure "at least" twice and cut once

Beautiful bench with done great features. I’m always envious of these things. I ant imagine building a top like that. It would cost me $1000 at least. I don’t know if it’s just where I live or what, but hardwood lumber is so expensive here that I have to make do with whatever I can find – scraps from work, etc. Maybe of I keep my eyes on Craigslist I’ll find a bowling alley demo or something, but otherwise I could never afford a solid maple top like yours.
Losing fingers since 1969
Thank you Brian ! Although I wasn’t going to buy a top from Woodcraft or Grizzly, I did price compare between buying and making. If maple is that expensive in your area, then maybe it might be worth checking into.
Fortunately maple is cheap in my locale. Nevertheless, it’s real easy to rack up a $1000 bill when you include the vises, holdfasts, dogs, and all the other goodies.
My justification is passion and knowing this isn’t a fad or phase in I’m going through. I’m in it for the long haul. Something I strive for with everything is build it right (or at least the best of my ability) and build it once, and then you have it for a lifetime.
If you think in those terms, then that grand you invested in isn’t that much at all
Measure "at least" twice and cut once

that bench is awesome, I would love to have it!!
Thank you Wes !
Measure "at least" twice and cut once
More from kdc68