


Share your craft projects
Make new craft buddies
Ask craft questions
Blog your craft journey

kdc68
373 posts
and
22 followers
in over 12 years
in over 12 years
More from kdc68


Unity


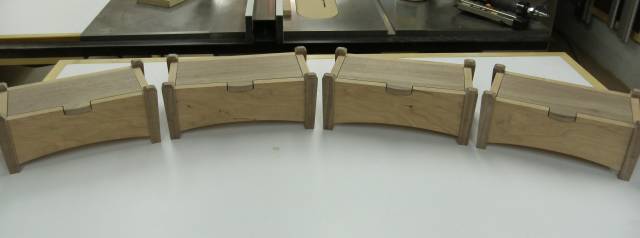
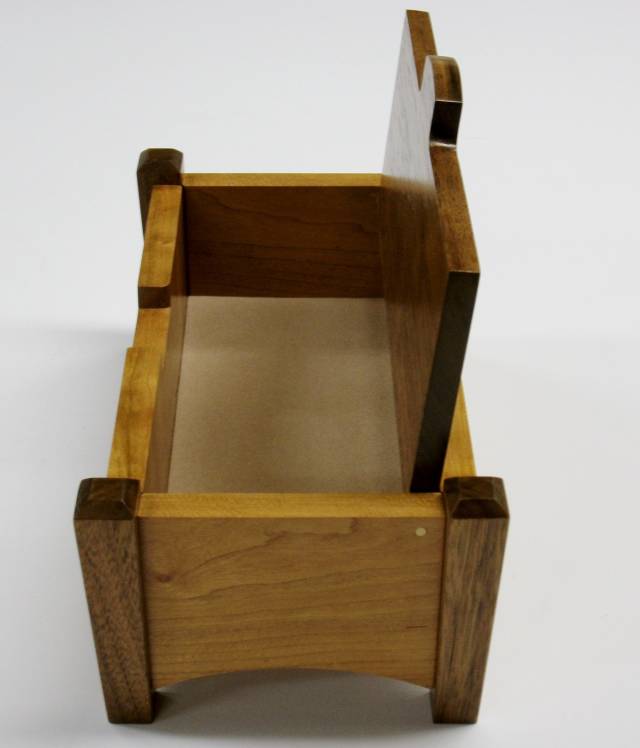
Oxford dictionaries defines the word Unity as “the state of being united or joined as a whole”. I tried to interpret that definition with these four boxes. This year has been tough; my family is experiencing difficult times. These were made for my mother, my two younger brothers, and myself for Christmas. The message I’m sending to the four of us is “we are in this together”.
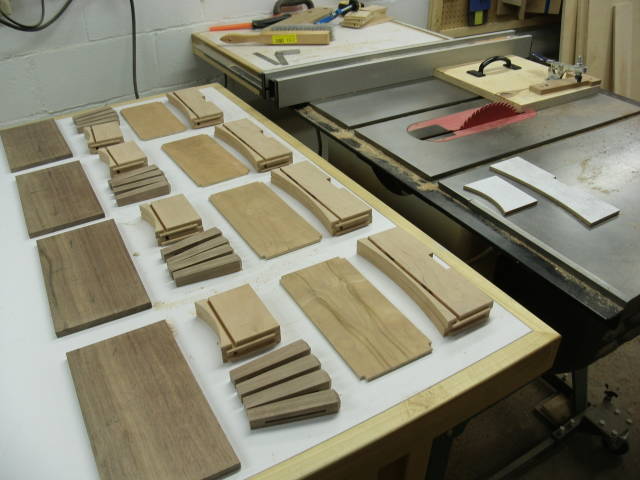
Going from a photo of a box I seen on the internet , I drew out my patterns, then made templates from 1/4” hardboard.
I was saving a beautiful piece of figured cherry for something exactly like this. I laid out the fronts and backs of each box onto the cherry board in sequence. As seen in the photos, the sequence is left to right. Luckily the board was large enough to also yield the eight side pieces.
I wanted contrast for the lids and legs. They are made from a single piece of walnut. The straight grain and the rich color in this piece of walnut was perfect for contrast. As I did with the cherry, the lid of each box was laid out onto the walnut board in sequence from left to right. All 16 legs were cut from this single board as well.
The box bottoms are cherry veneered 1/4” plywood. They were ripped from a wider sheet into a single strip and crosscut to length in sequence from left to right.
I like the look of amber shellac on walnut and I like the look of garnet shellac on cherry. The compromise for the finish is 1:1 ratio of dewaxed amber and dewaxed garnet shellac. I made a separate batch of the amber and a separate batch of the garnet both equal in volume and both a 1lb. cut, then mixed the two together. I applied the shellac mix in two light coats. I then top coated in lacquer, first in gloss for clarity, then in satin for sheen. Four coats of lacquer in total.
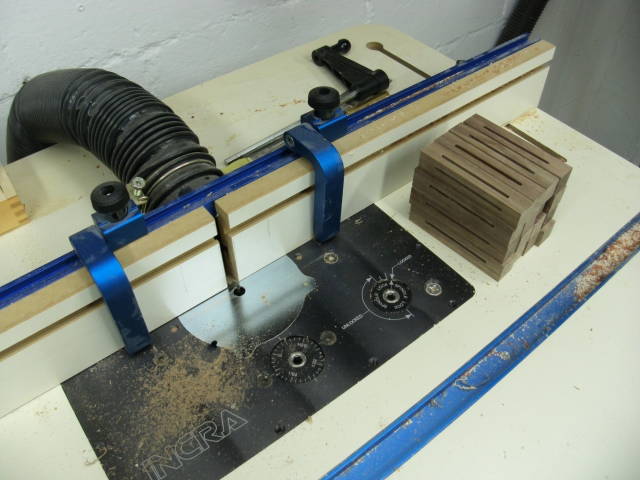
The method of construction is mortise and tenon. Tiny 1/8” wide by 1/4” mortises were milled into the legs with a 1/8” bit on the router table. Photo below
v
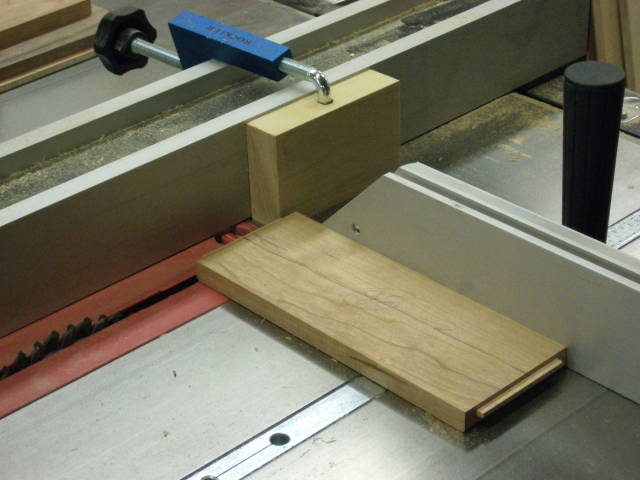
The corresponding tenons were milled on the table saw with a box joint saw blade set. Photo below
v
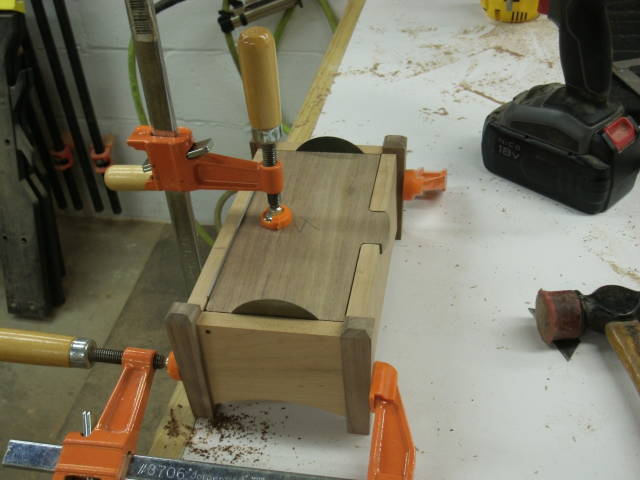
Tenons were cut slightly fat, and then sized to a snug fit into each mortise with a shoulder plane. First dry fit is in the photo below
v
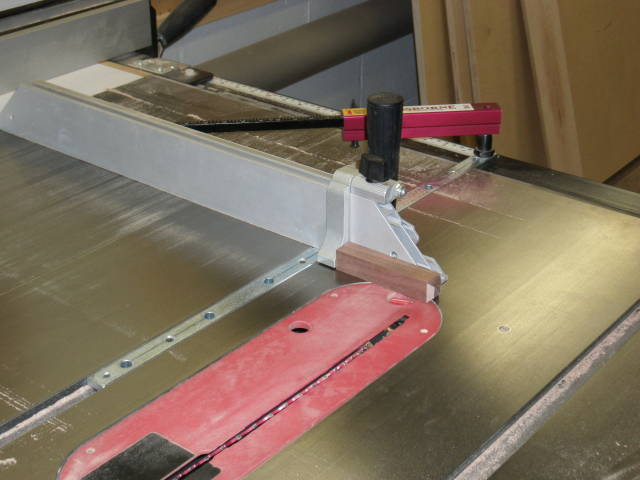
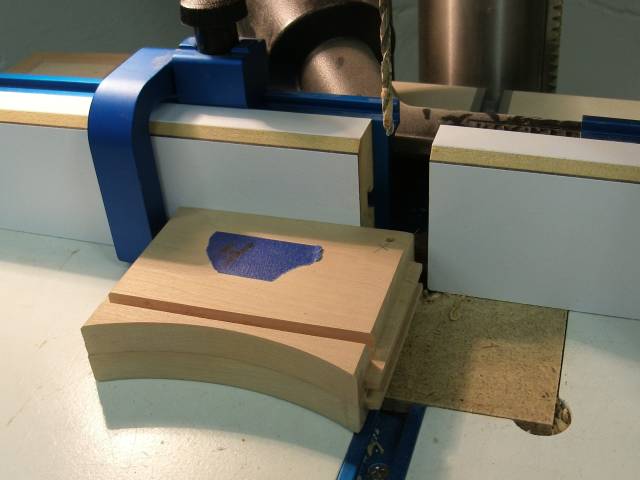
Chamfers were cut on the tops on the legs next. Photo below
v
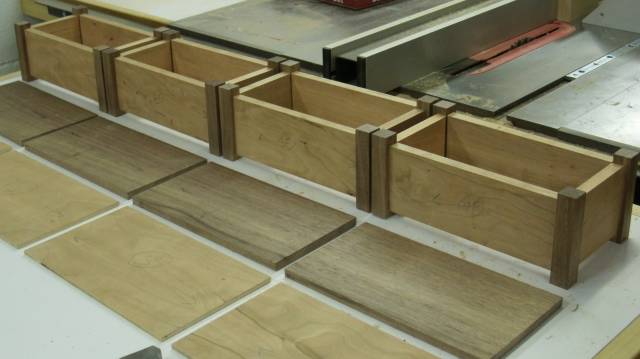
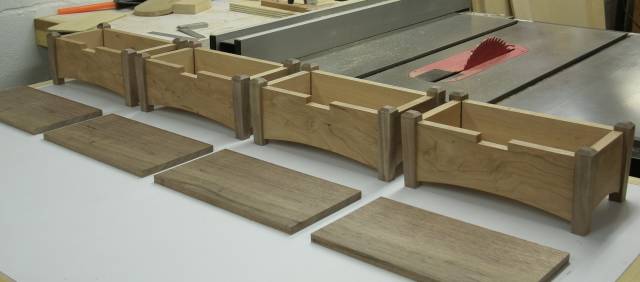
More milling and shaping completes the legs, fronts, backs, sides, and bottoms. Next to do are all the lids. Photo below
v
It was necessary to notch the bottoms. Photo below
v

Another dry fit before moving on to milling the lids. Photo below
v
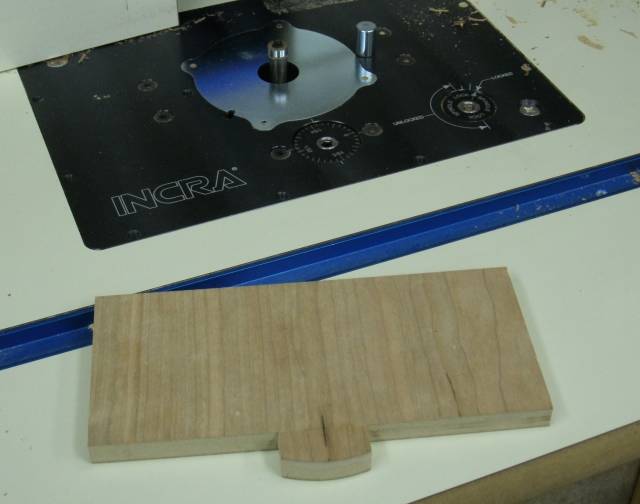
I made a lid template from scrap. As I did with the fronts, backs, and sides I used a pattern bit on the router table to shape the lid. Photo below
v
Lid fresh off the router table and dry fitted to the box. Spacers cut from scrap are inside the box supporting the lid during this dry fit. Photo below
v
All lids fresh off the router table. Some hand work is next to complete the desired fit on all the lids. Photo below
v
I used a piece of 1/8” brass rod as hinges. Once I determined the location of the brass rod on the box assembly, I ganged the sides of each box together and drilled through holes of the drill press. Photo below
v
I used a 6” steel rule and shims from my dado stack to align the lid into position and clamped in place. I bravely drilled the corresponding holes into the lid with a hand drill and by eye. The dado stack shims are thickness of #6 brass washers that I used between the lid and box side in conjunction with the brass rod as the hinge mechanism. Photo below
v
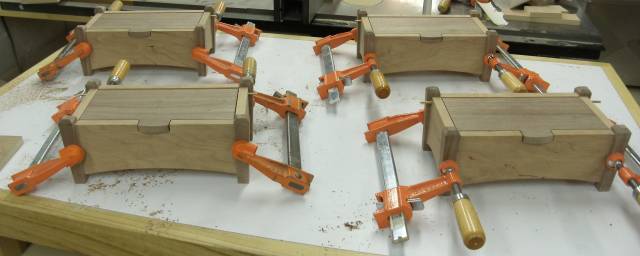
Another dry assembly was necessary for the hinge install and final lid fit. I tweaked each box in the dry fit to achieve an even reveal with the lid and clamped in place. It was necessary to roundover the back edge of the top in order for it to clear the back and create a stop. All the lids open a couple of degrees passed 90. Later on I epoxied the brass rods into place and cut flush to the box sides. Photo below
v
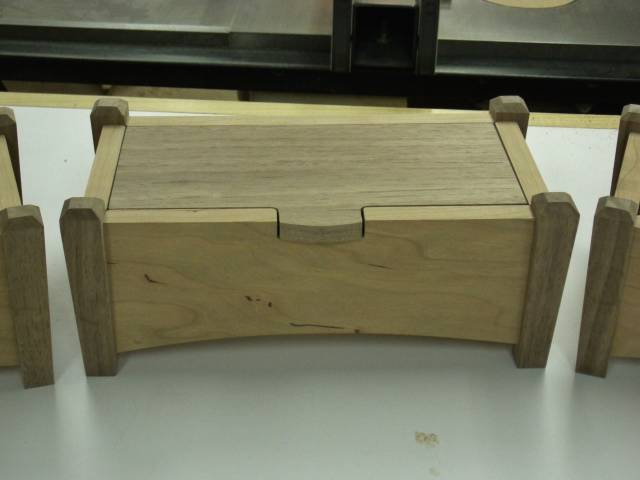
I finished them off by fitting the insides with sand colored self- adhesive backed felt. Photo below
v
Measure "at least" twice and cut once
8 Comments

Unity is befitting.
The flow across boxes came out really well.
Great pictures too!
Abbas, Castro Valley, CA
Thanks lanwater !
Measure "at least" twice and cut once

beautiful work , really nice contrast and finish
Wheaties
Thank you Wheaties !
Measure "at least" twice and cut once
How did you flush cut the brass?
Berta
Berta
I cut the pins roughly to length on my band saw as I was fitting the lids to the box. I left them long enough to grab with pliers when I was dry fitting. Picture posted above.
Once satisfied with how everything went together I cut the pins again with my band saw a sixteenth or so proud of the finished length and epoxied in place into the sides.
I used 100 grit adhesive backed sandpaper on my benchtop and sanded them flush with the sides. I proceeded through finer grits in the same manner. The brass is soft, and sanded easily.
I should have phrased it differently in my post. Thanks for commenting !
Measure "at least" twice and cut once

I really like that design and a great write up with pictures. I like how the Cherry and Walnut complement each other.
Randy - If I'm not on the computer than I'm out making sawdust.
Thank you Blackie !… I agree the cherry and walnut complement each other well…
Measure "at least" twice and cut once
More from kdc68