


Share your craft projects
Make new craft buddies
Ask craft questions
Blog your craft journey

kdc68
373 posts
and
22 followers
in over 12 years
in over 12 years
More from kdc68


A Mahogany and Birdseye Maple Beauty


This jewelry box will be a Christmas gift for a friend. It is made from solid Mahogany, Maple, Bloodwood, and Maple veneered MDF panels. The box lid features a Birdseye Maple veneered top. The box inside provides organization with a divider and a tray made of maple and lined in a rose colored felt. Keyed miters using bloodwood were added for a bit of contrast and compliment the mahogany and maple. I used dye stain, gel stain, shellac, gloss and satin lacquer for the finish.
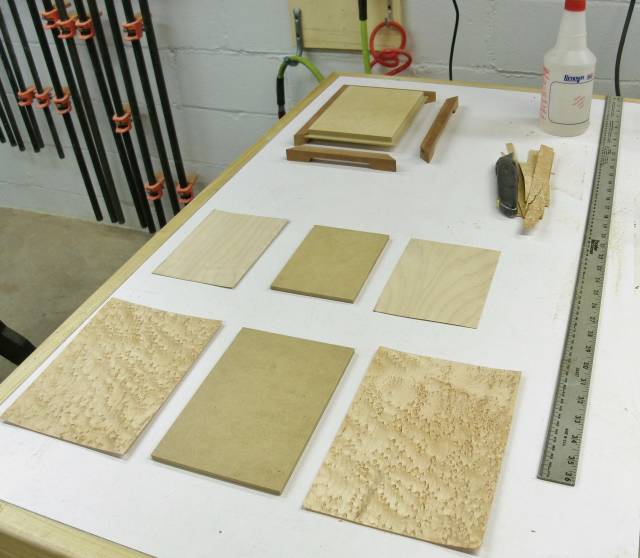
Pictured below will be the veneered panels where I used “cold press” glue for adhering. I chose Birdseye maple on a 1/4” MDF panel for the lid. Plain sliced maple veneer on a 1/4” MDF panel for the tray and a 1/2” maple MDF panel for the box bottom. In the picture, the box bottom is about ready for assembly. The mitered base is grooved to fit the tongued panel.
v
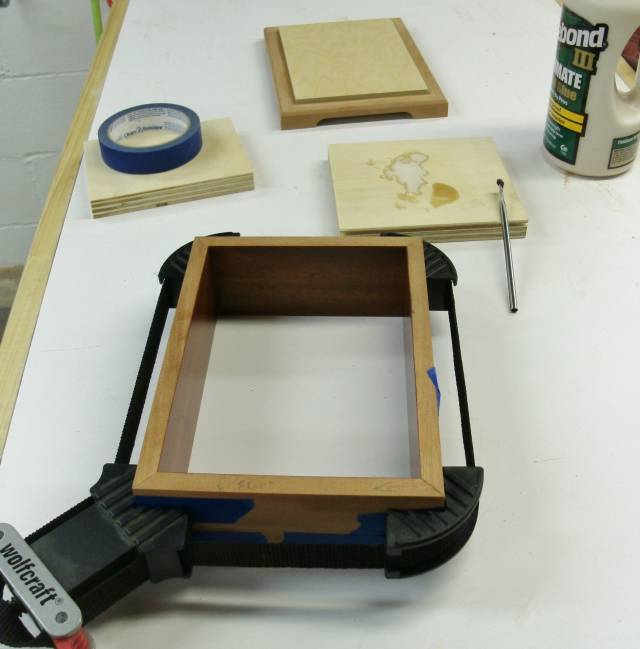
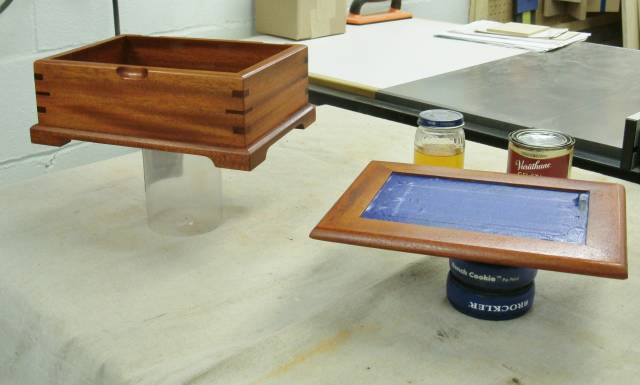
Pictured below is the assembled box. I used the painters tape method to assemble followed that with a band clamp. The inside is prefinished. Also, the box bottom is assembled. The veneered panel is prefinished in satin lacquer.
v
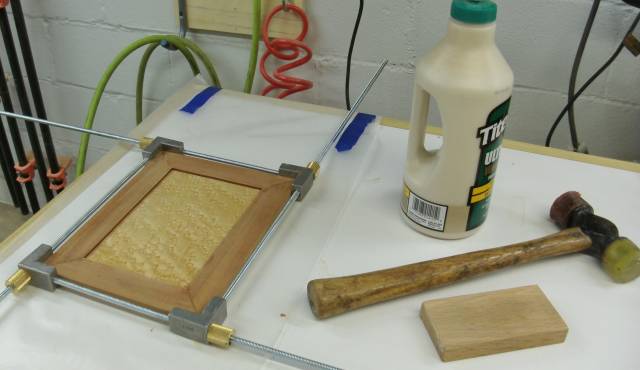
Pictured below is the assembled lid. A centered groove houses the prefinished veneered panel. Also the inside of the mahogany frame is prefinished.
v
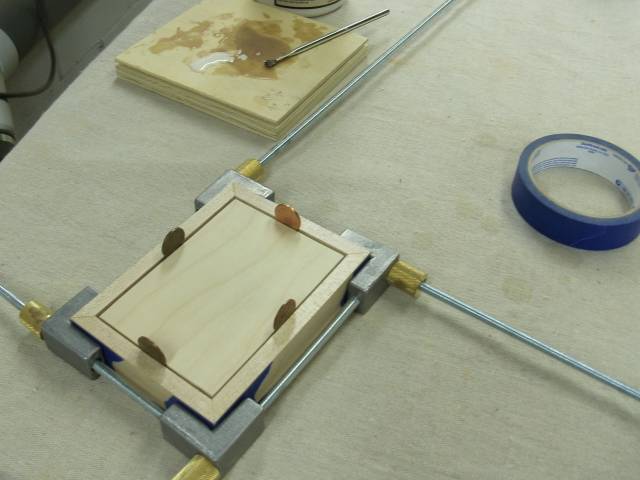
Pictured below is the assembled tray. I machined the tongue large enough for a small reveal on the underside. I have pennies as spacers to be sure that the reveal is equal on all sides.
v
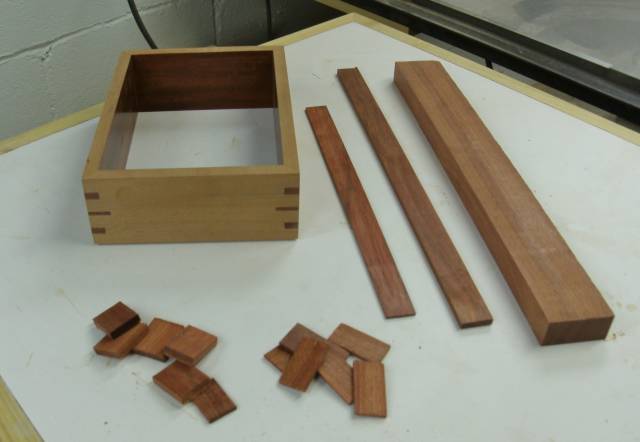
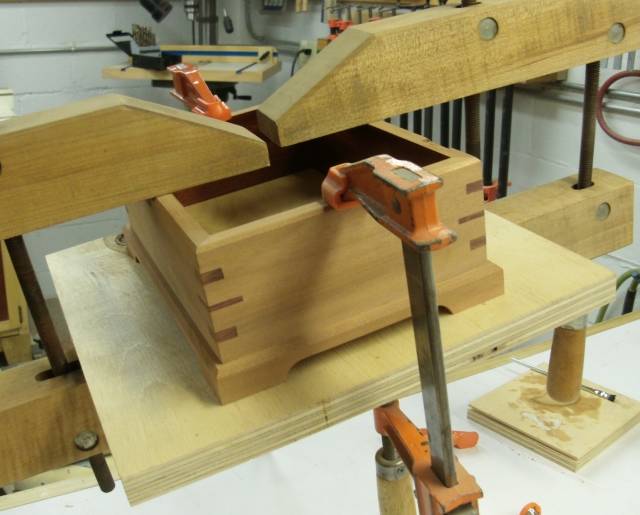
Pictured below is the assembled box and tray with keyed miters made from bloodwood. I chose to use two sizes and two depth settings this time around. I chose 1/8” keys using a 1/8” FTG rip blade and 1/4” keys using a box joint saw blade set. I used this table saw jig from this project post to create the mitered keys.
https://woodworkingweb.com/creations/643-spline-jig
v
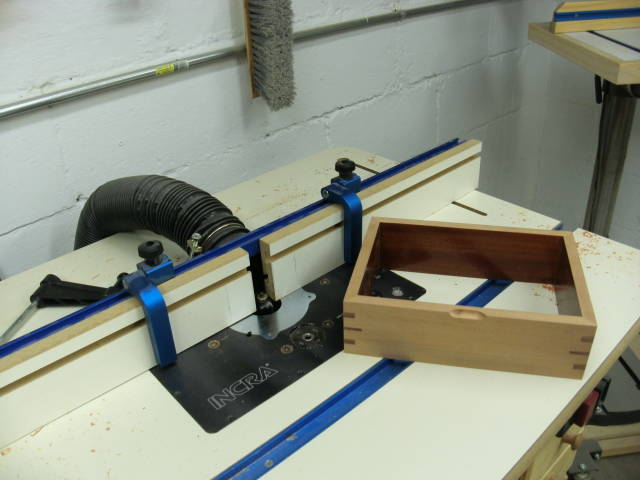
Pictured below is routing the finger pull. The set up used here is a cove bit in the router table with two stops on the fence.
v
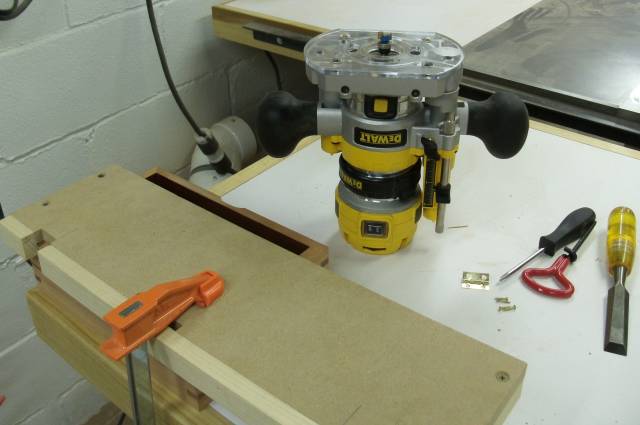
Pictured below are the hinges being mortised using a jig and router. As seen in the second photo I only mortised the box, the opposing leaf of the hinges are surface mounted to the lid. This method of mounting the hinges the mortises are the depth of the hinge barrel.
v

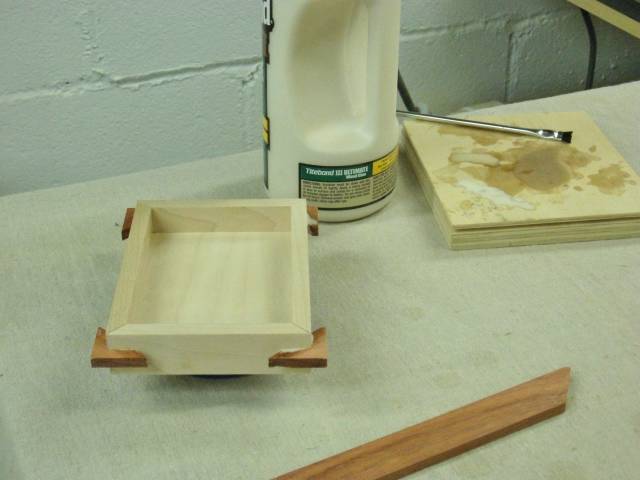
In the pictures below is the box and bottom assembly. This step is made easier because the veneered panel is shouldered to fit the inside of the box, so alignment is done for me. That shoulder in the bottom can be seen in the top portion of the second photo.
v

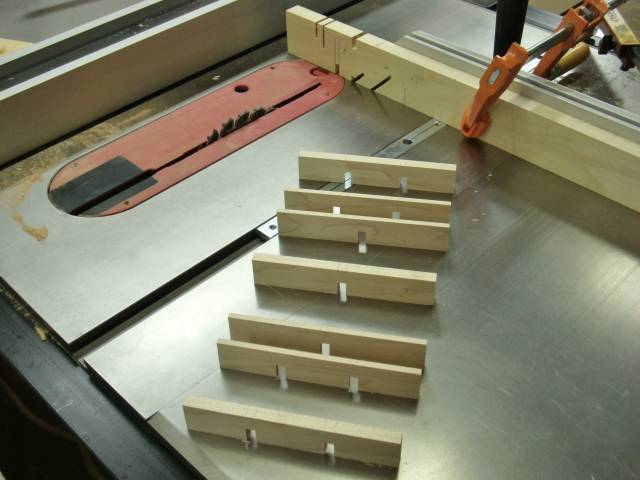
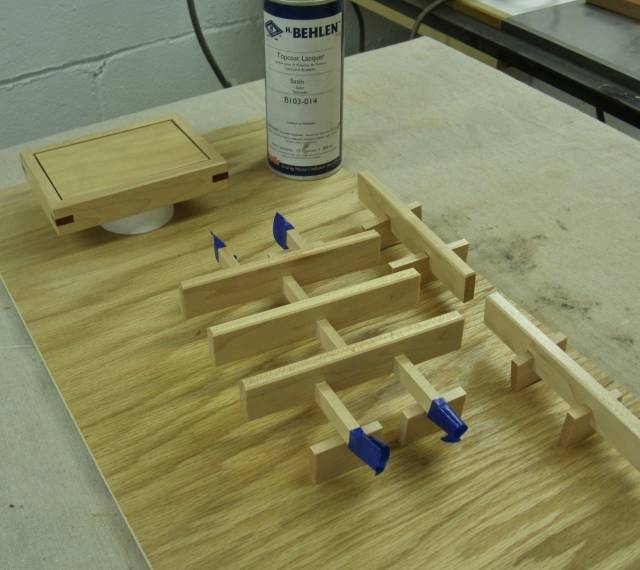
In the pictures below are the vertical pieces that make up the divider in the box. After glue up, I will have five vertical pieces that are 3/8th in thickness. The two pairs of 3/16th pieces will be glued together. Doing it this way creates 6 easy mortises from the notches. The notches were cut using a box joint saw blade set on the table saw. While the glue sets I machine the horizontal pieces to fit the notches and mortises.
v
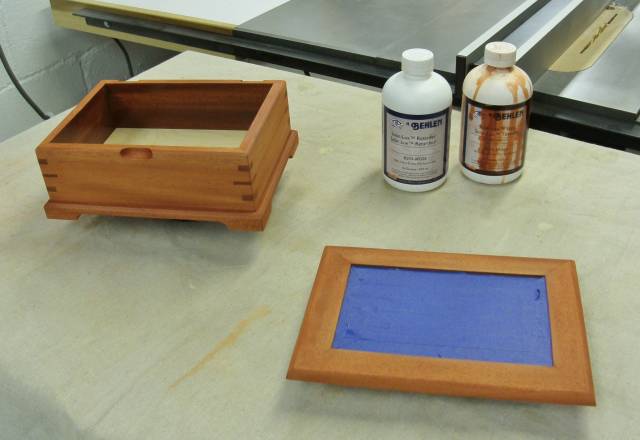
In the photo below has the Golden Fruitwood dye applied to the remainder of the box and lid. Even though the inside edge of the mitered frame and birdseye panel are prefinished, I masked off as a precaution. Applied the dye with a rag saturating the wood well and allowed to dry. I bought the retarder (pictured on the left) but didn’t use it. I applied the dye right out of the container (pictured on the right).
v
In the photo below is of the box and lid after I applied the shellac washcoat and gel stain. After the washcoat dried, I applied the gel stain as a glaze. The shellac sealed in the dye color yet allowed the gel stain to fill in the pores. I used Zinsser’s Seal Coat as a one pound cut and wiped on. A far better explanation of the finishing can be found in the link below.
http://www.woodworkerssource.com/blog/tips-tricks/how-to-finish-mahogany-woodworking-projects/
v
In the picture below is after satin lacquer is applied to the maple tray and divider. I masked the ends of the divider sub assembly so I could apply glue there in the final assembly step. The sub assembly and the two ends will be fitted together as a unit inside the box. A pressure fit and a little glue secures this final assembly to the inside of the box.
v
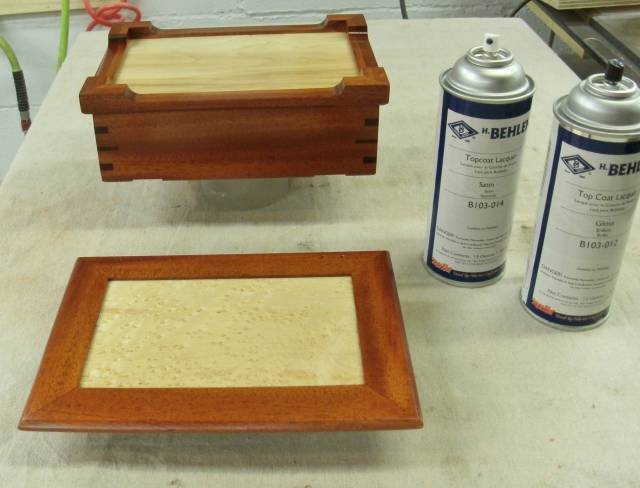
In the picture below is of the first coat of gloss lacquer that’s applied to the box and lid. I used gloss first for clarity then used satin to reduce the sheen.
v
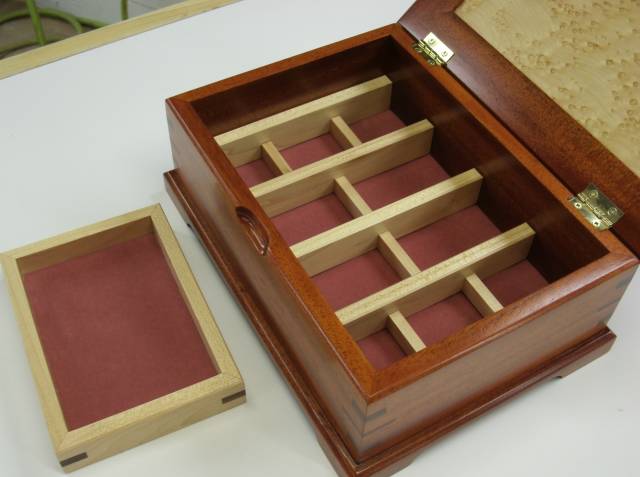
In the picture below is of the rose colored felt. I use the self-adhesive type and first applied an oversized piece to a sheet of poster board. I used patterns traced over the felt with a sharp razor blade to cut the felt to size. The patterns were cut from scrap to the exact inside dimensions of the box and tray. The divider holds down the felt to the box bottom while the felt in the tray is a pressure fit.
v
Supplies Used
Behlen Solar-Lux Golden Fruitwood
Behlen Topcoat Lacquer in Gloss and Satin
Zinsser’s Bullseye SealCoat
Varathane Dark Walnut Gel Stain
Self – Adhesive Backed Felt in the color Rose
1” 95 degree stop hinges
Measure "at least" twice and cut once
19 Comments

Really lovely and great build pictures. Thanks for taking the time for us.
Loving the splines…the whole thing is great.
-- Alec (Friends call me Wolf, no idea why)
Thanks Wolf (& Rabbit!) for the reply and compliment !
Measure "at least" twice and cut once

This is a beautiful box, and I’m sure will be a cherished gift. Thank you for sharing!

That is gorgeous. The recipient will be one lucky lady. Nice write up too.
Losing fingers since 1969
David and Brian , thanks for posting your compliments…..I think she will like it too…
Measure "at least" twice and cut once

That’s one beautiful box with incredible details . . . and many, many hours of work in it. The recipient will be truly blessed.
L/W
“Those who would give up essential Liberty, to purchase a little temporary Safety, deserve neither Liberty nor Safety.” Benjamin Franklin

Very nice Box.
Fine details.
Abbas, Castro Valley, CA

Very interesting pictures of progression , really good job . I think she will cherish it and pass it down someday .
Wheaties
lightweightladylefty, lanwater, and Wheaties thank you all for posting compliments. It is appreciated !
Measure "at least" twice and cut once

Beautiful box, very fine workmanship and super photo work up.
woodworking classes, custom furniture maker
Thanks Jim for the post and the compliment !….Both are much appreciated !
Measure "at least" twice and cut once
Thanks to Woodworking Web for choosing this as Editor’s Choice !
Measure "at least" twice and cut once

Very nice work and a great looking box.
Mike, an American living in Norway
Thank you Mike !
Measure "at least" twice and cut once
Nice box!

A very nice box, and really like all the detail on the build.
Randy - If I'm not on the computer than I'm out making sawdust.
Mike and Blackie …..Thank you both for the compliments !
Measure "at least" twice and cut once
Beautiful workmanship, thanks for sharing:)
Thank you Sheri !
Measure "at least" twice and cut once
More from kdc68