Kelly
in almost 12 years
More from Kelly
Ceiling Hung Eyeglass Rack
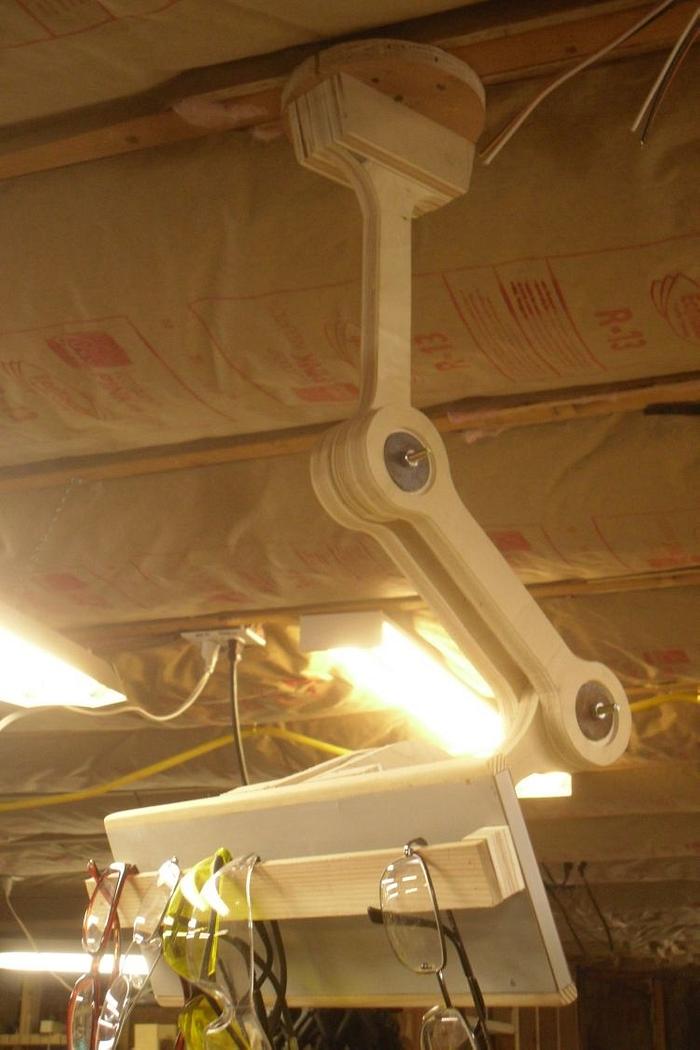
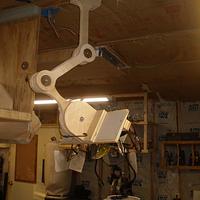
For many of us, setting up our shops can be as entertaining as using them to build or repair things. This ceiling mounted eye glass storage for prescription, magnifying and safety glasses falls into that category. Building it has proven well worth the effort, since it gives me a safe place to store them, where I can always find them.
Of course, you could modify your adjustable storage to use it to store tape measures, a phone, pens and pencils or whatever worked for you.
You can make your ceiling mount storage as rough or as fancy as you see fit. Mine was a prototype, so it’s a on the rough side.
The articulating arms can be made a number of ways. For example, the arms could be:
- Simple rectangles;
or
- Rectangles with rounded ends;
or
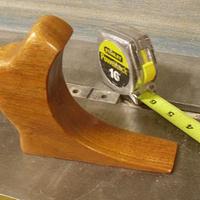
- Dog bones, like the one in the pictures;
or
- Two 3" square pieces of plywood 6" apart joined by 3/4" square pieces of wood 12" long;
or
- A rectangle cut to be wide in the middle and tapering down to each rounded end (e.g., if the initial rectangle was four inches, from the center, you could taper down to 3" rounded ends by taking 1/2" off each side of the two ends.
Of course, you could make different arms and mix it up, if that was your inclination. Too, you could drill round holes or cut square holes in the rectangles mentioned above to remove weight or just to change the appearance. Obviously, you have several choices regarding how the arms of your storage will look.
To build this, you will need the following:
1) Enough scrap [1/2" to 3/4"] plywood to create four arms for your storage rack. For the one in the pictures, that would be enough scrap to produce four 3″ × 12″ arms, a 6″ × 14″ plate for the tool mount face, and four 3″ × 5″ squares to create the ceiling and the plate mounts.
2) Four 3" 1/4-20 screws or bolts.
3) Four flat washers (for the pivot areas).
4) Four lock washers (for the pivot areas).
5) Four 1/4×20 nuts (for the pivot areas).
or
5) Four jig knobs for quick adjustments, or just for show (for the pivot areas).
6.0) Wood screws:
6.1) Four 1-1/2" wood screws to mount the storage portion to the arm.
6.2) Two 2-1/2" wood screws to mount the storage unit to the ceiling.
6.3) Two 1-1/4" wood screws to attach the mounting blocks for the storage bar.
6.4) Two 1/2" wood screws to attach the storage bar to the mounting blocks.
7) 1/8" to 1/4" thick by 1/2" to 3/4" wide and about 10" to 12" long material for the bar. For example, an aluminum yard stick provides great material to use as a bar on which glasses, tape measures and other items can be mounted.
8) 1/8" to 3/8" thick wood wide enough to band the edges of the plywood, if you want to hide some of the plywood edges.
Step 1: LAYOUT and CUTTING
LAYOUT and CUTTING
Except for the bar off which glasses or tape measures hang, the storage rack in the picture is constructed from 3/4" plywood.
Layout for this rack does not have to done in any particular order. For these purposes, I’ll start with the articulating arms.
The eye glass storage in the photo has three articulating arms, which required making four identical arms, since the center arm has to sandwich the ones at each end.
The following directions are for the dog bone shaped arms seen in the photo. With my ceiling at eight feet off the floor, the 12" length of the arms required two of the arms to be adjusted to significant angles to keep the rack above head height.
If the arms were made longer, you would have to increase the angle of at least the upper arm to keep the rack above head height. Longer arms would allow you to mount your rack on a higher ceiling, as well as to reach across the span between centers of the roof trusses. I prefer having the rack arms set at significant angles for show.
1) Cut four pieces of plywood 3" wide by 12" long.
2) Draw a 3" diameter circle on each end. The diameter should be equal to the width of the plywood. Mark the
center of each circle, since this is where holes would be drilled to join the pieces later.
3) Draw lines in 3/4" from and parallel to the two long edges. The line should run circle to circle.
4) Use a template or other means to draw a partial circle between the lines just drawn so the circles flow into the centers of the arms, like the arms in the photos.
5) On four 3″ × 5″ pieces, draw a circle the diameter of the width (3" diameter). To avoid confusion during cutting, ONLY mark half the circle, since this is the only part of the circle to be cut out.
As with other circles drawn, mark the center, since this is where you will drill the assembly holes.
6) Cut out the four arm pieces and the four base pieces using a jig or band saw.
7) For the base pieces, you need a couple pieces of wood or plywood the 1″ × 3″ (the width of the base). These will be sandwiched between the two base parts at the top of the rack and for the part to which the actual storage plate mounts.
8) Cut out the 6″×14″ plate that will house shop items.
9) If you are going to band the edges of the storage plate, cut and miter 1/4" to 1/2" pieces for that purpose.
10) Cut a strip of wood or aluminum 1" wide by 1/8" thick by 14" long for hanging eye glasses, mounting tape measures or whatever you dedicate the rack to.
11) Cut two mounting blocks for the strip. These should be as wide as the strip in “10,” above and about 3/4" wide and deep.
12) Drill 1/4" to 5/16" holes at the center of the circle at each end of the arms (previously marked) and at the center of the the round portion of the four base pieces (also previously marked.
13) Sand to taste. I would at least knock any sharp edges and such off to avoid splinters.
14) If desired, apply the finish of your choice to each of the parts of the rack. Avoid paint or other finish on the bottom 1" of one side of each of the four 3″×5″ base pieces.
Step 2: Assembly
1) The bases that mount the unit to the ceiling and to the plate on which items are stored is made by sandwiching the two 1″ × 3″ previously cut.
2) Apply glue to both sides of the 1″×3″ pieces, then sandwich them between the two 3″×5″ pieces with the single rounded end. It may be best to lay the pieces on waxed paper. Align the edges so the ends of the 1″×3″ pieces align with the sides of the 3″×5″ pieces and the bottoms of all three pieces are flush. When aligned, clamp the three pieces and allow the glue to dry.
3) Slip a flat washer over 1/4×20 bolt or screw, then, with an arm on edge, slide the bolt through a screw hole of the arm. Now with it pointing in the opposite direction, slide another arm over the screw until it’s against the first arm. Then install the last arm, with it pointing in the same direction as the first.
When done, you should have two arms pointing in one direction and a single arm pointing in the opposite direction.
Slip another washer over the bolt, add a lock washer, then install a 1/4-20 nut or knob and lightly tighten.
4) Attach the fourth arm to the other end of the double arms, again using a bolt, two flat washers, a lock washer and a nut or locking knob.
5) Install one of the bases to one of the arms, again using a 1/4-2- bolt, two flat washers, a lock washer and a nut or knob.
6) Mount the last mounting base to the back of the 6″ × 14″ plate. Center the base between the length and width of the base and mark where the base rest on the plate. Use the pencil marks to drill a hole about 3/8" in from the edge marked by tracing the outer two 3/4" pieces of the base, and at about center of the length of both outer pieces [sandwiching the spacer]
Pre-drill the screw holes using a bit a couple sizes smaller than the diameter of the screws. Then mount the back.
7) Mount the 1/8" x1" bar to the two 1″×3/4″×3/4" mounting blocks. You can glue the three pieces or glue and nail them, but pre-drill holes so the wood doesn’t split. Of course, if you used aluminum stock from a yard stick, you need to drill the holes for mounting using nails or screws.
8) After the bar is mounted, position it at about center on the width and at or near flush with the two ends, mark the position, then drill a hole through the plate to allow you to attach the blocks to it using two screws. Again, pre-drill the holes, to avoid splitting the blocks.
9) Drill a couple holes through the center spacer of the base you’ll mount to the ceiling. The holes should be about 3/4" in and can be at a slight angle. As before, make the holes just a bit larger than the mounting screws.
Step 3: You’re Done Building, Now, Mount Your Storage Rack
Now, choose a spot on the ceiling you think is a good location, and which has 2x backing you can drive two screws into.
Mount the rack.
If you used bolts and nuts, use two end wrenches to lock the arms a position that suites your fancy. If you used a knob, tighten it when you are happy with the position.
Install your tape measures, glasses or whatever you planned your rack for and enjoy.
4 Comments
Nice work, good idea.
Wheaties
brilliant!
JAGO - just a grandma’s opinion
cool
woodworking classes, custom furniture maker
Nicely done!


