MJCD
in almost 12 years
More from MJCD
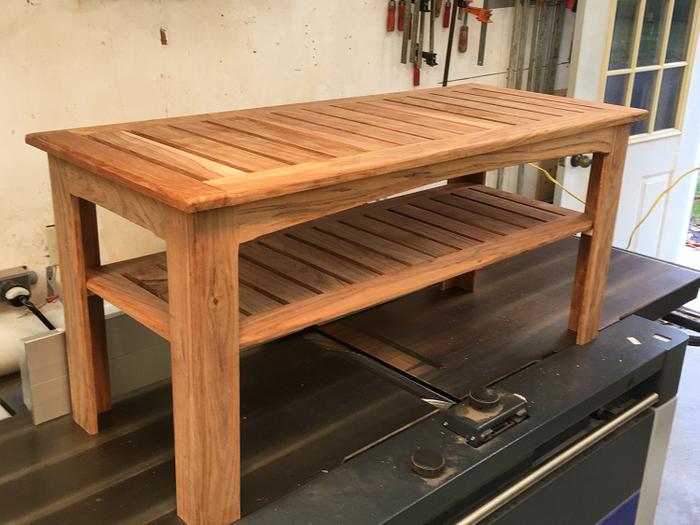
3-Season Teak Bench
With summer chores and family details, getting in the shop has been a challenge. This is a great week-long project that will provide family-wide use. This particular bench was requested by a retired 1st-responder, and I’m always pleased to do this.
Project: 3-Season Bench
Materials: Rhodesian Teak (Jatoba, any of the Teak family will provide good results)
Joinery: Mortise & Floating Tenons (Festool Dominos) – though, any mortising jig will get you there.
Dimensions: 45”x19”x 21”(h) nominal
Finish: none
Tools: Festool Domino (floating M&T), jointer/planer, cross-cut saw, bandsaw.
Challenging Tasks:
Managing 46 individual pieces, excluding tenons, and one work surface, this project is a study in process and execution.
Key Takeaways:
- Wood-movement will overcome glue; and must be designed-in.
- Maximizing yield from source lumber: mark-up the source-boards to determine the highest yield; I oversized thickness (6/4, then resawing to yield ¾” and ½” planks).
- Create master cut plan; keep track of cuts from source lumber, number each piece.
- Similar-sized boards should be cut at the same time, using a repeatable setup. Setup & confirm size, cut several times.
- Dry-fit is essential.
Bill of Materials
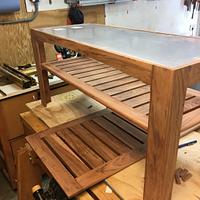
The project is 100% Rhodesian Teak; with a ¼” acrylic sheet on the underside of the Top – this, to shield items on the Shelf from rain and spills (this is not intended to be weatherproof).
In all, there are 46 individual pieces (excluding tenons), with 13 upper-slats, 13 (smaller) lower-slats, (4) 2-part legs; and, 2 sets (upper & lower) of stretchers & end-caps; and a few support-boards. Ensure your master cut plan is internally consistent; that is, if you cut each board per the cut plan, the project will go together without clamps.
Build Plan
All dimensions flow from the Top – this is 45” x 19” – all other parts are smaller due to insets and offsets, board thicknesses, and built-in ‘movement’ tolerances.
There are 3 composite pieces: Top, mid-Shelf, and the Legs & Support Frame.
The Top is ¾”; the mid-Shelf ½”, and the Legs & Support Frame ½”.
I started with 6/4 material, resawn to yield the Top and the bottom, respectively – then planned to final thickness. These pieces are then ripped to within a 1/16” of their final size, then jointed to finish the edge and width.
A table saw cross-cut sled, set appropriately, will yield identical lengths for each cut group – it is important to consistently dimension. The Top and Shelf, individually, are dry fit – to get the slat spacing (1/2”, in this case – the math is straight forward). Once the spacing is achieved, the parts (including the end-caps) are numbered; and, M&T reference marks are drawn. The mortises are cut, the Top and Shelf are dry fit, again – when the parts naturally fit together, without clamping, the Top and Shelf are good. It’s important to have the parts naturally fit together, such that the end-caps mortises naturally receive the stretcher(s) tenons – if you force this to fit, eventually, the project will fail due to wood movement.
Parts for the Legs and Support Frame are cut; with a shallow arc (1/2” rise over a 41” run = ~35’ radius) bandsawn on the Support Frame stretchers: the Legs and Support Frame are assembled. All edges are minimally relieved, with a full quarter-round on the Top & Shelf edges.
Designing-in Wood Movement
This bench will be in a covered 3-season room – rain and direct sunlight will happen, but not the baking, drenching weather experienced by a fully-exposed piece. With this in mind, all of the slats are free to move within floating M&Ts – the only straight grain/end grain glue joints are at the End-Caps, and span 2.5” each. If this were a fully-exposed outdoor bench, these joints would be pegged tenons, only.
When I made an all-season outdoor bench (about 5 years ago), I contact both Deft and Waterlox regarding exterior finishes – Northeast, waterfront. Both recommended their ‘marine-grade’ products; and cautioned me that I’d have to re-apply every 3rd year, or so. For this project, I’m bypassing an applied finish, and expect the Teak to weather the elements.
If anyone would like additional information, please let me know.
Do Take Care.
7 Comments
excellent work,…..I really lke your bench .
Not only is that a beautiful bench but the workmanship and narrative are equally as good. Just makes me realize what a hack I am. Congrats!!
Jack
Moment & Jack – thanks for the comments… I don’t post repetitive work; and, in this case, for me, it is a study in ‘process and execution’ – keeping track of the individual parts, in my small (400 sq’) shop and ensuring all similar items are cut without moving templates was a challenge. The woodworking part of this project is fairly small compared to the prep and scheduling – in most shops, this would be an easy project.
As with most of my work, this is a very buildable bench; if want additional information, please let me know.
Do Take Care.
The bench really looks lovely. The acrylic “shield” was a clever idea.
L/W
“Those who would give up essential Liberty, to purchase a little temporary Safety, deserve neither Liberty nor Safety.” Benjamin Franklin
Jack:
In our own minds, we are all hackers… this is what spurs us onto doing better the next time, and the next time. Also, the only thing that is important is that we do our best, and enjoy doing it.
very nice looks great.
woodworking classes, custom furniture maker
A beautiful piece . Really like the wood you chose and the design
Wheaties


