Firing this blog series back up since I'm actually going to get time to work on this drill press…FINALLY! This post won't be long. I decided to make a new cabinet so the drill place has a nice knew home once its restored. The following is just be babbling about my thought process in making the cabinet.
Before we get to far never mind the mess you see all over the shop. I'm in the middle of rearranging. As soon as the drill press is finished I'm starting on a massive miter saw station build.
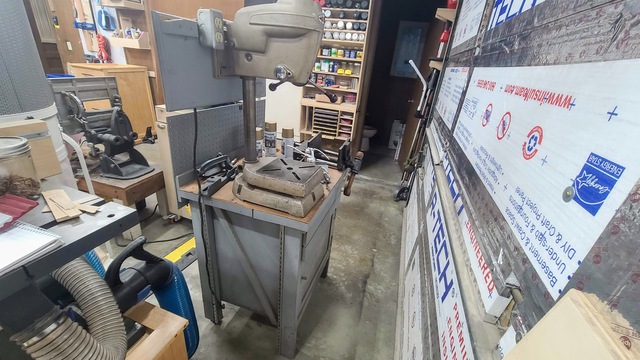
We left off with it partially taken apart sitting on this crappy old cabinet.
This current stand has 2 drawers that don't fit properly and a cabinet. It also wobbles a tad which probably isn't good for the tool. It's also WAAAY to short for me. My eyeballs…which I'm fond of using…are dead on with the top pulley. Sure I wear safety glasses in the shop but it still unnerves me to be eye level with a spinning pulley. The height also puts the widest part of the headstock in the way of getting a clear sight at what I'm trying to put holes in.
Knowing what I didn't like I set out to make a cabinet that had at least 4 drawers. The cabinet needed to be sturdy as well as mobile and it needed to be taller. I set the drill press up on different size blocks and it turns out 42" was the perfect height. Unfortunately plywood costs a crap load right now and I didn't have enough on hand to make a cabinet that tall. I had to settle for 40" and not screw anything up in the process.
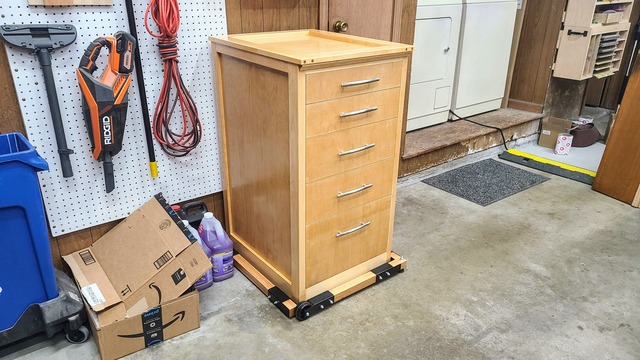
My final result came out like this.
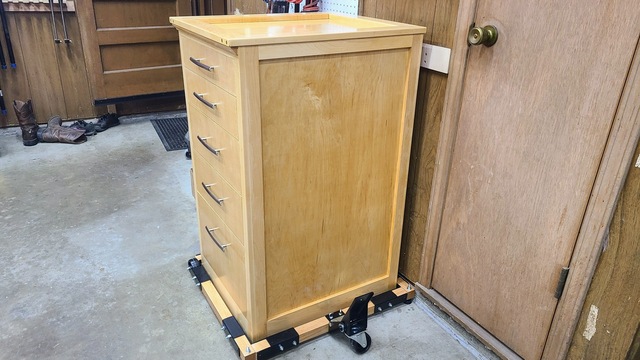
The base is 21" W x 25" D x 40" H. The top lip expands overall depth to 26" and overall width to 21-1/2". The cabinet is constructed of maple plywood I had on hand as well as trimmed out in soft maple. The drawers have inset faces with maple edge banding. The entire thing is finished in 5 coats of Waterlox medium sheen and finally waxed. Maple with waterlox is pretty much my standard shop furniture style now. I love the honey color and the finish is pretty damn durable.
As you can see I'm using a Rockler mobile base with laminated oak lumber. I have it oriented opposite of the normal direction so I can hug the wall and not block a drawer. These bases aren't super by any means but if you don't move things often and have smooth floors they are more than adequate.
I added the top lip for two reasons. One this cabinet style exactly matches the one I built for my bandsaw. Pretty sure I have that listed in my projects. And second, my floors are not super level and in this case I can only get level side to side and not front to back. If I set a drill bit down on the top I don't have to worry about it rolling off onto the hard concrete.
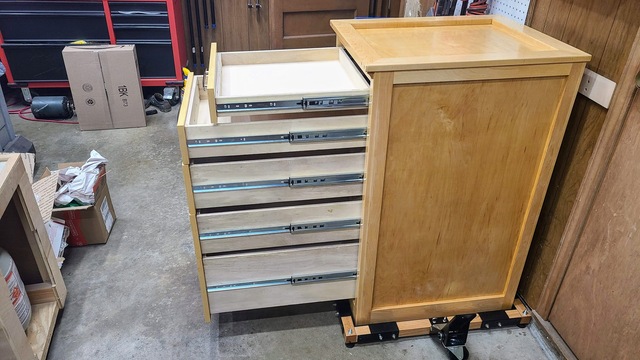
Last weird thing I did was make my top drawer a little more shallow than the rest.
I intend for the top drawer to hold my most used auger, forstner, and counter sink bits. I didn't want to run the risk of stuff random crap in the back of the drawer. I will be doing a ton of organization on the drawers in the future so that shouldn't be a problem but better safe than sorry I guess.
And that's a wrap for the latest entry. Sorry no pics of fancy restored drill press parts yet. I did feel its important…or at least semi-interesting…to share with others how we go about choosing how we set our shops up.