


Share your craft projects
Make new craft buddies
Ask craft questions
Blog your craft journey
sansoo22
81 posts
and
3 followers
in over 3 years
in over 3 years
More from sansoo22
Dunlap 103.23622 Drill Press #8: Balancing the pulleys and some accessories
Dunlap 103.23622 Drill Press #7: Installing a switch and final assembly
Dunlap 103.23622 Drill Press #6: Painting the cast iron
Dunlap 103.23622 Drill Press #5: Motor cleaning and restoring
Dunlap 103.23622 Drill Press #4: A New Home
Dunlap 103.23622 Drill Press #1: Introduction and Planning
This is
part 1
in a
8 part
series:
Dunlap 103.23622 Drill Press
-
Introduction and Planning
-
Addressing the motor pulley and shaft
...
- Introduction and Planning
- Addressing the motor pulley and shaft
...
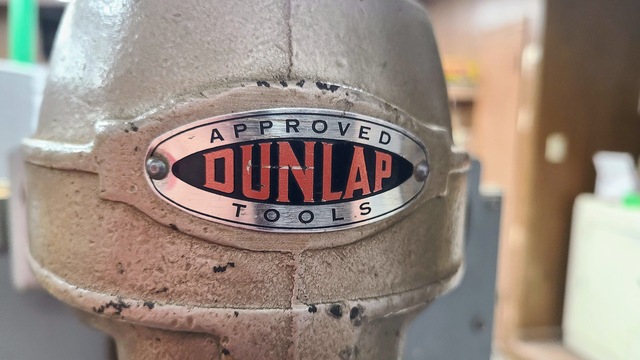
I recently purchased a Dunlap 103.23622 bench top drill press at an estate sale for $40. I thought it was such a nice deal that I should throw 4 x that amount in parts at it and make it look brand new.
Also note…I've never owned a drill press so this should be a fun time learning how they work as I go.
The primary focus of this blog is to document every last part number of every last replacement part I order and put on this thing. I have seen quite a few forum posts about the Dunlap and comparable Craftsman drill presses but no one has done a full write up of everything they ordered for it. One of the entries in this series will be totally boring as hell with just a list of parts and a picture of them…but hopefully someone might find it useful when doing a Google search about this model or a similar Craftsman model.
A little history:
From as much info as I can gather this Dunlap model was built by King Sealy sometime around 1950. Its not quite as nice as the Craftsman 100/150 models from around the same time frame as it uses an oil embedded bronze bushing for the spindle instead of a couple bearings. Although I have also found a few Craftsman with the same bronze bushing in the head. Back then Craftsman seems to have had multiple versions of the same tool. Why I don't know. Dunlap was supposed to be their downline so why have the same exact thing painted battleship grey with a Craftsman badge.
Enough chatter lets see the ugly bastard
Some of the tear down has been done before I decided to do this write up so forgive me if some of the images are missing parts. This thing was complete and running when I got it.
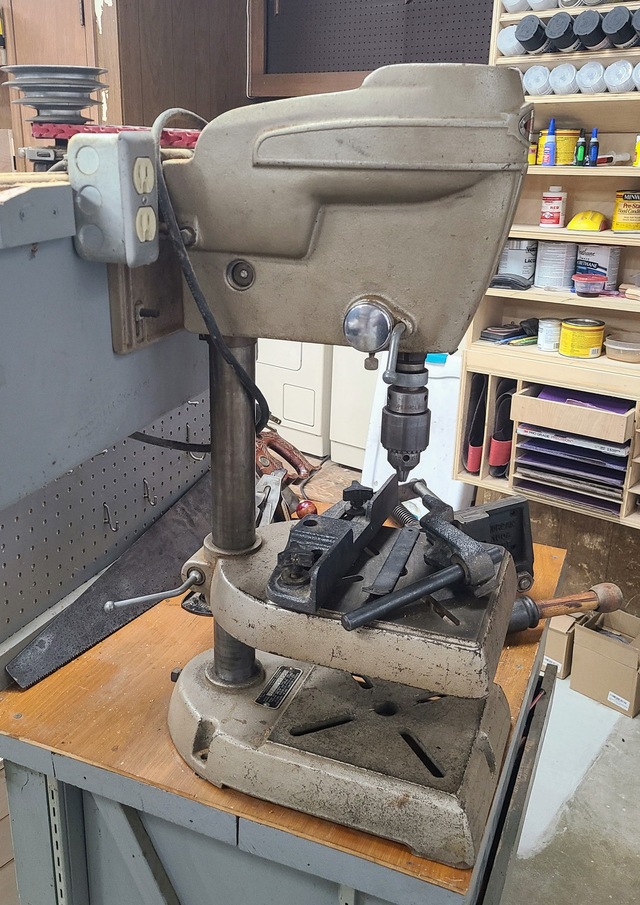
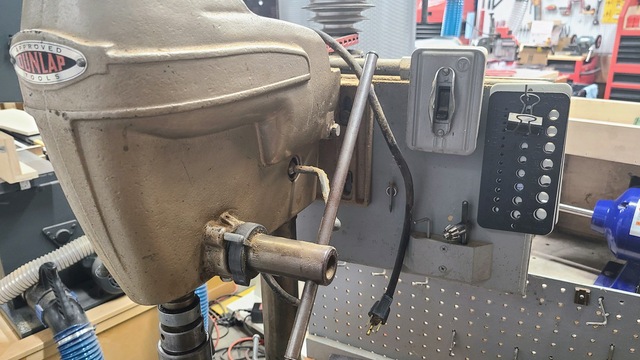
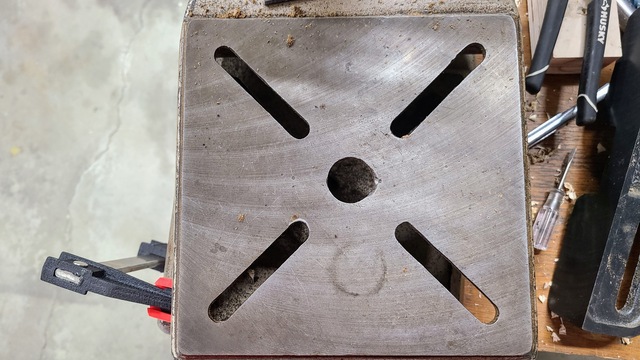
Table isn't in bad shape at all. Center hole has some wear from mishaps but I've seen worse.
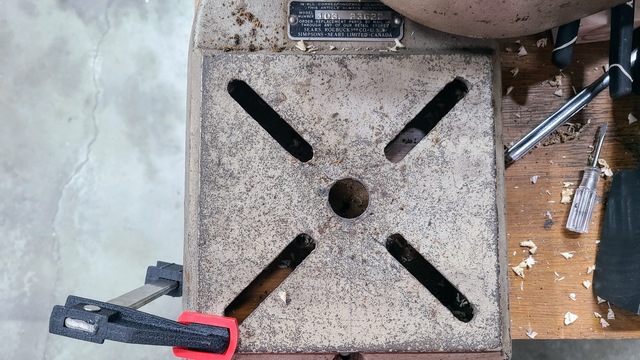
Bottom table/pedestal is painted and I can't decide if I will re-paint it or leave it bare cast iron. They seem to get pretty beat up from setting crap there so I think I might opt for bare cast iron.
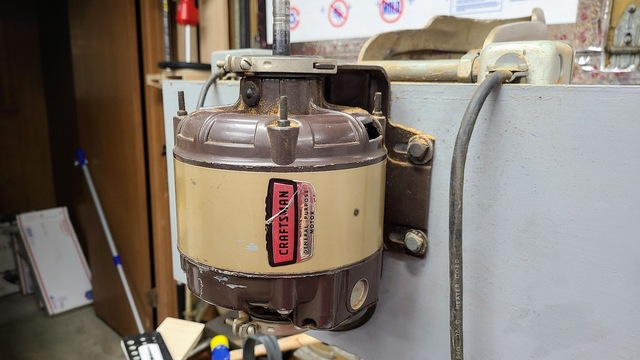
I will even be repainting the motor housing in that same color scheme. EBay was kind enough to have that Craftsman decal for sale so will even replace that.
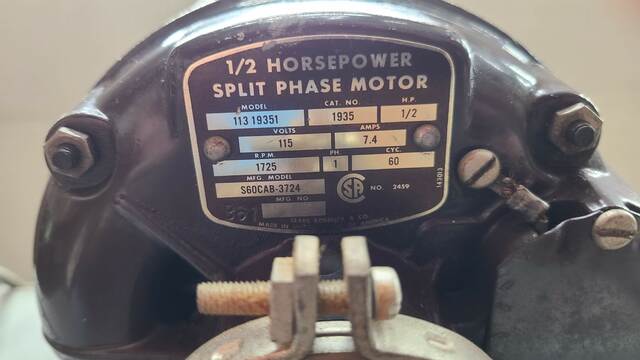
The previous owner apparently didn't get the memo that this was a bench top drill press. Most of these come with a 1/3rd HP motor. He opted for the 1/2 HP typically found on the floor standing versions but I'm not complaining. It still runs nice and smooth.
Previous owner was a wood worker if you can't tell.
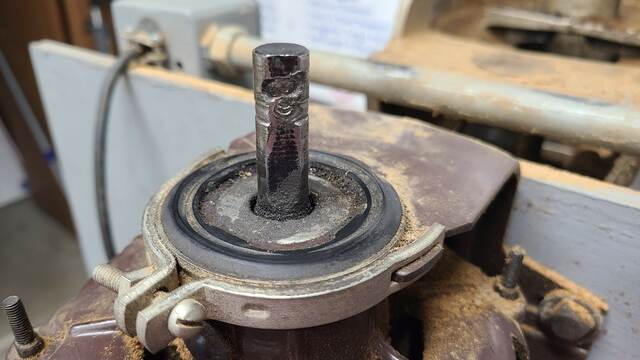
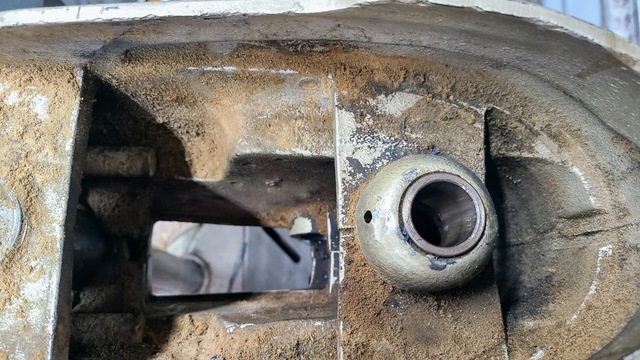
Inside of the motor is just as dusty and that shaft has seen better days but I have a plan to get a better fit for the pulley.
Next steps
This is the part I'm not quite sure how to proceed yet. The main body of the drill press is to bulky to put in my blasting cabinet. I'm considering a cheap Harbor Freight gravity fed gun and some coal slag to blast it outside. The main bushing is getting replaced and I will do that after its been painted to avoid any issues with overspray. I'm open to suggestions on that part.
The quill and pinion assembly have already been removed. I have a couple bushings on order for that and will go over its cleaning and reassembly in the next entry. I'm still restoring planes as well and have a customer about ready to send another batch so this is a side project and may take some time to get fully documented. However I am taking an abundance of photos along the way to avoid missing any important steps.
And that's a wrap for this entry. Thanks for stopping by.
3 Comments
I'll be following this for sure. Should be a beaut by the time Sansoo finishes with it.
Half of what we read or hear about finishing is right. We just don’t know which half! — Bob Flexner
It's been done for awhile. Most of the blog is over on LJs. I'm transplanting to here and finishing up the blog. So there will be some pretty pictures coming up very shortly.

Following. Can’t wait to watch it transform!
Ryan/// ~sigh~ I blew up another bowl. Moke told me "I made the inside bigger than the outside".
More from sansoo22
Dunlap 103.23622 Drill Press #8: Balancing the pulleys and some accessories
Dunlap 103.23622 Drill Press #7: Installing a switch and final assembly
Dunlap 103.23622 Drill Press #6: Painting the cast iron
Dunlap 103.23622 Drill Press #5: Motor cleaning and restoring
Dunlap 103.23622 Drill Press #4: A New Home