This is something that I've wanted to build for a while for my small shop, but never got around to it until now. I kind of forced my own hand by finally pulling the trigger on a benchtop planer, but not having a place to put it. The planer hasn't arrived yet, but I'm working out the details for the build ahead of time.
I went back and re-watched all the videos on the different approaches people used to build them. They're all mostly variations on a theme, with some differences in how they lock the rotating platform in place. I was particularly watching for how folks were dealing with the power cords. I really wanted to avoid having to juggle power cords on each flip. In the cases where an onboard power strip was incorporated, the power cable was brought through the rotating pipe axle. It works, but you have to sacrifice the power strip plug in order to feed the cord through the pipe and then install a new one after the cord is threaded through. You also end up with tool power cords to manage on the platform. I wasn't crazy about doing either.
I've worked out an alternative method that doesn't require cutting any cords, allowing tool cord management on side of the cart. It involves using a rotating hub rather than a section of pipe. The hub is large enough to allow cords to be passed through it without having to cut-off their plugs. I'm also going to attempt to skip using the pipe altogether in order to simplify the construction of the platform (it will just be two pieces of 3/4" plywood glued together without the need for an inner frame to sandwich the pipe).
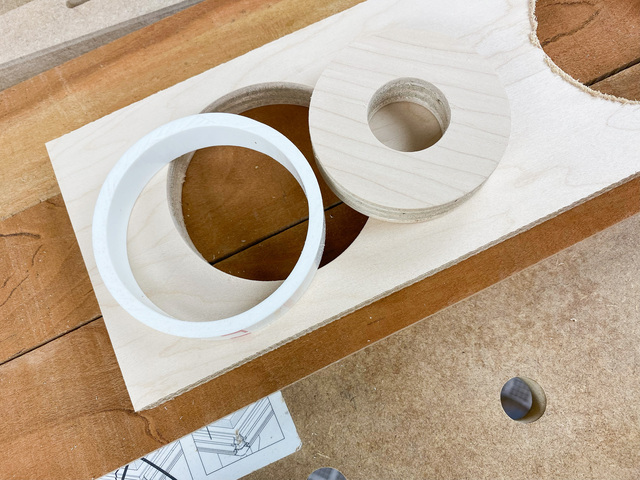
The hub is a 3/4" plywood disc that will press into a slice of 3" PVC pipe, which in turn will ride in a semi-circle cutout on the top edge of the side pieces. My expectation is that the PVC will allow the platform to rotate smoothly.
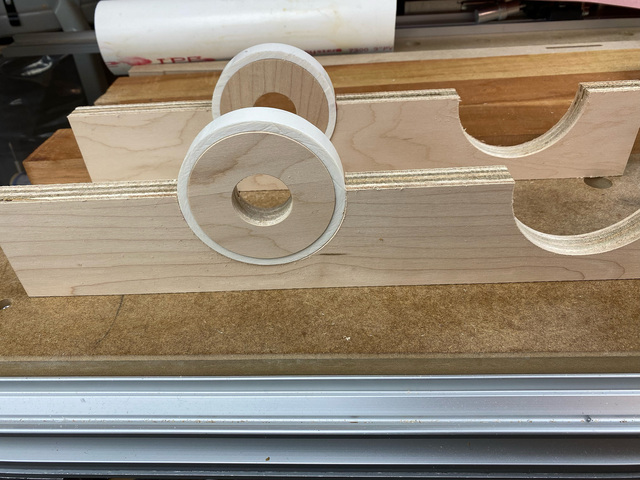
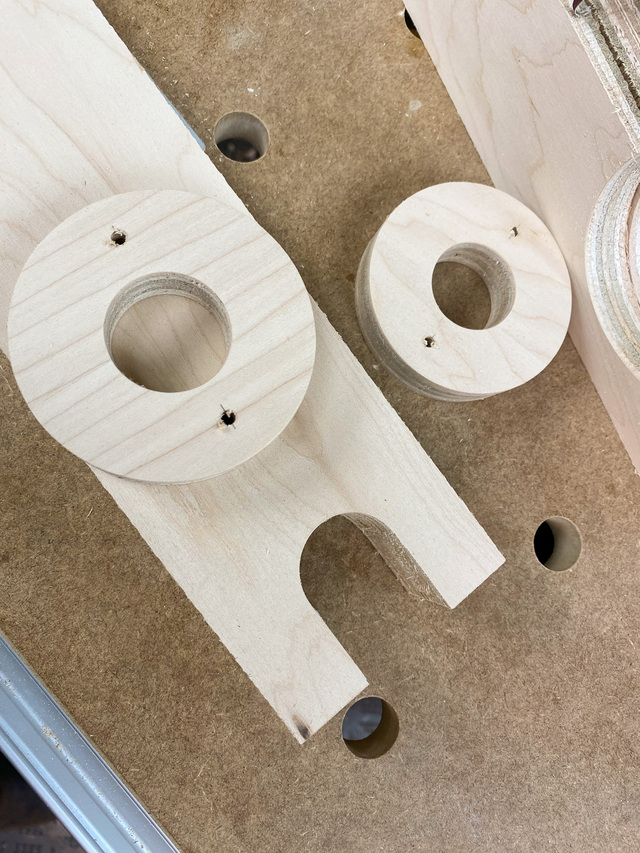
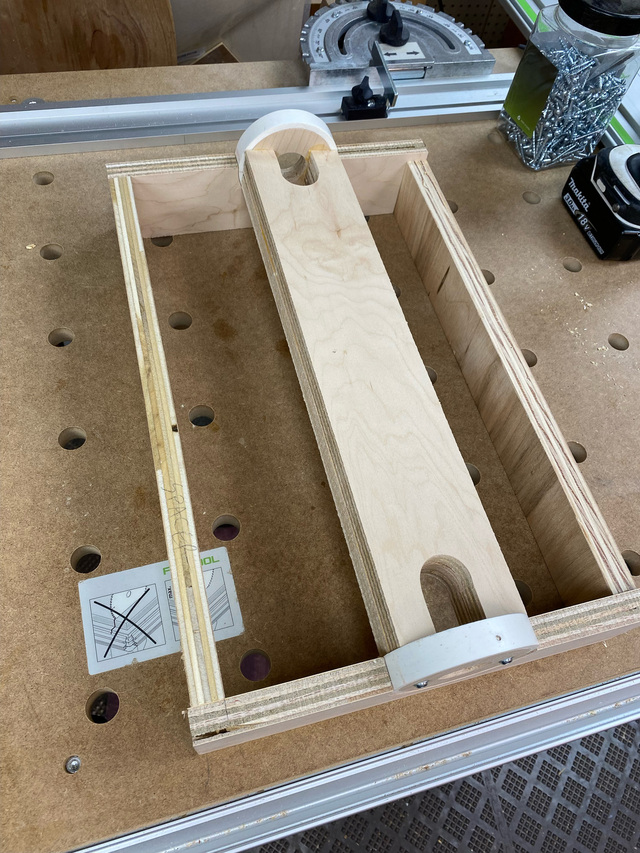
Since there won't be a pipe for support, I made a platform mockup with some scraps and a set of rev. 1 hubs to see if the joint between the hub and the platform could support the weight. Even with the reduced gluing surface of the rev. 1 hub, I was able to put my full weight on the mockup platform without any complaints from the joints (each hub is attached with a pair of 2-1/2" screws as well as glue).
The platform mockup was two pieces of 3/4" plywood, glued together, and just wide enough to provide a full gluing surface for the hubs.
Here's the completed mockup for the platform and side supports. As I mentioned, I was able to put my considerable weight on the platform without seeing/hearing any joint failure.
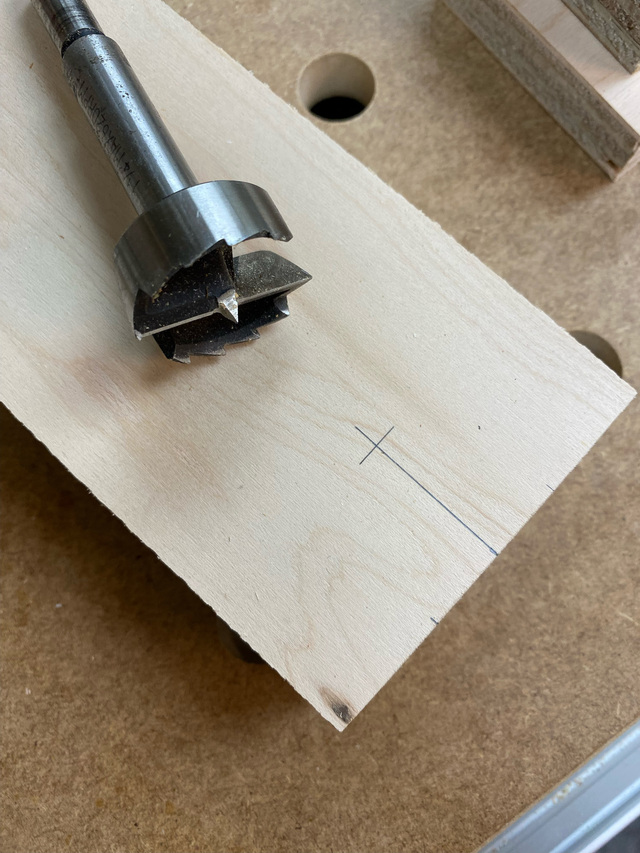
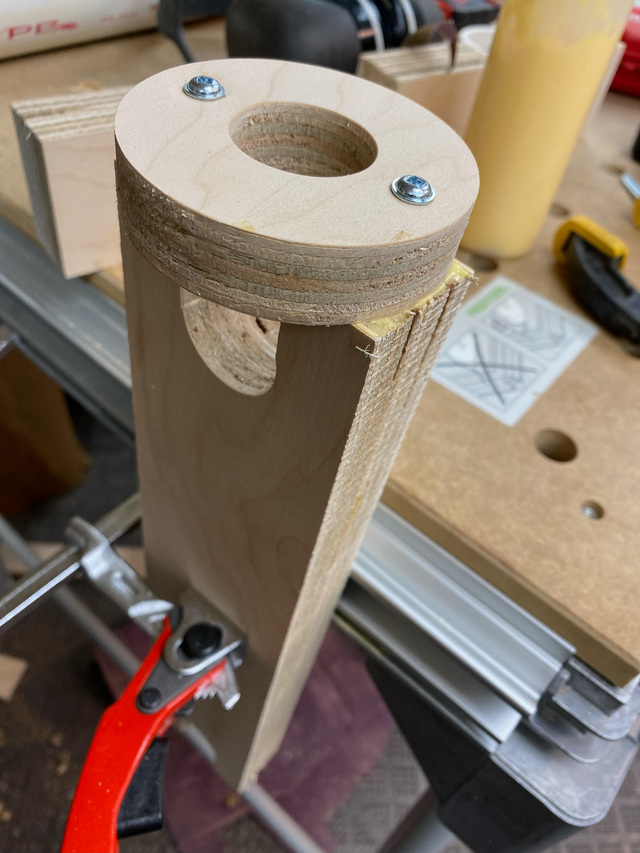
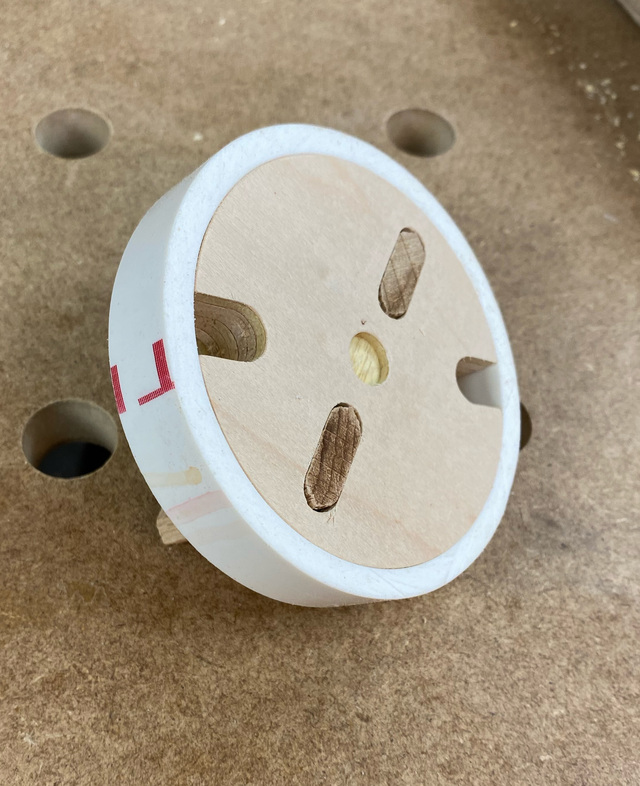
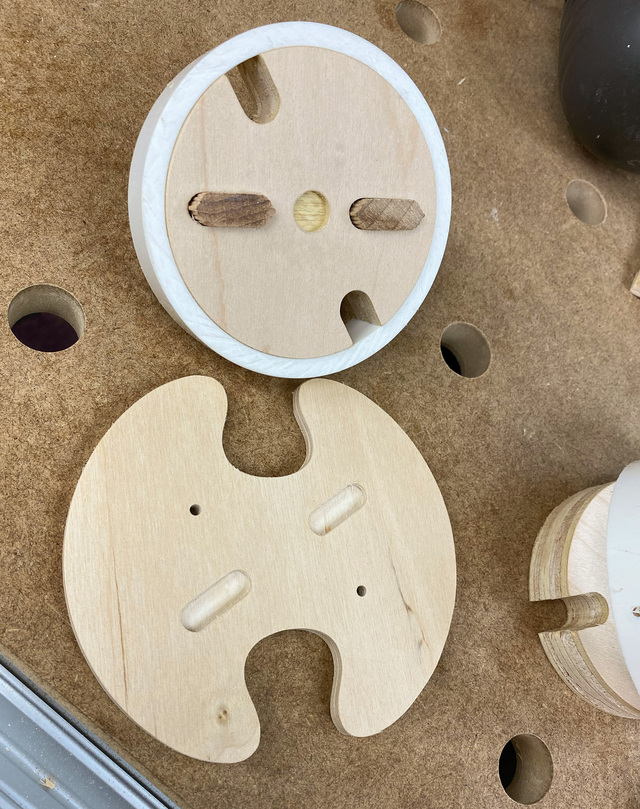
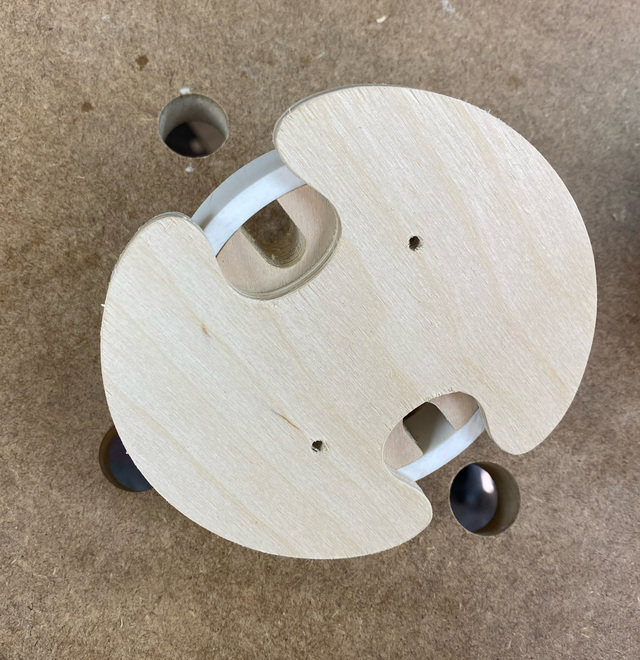
I had no sooner got the rev. 1 hub tested when I had an idea for an improvement that would improve the joint strength. I modeled hub rev. 2, but I had another idea for an improvement before I could cut them out. I'm now up to rev. 3, which I think will be a winner. The big changes here are that:
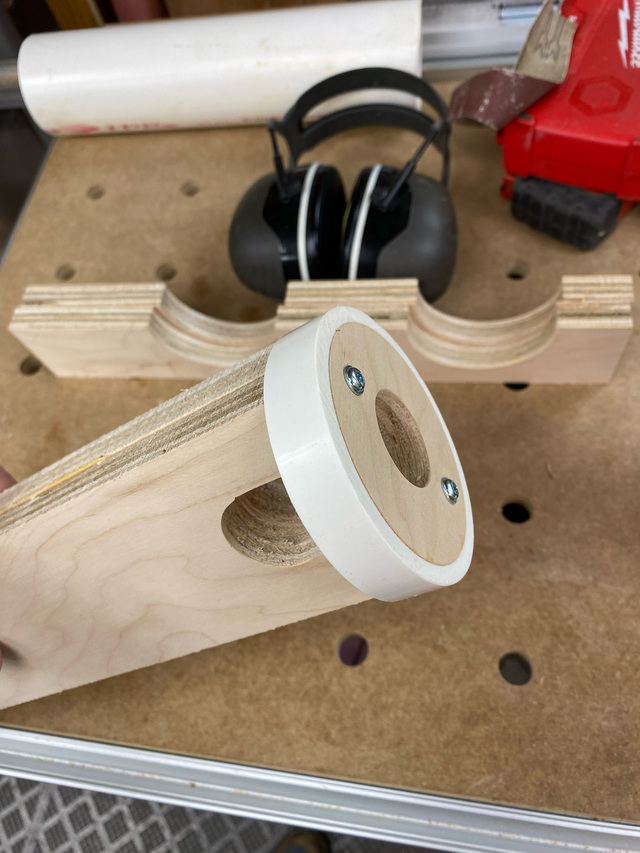
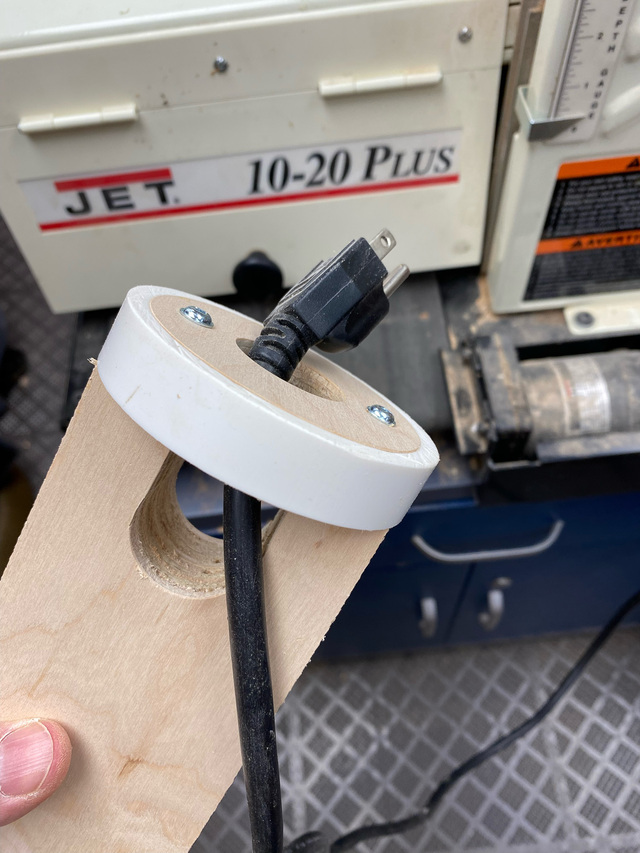
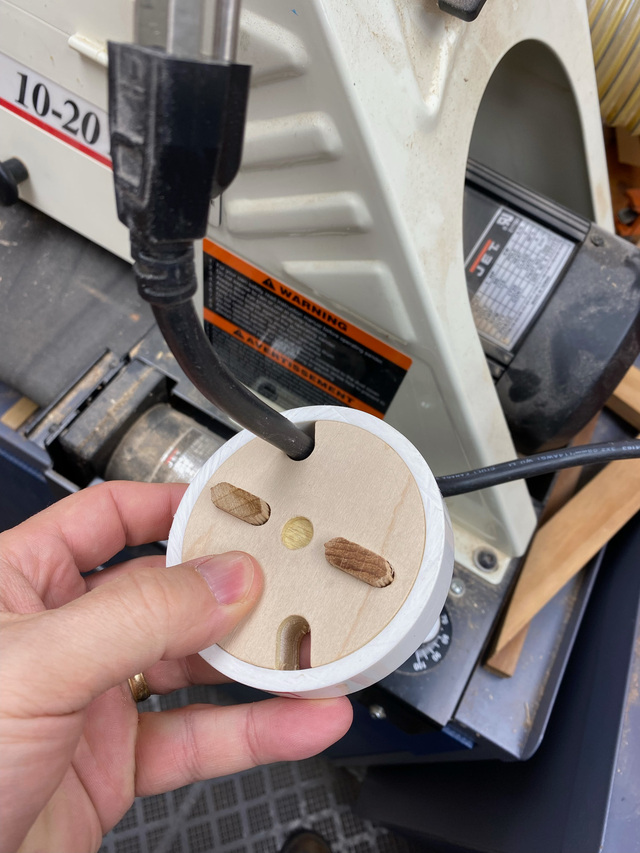
The tool cords will fit into perimeter slots in the hub prior to the PVC ring being pressed on, and
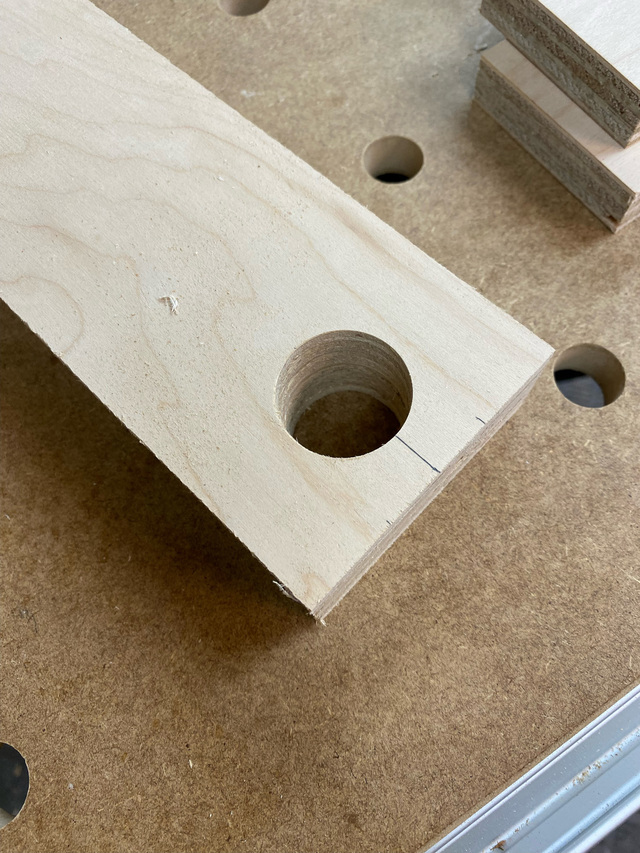
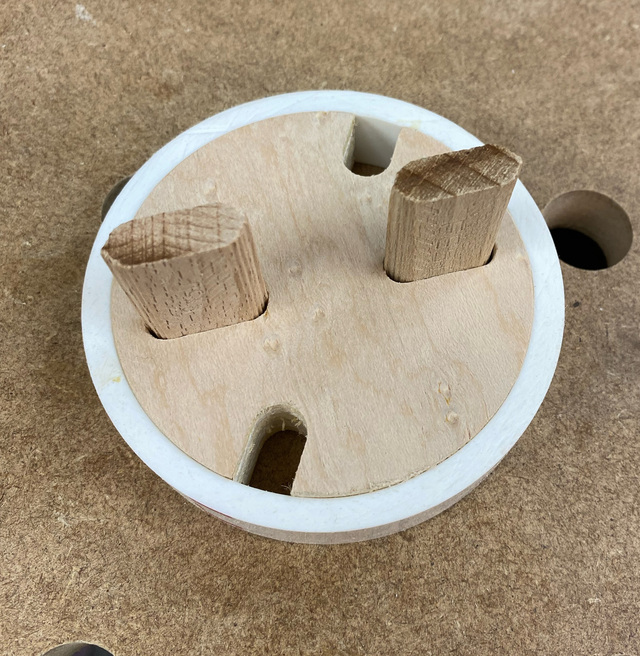
The hub will be held to the platform with a pair of dominos (and 1 screw for good measure).
The slots are rotated off vertical so that their not positioned where the highest force will be concentrated when the platform is horizontal.
I don't know if there will be a tendency for the sides of the cart to splay outwards, but to be safe I made some retainer caps that will fit over the hub once the cords and PVC rings are in place. These will fit over the stubs of the dominos that protrude 1/8" and be held in place by a couple screws.
I've got a piece of leftover 3/4" plywood that should be large enough to make the platform. For the rest of the cart, I'll need to head to the big box store to get another sheet. But I think the most challenging part of the project is now behind me. (Fingers crossed.)
That looks like a good solution once it’s in place, but I’m having trouble understanding how you’re going to attach the planer and other tool to the rotating platform.
If I’m following your description, you have to bolt both tools to the platform and trap their cords between the hubs’ inner and outer parts before dropping the hub/platform assembly onto the cart. That sounds awkward. Or am I just not understanding?
Ron Stewart commented 25 minutes ago new That looks like a good solution once it’s in place, but I’m having trouble understanding how you’re going to attach the planer and other tool to the rotating platform.
If I’m following your description, you have to bolt both tools to the platform and trap their cords between the hubs’ inner and outer parts before dropping the hub/platform assembly onto the cart. That sounds awkward. Or am I just not understanding?
Ron, I have a couple ideas on how I'll do that, but where I'm currently leaning is to initially attach the tools without routing the cables. Once the tools are mounted, I'll temporarily raise and support the platform on one end so I can slide off the PVC ring, route the cables into position, slip the ring back on, and then drop the hub back into it its cradle. We'll see if that works in practice. Otherwise, I can route the cables before I attach the tools to the platform, as long as I can keep the tools nearby, within the range of their cord lengths.
Thanks for the explanation, Ross. I knew you'd have a plan. I suspect you'll have a few tense moments wrestling everthing into place, but I have no doubt it will work out.