Share your craft projects
Make new craft buddies
Ask craft questions
Blog your craft journey

Ron Stewart
954 posts
and
24 followers
in over 3 years
in over 3 years
Giraffe Bookcase #7: Gluing the Case
This is
part 7
in a
9 part
series:
Giraffe Bookcase
The glue-up part of a project is always nerve-wracking for me, and this project was no exception. Dowel joinery helps a lot, but it doesn't totally prevent parts from racking. There were few parallel or perpendicular parts, making it difficult to use clamps. There was also the question of sequencing-there were too many joints to glue all at once.
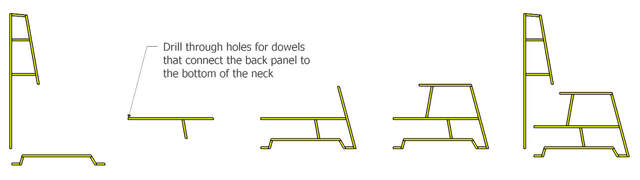
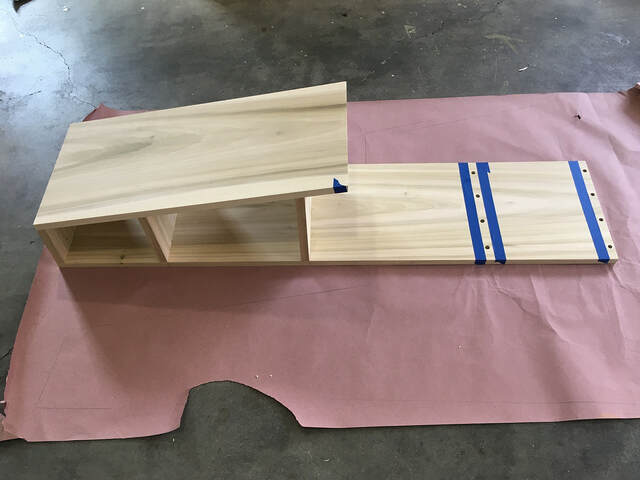
It took me a lot of time to come up with a plan, but here it is pictorially. Basically, I glued the neck assembly in one step, then gradually built up the body, and finished by attaching the body and neck assemblies.
It took me a lot of time to come up with a plan, but here it is pictorially. Basically, I glued the neck assembly in one step, then gradually built up the body, and finished by attaching the body and neck assemblies.
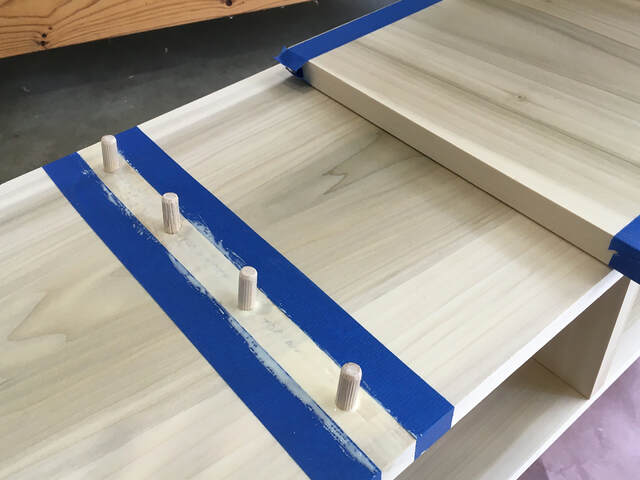
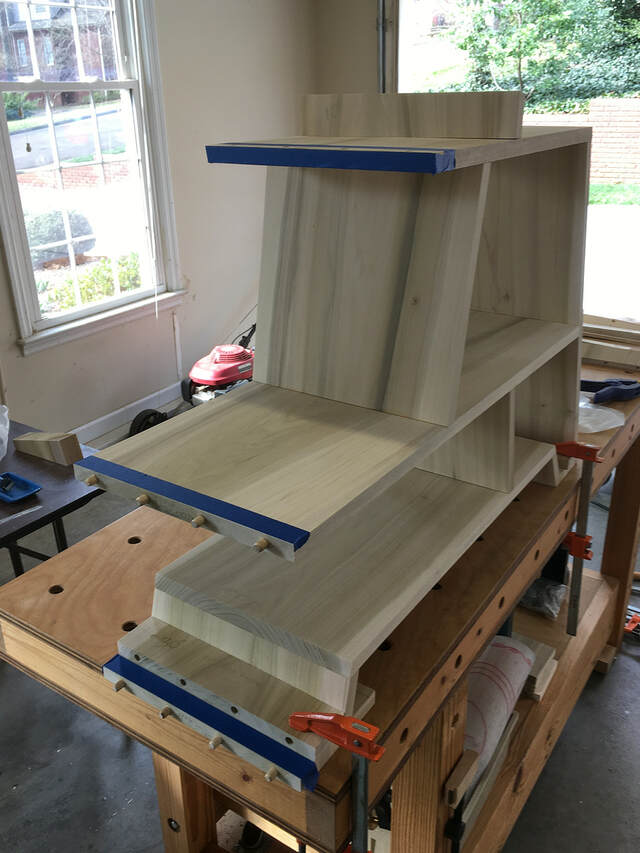
I started with the neck assembly, and I made a few small mistakes. First, I didn't tape off all the joints, which meant more cleanup later.
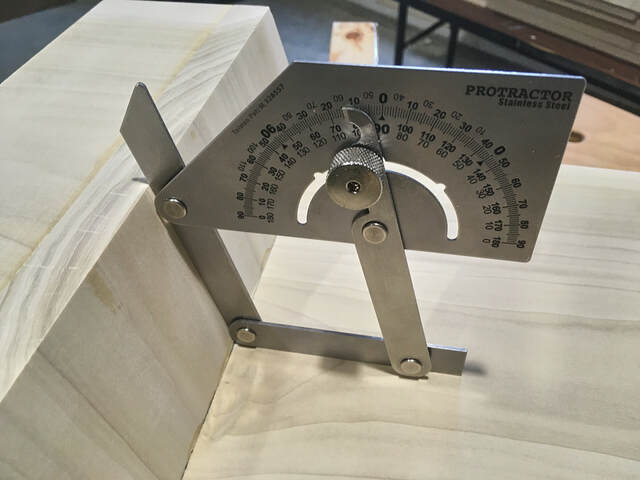
Second, I didn't notice that the assembly racked slightly when I tightened the clamps, and I didn't double-check the angles between the shelves and the neck front in time to catch and fix the problem. As a result, the shelves in the neck aren't perfectly perpendicular to the neck's front panel. They're off by about one degree, which really annoys me even though it's not really that bad. Fortunately, this error didn't throw off the rest of the case-I didn't have to trim off the ends of any other parts and adjust any angles to make things fit properly.
Earlier, I mentioned a mechanical workshop protractor I bought from Lee Valley. (As luck would have it, it arrived after I glued the neck assembly.) It's very handy. I used it frequently for the rest of the glue-up. It can measure both inside and outside angles, and it's small enough to fit inside any of the bookcase's cavities.
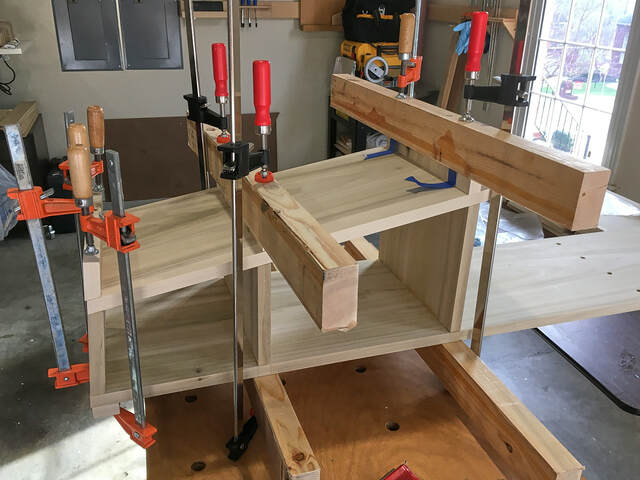
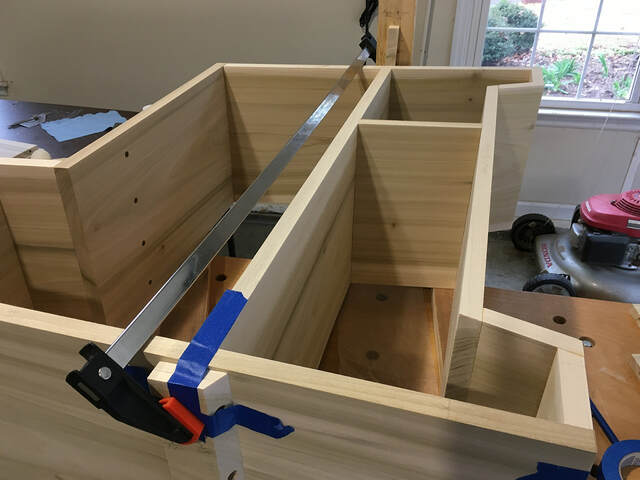
Clamping during the glue-up was interesting. Sometimes, I had to clamp parts indirectly. For the bottom shelf assembly, I clamped the short rear shelf and long bottom shelf to my bench, trapping the front of the rear thigh between.
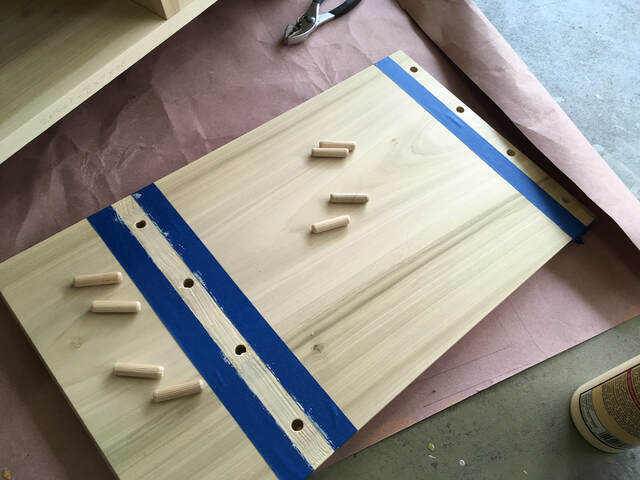
After my problems with the neck assembly, I worked a bit smarter. I tried to limit each new glue-up to three or four joints, and I taped every joint to keep squeezed-out glue off the parts. As I glued, I dry-fit adjoining parts to aid in alignment.
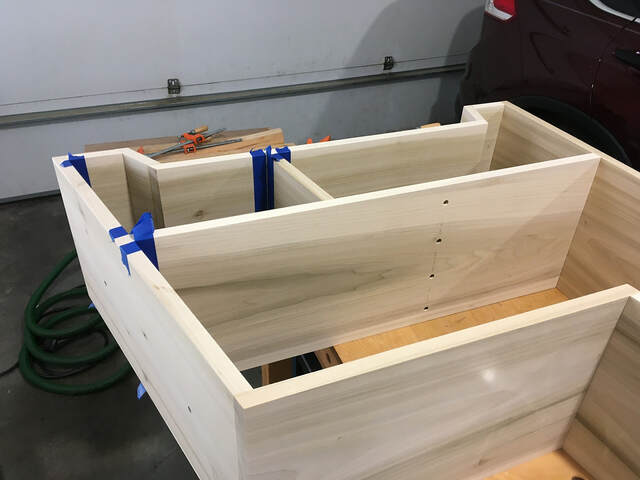
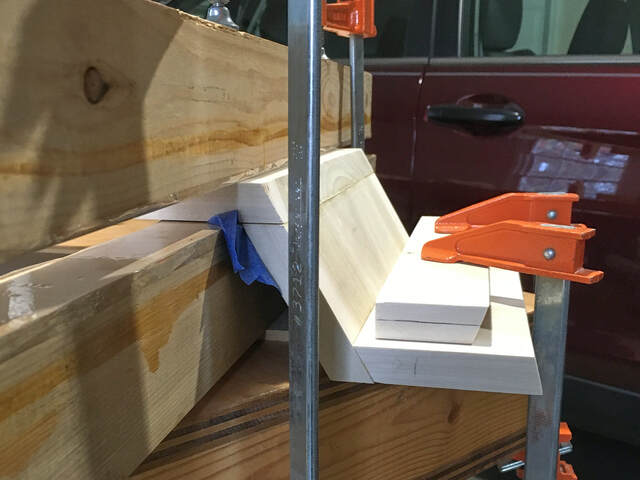
In a few places, I could clamp conventionally, sometimes using angled scrap to form parallel clamping surfaces.
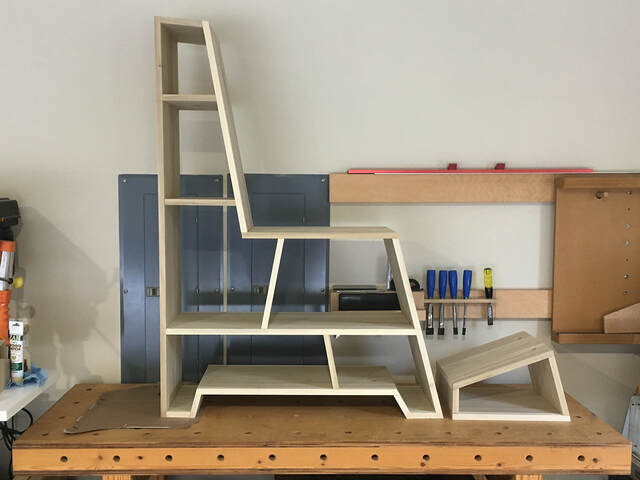
I finally reached the point where the entire body assembly was glued together.
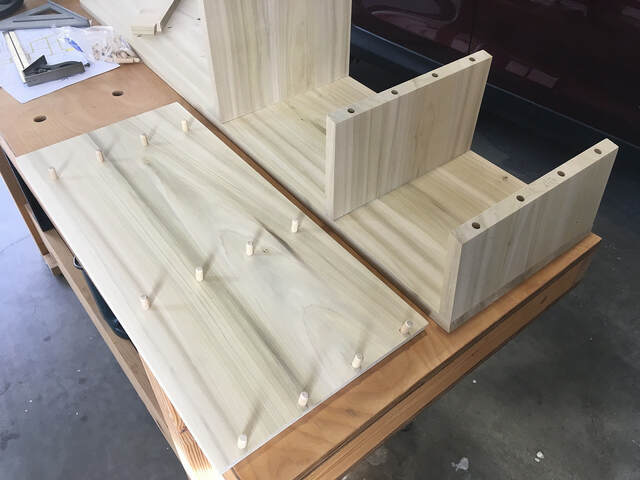
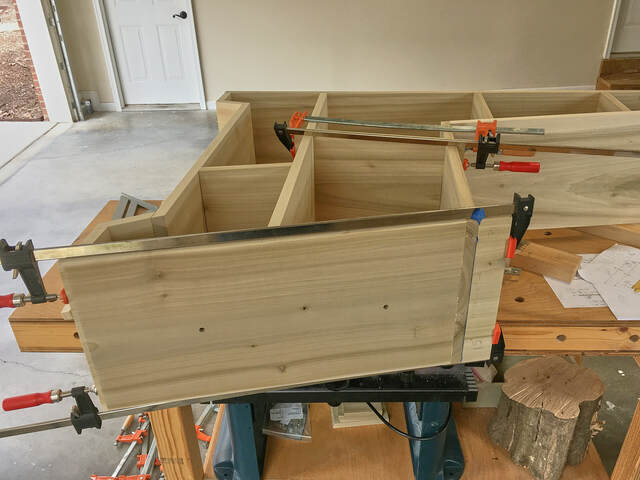
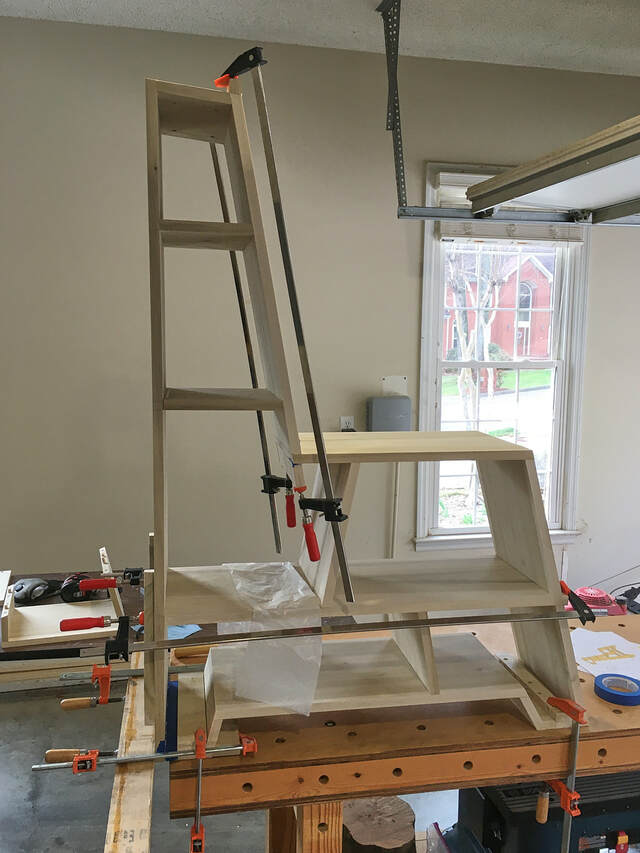
That left the final step of gluing the neck and body assemblies together. This step required the only through-dowels in the entire bookcase. Both assemblies were rigid, and I didn't want to run into clearance problems between the dowels and panel edges at the giraffe's back/neck joint. I decided to drill dowel holes all the way through the front end of the back so I could insert the dowels that attached it to the bottom edge of the neck from underneath after everything was in position. That worked out well.
Fortunately, I was able to use clamps across the chest and rump.
I was also able to clamp the top of the neck to the back. For peace of mind, I also clamped the body assembly to my bench. (I had nightmarish visions of wrestling with clamps and cauls and accidentally pushing the entire bookcase off the bench.)
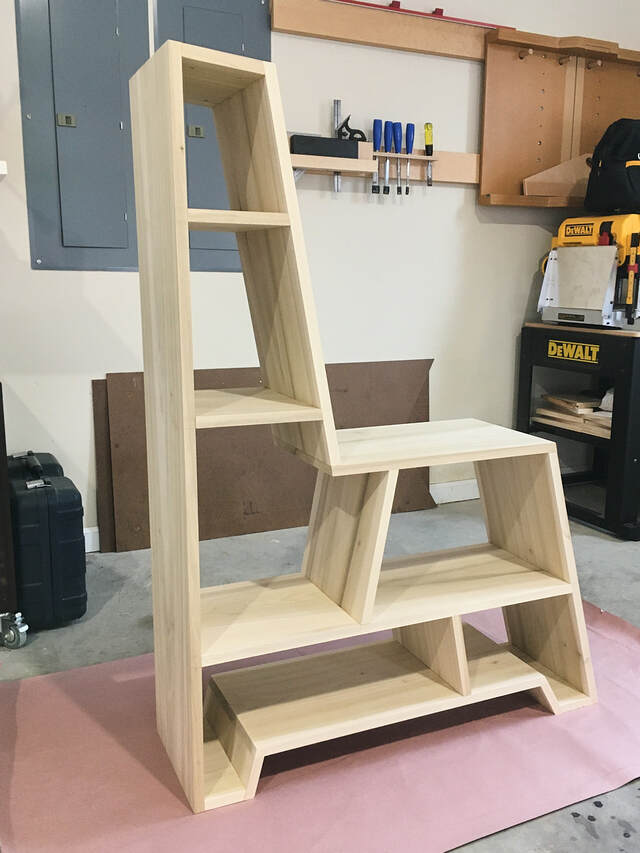
Now it was starting to look like a real bookcase.