I have always been fascinated with timber framing, an old school joinery and the large timber that are used. I have a large project that I want to get started on this year, and need a good set of Sawhorses for the build. So before I order the material for the horses, I wanted to give it a trial run and see how it goes.
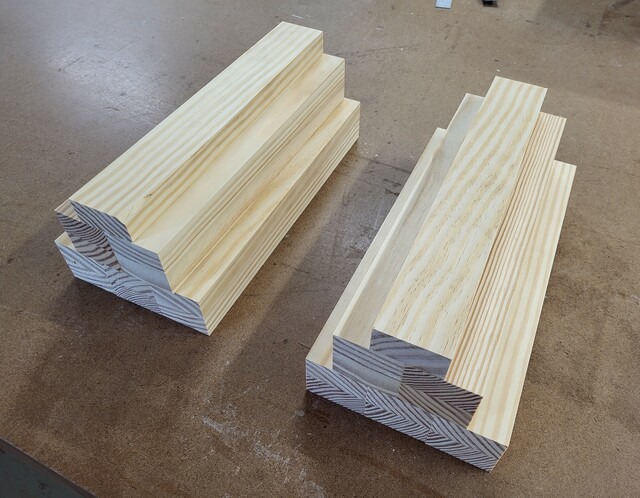
I decided to build these at a 1/3 scale, seems like a good size. and I can use them on the bench when I need to elevate a project and such. I had some pine stair tread drops for a past job site. Started by ripping some 2-1/16" widths to glue up a 2" thickness, keeping one blank for cross bracing. I ended up with five 26" glued up squares, ran them through the planer to get smooth joints and the 2" thickness. Then cut to a 12-1/2" length. Note: these are clear pine, I did find one blemish, but I can work with that. A small tight knot.
Thanks for reading and following along. Comments are always welcome.
Ryan, actually it is fun. I can have a little quite time in the shop and hear the radio.
Nathan, Sorry to disappoint you, but not building another barn. The shop is already a mini barn. Yes, I am running out of room so I will have to add to one side or the other with a lean-to someday.
Eric, we have a guy in our guild who is a retired aeronautical engineer and has a lot of money to buy toys. He has a 6' x 12' CNC router and makes post and beam structures. Since he got the CNC he has gotten away from the mortise and tenon style of post and beam building He now routs a pocket on both side of the post and beam on the CNC and builds these gussets to fit into the pockets and bolts them in. The Amish who build for him put up the frame for his new workshop barn in one day. They love this method. I was at the demo of the routing process and did not have my camera. I'll try to get you some shots of it in the future.
Cheers, Jim ........................ Variety is the spice of life...............Learn something new every day
Jim, that is cool. Technology has advanced very far, and I see no end to the advancements. I bet the structures look fabulous, to see all of the intricate joinery.
Splinter, I hear you on the robust joinery, something with a lot of pieces that comes together are a unit. The bench that I have in the shop is along the same lines, used 2x6's left over from the shop build and ripped them in half, cutting dados and used tenons on the legs. Should have used a draw bore pin though. I'll be building another bench one day.