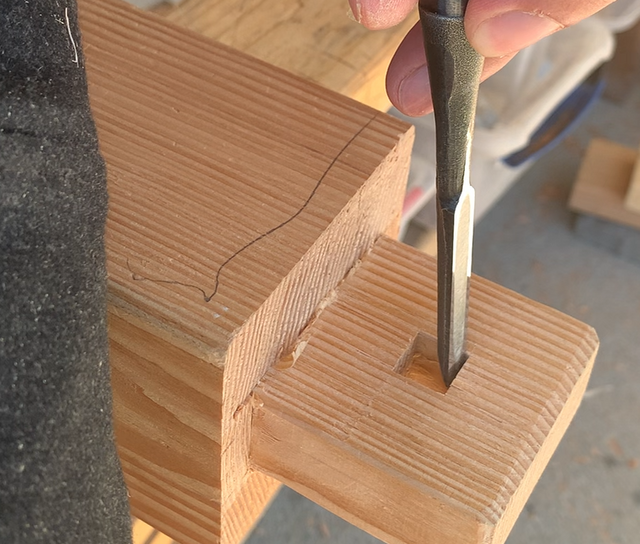
I had to think the process through, since I wanted to use the drill press, the wrong way would have meant drilling by hand, and I may have drifted.
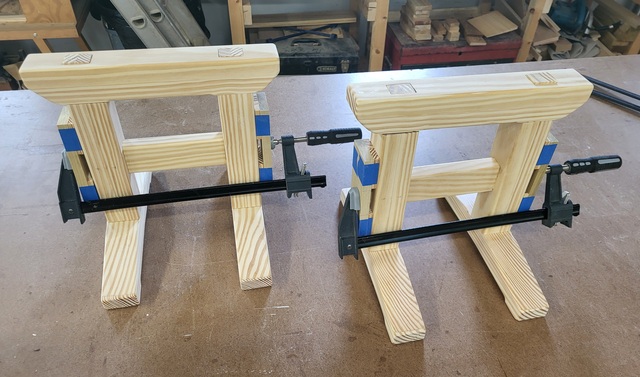
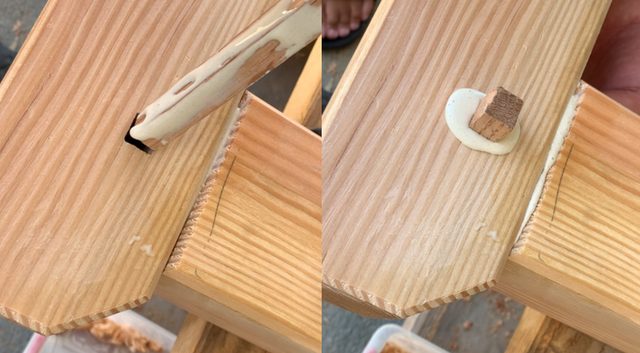
I started out by gluing up the legs and the cross piece, I also fit the other parts in place to keep everything lined up. Due to the tenons being a tad proud, I made up a few blocks with a hollow to clamp everything together.
After the glue set up, I sanded the proud tenons so I could use the fence to drill out the holes. Took them over to the drill press to drill the pin holes. Then drove the pins through with a couple of small drops of glue. The next pieces to glue together were the feet, the same principle was needed to clamp things in place.
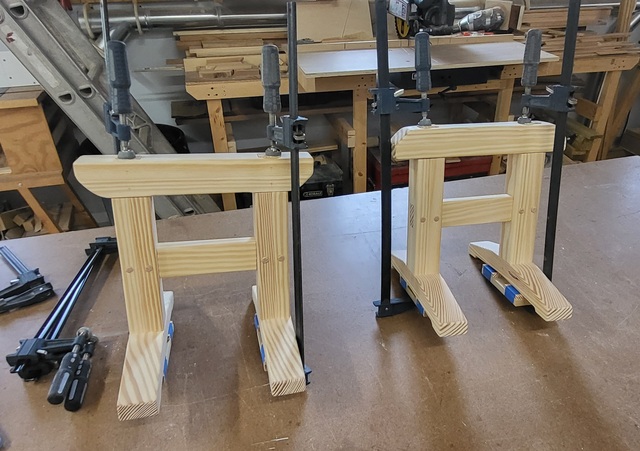
Had to adjust the drill press to accommodate the height of lower frame. Drilled the holes and set the pins again. Now it was time to glue the top in place, rinse and repeat the process.then drill and set pins.
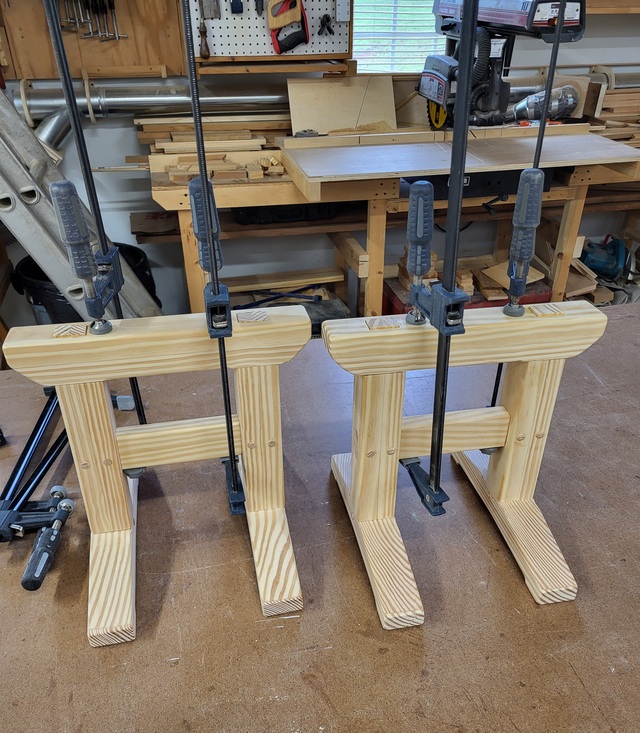
I ended up just sanding the pins flush and now I can call these done, except a few coats of Danish Oil. Once that is done, I'll post as a project.
A few things that I learned during this build: Take the time to cut the mortise after a careful layout, one cannot rush through this. Drill for all of the pins before creating the mortise, I think this will work better on the full-sized set. There will be a few more to drill. Maybe cut a chamfer on the end of the tenons for the cross brace. Or Cut a mortise in the tenon and use a wedge to lock it in place, that may help if they ever start to loosen up.
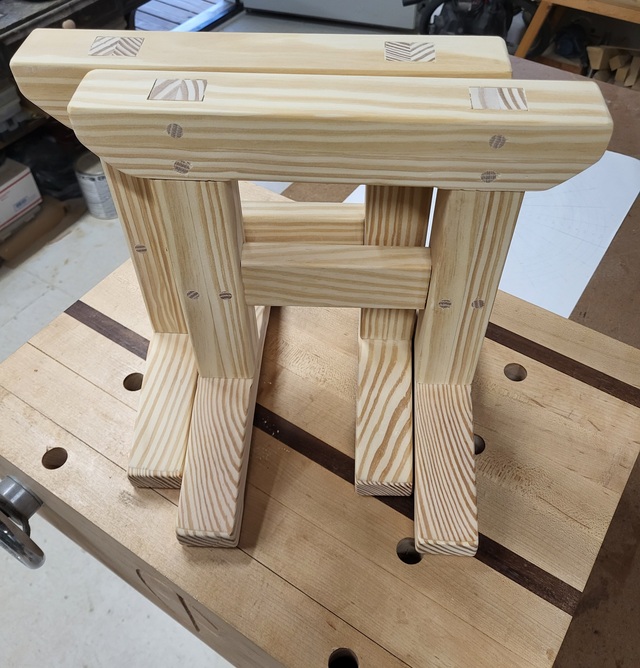
Other than that, the build went well and fun doing it, even having to chop out the mortise.
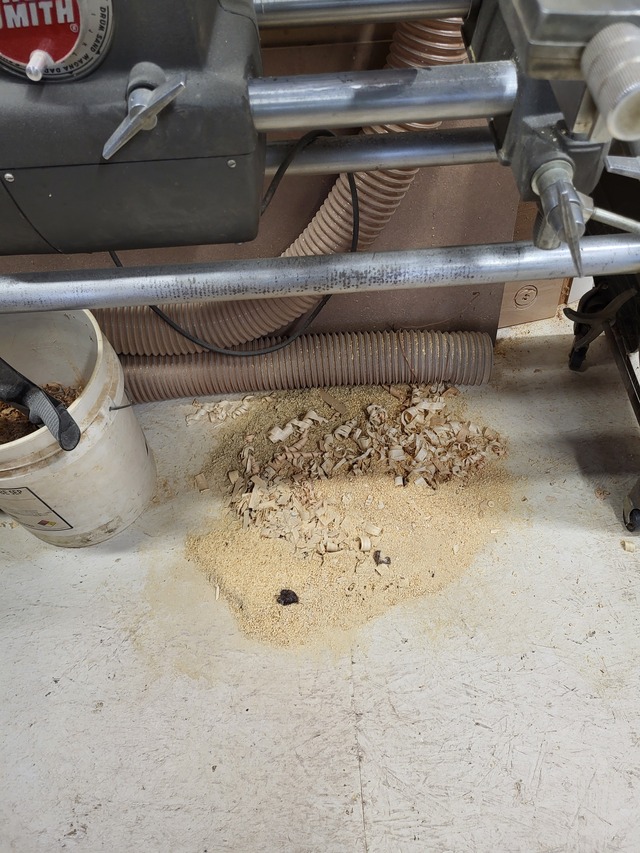
And for Splinter asking about the chips. I brush them off the bench and eventually sweep them over to a pile.
Thanks for reading and following along, and comments are always welcome.
Ahh, so the pegs aren’t drawbored, just holding things in place. I was wondering about that.
Wedged tenons will hold tightly, but they’re best if the accompanying mortise is slightly flared. Which is harder to cut… Also, if you try wedged tenons, drill a hole through the tenon at the bottom of the kerf for the wedge. That will prevent a split from propagating down from the wedge into visible bits of the wood. DAMHIKT.
Dave, thanks. I will need to keep that in mind about the wedged tenons. I may also experiment with the drawbore, never done one before.
Pottz, thanks. Ihave had a project on my build list, but I need something sturdy to use. So, I experimented with these. I haven't seen many posting about timber framing. No, I'm not building a barn, just need a sturdy set of horses.
Your first and second pictures are confusing my brain. At first glance, with the workbench in the background, it looks like these things are giant until you realize that they are sitting on top of another bench.
I used draw bores on the stretchers on my workbench legs. I followed Chris Swartz's directions when I built my bench. Highly recommended and pretty easy too -- with no glue required. You basically drill the hole in the leg (or whatever) from one side and into the other side of mortise, slide the tenon in and use the drill bit center or lead screw to mark the center on the tenon. Remove the tenon and drill a hole into the tenon ~1/16 (+/-) closer to the tenon's shoulder and when you drive it home, it pulls the joint tight. You may have to experiment with how far to offset the hole in the tenon, depending upon the size or scale of the tenon and the size and stiffness of the dowel.
--Nathan, TX. Hire the lazy man. He may not do as much work but that's because he will find a better way.
Nice! and I thought yours were giant one, too! I used a Japanese style square draw peg and the line on the shoulder is my marking line:) 1/32" difference (out of 4x4 lumber) squeezed glue nicely and made the joint tight.
Nathan, thanks. Appreciate the feedback on the drawbore, I was thinking that was how it was accomplished. I would also think that one would have to have a slight taper on the far end from the shoulder to assist in driving the peg in place or use a tapered peg for that matter. I'll have to look it up.
Yrti, thanks. The square hole in the tenon is neat, adds to the joinery and the looks.
IIRC, I just whittled a little off the end to taper it slightly. In my case I drilled all the way through the leg so that it would come out the other side but for something where you might not want it to show you could stop short of going all the way through so it would only show on one side. Chris Swartz has a good tutorial in his free Anarchist Workbench ebook.
--Nathan, TX. Hire the lazy man. He may not do as much work but that's because he will find a better way.
Suspiciously looks like the size of a sawdust pile someone would hire on versus actually create, but what the heck, I'm over that and have moved onto your finished stands 😀
I think your bigger version will be an unmitigated success, these two look as solid as possible. I can see some timber frame style tables emerging from the loft in the future!
Splinter, thanks. I am happy with them, and they will be a nice little addition to the shop for bench use. As for the larger ones, they will be easy now. You know I had to add that photo just for you, lol.
As for tables and such, that is a possibility, even a real bench would be a great addition to the shop.
This was a fun project to watch. What a great way to work out construction details and skills for the larger project. I look forward to seeing that one, too.