I needed a few things before I could start veneering the panels:
A jig to joint the edges of the veneer
A vacuum bag for the panels
Some platens for the vacuum bag
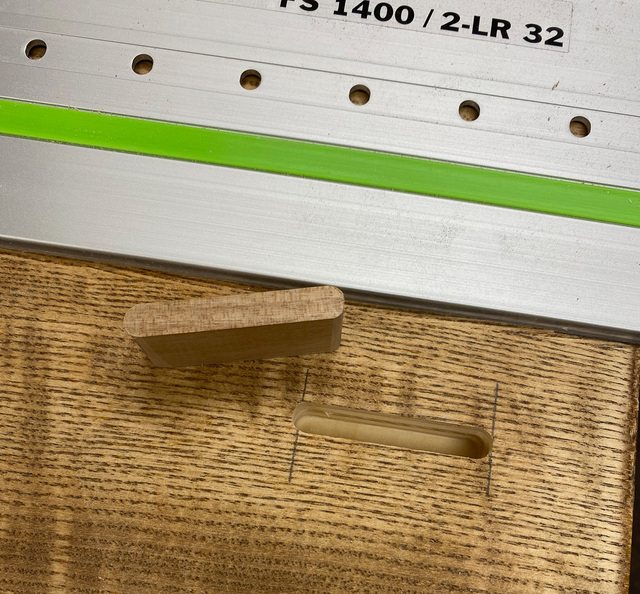
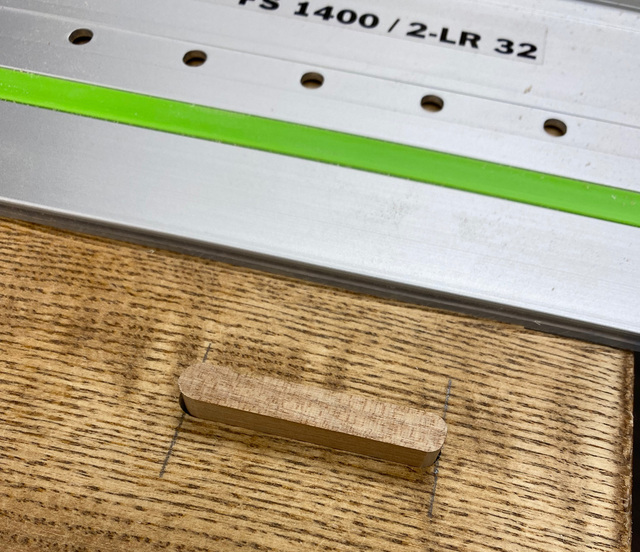
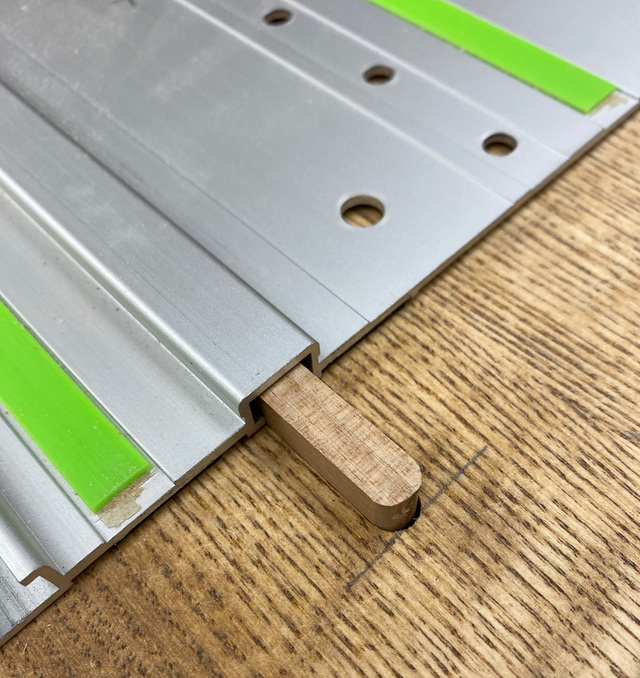
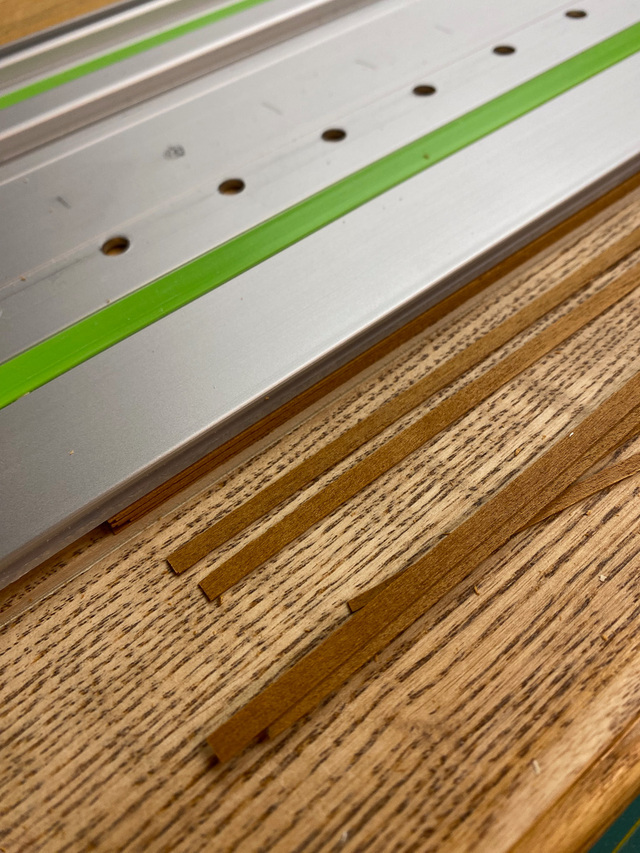
I've not done a lot of veneering before, and very little that required joining two pieces. I needed a good way to joint the edges to produce a tight seam. After a bit of research, I found a technique that uses a tracksaw. I just needed to build a simple jig. It's a salvaged plywood 4ft shelf for the base with a pair of coplanar cleats to snugly index the underside of the track. I can joint a stack of veneer with a single pass of the saw. The cleats ensure that the track is always in the same place and maintains the zero-clearance kerf in the base.
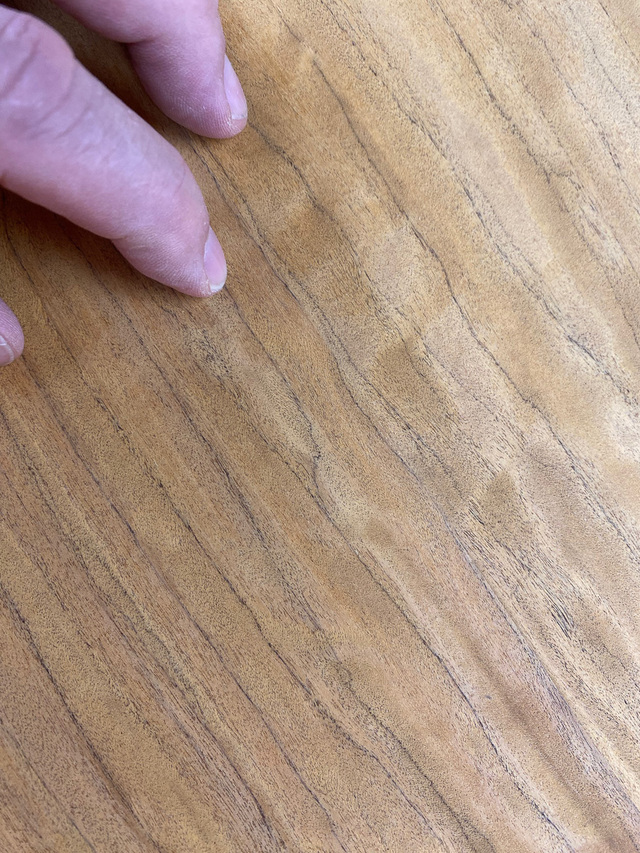
Find the seam. In some cases they disappeared so thoroughly that I was missing them completely when applying tape.
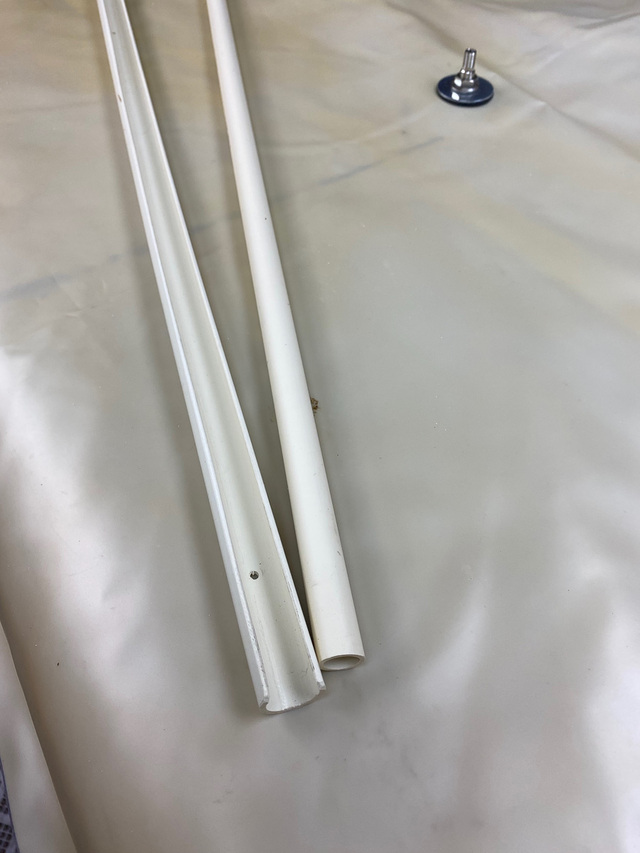
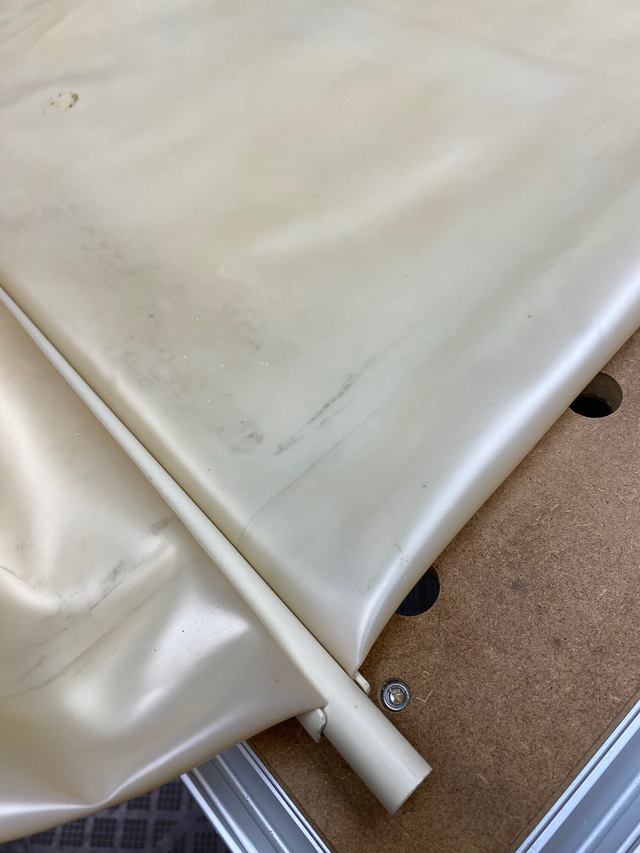
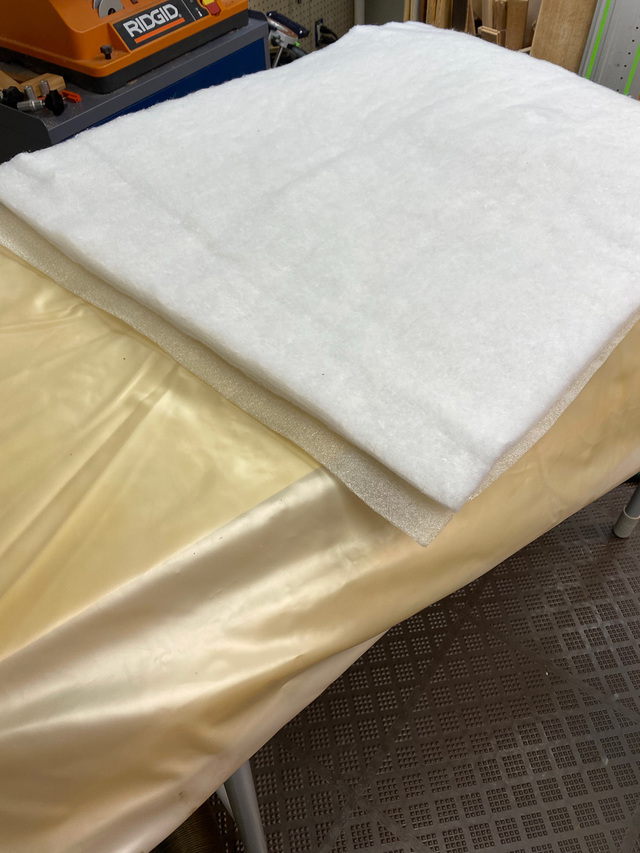
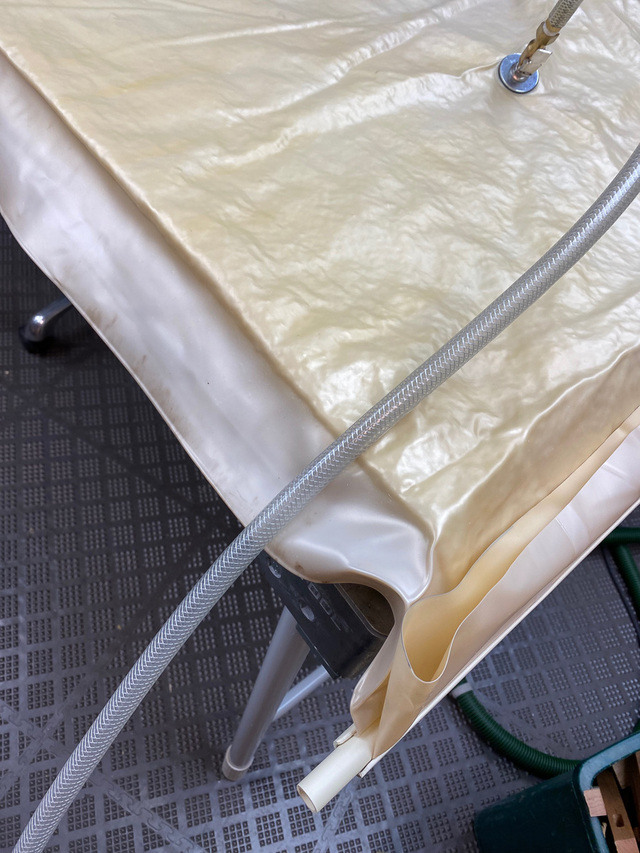
Next I needed a vacuum bag large enough to fit the panels. I had saved two half-king waterbed vinyl bladders specifically for this purpose. I sliced off one end and installed a vacuum port. It is almost opaque, which is a not great. But it was free. I made a C-style bag closure using some CPVC pipe. The 1/2" CPVC slides easily inside of 3/4" CPVC, so all I needed to do was slice off a portion of the 3/4" pipe to create 'C' clamp. The waterbed bladder had some poly batting inside that served as baffles. I saved that as well and used a section for a breather layer. Some thin packing foam underneath it would keep the batting from pressing into any glue squeeze-out.
It took a while for my little shop-made vacuum pump to draw down to -25 in. Hg, which is about all it can do. But it got there eventually.
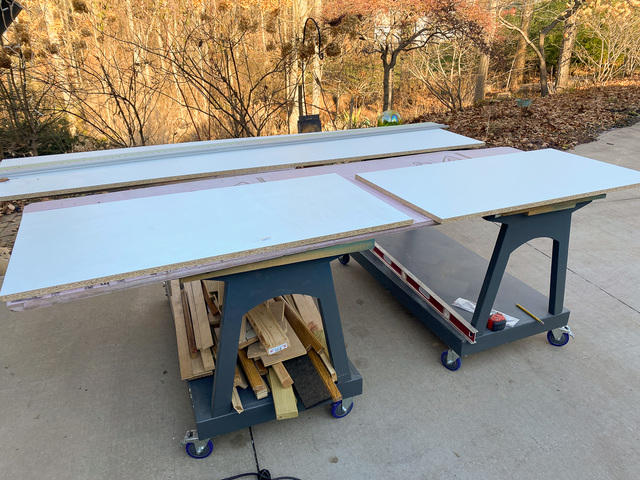
For the platens, I did have to go buy a sheet of melamine, which I broke down to create a couple 2ft x 4ft platens. Actually, the melamine sheet was an inch greater than 4x8 in both directions, so I got a little overhang when gluing two rough panels, most of which were 2x2.
Good call on the WB salvage for your bag!. I've saved several just for doing that but haven't had the need yet.
I'll have to remember how you show that bag clamped up, I was thinking I'd have to glue two seams.
The seams you cut are indeed awesome, neat trick with the track saw 👍
I always wondered about the extra inch for melamine, perhaps because it is so easy to ding an edge and this way you can get a true 4x8 and the lumber yard doesn't have a pile of rejects?
Splinter - the one minor issue I had with the WB bladder is that there was a seam that crossed the opening where I had cut it open. I was losing vacuum there due to the double thickness seam. I found that a little butyl tape applied there fixed the issue.
Pottz - I should have pulled the veneer pieces apart slightly to reveal the gap. Even staring at the original hi-res image I have some trouble finding the seam. I'd say that's a winning jointing technique.
Neat way of jointing and a clever jig. The few times I have done veneered projects I have done the classic cloamping between boards and pass over the jointer. This looks way simpler.
And great idea to use a water bed for the vacuum bag. The real bags are not easy to get where I live, might give this a try. Would love to learn mode about your pump!
"The good chair is a task one is never completely done with" Hans Wegner
Ty - I made the vacuum pump from an old compact refrigerator compressor. Google it and you'll find a lot of info. I incorporated a vacuum controller that shuts-off the compressor when it reaches a certain vacuum level and turns it back down once the vacuum leaks down some. There's some hysteresis involved, so it doesn't cycle constantly. There are free detailed plans for a few different styles of vacuum pumps here: https://www.veneersupplies.com/pages/DIY__Vacuum__Press.html
Duck - Thanks. The makeshift bags are pretty tough. I've been using some smaller tube-style bladders for years.
Kaerlighedsbamsen commented 1 day ago Cool, always wondered if a refrigerator compressor would work. Great resource thet you linked to, lots of good information, thanks!
It does work, but it's pretty slow at moving air out of the bag. Yeah, I found that site very helpful.