Theoretically, I could mount the drawer slides directly to the wall above and below the breaker box and attach the back panel to them. I calculated that the probability of my lining everything up so the panel slides smoothly is approximately 0%. I decided that the best approach was mounting the slides on a bracket. That way, I’d know the slides were parallel and correctly spaced. I could do all the critical alignment in the shop. Then I’d just have to screw the bracket to the wall at my daughter’s house.
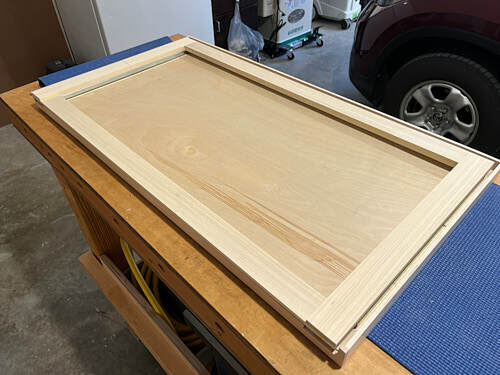
The bracket is just a square frame. To determine its thickness, I measured the space on the panel behind the slides and added about 1/8” - 3/16”. The extra space will ensure the sliding panel doesn’t contact the wall.
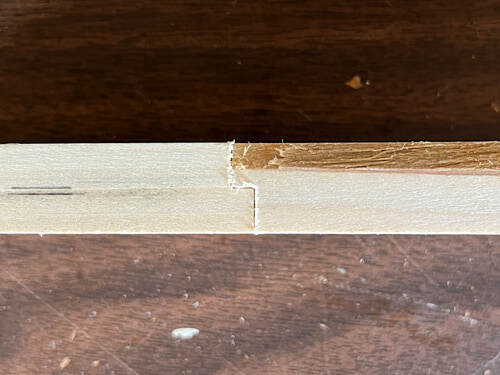
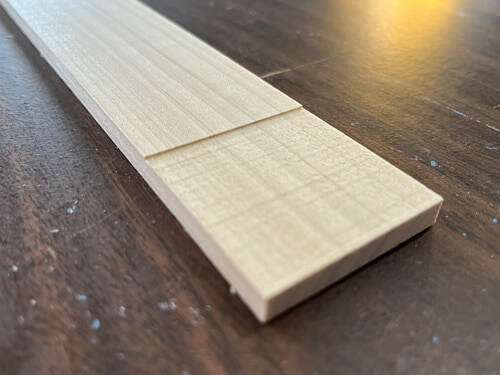
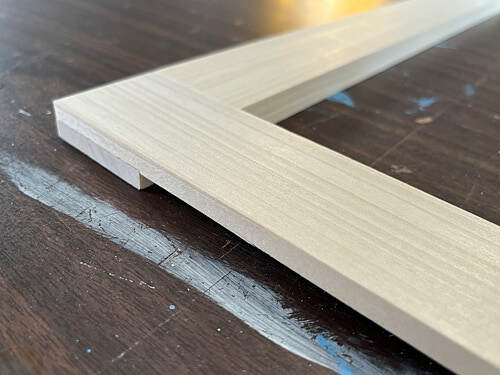
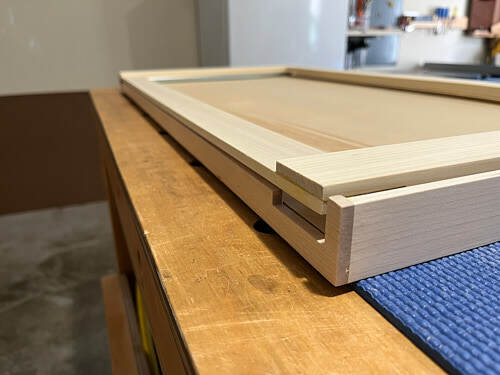
I decided to use half lap joints. They would be strong enough to keep the frame square until I screwed the rails to the wall. I don’t do much real joinery (I usually use dowels), so it was satisfying to see my test pieces, and the actual frame parts, line up.
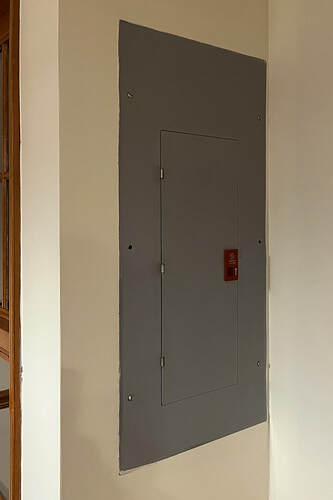
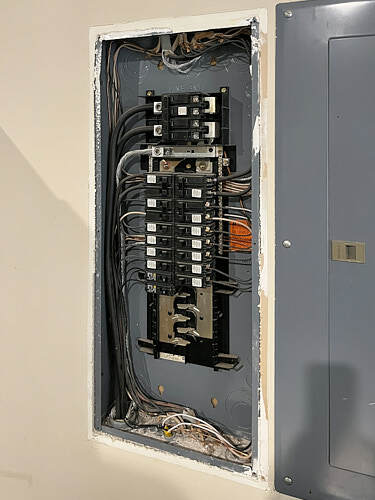
Before gluing the frame together, I had to address one complication. Here’s a photo of the breaker box.
Note how it’s jammed into the corner where the bracket's right stile needs to go. I planed the back side of the stile down almost all the way to the joint so it would span the breaker box. Then I glued the frame together.
Now I was almost ready to install the slides. Before I did that, I gave some serious thought to how I was going to mount the bracket to the wall. I thought two screws in each rail would suffice, and I wanted each screw to hit a stud if possible.
When I took measurements months ago, I mistakenly assumed that the screws I could see holding the breaker’s cover to the wall were in studs. I watched some videos about installing breaker boxes, and I took the cover off one of ours, and now I understand how many are installed. The internal breaker box fits between, and is screwed into the sides of, two studs. The front of the internal box folds inward and has tapped holes for bolts that hold the cover and door in place. Here's our panel.
That means that the studs are farther apart than the bolt holes in the cover.
My best guess is that the studs in my daughter’s house look something like this.
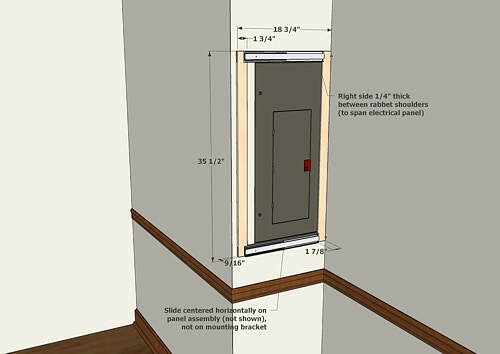
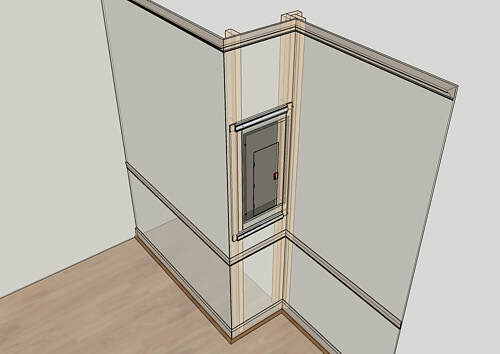
I had originally planned to center the mounting bracket within the shelf’s back panel. But, if I did that, the mounting screws on the right side would miss the stud there. Shifting the bracket as far to the right as possible gives me the best chance for success. If you look at the rendering above, you can see where I’ve modeled screw locations. The ones on the right might work. If not, I’ll resort to plastic wall inserts.
I decided to center the drawer slides horizontally on the shelf panel, and I did some quick calculations to determine how far I needed to shift them to make everything align.
I rigged up a scaffold to help position the slides as I drilled the holes for the mounting screws.
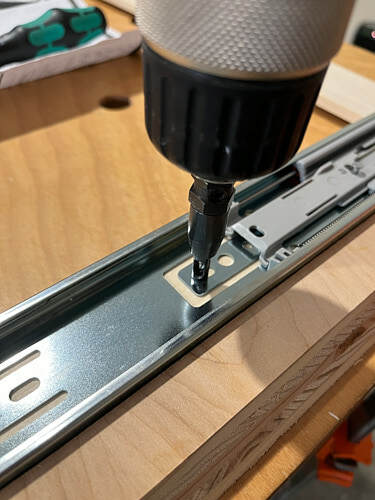
The next two photos are for my daughter. I was explaining to her a few days ago how useful VIX bits are.
That was the easy part. The harder part was attaching the drawer side of the slides to the back of the shelf panel in the correct locations. I didn’t want to take measurements and draw alignment marks—too many opportunities for error.
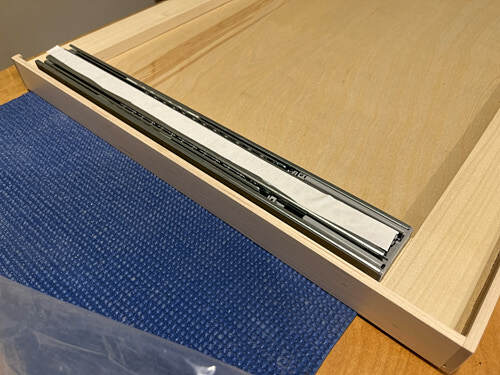
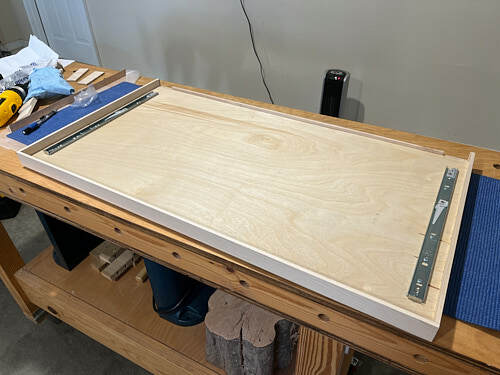
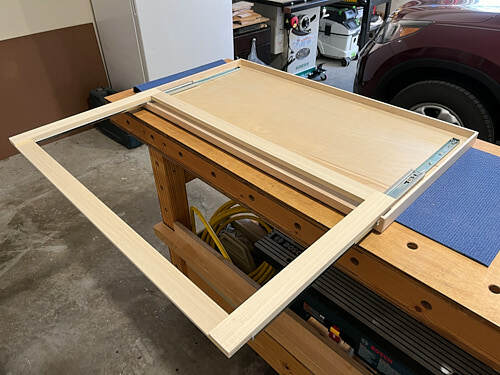
Instead, I attached a strip of carpet tape to each slide.
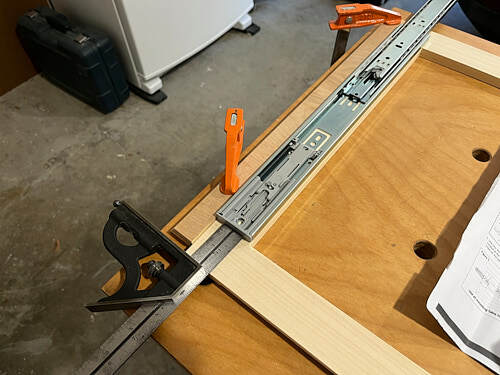
Now all I needed to do was carefully position the mounting bracket onto the taped slides. To help with that, I used a guide board and some spacers. I rested the stile against the guide and slowly rotated the bracket into position.
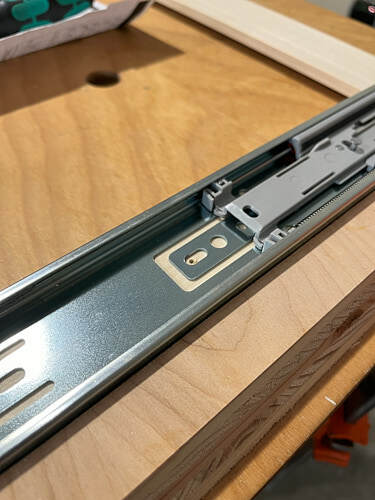
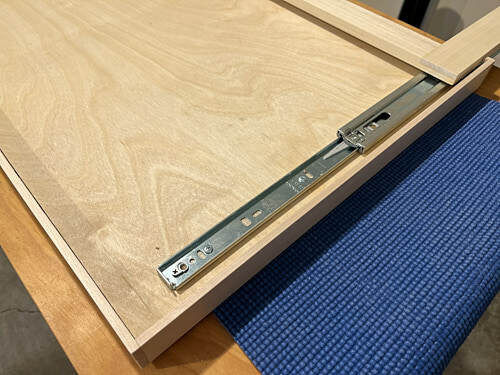
The carpet tape is very strong and held everything together while I opened the slide. Then I drilled the first few screw holes.
To drill the rest, I had to separate the slides. Then I removed the tape and drove the screws.
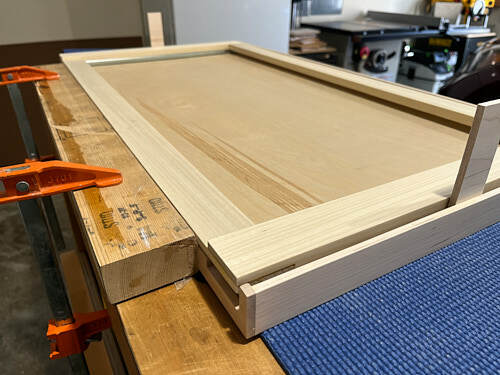
Everything lined up properly when I reattached the mounting bracket.
The moment of truth had arrived. It was time to test the movement and self-closing.
Success! It’s nice when everything works out as planned. At this point, the project is complete until I install the shelf in a few months. Then I’ll see if the measurements I took are correct.