This blog series documents the planning, design, and construction of the sliding modular display shelf I built for my daughter.
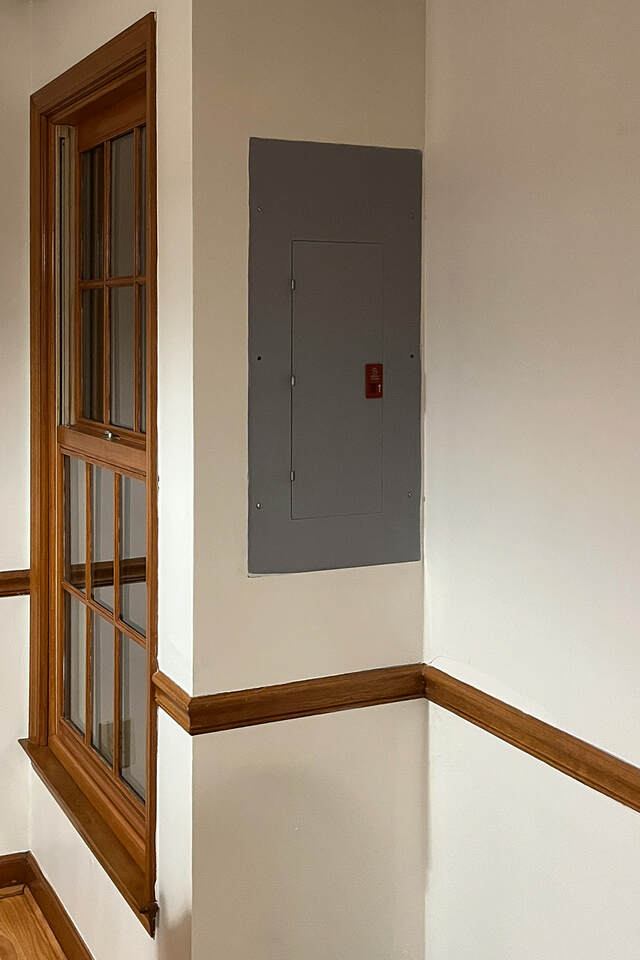
My daughter’s house’s breaker box is in her kitchen. She’s wanted to cover it somehow since she moved in. We had previously discussed a few options: a framed picture, a tapestry, etc.
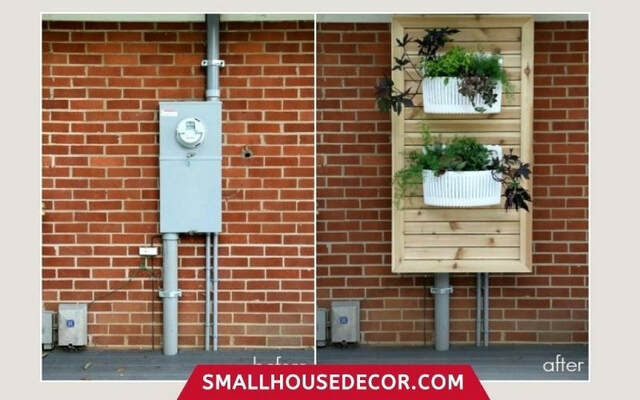
A few months ago, my wife showed her a photo of a slat panel with planter boxes covering an electrical meter. She liked the concept and asked me if I could build something similar for her breaker box.
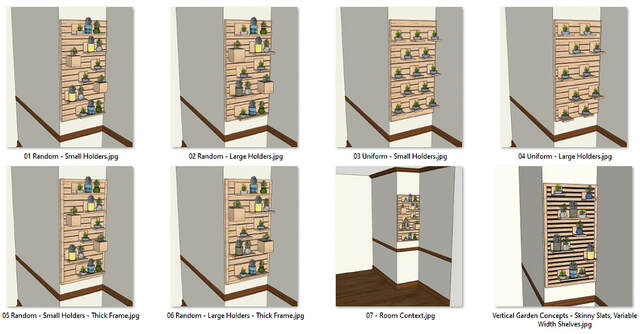
My daughter lives over 500 miles away. During one of our visits there, I took detailed measurements of that kitchen wall and the breaker box. When I got home, I modeled that part of the room along with some concepts in SketchUp to kick off design discussions.
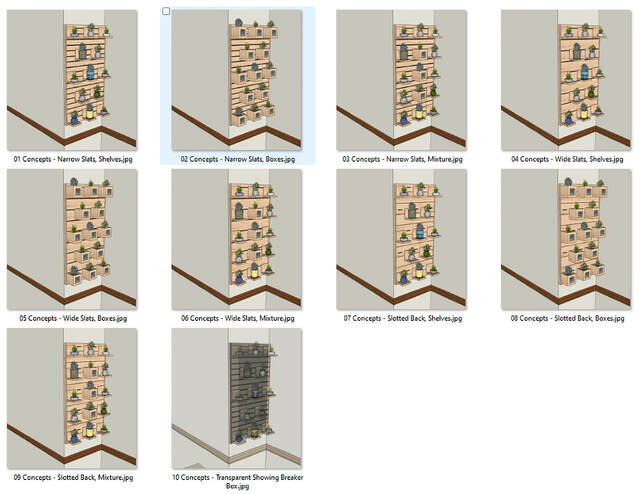
The conceptual design was a collaboration between my daughter, my wife (who also acted as my daughter’s proxy), and me. Initially, my daughter wanted only L-shaped shelves to hold the plants. My wife and I wondered about small boxes, possibly with decorative tiles on the fronts. I modeled several options in SketchUp showing several slat widths and shelf/box combinations.
My daughter liked the narrower (approximately 2” wide) slats and boxes in addition to shelves. She didn’t care for the decorative tiles. She also liked the idea of a thicker, mitered frame. My wife thought some wider shelves might be a nice option, and I wondered if even thinner slats would look nice. That led to more SketchUp modeling.
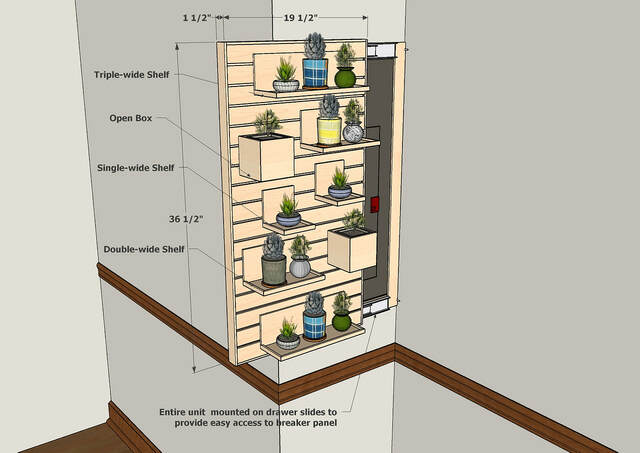
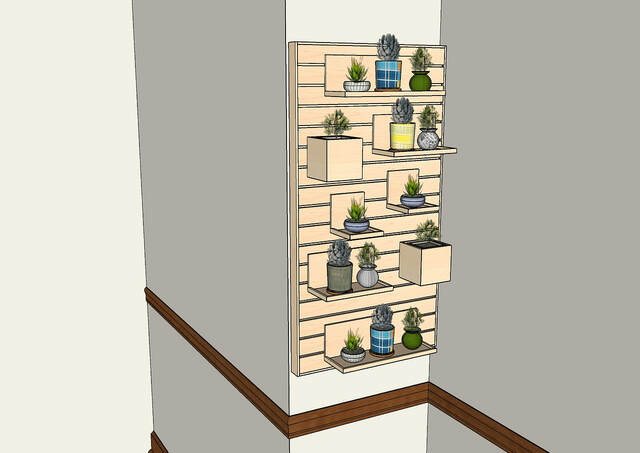
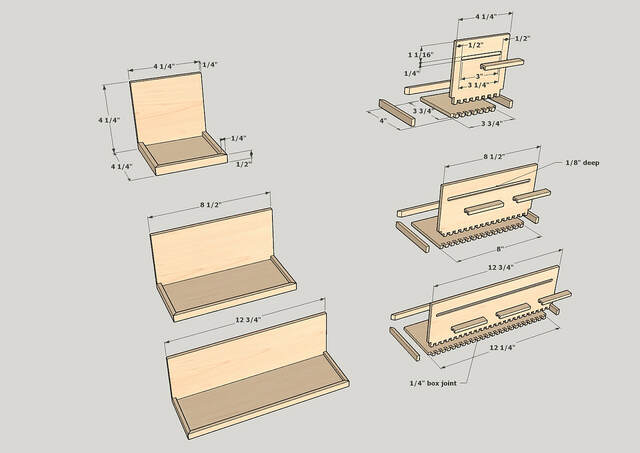
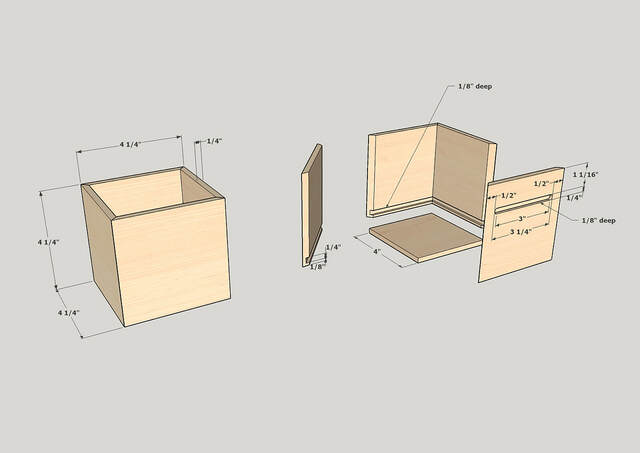
In the end, we settled on the original slat width, a thin frame, boxes that were 4 1/4" cubes, L-shaped shelves that were also 4 1/4" wide, high, and deep, and double- and triple-wide shelf variations. The boxes and shelves are centered vertically on the slat that holds them.
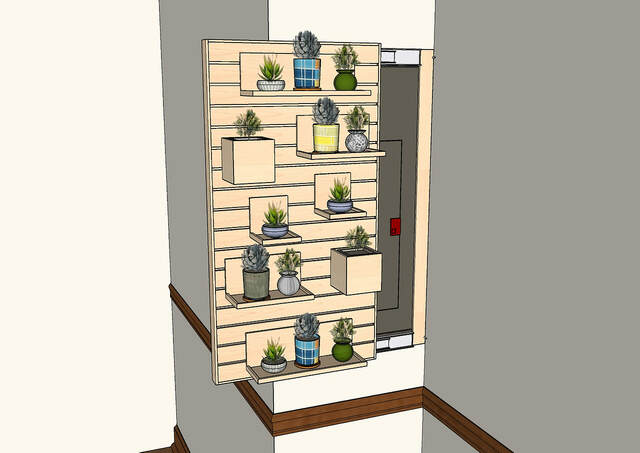
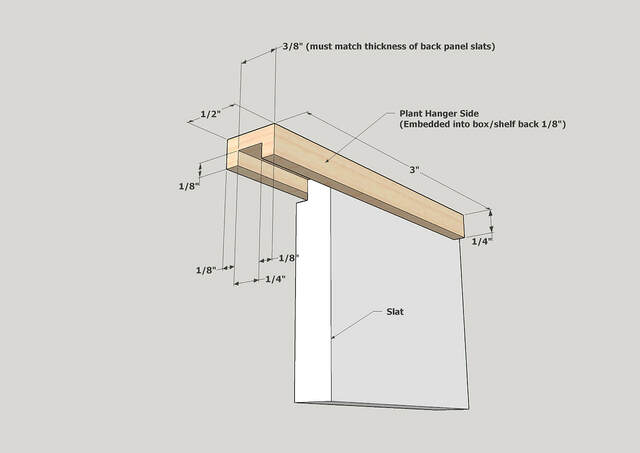
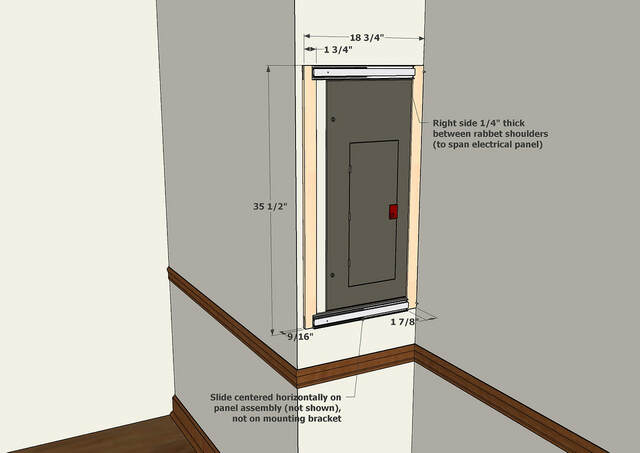
We also discussed various ways to mount the shelf. My first thought was a French cleat (simple and cheap). The problem with a cleat is that it likely meant removing all the planters before removing the shelf. Hinges that opened wider than 90 degrees would have worked too. (A hinge that opened only 90 degrees would create a narrow “tunnel” to the breakers, making them too hard to reach.) In the end, I proposed full-extension drawer slides, and we settled on them. This rendering at the top of this post captures the overall design.
To convince myself that the drawer slides would allow easy access to the breakers, I modeled 16” slides in closed, halfway extended, and fully extended positions. For fun, I created a short animation that showed the shelf sliding open.
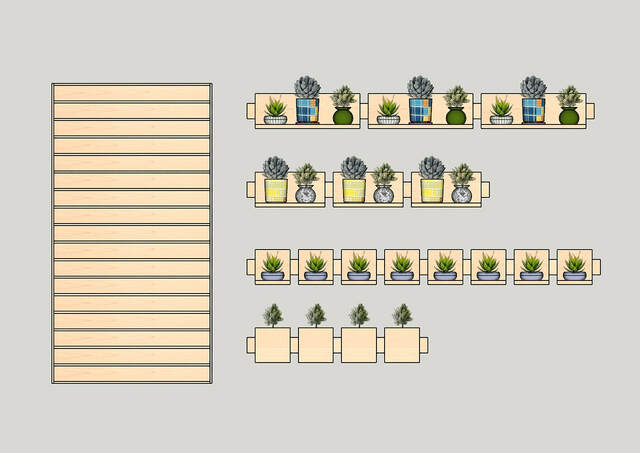
At this point, my daughter had no firm idea how she might lay out the boxes and shelves. (She probably won’t until she buys plants and planters.) I decided to build more plant holders than she’d ever use: four boxes, eight narrow shelves, and three each of the medium and wide shelves.
To aid in laying out the shelves and boxes, I also created a paper-doll-style planner. The idea is that my daughter could print this image, cut out the individual plant holders, and arrange them on the panel. That could be handy for her while she waited for me to build and deliver the completed shelf.
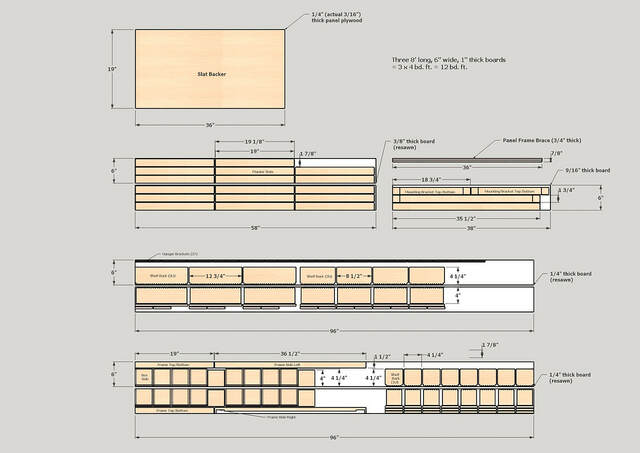
With the overall concept defined, I started working out the construction details and modeled the entire project in SketchUp. I didn’t model everything shown below at that time, but I did go as far as creating the cut sheets. With lumber being so expensive, I like to have a good idea of how much I need before I visit the lumberyard. I also always buy a little extra. The lumberyard is 45 minutes away and is open only on weekends, so buying less than necessary could cost me an entire week.
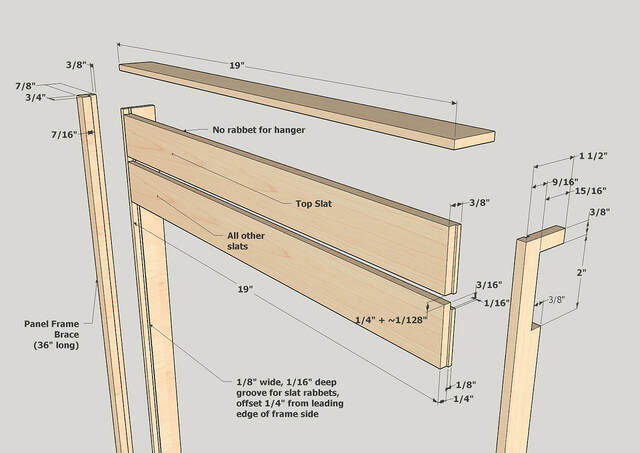
One important consideration for me was keeping the shelf’s weight down. That’s why most of the components are made from 1/4" stock. To strengthen the sliding panel, I opted for 3/8” thick slats.
LBD, I thought you’d appreciate all the SU work. Funny thing: I probably spent more time learning how to do billboarding in SU to make the plants look halfway decent than I did modeling the shelf variations. (For those who don’t know, billboarding is an old computer graphics trick for creating pseudo-3D objects. In this case, each plant is an a GIF image with a transparent background stuck on a pair of rectangles that intersect at right angles in the center. The rectangle outlines are turned off. From above, each plant looks like a cross. From most other angles, they look sort of like plants.)
Thanks SplinterGroup! It’s definitely in her kitchen. The garage on the house was added after the house was built. Originally, I guess that location was near the exterior wall closest to the electrical supply. The funny thing is that the laundry room is only about eight feet away. Too bad the builder didn’t put the panel there.
LBD, I thought I remembered seeing the technique used in a SUnscreenshot or rendering in one of your posts (maybe one about your model ship). I don’t know if it was here or on LJ. Maybe I’m just mistaken.
If I remember correctly (been awhile since I watched), he talks about “always face me” components that let you use just one instance of each transparent texture image instead of the crossed ones I used. These components auto-rotate to face the camera. I think I tried them and preferred the look of the crossed textures.
LBD, I found the post of yours I was thinking about it. It's the case for your model ship. Your SU model has a rectangular solid representing the ship, with textures on each face showing the ship from the appropriate angle. That's very similar to what I did. I don't know if your model would look any better if you put a transparent background on the textures and hid the edges of the solid--probably not.
Hell, I didn't realise I was such a smart rrs. I was just goofing around and that was done with importing pictures as textures... and using Miss Eneroth's plugin I mentioned in the other thread.
If your first cut is too short... Take the second cut from the longer end... LBD


.png)


